

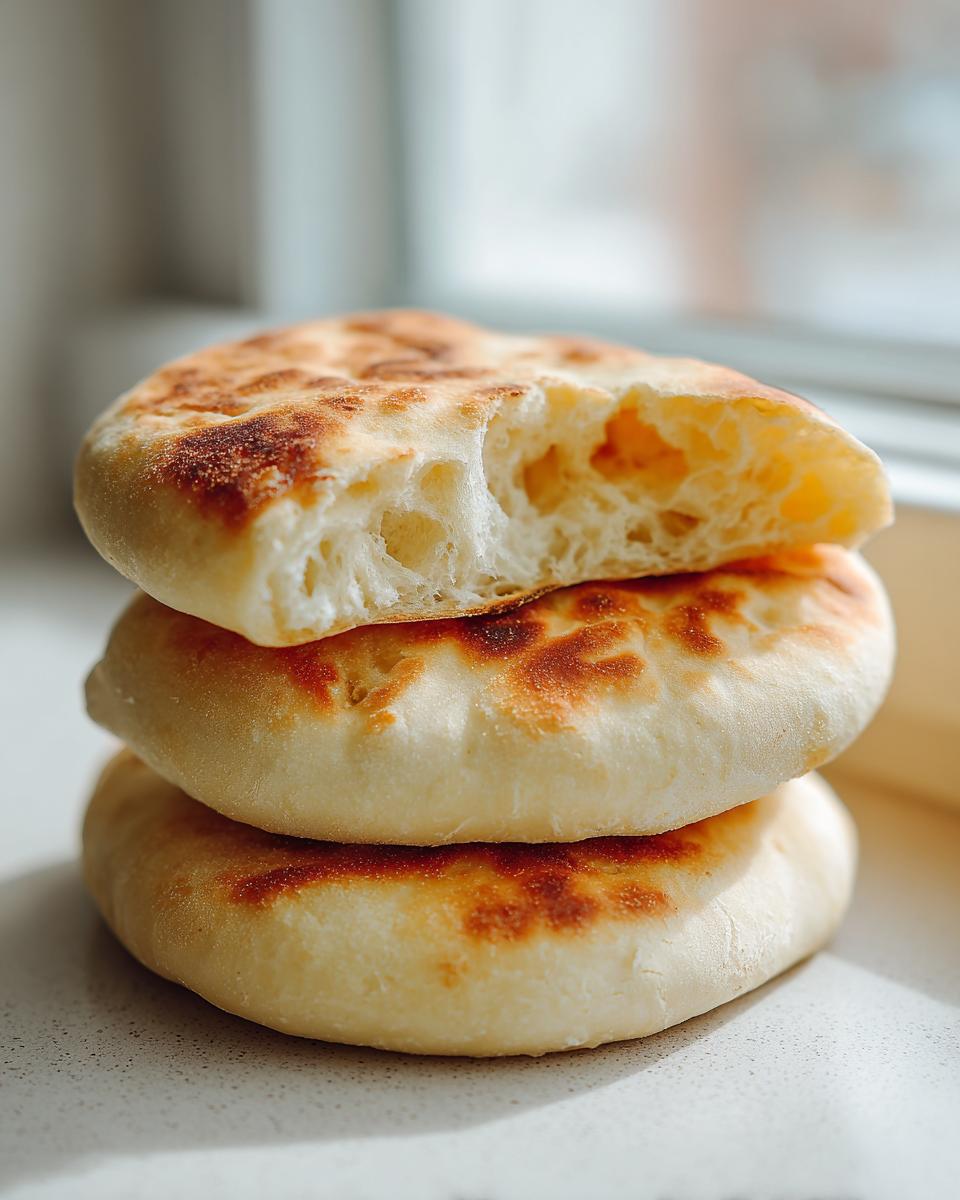
There is absolutely nothing in the world that beats the smell of bread baking, is there? That comforting, warm aroma fills the entire house, promising something wonderful is coming. And while I adore a good crusty loaf, today we are talking about the ultimate simple pleasure: incredible, homemade pita bread that puffs up into these beautiful, airy pockets.
For years, I struggled with flat, stiff store-bought versions, or recipes that promised perfection but delivered chewy disappointment. But after years of testing and refining, often drawing on my background in food science and my grandmother’s insistence on soulful technique, I have cracked the code. This recipe is my go-to for achieving that melt-in-your-mouth, soft pita bread with flawless internal pockets, all done right on your stovetop. Trust me, once you make these fresh, you won’t ever go back. You can read a little more about my philosophy on reliable cooking over at my story page!
- Why This Homemade Pita Bread Recipe Works So Well
- Ingredients for Soft & Fluffy Pita Bread
- How to Prepare Your Homemade Pita Bread on the Stovetop
- Tips for Success with Your Easy Pita Bread Recipe
- Serving Suggestions for Authentic Pita Recipe
- Storing and Reheating Your Freshly Baked Pita Bread
- Frequently Asked Questions About Making Pita Bread
- Estimated Nutritional Information for Pita Bread
- Share Your Homemade Pita Bread Creations
Why This Homemade Pita Bread Recipe Works So Well
I’ve tested countless yeast bread recipes, and I know what makes a recipe reliable—it comes down to consistency, which is something you need when you’re chasing that lofty pocket. This isn’t just another flatbread recipe; this is engineered for softness and puff. This particular pita bread process guarantees fluffiness, which is why I stake my reputation on it for my readers.
- It consistently produces that pillowy soft texture we all crave.
- The dough is forgiving, making it perfect for weeknight cooking or when you’re still trying to get your baking bearings.
- It relies on simple stovetop heat, meaning you don’t have to heat up your whole kitchen with the oven.
If you’re looking to integrate this into your busy schedule, you can find more ideas for speedy meals over here on my weeknight ideas page!
Achieving the Perfect Pita Pocket Every Time
That glorious puff? That’s the single best part of any Pita Pocket Recipe. It’s not a fluke; it’s physics, and we control it! The key is ensuring your dough is rolled thin enough, but not so thin that it tears, and then immediately hitting it with screaming hot, dry heat. That sudden blast of temperature turns the moisture inside the dough instantly into steam, forcing that beautiful separation inside the bread. Don’t worry if the first one flops—it’s usually just testing your pan’s temperature!
Quick Pita Recipe: Ready in Under 90 Minutes
I know we all sometimes need that fresh bread flavor *tonight*, not tomorrow. That’s why I tuned this version to fit into a busy evening. While there is a rise time, the total hands-on work is minimal. With only about 20 minutes of actual prep time and 15 minutes of cooking, we wrap up the whole adventure in about 95 minutes. It truly is a fantastic and Quick Pita Recipe for when those cravings strike!
Ingredients for Soft & Fluffy Pita Bread
I always tell people that making exceptional flatbread from scratch starts with measuring twice. I’ve used these exact quantities time and time again, and they give you that perfect starting dough for beautiful, pillowy bread. Clarity here builds trust, and I want you to succeed!
- 3 cups all-purpose flour
- 1 cup warm water—and this is important, aim for about 105–115°F, just warm enough that it feels pleasant on your wrist. Too hot kills the yeast!
- 2 1/2 teaspoons active dry yeast
- 1 teaspoon sugar (this feeds the yeast, don’t skip it!)
- 1 teaspoon salt
- 1 tablespoon olive oil
- 2 tablespoons Greek yogurt (this is purely optional, but highly recommended for that extra richness)
If you’re planning on making these for a delicious morning meal, you can check out some of my other favorites over on my healthy breakfast ideas page.
Ingredient Notes and Substitutions for Your Pita Bread
Let’s talk about that Greek yogurt. My family recipe calls for it because it adds a gentle tang and a layer of fat that just makes the final pita feel incredibly tender. If you don’t have it on hand—no sweat! You can still make amazing pita bread. Just omit it, and your bread will be slightly less rich, but still wonderful. If you want to substitute, a tablespoon of sour cream works in a pinch.
As for the flour? I stick to standard all-purpose flour because it gives the structure needed for that big puff. If you were aiming for a heartier flatbread from scratch, you could try swapping out up to half a cup for whole wheat flour, but know that too much whole wheat can make it harder for the pockets to form vigorously.
How to Prepare Your Homemade Pita Bread on the Stovetop
Alright, let’s get down to the real magic here. Making pita bread shouldn’t require a huge baking setup. My favorite way to get that amazing fluff, which means we use the stovetop instead of the oven, is incredibly straightforward once you see the steps. We break this down into three main phases: waking up the yeast, developing the dough, and then the actual cooking drama! If you’re interested in other yeast projects, you can see how I approach a hard-crusted loaf right here.
Activating Yeast and Mixing the Pita Bread Dough
First things first, we have to wake up that sneaky yeast. In a small bowl, mix your warm water—remember, wrist-warm, not hot!—with the sugar, and then sprinkle that active dry yeast right on top. Give it a gentle stir and just step away for about 5 to 10 minutes. When it starts looking foamy and bubbly, like the top of a good beer, you know your yeast is happy and ready to work its magic! That’s called blooming, and it’s your first true sign of success.
Next, grab your big mixing bowl. Throw in the flour and salt. Then, make a well in the center and pour in your foamy yeast mixture, your olive oil, and that optional Greek yogurt if you’re using it. Mix everything together until it looks like a total mess—what we bakers call a ‘shaggy dough.’ Don’t worry about neatness yet; we just need everything incorporated.
Kneading and Rising for Fluffy Pita Bread
Now for the workout! Turn that shaggy mess out onto a lightly floured surface. This is where the transformation happens. I always tell folks that kneading is less about brute strength and more about rhythm. I work the dough, folding and pushing, for a solid 5 to 7 minutes. You’ll feel the dough change texture; it goes from rough and sticky to smooth and beautifully elastic under your hands. That elasticity is what helps hold the steam when we cook them later.
Once it’s smooth, tuck it into a lightly oiled bowl. Give it a turn so it’s coated, cover it tight with plastic wrap, and put it somewhere warm. We let this gorgeous thing rise for a full hour. You want it to literally double in size. Patience here ensures you get that lovely fluffy pita bread texture we are aiming for—skipping the rise means flat pitas, and we won’t have that!
The Secret to Cooking Perfect Pita Bread Pockets
This is the moment of truth, and everything hinges on heat! Heat up your cast-iron skillet—or any heavy pan you have—over medium-high heat until it’s ripping hot. Do not add any oil; this needs to be a dry bake. While the pan heats, punch down your dough gently and divide it into 8 little balls. Roll each ball out pretty thin, about 6 or 7 inches across. Work fast once they are rolled!
Carefully lay one round into that scorching skillet. Watch closely! Within a minute or two, you should see bubbles forming all over the top. That’s the steam building. Flip it over quickly. The second side cooks faster, and that’s usually when the grand finale happens—the whole thing balloons up! If yours is being stubborn and only puffs a little on the edges, don’t panic, you don’t need an oven for this Pita Bread Without Oven method. Just use a metal spatula and gently press down on the flat parts of the top surface, directing that steam bubble right into the middle. It works almost every time! Wrap the finished pitas in a clean kitchen towel right away to steam them softly while you cook the rest. It keeps them wonderfully soft.
Tips for Success with Your Easy Pita Bread Recipe
I know that trying any new yeast bread recipe can feel a little intimidating, especially when you’re aiming for those perfect pockets. That’s why I want to make sure you feel completely confident tackling this! Success with homemade pita bread isn’t about guesswork; it’s about mastering a few small handling details. These are the things I learned the hard way, so you don’t have to!
First, let’s talk about resting the dough balls. After you divide your dough and roll them into little rounds, you must cover those balls and let them rest for 10 minutes before rolling them flat for cooking. This might feel like a delay, but it’s crucial! If you try to roll the dough out immediately after dividing, the gluten is too tight, and the dough will fight you every inch of the way. That rest period, sometimes called a bench rest, lets the gluten relax, giving you thin, even circles without tearing.
Second, once you roll it out, don’t let those rounds sit around waiting for their turn in the pan. They need to go straight from the rolling pin onto the skillet. If they sit out too long, the surface starts to dry slightly, and a dry surface often refuses to puff. Think of it as a race against time once you roll them—hot pan, thin dough, immediate heat. If you’re interested in how resting makes a difference in other bread types, check out my thoughts on handling dough elasticity when making soft honey sandwich bread.
Finally, remember that heat consistency is everything! If your pan isn’t hot enough, the moisture stays liquid longer, the dough steams slowly, and you end up with a soft flatbread instead of a puffy pita. We are aiming for a violent reaction that creates instant steam. If you notice your first couple of pitas aren’t puffing, bump that heat up slightly before continuing. Mastering this makes you an expert in Pita Bread Beginners territory instantly!
Serving Suggestions for Authentic Pita Recipe
Now that you’ve created these beautiful, cloud-like rounds of pita bread, the best part is deciding what to eat them with! Honestly, warm pita is a worthy snack all on its own, perhaps just drizzled with good quality olive oil. But these particular pitas scream Mediterranean feast, so I highly encourage leaning into that!
For lunch or dinner, you have got to try them as the perfect vehicle for a gyro. These pitas are soft and sturdy enough to hold loads of fillings—sliced meat, fresh tomato, onions, and a dollop of tzatziki—without tearing apart the moment you pick it up. That’s why getting that soft structure right is so important!
But let’s be real, nothing beats tearing off a piece of warm bread for dipping. These are phenomenal for Pita for Hummus Dipping. Seriously, homemade pita with homemade hummus? Yes, please! If you happen to need a truly show-stopping dip recipe, I highly recommend pairing these with my favorite caramelized onion dip; you can find that recipe right here. That sweet, savory dip with warm, puffy pita is just heavenly.
And don’t feel limited to Greek food! Since they are so versatile, they make fantastic wraps. I often use leftover steak or chicken—like the ones I make for these amazing skillet fajitas—and roll them up tight. They handle savory spices just as beautifully as they handle tzatziki. You can check out the way I handle seasoned steak for wraps over at my steak fajita post when you’re looking for a filling idea!
Storing and Reheating Your Freshly Baked Pita Bread
The biggest challenge with homemade bread, especially something delicate like pita, is that it’s always, always best eaten the second it comes off the heat. I swear, the minute they cool down, they try to turn into cardboard! We have to be proactive about maintaining that wonderful softness we worked so hard to achieve.
The absolute number one, can’t-miss step? As soon as that Freshly Baked Pita comes out of the hot skillet, wrap it immediately. I mean *immediately*. I stack three or four of them, one right on top of the other, inside a clean, lint-free kitchen towel. Then, I wrap the ends of the towel tightly around the stack to seal in all that residual steam. That trapped moisture is what keeps them pliable and soft. If you let them sit exposed on a wire rack, they’ll stiffen up fast!
If you have way too many (which is a great problem to have, by the way!), you can totally store them. They’re best eaten the day they are baked, but they’ll stay quite soft in an airtight zip-top bag at room temperature for two days. Keep them sealed up tight! Don’t refrigerate them; the fridge is the enemy of soft bread, making it stale quickly. If you need to keep them longer than two days, you should freeze them.
To freeze them, wrap the stack tightly in plastic wrap first, then slide them into a freezer-safe bag. They are good for up to three months. When you’re ready to eat them, you just reheat them the same way you cooked them! You can quickly pop them back into that hot, dry skillet for just 30 seconds per side until they are warm all the way through. Sometimes they even puff up again slightly—it’s like magic!
Frequently Asked Questions About Making Pita Bread
Why didn’t my pita bread puff up like the picture?
Oh, I get this question all the time! Don’t worry, this is the most common hitch when making pita bread, and it almost always comes down to two things: heat or rolling technique. If your skillet isn’t scorching hot—I mean seriously hot, smoking slightly—the water in the dough won’t turn to steam fast enough to separate the layers. That’s critical! Also, make sure you didn’t let the rolled-out dough sit too long, or the surface dries out. If it only puffs a little, try gently pressing the top with your spatula to encourage that steam to move toward the center. That usually shocks it into ballooning!
Can I use instant yeast instead of active dry yeast?
Absolutely, you can! Instant yeast is designed to go straight into the flour mix without the ‘blooming’ step, which is fantastic if you’re in a hurry. If you substitute, you can skip Step 1 with the warm water and sugar entirely. Just combine the instant yeast directly with the flour and salt, then proceed with adding your liquids. It might save you about 10 minutes overall, making it an even more quick pita recipe!
Can I make these ahead of time or freeze them?
Yes, you can! As I mentioned earlier, they are truly best eaten the day they are made, but they freeze like a dream. You just need to follow the wrapping instructions carefully: stack them, wrap them tightly in plastic wrap, then put them in a freezer bag. When you want to revive them, just toss them onto a very hot, dry skillet for about 30 seconds per side. They get wonderfully soft again! I wouldn’t recommend refrigerating them, though; that seems to speed up the staling process for us.
Is the Greek yogurt absolutely necessary for soft pita bread?
It’s my secret weapon for that rich, pillowy soft bread texture, but no, it isn’t crucial! If you look at the ingredients list, I marked it as optional. The yogurt adds a little fat and acidity—think of it like buttermilk in a biscuit—which enhances tenderness. If you skip it, you’ll still get that beautiful pocket and a delightfully soft bread, it will just be slightly lighter in overall richness. If you want to connect with me about your results or have other questions, feel free to reach out through my contact page!
Estimated Nutritional Information for Pita Bread
When I develop a recipe, especially one that uses simple, whole ingredients like we do here for this homemade pita bread recipe, I like to keep nutrition in mind. Knowing what you’re eating just adds another layer of confidence, right? This information is based on the recipe yielding 8 pitas, with one pita being a standard serving size. This helps you plan those amazing gyros or dips without any second-guessing!
Now, since these are made fresh in your kitchen with basic pantry staples, there are no weird preservatives or anything artificial, which I just love. But please remember, since we all measure sugar, oil, and flour slightly differently, these numbers are a very close estimate based on standard ingredient calculations.
- Serving Size: 1 pita
- Calories: About 180 per pita
- Total Fat: 3g
- Saturated Fat: 0.5g
- Carbohydrates: 34g
- Fiber: 2g
- Protein: 6g
- Sugar: 1g
- Sodium: Roughly 250mg
Isn’t that great? Low sugar, good fiber, and definitely better than anything you’d pick up pre-packaged off the shelf. It really proves that making your own fluffy pita bread doesn’t mean sacrificing your healthy goals!
Share Your Homemade Pita Bread Creations
Now that you’ve got the knowledge to make truly magnificent, soft pita bread right on your stovetop, I really want to see what you create! Honestly, seeing your successes—especially those perfectly puffed pockets—makes all the recipe testing worth it. This is why I love sharing what I do here; it opens up a conversation about great food!
Please, if you loved this recipe, come back and leave a rating below. Tell me how they worked for you! Were they destined for gyros, or did you just dip them into a bowl of hummus? Every little detail helps other home cooks who might be nervous about trying their first batch of freshly baked pita. I read every single comment!
And if you’re sharing photos on social media, tag me! I love seeing my recipes in real kitchens. It inspires me to keep developing new favorites for you all. If you’re looking for quick ideas on how to use up those leftover pitas for a fast meal, check out some simple recipes over on my easy lunch ideas page.
If you wanted to see how another great baker tackled the Greek pita game, you can also check out this resource I found interesting: Greek Pita Stovetop Secrets. Happy baking, my friends!
PrintSoft & Fluffy Homemade Greek Pita Bread (Stovetop Method)
Make incredibly soft, fluffy homemade Greek pita bread that puffs into perfect pockets using a simple stovetop method. This recipe uses basic ingredients and is ideal for gyros, dipping in hummus, or making wraps.
- Prep Time: 20 min
- Cook Time: 15 min
- Total Time: 95 min
- Yield: 8 servings 1x
- Category: Bread
- Method: Stovetop Cooking
- Cuisine: Mediterranean
- Diet: Vegetarian
Ingredients
- 3 cups all-purpose flour
- 1 cup warm water
- 2 1/2 teaspoons active dry yeast
- 1 teaspoon sugar
- 1 teaspoon salt
- 1 tablespoon olive oil
- 2 tablespoons Greek yogurt (optional, for extra softness)
Instructions
- Combine the warm water, sugar, and yeast in a small bowl. Let this mixture stand for 5 to 10 minutes until it becomes foamy.
- In a large mixing bowl, combine the flour and salt. Add the yeast mixture, olive oil, and Greek yogurt (if using). Mix the ingredients until a shaggy dough forms.
- Turn the dough out onto a lightly floured surface. Knead the dough for 5 to 7 minutes until it becomes smooth and elastic.
- Place the dough in a lightly oiled bowl, turning it once to coat. Cover the bowl with plastic wrap or a clean kitchen towel. Let the dough rise in a warm place for 1 hour, or until it doubles in size.
- Gently punch down the risen dough. Divide the dough into 8 equal pieces. Roll each piece into a smooth ball.
- Cover the dough balls and let them rest for 10 minutes.
- Heat a dry cast-iron skillet or heavy-bottomed pan over medium-high heat until it is very hot.
- Working with one ball at a time, roll it out into a thin circle, about 6 to 7 inches in diameter. Do not let the dough rest once rolled.
- Carefully place one rolled pita into the hot, dry skillet. Cook for 1 to 2 minutes until bubbles appear on the surface.
- Flip the pita and cook the second side for another 1 to 2 minutes. The pita should puff up completely, forming a pocket. If it does not puff, press gently on the top surface with a spatula to encourage puffing.
- Remove the puffed pita from the pan and wrap it in a clean kitchen towel to keep it warm and soft while you cook the remaining rounds.
- Serve your fresh pita bread warm.
Notes
- For the best pocket formation, ensure your skillet is very hot before placing the dough in.
- If you skip the optional Greek yogurt, the pitas will still be soft, but the yogurt adds richness.
- These homemade pitas are best eaten the day they are made.
Nutrition
- Serving Size: 1 pita
- Calories: 180
- Sugar: 1
- Sodium: 250
- Fat: 3
- Saturated Fat: 0.5
- Unsaturated Fat: 2.5
- Trans Fat: 0
- Carbohydrates: 34
- Fiber: 2
- Protein: 6
- Cholesterol: 0