
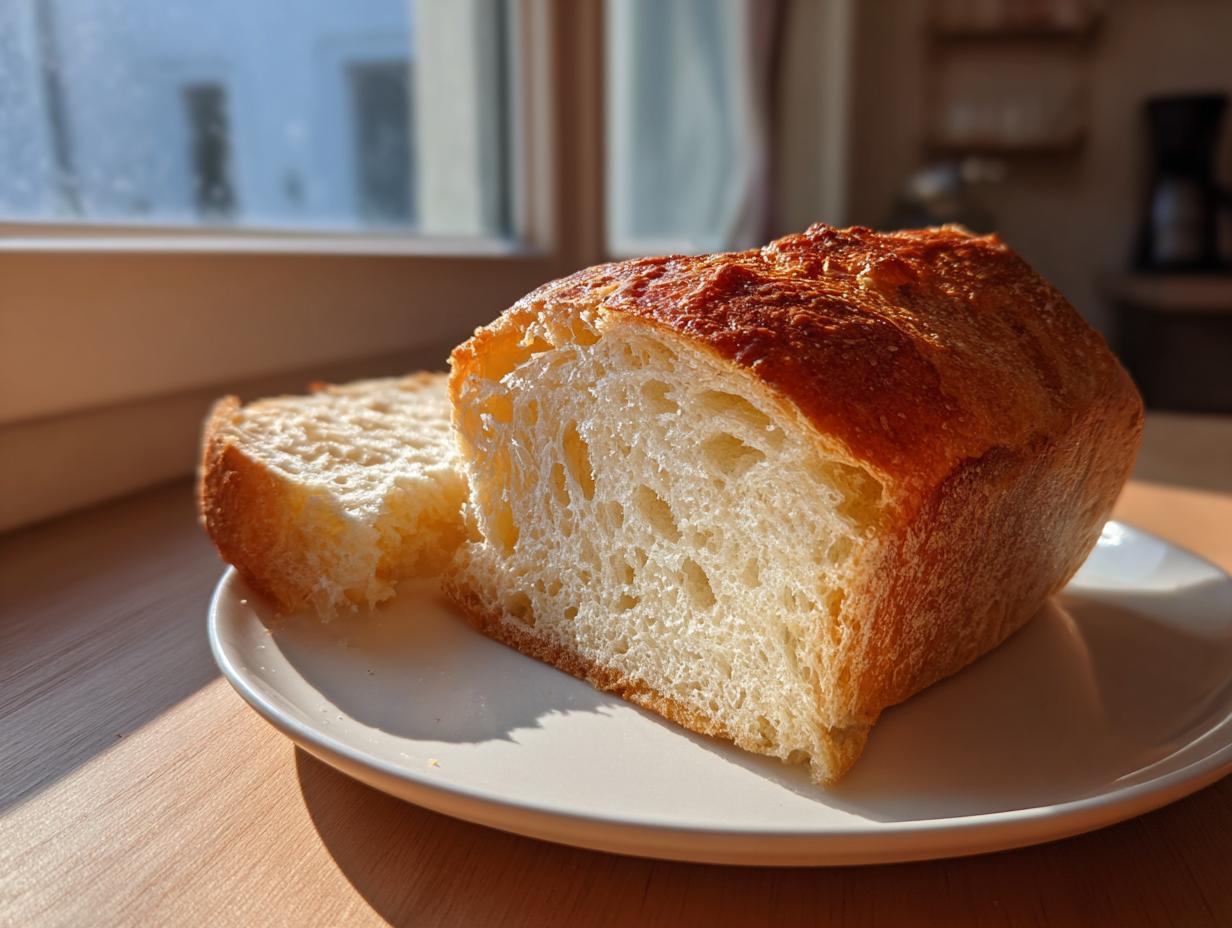
Oh my goodness, there is absolutely nothing that compares to the smell of fresh bread baking, is there? That warm, slightly yeasty aroma completely transforms your kitchen into a little corner of Italy. If you’ve always dreamed of pulling a perfect loaf of Italian bread from your own oven—one with that beautiful, shatteringly crisp crust and an interior so light and chewy it practically begs for olive oil—you’ve come to the right place. I’m Mia Rodriguez, and after years developing recipes professionally, I can tell you this is the Best Italian Bread Recipe you’ll ever try at home. We aren’t messing around with fussy techniques; we’re achieving bakery-style results, quickly and reliably. Trust me, my background in food science ensures these steps just *work*. You can read more about my culinary philosophy over on my About Me page!
- Why This Easy Crusty Italian Bread Recipe Works for Beginners
- Simple Bread Ingredients for Your Italian Bread
- Step-by-Step Instructions for Your Crusty Italian Bread Recipe
- Expert Tips for the Best Italian Bread Recipe
- Ingredient Notes and Substitutions for Your Loaf
- Serving Suggestions for Your Warm Italian Loaf
- Storing and Reheating Your Homemade Bread
- Frequently Asked Questions About This Bread
- Estimated Nutritional Information
Why This Easy Crusty Italian Bread Recipe Works for Beginners
I know what you’re thinking: bread is hard, right? Wrong! This recipe is truly designed to be one of the easiest ways to make Italian bread at home. I’ve stripped out all the fussiness so you can get that gorgeous loaf on the table even on a busy night. Because we focus on great technique over complicated ingredients, you get true bakery quality without the stress. If you need quick baking ideas for those busy weeknights, check out my collection of Weeknight Dinner recipes!
- It comes together with pantry staples—no specialty flours needed!
- The timeline keeps the total hands-on time super short.
- It’s straightforward: mix, knead briefly, rise, bake. Simple!
Achieving That Perfect Soft and Chewy Interior
The secret to that fantastic bite is hydration combined with a good, short knead. We use just the right amount of water (the hydration) relative to the flour, which keeps the dough supple and easy to handle. That 5 to 7 minutes of kneading develops just enough gluten structure to trap the gases during the rise, giving you that beautiful, airy chewiness inside rather than a dense brick.
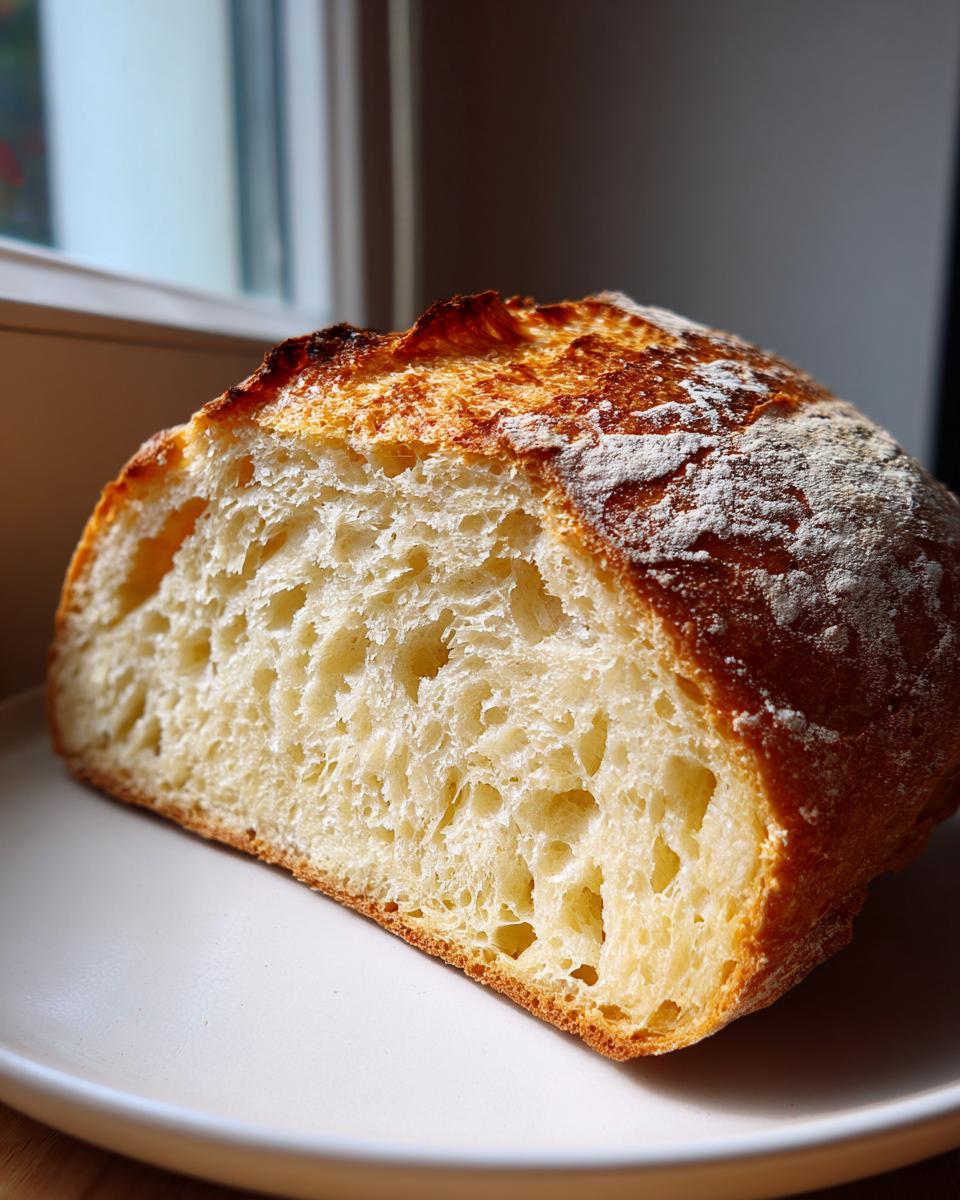
Tips for a Golden Brown Italian Loaf Crust
That crunchy crust, folks, that’s the showstopper! We achieve that signature crackle primarily through one simple trick we use during baking: steam. When the loaf hits the hot oven, we create a steamy environment right away. This keeps the exterior soft enough to expand fully before setting hard. That quick puff, followed by a dry, hot bake, is how we get that deep, crackling golden brown on your Italian loaf.
Simple Bread Ingredients for Your Italian Bread
When it comes to rustic breads like this, I always say the fewer ingredients you have, the more they have to shine. That’s why this loaf is so satisfying—it relies on pantry staples you probably already have! You don’t need anything fancy to get that bakery quality; just good, honest flour and yeast.
Here is exactly what you’ll need for one perfect loaf:
- 3 1/2 cups all-purpose flour
- 1 1/2 teaspoons salt
- 1 teaspoon granulated sugar
- 2 1/4 teaspoons active dry yeast (that’s one standard packet!)
- 1 1/4 cups warm water (make sure it’s between 105–115°F—too hot kills the yeast!)
- 2 tablespoons olive oil, plus a little extra reserved for greasing the bowl
As a quick note on quality, I always recommend using a decent quality active dry yeast. Since this bread relies on a pretty quick rise, vigorous yeast makes all the difference! If you’re unsure about your yeast, go ahead and let it foam up extra long in the sugared water—better safe than making flat bread, right?
Step-by-Step Instructions for Your Crusty Italian Bread Recipe
Alright, let’s get kneading! Baking this bread is a step-by-step process, but I promise each stage is satisfying. Follow these steps exactly, especially paying attention to the timing for proofing and preheating, and you’ll be rewarded with fresh bread in just a couple of hours. This is where the magic happens, so ditch your phone for a minute and focus on that dough! We need to nail these steps to get that bakery-style result.
Activating the Yeast and Mixing the Dough
First things first: we wake up the yeast. Grab your big mixing bowl and pour in the warm water. Remember, it needs to feel warm to the touch—not hot! Stir in that teaspoon of sugar, then sprinkle the yeast right on top. Give it a gentle stir, then just leave it alone for five minutes. If it gets foamy and bubbly—like a little tiny beer head—your yeast is happy and ready to go! If nothing happens, toss it out and start again; that yeast packet was tired!
Next, stir in your two tablespoons of olive oil. In a separate bowl, I need you to whisk the flour and salt together really well. Now, slowly incorporate that flour mixture into your wet ingredients, stirring until it just barely comes together into a shaggy mess. Don’t try to mix it all perfectly yet!
Kneading and First Rise for Soft and Chewy Italian Loaf
Time to get your hands in there! Turn that shaggy dough out onto a lightly floured surface. We are going to knead this dough for a solid 5 to 7 minutes. You’re looking for elasticity and smoothness; it should feel soft and pliable, the perfect texture for a soft and chewy Italian loaf. Once it stops sticking to your hands like glue, lightly oil a clean bowl and place the dough inside, turning it so it gets a nice oily coat.
Cover that bowl up tight—maybe with plastic wrap or a clean kitchen towel—and stick it somewhere warm. Don’t disturb it! This first rise needs between 1 and 1.5 hours, and you are waiting until that ball of dough has doubled its size. That doubling is the signal that your Italian bread dough is ready for the next step.
Shaping and Final Proofing
Once the dough has doubled, gently punch the air out—it’s therapeutic, trust me! Now, you get to decide: do you want a rustic, free-form oval loaf, or are you baking this in a 9×5 inch loaf pan? Either way, lightly grease your pan or just dust your surface. Shape the dough gently into your chosen form and place it where it can rise again. This second proofing time is shorter, usually 30 to 45 minutes, until it looks visibly puffy.
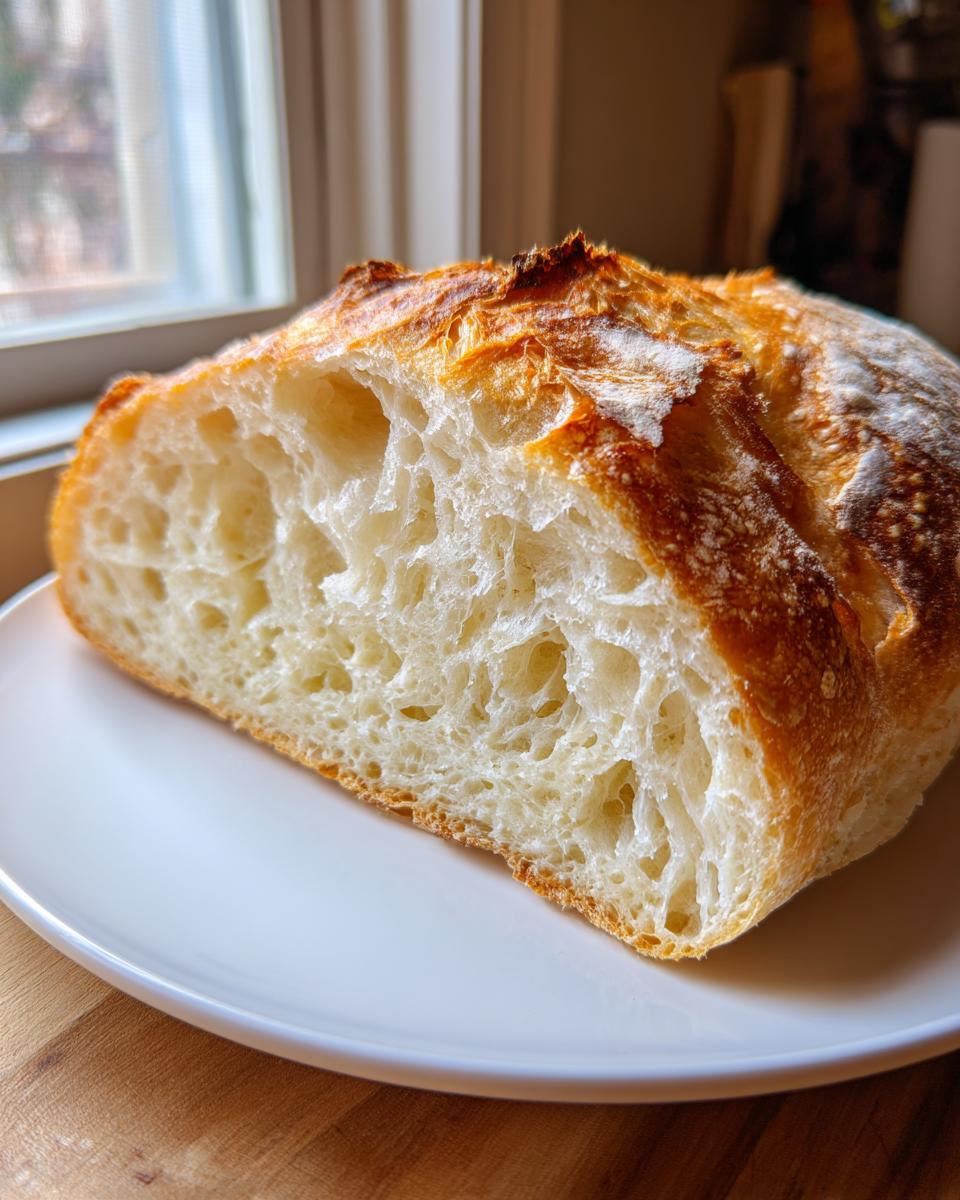
Baking Techniques for Bakery Style Bread at Home
This next part is non-negotiable if you want that crunchy exterior! Preheat your oven to a hot 400°F (200°C). Before you slide your loaf in, brush the top with a little water—this helps encourage cracking for that amazing crispness you crave in a crusty Italian bread. Even more important: heat a shallow pan on the bottom rack while the oven preheats. When you put your loaf on the center rack, quickly pour about a cup of hot water into that bottom pan and shut the door fast! That burst of steam is what makes this Bakery Style Bread at Home possible. It bakes for 30 to 35 minutes until it sounds hollow when tapped.
After you pull that gorgeous golden loaf out, transfer it immediately to a wire rack. Don’t let it sit in a hot pan! If you’re making something saucy like a big bowl of pasta, or whipping up some of my favorite appetizers and snacks, let the bread cool completely before slicing it so that crumb sets up perfectly. Also, for dipping, this is wonderful served warm with olive oil!
Expert Tips for the Best Italian Bread Recipe
Now that you know the steps for making this glorious loaf, let me give you the pro tips I learned over years of testing recipes—especially the ones that make the difference between ‘good’ bread and truly amazing Italian bread. If you want that crackly crust that sings when you slice it, the steam trick is key. Remember to crank that hot water into the bottom of the oven right as you lock the door!
But here’s the trick from the professionals: For an even crispier exterior, try spraying the sides of your oven lightly with water two or three times during the first 10 minutes of baking. It creates a super humid environment, which delays crust formation and lets the loaf fully expand before the crust sets hard. For the record, you can see how another great baker deals with crust structure over at this article!
Now, if you’re making this to use for something like sandwiches—which is a great idea for a quick lunch—you might prefer a softer exterior. If you skip the steam pan entirely and immediately brush the hot loaf with melted butter right when it comes out of the oven, the crust will soften up beautifully while still maintaining that wonderful golden color. Both ways yield fantastic results, you just have to decide if you need crunch or cushion!
Ingredient Notes and Substitutions for Your Loaf
I get so many questions about tweaking the ingredients, and that’s totally fair! When you’re making homemade bread, sometimes you need to work with what’s in your pantry. Remember, I used my nutrition background to make this specific formula work perfectly for that soft, chewy interior, but here are a few common substitutions you can try with confidence.
For instance, can you swap out the flour? Yes, you can absolutely use Bread Flour instead of All-Purpose Flour. Bread flour has a higher protein content, which means you might get a slightly chewier loaf—which is great, but you may need to add an extra tablespoon or two of water because bread flour tends to absorb liquid faster. Don’t worry if you do this; just keep kneading until that dough feels smooth.
What about the yeast? If you only have Instant Yeast instead of Active Dry Yeast, skip Step 1 entirely! You don’t need to proof it; just mix the instant yeast right into the dry ingredients with the salt and sugar, then proceed to Step 2 by adding the water and oil. It saves about 15 minutes right off the top!
I often get asked about the sugar. Yes, you can swap the granulated sugar for an equal amount of honey or maple syrup, though that will slightly alter the final taste profile. Stick with the white sugar if you want that classic, clean flavor, but don’t stress if you use brown sugar instead—it just adds a tiny bit more molasses flavor.
Serving Suggestions for Your Warm Italian Loaf
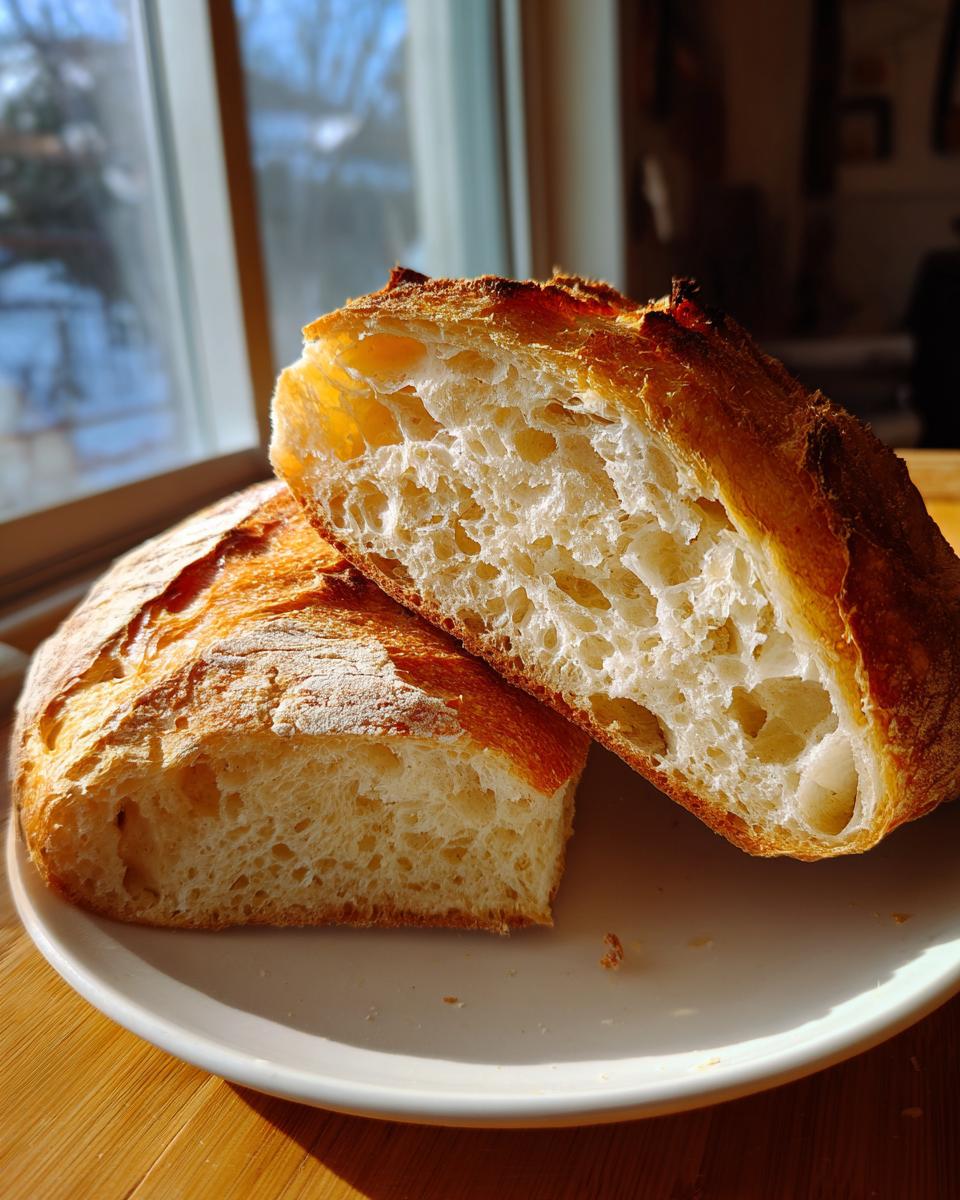
The hardest part about baking this Italian bread is waiting for it to cool down enough to slice! But once you have that golden, aromatic loaf ready, the possibilities are endless. Seriously, don’t let that crusty perfection sit unused!
My favorite way, and probably the most fundamental way to enjoy it, is while it’s still warm. Just slice thick pieces horizontally and serve them alongside a big bowl of something saucy. Think about tearing off chunks to soak up every last bit of marinara or rich beef ragu. It’s absolutely heavenly alongside my recipe for creamy horseradish sauce, too, if you’re making roast beef!
You mentioned sandwiches earlier, and this works beautifully because the sturdy crust holds up to hearty fillings. It’s perfect for Italian subs piled high with meats and cheeses, or even just simple grilled cheese sandwiches where you want that exterior crunch.
For a casual appetizer or side dish, you can’t beat dipping. Slice the loaf, drizzle it generously with good quality olive oil, maybe sprinkle on a little fresh oregano, or even rub a cut clove of garlic across the surface for a fresh bruschetta base. And if you’ve grilled up some delicious veggie kabobs, this bread is the ideal companion to sop up any leftover smoky marinade. You can find another excellent recipe inspiration for a crispy loaf over at this site!
Storing and Reheating Your Homemade Bread
Once your bread cools down completely on the rack, storage is all about preserving that crispy crust we worked so hard for! Don’t wrap it tightly in plastic wrap right away; that traps moisture and softens the outside almost instantly. For up to three days, I recommend storing it cut-side down on a cutting board, covered loosely with a clean kitchen towel.
If you know you won’t finish it within three days, slice the loaf, put those slices in a freezer-safe bag, and freeze them flat. When you want a slice, just pop it straight into the toaster! If you want to bring a whole loaf back to life, spritz it lightly with water and bake it at 350°F (175°C) for about 5 to 8 minutes until the crust crisps up again. It’s almost like it came right out of the oven!
Frequently Asked Questions About This Bread
I totally get it—when you’re looking for a quick Italian bread recipe, you need clarity on the timing and technique! I’ve collected some of the most common questions I hear from home bakers to make sure your experience is stress-free. If you ever have another question that isn’t answered here, please don’t hesitate to reach out to me on my Contact page!
Can I make this a No Knead Italian Bread recipe?
That’s a great question! While I love the simplicity of a truly no-knead loaf, for this specific recipe, I absolutely recommend kneading for those 5 to 7 minutes. Why? Because we are aiming for that bakery-style balance: a highly crispy crust bread tutorial look with a soft, chewy inside. If you skip the knead, the gluten network won’t develop enough to create those nice air pockets inside, and you risk getting a denser loaf, which isn’t quite what we are aiming for here. If you must skip kneading, you’d need to significantly increase the rise time—maybe 3 to 4 hours instead of 1.5—and the texture will change, but you can definitely attempt it that way!
How long does this Quick Italian Bread take, including rising?
When I call this a Quick Italian Bread, I mean quick relative to traditional artisan breads that take 18 hours! For this recipe, you need to budget about 2 hours for rising time, plus 20 minutes of active prep and 35 minutes of baking. So, you’re looking at roughly 2 hours and 55 minutes from start to finish. It’s definitely ready in under 3 hours, making it perfect for making a fresh, warm Italian loaf to go with that night’s dinner!
Is this recipe good for making Italian Sandwich Bread?
It is! If you bake it in a standard 9×5 inch loaf pan (which I explain in the instructions), the resulting loaf is rectangular and sturdy—perfect for slicing thick pieces for an Italian sandwich bread. Remember the note I made earlier: if you want a softer crust for sandwiches, skip the steam tray in the oven and brush the loaf with melted butter right after it comes out. That locks in a softer exterior while keeping the inside fluffy!
Why is the steam so important for this crusty Italian bread recipe?
The steam is like the magic secret from the professional bakeries that stops your loaf from becoming sad and dull. When the dough hits the oven, the high heat makes it try to expand really fast. If the air is dry, the outside sets too soon and cracks unevenly, or it just looks dull. The steam keeps the exterior moist for the first 10 minutes, allowing the bread to achieve maximum oven spring—that wonderful puffiness!—before the crust sets into that beautiful, crackly shell. Check out this tutorial on achieving crispy crusts for more details: This step-by-step guide shows brilliant crust techniques!
Estimated Nutritional Information
Baking with love is always my first ingredient, but I know that understanding the nutrition breakdown matters too! Since I developed this recipe using standard measurements and my background in Food Science, I can give you a good idea of what you’re looking at per slice. Keep in mind that since this makes one loaf, the final numbers depend on how thickly you slice it!
Here is the estimated nutritional data for one serving slice of this delightful loaf:
- Serving Size: 1 slice
- Calories: 150
- Fat: 3g
- Saturated Fat: 0.5g
- Cholesterol: 0mg
- Sodium: 250mg
- Carbohydrates: 28g
- Fiber: 1g
- Sugar: 1g
- Protein: 5g
Just a little note from me, Mia: These figures are calculated based on the standard ingredients listed, like all-purpose flour and the olive oil. If you use a different type of flour or add any extra brushed butter on top after baking, these numbers will shift slightly. Enjoy that beautiful, homemade bread knowing exactly what’s in it!
PrintEasy Crusty Italian Bread Recipe: Bakery Style Loaf at Home

Bake bakery-quality Italian bread with a golden, crunchy crust and a soft, chewy interior. This simple recipe is perfect for beginners and ready in a few hours, making it ideal for serving with pasta or making sandwiches.
- Prep Time: 20 min
- Cook Time: 35 min
- Total Time: 2 hours 35 min
- Yield: 1 loaf 1x
- Category: Baking
- Method: Baking
- Cuisine: Italian
- Diet: Vegetarian
Ingredients
- 3 1/2 cups all-purpose flour
- 1 1/2 teaspoons salt
- 1 teaspoon granulated sugar
- 2 1/4 teaspoons active dry yeast (1 packet)
- 1 1/4 cups warm water (about 105-115°F)
- 2 tablespoons olive oil, plus more for the bowl
Instructions
- In a large bowl, mix the warm water, sugar, and yeast. Let this stand for 5 minutes until it becomes foamy.
- Stir in the olive oil.
- In a separate bowl, whisk together the flour and salt. Gradually add the flour mixture to the wet ingredients, mixing until a shaggy dough forms.
- Turn the dough out onto a lightly floured surface. Knead the dough for 5 to 7 minutes until it becomes smooth and elastic.
- Lightly oil a clean bowl. Place the dough in the bowl, turning to coat. Cover the bowl with plastic wrap or a clean kitchen towel. Let the dough rise in a warm place for 1 to 1.5 hours, or until it has doubled in size.
- Gently punch down the dough. Shape it into a rustic loaf or place it in a lightly greased 9×5 inch loaf pan.
- Cover the shaped loaf loosely and let it rise again for 30 to 45 minutes, or until it looks puffy.
- Preheat your oven to 400°F (200°C). Place a shallow pan on the bottom rack to create steam later.
- Before baking, brush the top of the loaf lightly with water. Score the top of the loaf with a sharp knife if desired.
- Place the loaf on the center rack. Pour about 1 cup of hot water into the shallow pan on the bottom rack to create steam, then quickly close the oven door.
- Bake for 30 to 35 minutes, or until the crust is deep golden brown and the internal temperature reaches 200°F (93°C).
- Remove the bread from the oven and transfer it to a wire rack to cool completely before slicing.
Notes
- For an extra crispy crust, spray the sides of the oven with water twice during the first 10 minutes of baking.
- If you want a softer crust for sandwiches, skip the steam pan and brush the loaf with melted butter immediately after removing it from the oven.
- This bread is excellent served warm with olive oil for dipping.
Nutrition
- Serving Size: 1 slice
- Calories: 150
- Sugar: 1
- Sodium: 250
- Fat: 3
- Saturated Fat: 0.5
- Unsaturated Fat: 2.5
- Trans Fat: 0
- Carbohydrates: 28
- Fiber: 1
- Protein: 5
- Cholesterol: 0