
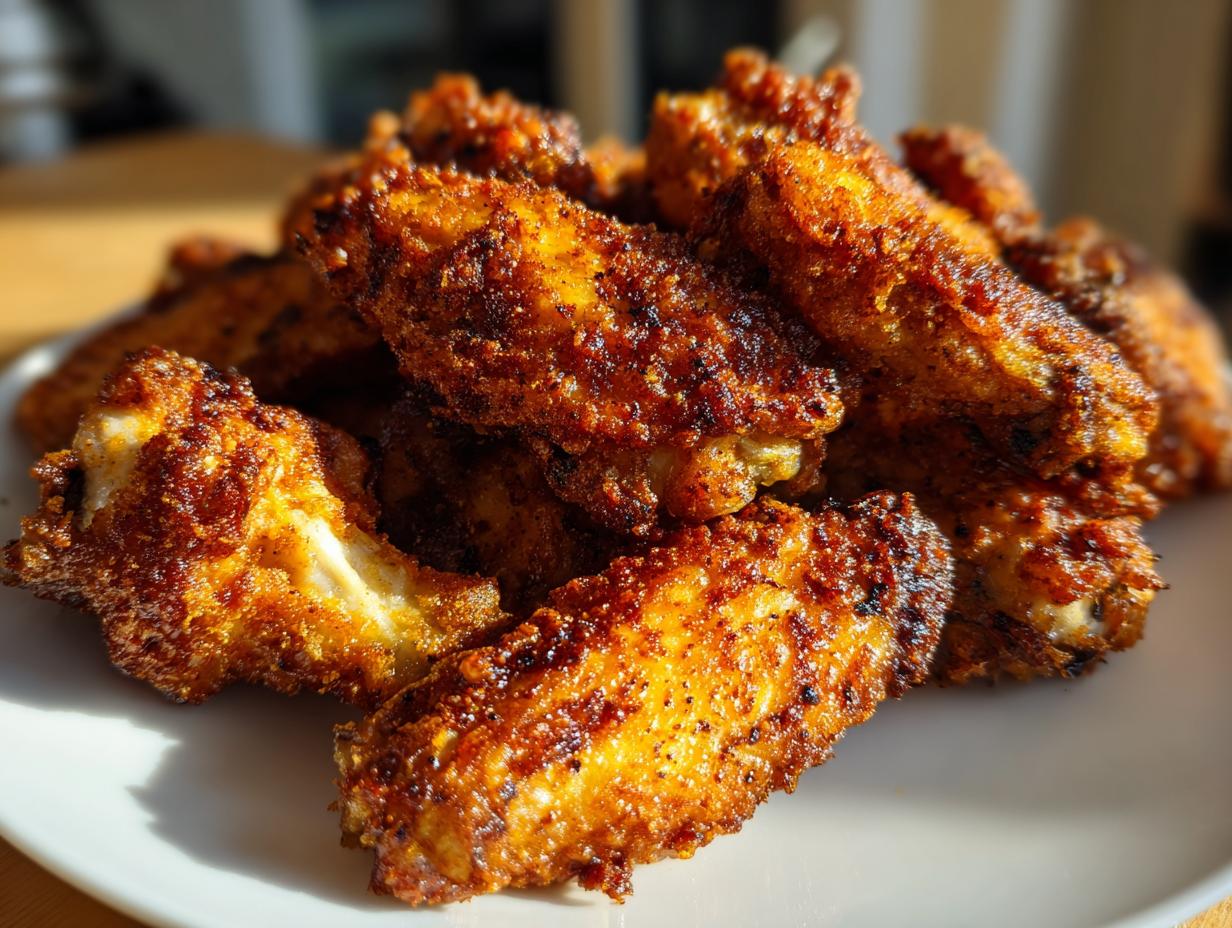
Oh, the disappointment! You pull them out of the oven, full of hope, only to find… flat, pale, slightly rubbery skin. If you’ve ever sworn off making crispy baked chicken wings because they just weren’t worth the effort compared to frying, don’t you worry one bit. I’ve been there, staring down a baking sheet of sad poultry. But trust me, those days are over! I’m Mia Rodriguez, and my background in both the soul of home cooking and the science of nutrition means I figured out the foolproof way to get that shatter-crisp skin without dipping a single wing in oil. This ultra-easy technique, focusing on a simple dry coating, guarantees you get the incredible crunch you crave every single time you bake. I share all my culinary secrets, built on both tradition and expert knowledge, over on my About page, but for now, let’s conquer that wing crispiness!
- Why You Will Make The Best Crispy Baked Chicken Wings
- The Essential Ingredients for Crispy Baked Chicken Wings
- Equipment Needed for Juicy Inside Crispy Outside Wings
- Step-by-Step Guide: How to Make Crispy Wings Without Frying
- Tips for Success: Achieving Non Greasy Chicken Wings Baked
- Flavor Variations and Serving Suggestions
- Storage and Reheating Instructions for Crispy Baked Chicken Wings
- Frequently Asked Questions About Oven Baked Chicken Wings
- Share Your Game Day Chicken Wings Baked Success
Why You Will Make The Best Crispy Baked Chicken Wings
I’ve tested this method against every trick in the book, and it consistently wins. When you follow these steps, you aren’t just following a recipe; you’re mastering a technique that delivers restaurant-quality texture right in your home oven. Trust me, these are the crispy baked chicken wings you’ve been searching for!
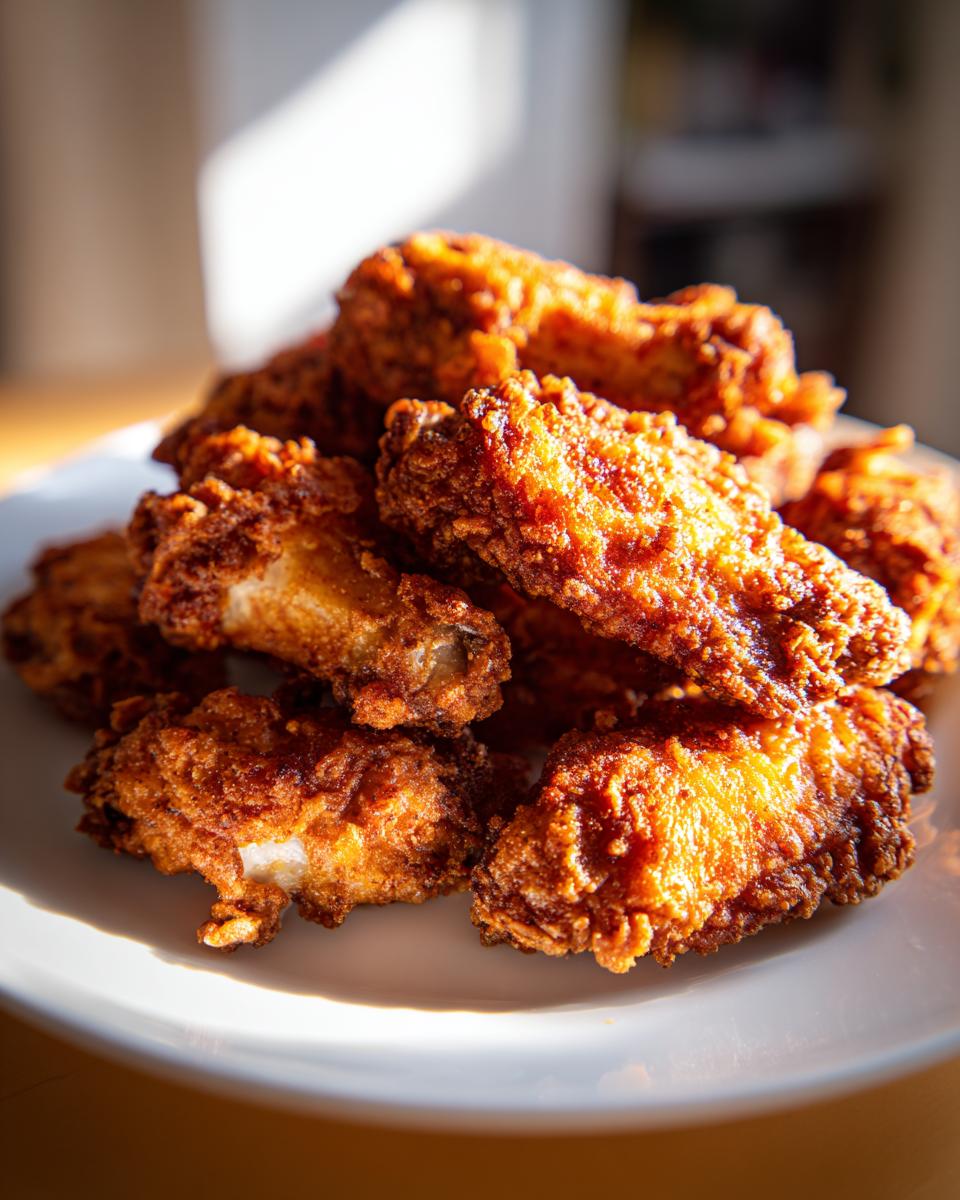
- Shatter-Crisp Skin Without Frying: The baking powder is the secret hero here. It raises the pH level on the skin, which helps break down proteins and dry out the surface area faster in the oven. This means you get that satisfying, crunchy bite everyone loves without the mess or the extra fat from deep frying.
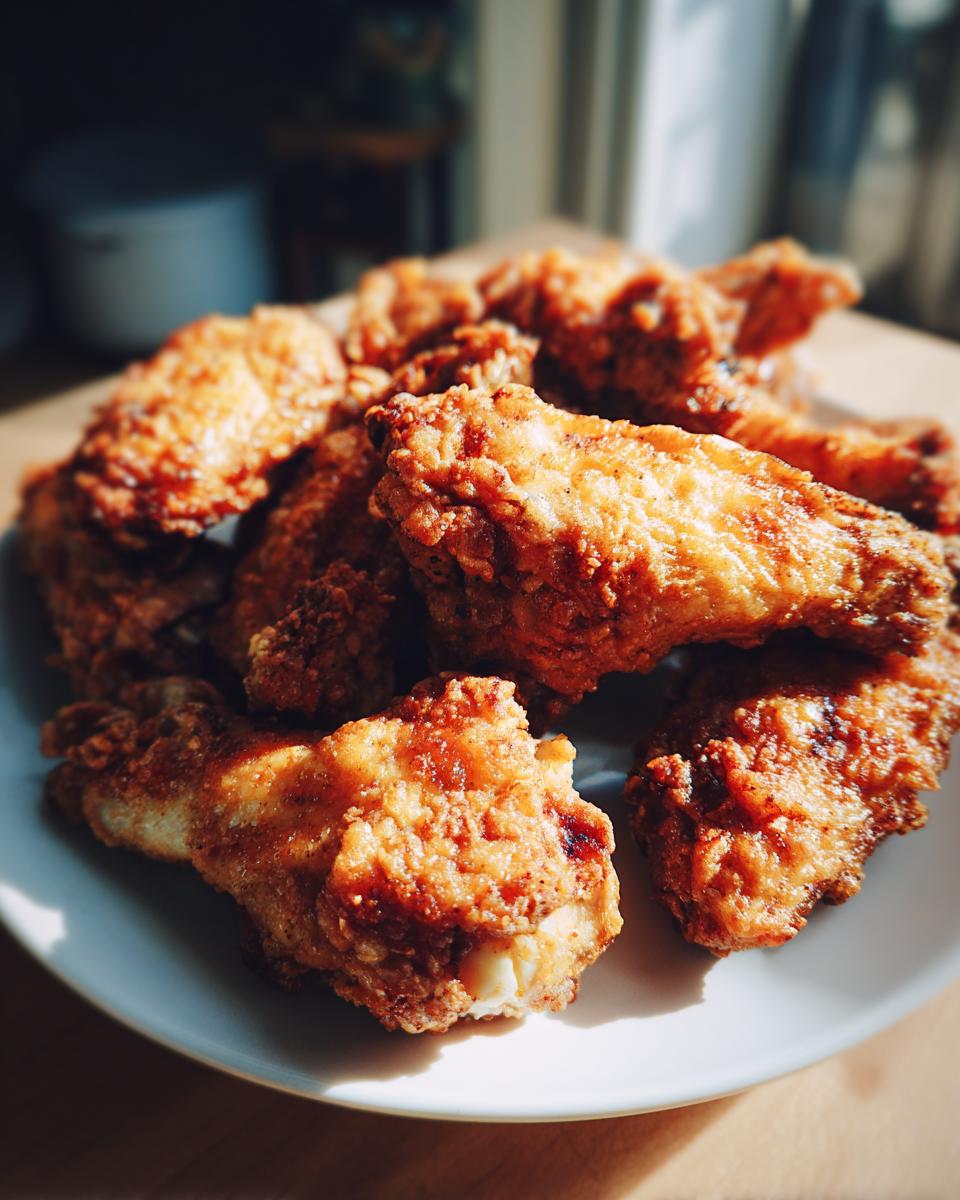
- Juicy Inside, Crispy Outside Guaranteed: Because we use a dry coating instead of heavy liquid marinades, the moisture stays locked inside the meat. You end up with perfectly cooked, fall-off-the-bone texture where it matters most, while the outside stays beautifully firm and crunchy.
- Ready Faster Than Delivery: Seriously, who wants to wait an hour for takeout? This is a wonderfully quick baked wing recipe. With about 15 minutes of prep, you have incredible, flavorful wings ready to go when the game starts. You can find excellent ideas for weeknight meals on my Weeknight Dinners page, but wings are always a winner!
- Healthy Crispy Chicken Wings: Since we rely on dry heat and the baking powder trick rather than submerging them in oil, you cut way down on unnecessary fats. It’s the perfect guilt-free way to enjoy football snacks or a fun dinner without feeling heavy afterward.
The Essential Ingredients for Crispy Baked Chicken Wings
Okay, folks, this is where we shine. When you are hunting for crispy baked chicken wings, the ingredient list needs to be short, but every item needs to pull its weight. I kept this down to absolute bare essentials, drawing on my nutrition background to make sure what we *are* using actually contributes to that incredible crunch or keeps the meat tender. You probably have everything you need sitting in your pantry right now!
- 2 lbs chicken wings (flats and drumettes separated, ensure they are separated for even cooking, this is crucial!)
- 1 tablespoon baking powder (If you can find aluminum-free, grab it! It just cleans up any potential metallic aftertaste, though standard works fine too. This is our magic dust.)
- 1 teaspoon salt (Kosher salt is best because it adheres well, but use what you have.)
- 1 teaspoon garlic powder (Don’t skimp; this adds great depth for a simple dry rub!)
- 1 teaspoon onion powder
- 1/2 teaspoon black pepper (Freshly ground is always better, but pre-ground is totally acceptable for wings.)
- 1/2 teaspoon paprika (I use regular sweet paprika here for color, but if you want to add a little smoke, use smoked paprika instead!)
- Cooking spray or oil for the rack (Just a light mist—we want air circulation, not an oil slick!)
See? It’s nothing fancy! No buttermilk soak, no tricky additions. It’s just the perfect blend of spices combined with that powerhouse baking powder that gives you the best oven baked chicken wings texture possible without frying.
Equipment Needed for Juicy Inside Crispy Outside Wings
Listen, you could have the world’s best recipe, but if your equipment isn’t right, you’re going to end up with soggy bottoms, and we simply can’t have that! For these truly crispy baked chicken wings, we need to make sure air can move underneath those pieces just as freely as it moves over the top. That’s the key to avoiding that deflated, steamed texture we’re trying to dodge.
Here’s what you need to gather before you start mixing that spice rub:
- A large, sturdy baking sheet.
- Aluminum foil (My sanity saver for cleanup—you’ll thank me later!).
- One large mixing bowl (Big enough to toss 2 pounds of wings without throwing seasoning everywhere—trust me, ask me how I know!).
- A wire cooling rack that fits inside your baking sheet.
Now, let’s talk about that rack. This is non-negotiable, my friends. It’s the foundation of our no fry chicken wings recipe success. If you just lay the seasoned wings directly on the foil-lined pan, the bottom side steams in its own fat and moisture as it cooks. Yuck! When you use the wire rack, you lift the wings up, allowing hot air from the oven to completely circulate around every single surface—top, sides, and bottom. This is how we achieve that glorious, all-over crunch you see in the perfect game day photos. Don’t try to skip it; the rack is your MVP here!
Step-by-Step Guide: How to Make Crispy Wings Without Frying
Alright, now that we’ve gathered our tools and our secret weapon (that baking powder!), it’s time to put it all together. I promise, this method makes achieving crispy baked chicken wings so straightforward you’ll never look back. We ditch the fryer, but we keep all the crunch. Just flow through these steps, and get ready for your best batch yet!
- Preheat your oven to 425 degrees Fahrenheit. Line a large baking sheet with foil for easy cleanup, then place a wire cooling rack on top of the sheet. Lightly spray the rack with cooking spray.
- Pat the chicken wings completely dry using paper towels. This step is crucial for crispiness. Remove any excess moisture from the skin.
- In a large bowl, whisk together the baking powder, salt, garlic powder, onion powder, black pepper, and paprika.
- Add the dried chicken wings to the bowl. Toss thoroughly until every piece is evenly coated with the dry mixture. The baking powder helps dry out the skin during baking.
- Arrange the coated wings in a single layer on the prepared wire rack. Do not let the wings touch each other; space them out for even air circulation.
- Bake for 20 minutes at 425 degrees Fahrenheit.
- Flip the wings over. Reduce the oven temperature to 400 degrees Fahrenheit and bake for another 20 to 25 minutes, or until the skin is deeply golden brown and shatter-crisp.
- Remove the wings from the oven. If you plan to toss them in sauce, do so immediately in a separate bowl. For dry-rub wings, serve as is.
Prepping the Wings and Oven
First things first, crank that oven up to 425°F! If you are using my amazing foil-and-rack setup, make sure you get that rack lightly sprayed down so the wings don’t stick later. Now, pay attention: Grab a stack of paper towels. You need to pat those wings until they feel almost dry to the touch. Seriously, I once rushed this step because I was running late for a football game, and my wings were just… floppy. Moisture is the enemy of crispiness, so let’s remove it now. This drying phase is the absolute foundation for making genuinely crispy baked chicken wings.
The Baking Powder Coating Technique
Once they are dry, it’s coating time! Mix up all your spices—the baking powder, salt, garlic powder, everything—in that big bowl. Don’t just sprinkle it on top! Dump the wings right in with the dry mix. Now, get your hands in there (hands are always better than tongs for this part!) and toss them around until every single little nook and cranny of the chicken is coated in that pale, dusty layer. This seemingly small step is the real secret sauce to getting that fantastic crunch we all want in our oven baked chicken wings. I find that making sure the wings get enough seasoning is what really elevates a simple lunch into something worthy of game day!
Baking for Maximum Crunch
We use a two-part temperature plan here for perfection. First, we hit them hard at 425°F for 20 minutes. This high heat gets the skin aggressively crisping up right away. After that initial blast, flip every single wing—make sure they get even color! Then, we drop the temperature down to 400°F and bake for another 20 to 25 minutes. This lower temperature gently finishes cooking the meat inside until it’s totally juicy while still crisping up that glorious baking powder coating. If you watch them carefully in those last few minutes, you’ll see the skin turn that perfect, deep golden brown—your reward for making truly crispy baked chicken wings! If you need more tips on baking times, check out this guide on wing recipes here.
Tips for Success: Achieving Non Greasy Chicken Wings Baked
Even with the perfect baking powder coating, sometimes you just need that extra push to get over the top into truly spectacular territory! As a food scientist, I know that the small details are what separate a good batch of non greasy chicken wings baked from an absolutely unforgettable one. We’ve nailed the drying and the spice mix, but here are the extra steps, or cheat codes really, that elevate these wings.
First, let’s talk about the emergency crisp button: the broiler. If you pull those wings out after the full bake cycle and they look 95% done but maybe 1% shy of that deep golden crunch you see in magazines—don’t panic! Take them off the rack briefly, move the rack up to the highest position in the oven, and switch the oven to broil high. You only need 60 to 90 seconds, but WATCH THEM. Seriously, step away for no more than five seconds because they go from perfect to burnt surprisingly fast. This blast of direct heat renders the last bit of fat and makes that skin pop!
I have to tell you about a disaster last year. I was trying to be speedy before a big gathering, and I only lightly dabbed the wings—I didn’t *pat* them dry like I always preach. The result? The baking powder and spice mix turned into a thick, wet paste right on the skin, and instead of crispy baked chicken wings, I ended up with puffy, slightly salty chicken nuggets attached to bones. Lesson learned: moisture removal is non-negotiable! If your wings aren’t bone dry, they will never be truly crispy. For other crunchy recipes, you can check out my delicious potato latke recipe where the frying technique is adapted for crispness.
And remember what I said about the rack? It’s worth repeating because it’s the key to avoiding those gross soggy bottoms. The wire rack lifts the wings so the rendered fat and any moisture drips right underneath onto the foil below, rather than pooling at the base of the wings. If you want the best oven baked chicken wings, the rack provides that essential 360-degree exposure to the hot air. If you’re wondering about exact timing versus temperature adjustments, check out this excellent resource on baking times—it really highlights how heat control impacts texture.
Flavor Variations and Serving Suggestions
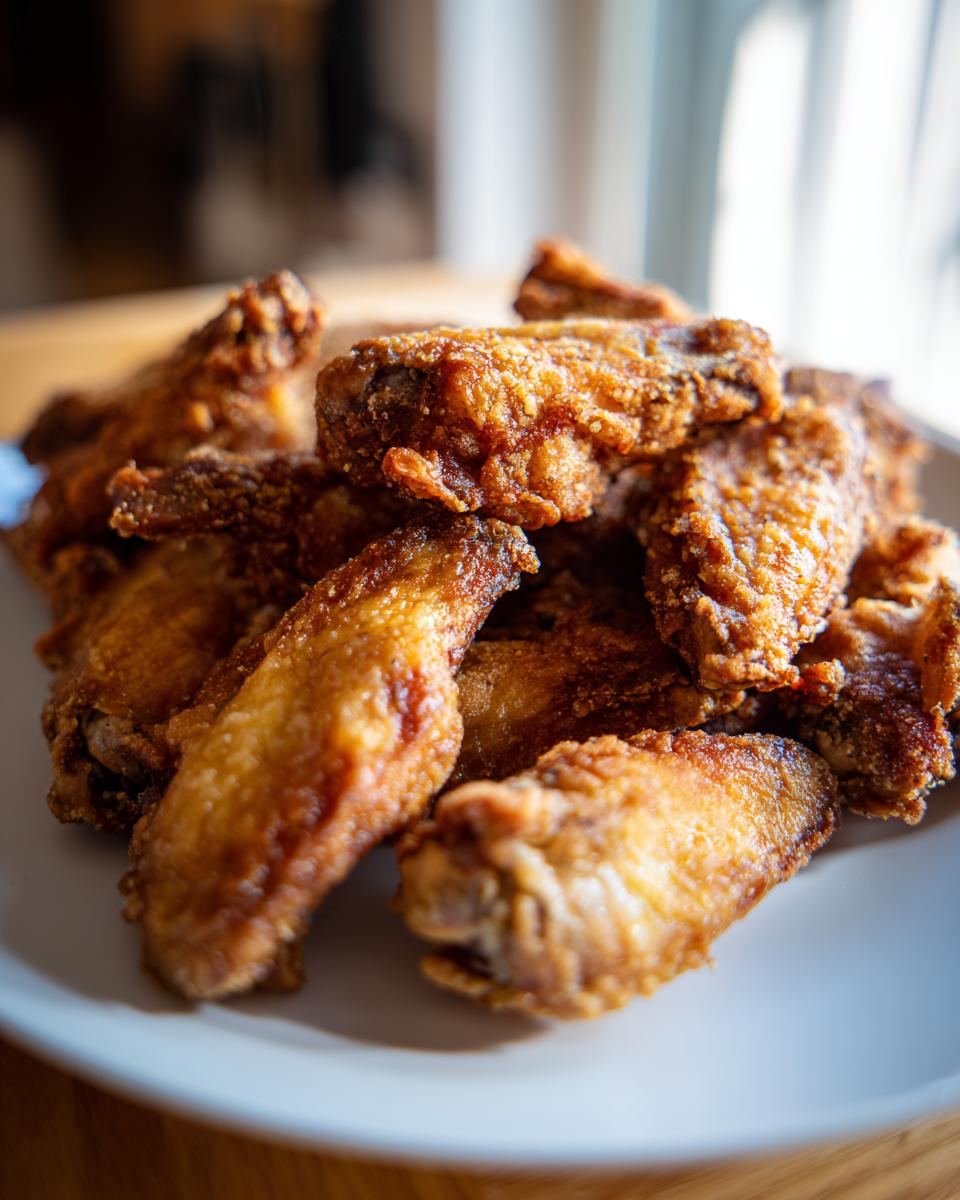
So, you’ve pulled perfectly golden, shatter-crisp wings out of the oven. Congrats! Now you have a choice: do you leave them as crunchy, seasoned jewels, or do you want to toss them in a glorious sauce? My advice, based on years of testing, is to *always* sauce them immediately after they come out.
The heat remaining on the wings is the perfect adhesive for any sauce you choose. If you wait even five minutes, the skin starts to cool and firm up, and that beautiful dried surface won’t grab onto the sauce as well. Toss them gently but quickly in your bowl right away. If you leave them sitting in the sauce, though, that is when the crispness goes to die! We want a quick coat, not a bath.
Sauce Application: The Crispness Preservation Trick
The trick for keeping these juicy inside crispy outside wings even when you want them saucy is timing and technique. Use a bowl larger than you think you need. Dump your fully baked wings in, pour your sauce over them, and immediately put a lid on it or cover it tightly. Shake vigorously for about 30 seconds until every wing is glossy and coated. Then, get them onto the serving platter fast! They will retain the crunch much longer than if they were just sitting in a pool of sauce.
Elevating Your Dry Rub Game
If you prefer a dry rub finish, which keeps the texture absolutely rock solid, you can tweak the base spice mix we used earlier with just a few simple additions. These are perfect when you want something less messy for a party!
- Smoky BBQ Rub: Add 1 teaspoon of smoked paprika (if you didn’t use it above) and 1/2 teaspoon of brown sugar substitute to your base mix. That little bit of sugar helps caramelize beautifully at high heat!
- Spicy Kick Rub: Add 1/2 teaspoon of cayenne pepper for a bit of heat, or even a pinch of finely crushed red pepper flakes. You can feel the tanginess build up wonderfully without compromising the initial crispiness.
- Garlic Parmesan Toss: Wait until the wings are done—this is a post-bake step! Toss the hot wings lightly in melted butter, then immediately toss them in a mix of grated Parmesan cheese, dried parsley, and extra garlic powder. The cheese melts just enough to stick but doesn’t steam the skin.
Perfect Pairings for Your Baked Wings
Because these are such a satisfying, savory, and hopefully crunchy centerpiece, you don’t want to weigh the whole plate down. I always serve a couple of simple, bright sides to cut through the richness. They make for a great, slightly lighter meal when paired with vegetables.
For a fantastic crunch contrast, try my recipe for an Easy Crunchy Cabbage Salad. The tanginess of the dressing is so refreshing next to a spicy Buffalo coating.
Another favorite is something warm and smoky, like my Grilled Vegetable Skewers. The slight char on the veggies plays really well with the salty, fatty flavor of the wings. It turns a snack into a full, balanced meal!
Storage and Reheating Instructions for Crispy Baked Chicken Wings
You actually have leftovers! That is a testament to how delicious these wings are, because they fly off the platter! But what do you do when you have the remaining crispy baked chicken wings that didn’t quite finish the job on game day? The biggest battle with leftovers is maintaining that phenomenal texture, right? We do *not* want soggy wings on Tuesday!
First thing: handling the storage. If you made saucy wings, the sauce is going to start soaking into that hard-earned crispness right away. You need to get leftovers into an airtight container and into the fridge as quickly as you can—within two hours of them coming off the rack is ideal. If you used a dry rub, they are slightly more forgiving, but cold refrigeration is still the name of the game to keep them safe and stop that skin from getting sweaty.
When it comes to reheating, the microwave is your enemy. It heats the water molecules inside the meat, guarantees you get rubbery skin, and destroys the whole point of our hard work getting those oven baked chicken wings crispy in the first place. We need dry, circulating heat to bring that crunch back!
The Best Reheating Method: Back to High Heat
If you are striving for that original juicy inside crispy outside wings experience, you must use dry heat. The oven or an air fryer is the way to go. Set your oven to about 375°F. You don’t need to line the pan this time, but setting the wings on a wire rack—yes, that same trusty rack!—is highly recommended, even for reheating. This lets the air circulate and dries out any condensation that built up in the fridge.
Pop them in for about 8 to 10 minutes. If they are sauced, toss them lightly in a teaspoon of oil or spray them lightly with cooking spray before they go in. You’ll know they are ready when the internal temperature is safe and you hear a little crackle when you tap the skin with a fork. It brings them right back to life!
Using an Air Fryer for Quick Crisp Recovery
If you have an air fryer, this is even faster! It’s an excellent tool for reviving texture. Set your air fryer to 350°F. Lay the wings in a single layer in the basket—don’t overcrowd them! Cook them for about 4 to 6 minutes, checking at the 4-minute mark. The forced convection air works wonders to dry out the exterior skin, and you’ll have your crispy baked chicken wings feeling almost freshly made!
Frequently Asked Questions About Oven Baked Chicken Wings
It’s totally normal to have a few lingering questions when you are trying a new technique, especially one that promises crunch without grease! I know that when I first started experimenting with making healthy crispy chicken wings at home, I had a notebook full of scribbled questions. Here are the few things I get asked most often about nailing that perfect baked texture.
Can I use baking soda instead of baking powder for my crispy baked chicken wings?
That is a great question about substitutions! While they sound similar, they behave differently, which is key when we are aiming for the best texture for our crispy baked chicken wings. I really prefer baking powder here because it includes both a base (like baking soda) AND an acid. That acid is what helps break down the proteins on the skin, which is vital for that high-heat crisping we want. If you only have baking soda, you can use a much smaller amount—maybe half a teaspoon mixed with a tiny splash of lemon juice or vinegar to create that needed acid. If you just use baking soda alone, you risk getting a soapy or metallic taste that just ruins the whole batch. Stick to the powder if you can!
What is the best oven temperature for truly crispy baked chicken wings?
For truly spectacular results—that juicy inside crispy outside wings profile—we rely on a two-stage temperature attack! We don’t just use one temperature the whole time. We start high, cranked up to 425°F for the first 20 minutes. That intense heat shocks the skin, helps render the fat, and gets the drying process going immediately. Then, we drop it down to 400°F for the final 20–25 minutes. This lower temperature allows the inside meat to cook through tenderly (so it stays juicy!) while the outside finishes getting that gorgeous, deep golden color. It’s all about gradual, controlled crisping!
Are these the healthiest crispy chicken wings available?
Compared to their deep-fried cousins? Absolutely, yes! Remember, this recipe is specifically designed to require no oil submersion for crisping—the baking powder and the high heat do all the work! Because we aren’t adding cup after cup of frying oil, the fat content remains primarily the fat naturally rendered from the chicken skin itself. That’s why this method shines through as such a great option for those looking for healthiest crispy chicken wings that satisfy a craving without derailing your eating goals. They are wonderfully low-fat according to our analysis! If you are looking for other light appetizers, check out my recipe for baked jalapeno poppers too!
If you’re looking for more general baking tips that might apply to other uses, I always reference this great article on oven-baked wings for general inspiration!
Share Your Game Day Chicken Wings Baked Success
Whew! Now that you have mastered the secret to truly crispy baked chicken wings—the pat dry, the baking powder magic, and the dual-temperature bake—I just have one more request for you, my friend. I need to know how they turned out!
Nothing makes me happier than knowing I helped another home cook banish soggy wings from their kitchen forever. If you try this recipe out for your next big game night, or even just a Tuesday night when you need a serious flavor fix, please come back and let me know what you thought!
Did the skin shatter? Did your vegetarian uncle even sneak one? Tell me everything!
- Drop a rating for me at the bottom of this post—five stars is the goal, naturally!
- Share a photo of your incredible, crunchy creation on social media and tag me! It makes my day to see your work.
- Let me know in the comments if you went with a classic Buffalo toss or decided to stick with the dry rub.
If you are looking for more incredible recipes that are reliable and exciting, make sure you check out the Contact Page for ways to keep in touch. And if you’re searching for even more inspiration for a winning appetizer spread, take a peek at what others are making after trying this method, like these wonderful tips here!
Happy baking, and may all your wings be perfectly crisp!
PrintThe Ultimate Crispy Baked Chicken Wings: Juicy Inside, Shatter-Crisp Outside

Learn the simple, no-fry technique to achieve truly crispy baked chicken wings every time. This recipe uses a baking powder secret to render the skin perfectly crunchy while keeping the meat juicy inside. It is a healthier alternative perfect for game day or an easy dinner.
- Prep Time: 15 min
- Cook Time: 45 min
- Total Time: 60 min
- Yield: 4 servings 1x
- Category: Appetizer
- Method: Baking
- Cuisine: American
- Diet: Low Fat
Ingredients
- 2 lbs chicken wings (flats and drumettes separated)
- 1 tablespoon baking powder (aluminum-free preferred)
- 1 teaspoon salt
- 1 teaspoon garlic powder
- 1 teaspoon onion powder
- 1/2 teaspoon black pepper
- 1/2 teaspoon paprika
- Cooking spray or oil for the rack
Instructions
- Preheat your oven to 425 degrees Fahrenheit. Line a large baking sheet with foil for easy cleanup, then place a wire cooling rack on top of the sheet. Lightly spray the rack with cooking spray.
- Pat the chicken wings completely dry using paper towels. This step is crucial for crispiness. Remove any excess moisture from the skin.
- In a large bowl, whisk together the baking powder, salt, garlic powder, onion powder, black pepper, and paprika.
- Add the dried chicken wings to the bowl. Toss thoroughly until every piece is evenly coated with the dry mixture. The baking powder helps dry out the skin during baking.
- Arrange the coated wings in a single layer on the prepared wire rack. Do not let the wings touch each other; space them out for even air circulation.
- Bake for 20 minutes at 425 degrees Fahrenheit.
- Flip the wings over. Reduce the oven temperature to 400 degrees Fahrenheit and bake for another 20 to 25 minutes, or until the skin is deeply golden brown and shatter-crisp.
- Remove the wings from the oven. If you plan to toss them in sauce, do so immediately in a separate bowl. For dry-rub wings, serve as is.
Notes
- For extra crispiness, you can briefly place the wings under the broiler for the last 1-2 minutes, watching constantly to prevent burning.
- If you prefer saucy wings, toss them in your favorite Buffalo or BBQ sauce immediately after they come out of the oven. The residual heat will help the sauce adhere.
- Using a wire rack allows air to circulate completely around the wings, preventing the bottoms from becoming soggy.
Nutrition
- Serving Size: 4 wings
- Calories: 280
- Sugar: 0.5
- Sodium: 350
- Fat: 18
- Saturated Fat: 5
- Unsaturated Fat: 13
- Trans Fat: 0
- Carbohydrates: 1
- Fiber: 0
- Protein: 27
- Cholesterol: 95