
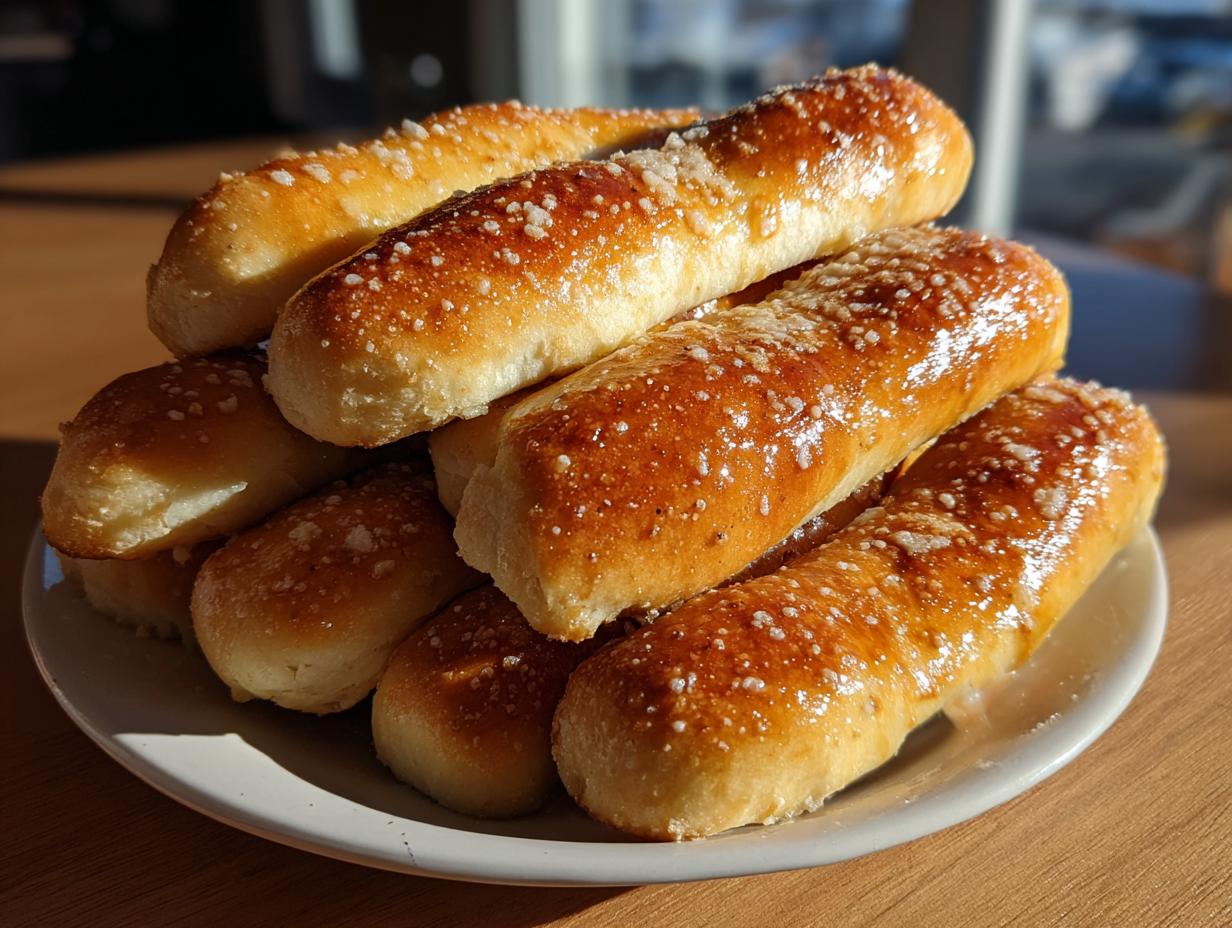
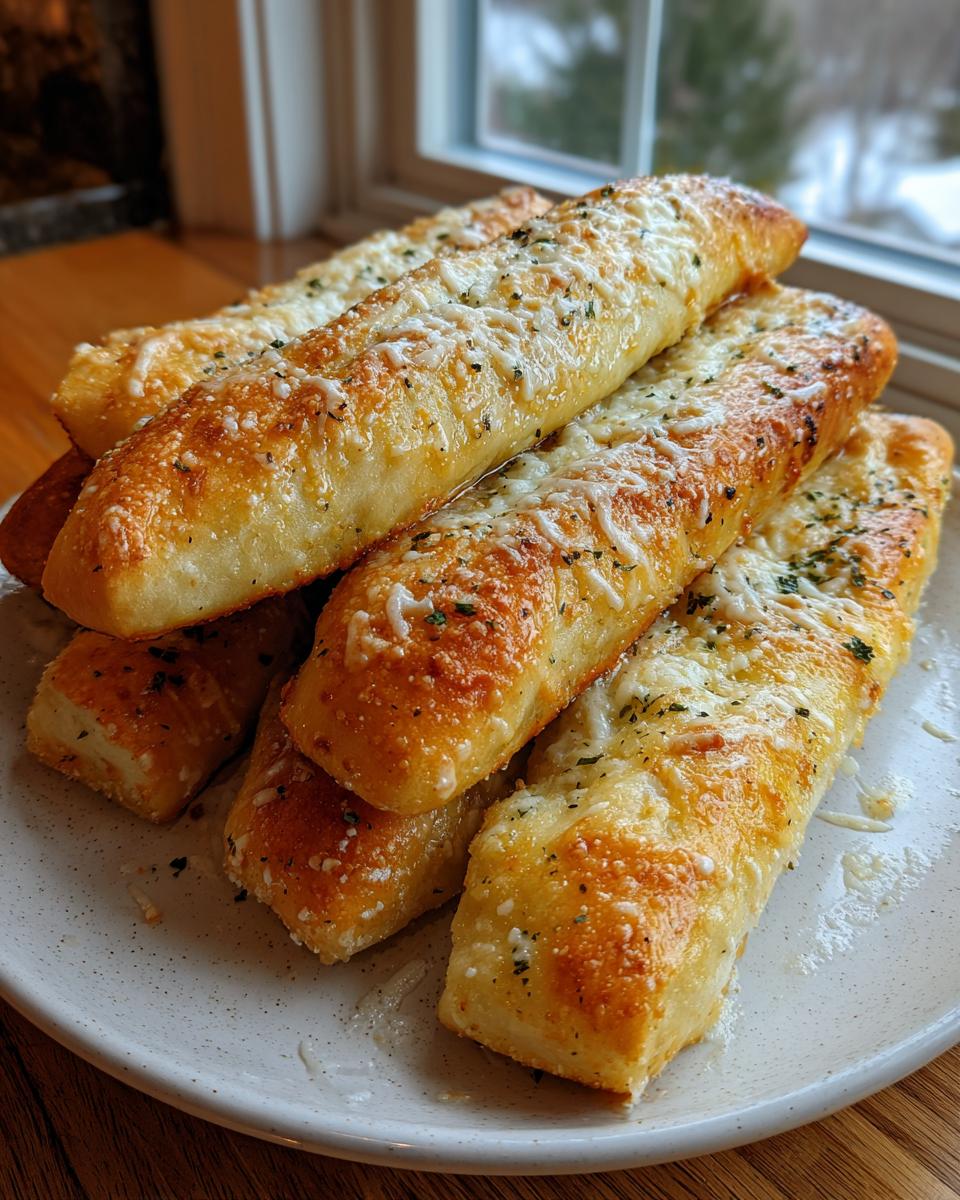
Oh, friends, I know that feeling! You’re halfway through a big bowl of pasta, and all you can think about is that warm, fluffy, slightly sweet bread waiting on the table. Making restaurant-quality food at home shouldn’t feel like a luxury, and trust me, these are the breadsticks you’ve been searching for. My goal here at Cooking by Mia is always to give you the clearest, most reliable path to exceptional home cooking, and that comes from testing things until they are perfect. My background—mixing my grandmother’s soulful Mexican flavors with the precision I learned studying Food Science—really helps me break down the *why* behind textures. And I can guarantee you: these deliver the ultimate soft & chewy Olive Garden Copycat Breadsticks experience. They are tender, dipped in the most addictive garlic parmesan butter, and honestly, they taste even better than the restaurant version!
If you want to know more about how I approach developing recipes like this, you can always read up on my full story here. But right now, let’s focus on getting that dough ready!
- Why This Homemade Breadsticks Recipe Works Better Than Takeout
- Essential Ingredients for Soft Breadsticks
- Step-by-Step Instructions for Olive Garden Breadsticks Copycat
- Tips for Perfect Garlic Parmesan Breadsticks Every Time
- Variations: From Garlic Breadsticks to Cheesy Breadsticks
- Storage and Reheating Instructions for Your Homemade Breadsticks
- Serving Suggestions for These Dinner Side Dish Bread Sticks
- Frequently Asked Questions About Making Breadsticks
- Nutrition Information for These Buttery Breadsticks
- Nutrition Information for These Buttery Breadsticks
Why This Homemade Breadsticks Recipe Works Better Than Takeout
When you’re chasing that perfect texture, you realize that the magic isn’t just in the butter topping—it’s deep in that dough structure. These soft breadsticks absolutely nail the pillowy, slightly dense texture you want in true restaurant style breadsticks. I spent weeks testing the rise time for this dough. Seriously, I have notes on variations where I let it rise for an hour versus an hour and a half! If you rush it, you get something closer to a cracker. But give it that full rise time? Boom! You get that fluffy interior that just begs to soak up sauce.
My goal wasn’t just to copy the famous ones; it was to make them superior—more flavor, better chew—and I’ve nailed that by focusing on gluten development. They’re perfect for a busy night when you need a reliable side dish!
Achieving That Perfect Chewy Breadsticks Texture
The chewiness comes down to two things: kneading and resting. You need to work that dough until the gluten strands are strong, which takes about 5 to 7 minutes by hand. Don’t be shy when kneading! Once you’ve kneaded it well, you have to let it rest and rise completely. That rest time allows the gluten structure to relax just enough after kneading so they bake up tender, not tough. It’s this balance of strength and relaxation that gives you that lovely, satisfying pull when you bite into them.
Essential Ingredients for Soft Breadsticks
When we talk about making the best homemade breadsticks recipe, it all starts right here on the counter with what you grab out of the pantry. Forget complicated flour blends; this recipe relies on simple, straightforward items you probably already have. Precision matters here, especially when we are aiming for that restaurant quality, so pay close attention to the temperature of your water!
Here is everything you need:
- 1 1/2 cups warm water (it needs to be about 110 degrees F—not hot, just warm!)
- 2 1/4 teaspoons active dry yeast
- 2 tablespoons granulated sugar
- 4 cups all-purpose flour, plus more for dusting when you work the dough
- 1 teaspoon salt (for the dough itself)
- 1/4 cup olive oil, plus more for brushing the bowl
- 1/2 cup unsalted butter, melted (this is crucial for the topping!)
- 4 cloves garlic, minced (seriously, fresh minced garlic makes all the difference)
- 1 teaspoon dried Italian seasoning
- 1/2 teaspoon salt (for the topping, needed to balance the butter)
- 1/4 cup grated Parmesan cheese
Ingredient Notes and Substitutions for Your Homemade Breadsticks Recipe
Now for the little details that build confidence! If you only have instant yeast on hand, you can totally use it. Just skip that initial 5-10 minute waiting period where you check for foam with the active dry yeast. You can dump the instant yeast right in with the flour and sugar mixture. If you don’t have olive oil, a light vegetable oil works fine in the dough, but I really suggest sticking with olive oil for flavor if you can swing it.
As for the flour—standard all-purpose flour is what I use, and it yields those wonderful soft breadsticks. Bread flour would give you an even chewier bite, but for this particular soft texture we are going for, AP flour is my tried-and-true choice. And please, avoid using margarine instead of the butter for the topping; that 1/2 cup of real butter melts into the garlic and seasoning in a way nothing else can replicate. It’s the secret to those amazing buttery breadsticks!
Step-by-Step Instructions for Olive Garden Breadsticks Copycat
Okay, this is where the fun really begins! It feels like a project, but honestly, the hands-on kitchen time is surprisingly quick, clocking in under 30 minutes before the dough gets to chill out and rise. We want to make sure everyone, even those of you new to working with yeast, feels completely confident making these from scratch. That yeast activation step is key to making sure these are truly quick bread recipe style favorites!
Making the Homemade Dough Recipe
First things first, we wake up that yeast! In a large bowl, mix your warm water, the yeast, and the sugar together. You absolutely have to let this sit for about 5 to 10 minutes. Watch it—it turns foamy and happy! If it doesn’t foam up, your water was too hot or too cold, and you need to start that part over. Don’t press on! Once you see that foam, stir in 3 1/2 cups of the flour, the salt, and the olive oil. Stir it until it looks like a messy, shaggy collection of dough bits—that’s totally normal.
Now, pull that shaggy dough out onto a lightly floured surface. We need to knead this for about 5 to 7 minutes. It takes muscle, but trust me, this is developing the gluten that gives us that amazing chew. Keep adding the rest of the flour slowly until it’s smooth and passes the elasticity test. Pop it into an oiled bowl, flip it over so it’s coated, cover it up tight, and let it go! It needs a warm spot for 1 to 1.5 hours until it’s doubled. I remember the first time I tried to rush this rise for some pizza dough treats years ago; it just didn’t puff up right!
Shaping and Baking Your Breadsticks
When your dough is beautifully risen, give it a gentle punch down—that’s the best part! Next, divide that whole batch into 12 equal pieces. Roll each piece out carefully into a thin stick, aiming for 10 to 12 inches long. This length is what gives you that perfect chew-to-soft ratio. Lay them out on a baking sheet lined with parchment paper. This parchment is your friend! Make sure to leave about an inch between each one; they need room to breathe and puff up a bit while baking.
Get that oven preheated to 400 degrees F. They bake fast—seriously, 10 to 12 minutes is all they need. You are looking for a light golden brown color. If you pull them out already golden, they are probably already tough inside!
Creating the Buttery Breadsticks Garlic Butter Topping
This is the showstopper, so get your ingredients ready while the breadsticks are in their final 5 minutes of baking. In a small bowl, whisk together your melted butter, the four cloves of fresh minced garlic (don’t skimp!), that Italian seasoning, and the extra salt for the topping. It should look like rich, fragrant liquid gold.
The timing here is non-negotiable for the best flavor infusion! The second those fantastic buttery breadsticks come out of the oven, grab your pastry brush and coat them generously with the garlic butter mixture. You need to work fast while they are steaming hot so the butter soaks right down into the crust. Right after the butter, sprinkle that grated Parmesan cheese all over. The heat will make the cheese cling perfectly. That’s it—the magic topping is complete!
Tips for Perfect Garlic Parmesan Breadsticks Every Time
Even with a fantastic recipe, sometimes those little things throw the results off, right? I’ve been there! As someone who relies on food science knowledge to balance flavor and texture, I can share a few hard-learned lessons to guarantee you get that perfect result every single time you tackle these garlic parmesan breadsticks.
First, let’s talk about that rise. If your dough doesn’t double in size, don’t bake it! If the temperature in your kitchen is a bit chilly, try setting your bowl near, but not *on*, a pilot light or inside an oven that’s turned off with just the light on. That gentle warmth is everything for the yeast. If you notice the dough feels sticky even after using the full amount of flour during kneading, it often means the yeast wasn’t happy to begin with, or you might have added your liquid (water) too warm.
Another thing I learned testing homemade dough recipes is about the shaping. You want uniform sticks! If you have one stick that’s fat and short, it’s going to bake up doughy while the thin ones get crunchy. Before you brush on that gorgeous butter topping, make sure your butter isn’t scorching hot—warm enough to melt, but not so hot that it scorches the garlic. If your garlic starts turning brown in the butter dish before it even hits the bread, take the butter off the heat immediately!
And here’s that little insider treat you asked for: If you want those amazing cheesy breadsticks, pull your breadsticks out when they look just slightly light golden, maybe around the 8-minute mark. Then, sprinkle liberally with mozzarella cheese—I love using freshly shredded for the best melt. Pop them back in for those last 3-4 minutes until the cheese is bubbly. Then, pull them out and immediately slather with the garlic butter and Parmesan. That slight pre-bake gives the cheese a chance to melt beautifully underneath the famous garlic coating. For more great ideas on snacks and appetizers like this, check out my appetizers page!
Variations: From Garlic Breadsticks to Cheesy Breadsticks
You know, once you master the base recipe for these homemade breadsticks, the fun really begins because they are such a blank canvas! We’ve made this recipe the ultimate Olive Garden Breadsticks Copycat, but that doesn’t mean we can’t make it *our* own. I love taking a reliable dough recipe and just adding a little jazz to the topping or even tossing something extra into the dough before the rise. It’s all about customizing your perfect dinner side dish bread!
If you’re looking to seriously upgrade, let’s talk cheese. If you didn’t add mozzarella during the pre-bake like I mentioned earlier, you’re missing out on incredible cheesy breadsticks. Seriously, that stretchiness is everything! For mozzarella breadsticks, just make sure you pile it on generously right before the cheese starts to brown.
But maybe you’re feeling more savory or herbaceous. Try mixing a tiny pinch of dried rosemary or oregano right into the dough along with the flour when you mix everything up in Step 2. It infuses a lovely, subtle Italian flavor throughout the whole stick, making them fantastic appetizer bread sticks even before you add the garlic butter. I also sometimes swap out half the Parmesan in the topping for smoked Gouda if I’m serving them with a heartier stew—it’s decadent, but oh my gosh, so good!
If you want to experiment with some spicy notes—which pairs surprisingly well with the sweetness of the dough—you can dabble in flavors similar to my jalapeño poppers recipe idea, but keep it light. Try adding a tiny pinch of cayenne pepper right into your melted topping butter. It gives you a lovely warmth on the finish without being overwhelming. Enjoy making these your own!
Storage and Reheating Instructions for Your Homemade Breadsticks
Okay, I know you probably won’t have any leftovers because these disappear faster than anything else I bake, but life happens! Maybe you’re thinking ahead or perhaps you decided to make a double batch to freeze for later—that’s the smart way to think when it comes to the ‘make ahead breadsticks‘ game. Storing them correctly is crucial because we worked so hard to get that soft, chewy texture, and we don’t want to lose it to staleness!
For leftovers you plan to eat within three days, keep them stored at room temperature in a truly airtight container. Seriously, seal it up tight! If you don’t seal them well, they’ll dry out overnight, and that garlic butter topping will get greasy. Do not refrigerate leftovers unless you absolutely have to; the fridge is the enemy of soft baked goods!
If you want to freeze them—and you absolutely can—you need to handle the topping carefully. I recommend freezing them *before* you apply the butter. Wrap the baked, plain breadsticks tightly in plastic wrap, then wrap that bundle in a layer of foil. They can hang out in the deep freeze for about a month.
Now, for reheating, we have to avoid the microwave whenever possible. Microwaving gives you that rubbery texture we hate. The absolute best way to revive them and get that soft interior back is in the oven. If they are room temperature leftovers, just pop them on a baking sheet at 350 degrees F for about 5 to 7 minutes. If they are frozen, let them thaw on the counter for an hour first, then bake them until they are warm throughout. If you skipped the butter topping before freezing, now is the time to melt fresh butter, stir in your minced garlic and seasoning, and brush it on right when they come out of the oven! That little burst of heat reactivates all those wonderful flavors!
Serving Suggestions for These Dinner Side Dish Bread Sticks
Now that you have an entire batch of glorious, buttery, garlic-infused sticks, the only remaining question is: what are we eating them with? Since these homemade breadsticks have that authentic Italian-American vibe, they honestly go with almost anything hearty and comforting. Making them is so easy, they’re perfect for those nights when you realize you need a last-minute, crowd-pleasing dinner side dish bread!
Of course, the classic pairing has to be pasta. They are absolutely essential when you are serving spaghetti and meatballs or a big lasagna. You need something substantial to sop up that extra marinara sauce, and these breadsticks are perfect for dipping and dunking. Forget serving plain rolls; we’re elevating the entire meal!
But don’t limit them just to Italian night! These make incredible appetizer bread sticks before a big meal, especially if you set out a small bowl of extra marinara or maybe even a creamy Alfredo dip on the side. If you are looking for something lighter to balance out the richness of the garlic butter topping, I always pair a batch of these with a crisp salad. Have you tried my recipe for Easy Crunchy Cabbage Salad with Tangy Vinaigrette? The bright, acidic dressing cuts right through the butter and cheese, making the entire meal feel perfectly balanced.
They’re wonderful alongside a hearty chicken soup, too. Honestly, once you pull them out of the oven, your family will find a way to eat them, I guarantee it! They are just that irresistible.
Frequently Asked Questions About Making Breadsticks
Can I use store-bought dough to make these breadsticks?
You absolutely can! If you’re short on time and need easy breadsticks right now, using refrigerated pizza dough is a huge shortcut. However, I have to be honest; the texture won’t be quite the same as the dough we make from scratch here. The homemade dough, with the proper rise, gives you that uniquely soft and slightly sweet crumb that makes these restaurant style breadsticks so special. If you use store-bought, poke holes in the top before baking to prevent giant bubbles, and still brush on that amazing garlic butter topping!
How do I make sure my breadsticks are chewy instead of hard?
Chewiness comes down to two things we talked about: kneading and baking temperature. You must knead until the dough is elastic enough—that takes patience! But more importantly, don’t overbake! We are looking for a light golden brown, not a deep brown crust. If you see them getting too dark, pull them out immediately. Too much time in the 400 degrees F heat sucks out the moisture we worked so hard to put in there. If they come out slightly less colored than you prefer, don’t worry; the butter topping will make them seem richer!
Can I skip the first rise time for this quick bread recipe?
Oh, I really, really advise against it. The time we give the yeast to bloom and the gluten to slowly develop is what creates the airy structure in our soft breadsticks. If you skip the rise, you’re essentially making a very dense, flat bread that won’t hold onto the butter topping properly. If you are truly pressed for time, you can try kneading the dough extra long and making very small sticks, but the result will be considerably denser than the fluffy texture we are aiming for. The rise time is what makes them feel light, not heavy!
What if I want extra-garlicky breadsticks?
I love that question! If you want to really amp up the punch, here’s what I do for the garlic breadsticks recipe: Mince six cloves of garlic instead of four for the butter topping. Then, here’s the real secret: right after you brush the butter on, let the breadsticks sit for just 2 minutes while the garlic blooms in the heat, and then brush them *a second time* with more garlic butter before sprinkling the Parmesan. Talk about an aromatic kitchen! If you have other recipe questions I haven’t covered, please feel free to send a message through my contact page!
Nutrition Information for These Buttery Breadsticks
When we are making things this delicious, we know some of the numbers are going to be a little indulgent, but that’s why we bake from scratch—so we know exactly what’s going into our food! We used real butter and good flour to make these the best buttery breadsticks they can be. Keep in mind that these figures are based on the recipe yielding 12 perfect breadsticks and using the ingredients listed.
These are estimates, of course, and can change depending on the exact brands you use, but here’s the baseline for one breadstick:
- Serving Size: 1 breadstick
- Calories: 195
- Sugar: 1.5g
- Sodium: 310mg
- Fat: 8.5g
- Saturated Fat: 4.1g
- Unsaturated Fat: 4.4g
- Trans Fat: 0.1g
- Carbohydrates: 26.5g
- Fiber: 1.2g
- Protein: 4.0g
- Cholesterol: 15mg
The Ultimate Soft & Chewy Olive Garden Copycat Breadsticks with Garlic Parmesan Butter
Make restaurant-style breadsticks at home that are softer and chewier than the famous version. This easy recipe delivers fluffy breadsticks topped with a rich garlic parmesan butter coating, perfect as a dinner side dish or appetizer.
- Prep Time: 20 min
- Cook Time: 12 min
- Total Time: 92 min
- Yield: 12 breadsticks 1x
- Category: Appetizer
- Method: Baking
- Cuisine: American
- Diet: Vegetarian
Ingredients
- 1 1/2 cups warm water (about 110 degrees F)
- 2 1/4 teaspoons active dry yeast
- 2 tablespoons granulated sugar
- 4 cups all-purpose flour, plus more for dusting
- 1 teaspoon salt
- 1/4 cup olive oil, plus more for brushing
- 1/2 cup unsalted butter, melted
- 4 cloves garlic, minced
- 1 teaspoon dried Italian seasoning
- 1/2 teaspoon salt
- 1/4 cup grated Parmesan cheese
Instructions
- Combine the warm water, yeast, and sugar in a large bowl. Let this mixture sit for 5 to 10 minutes until it becomes foamy. This shows the yeast is active.
- Add 3 1/2 cups of the flour, 1 teaspoon of salt, and 1/4 cup of olive oil to the yeast mixture. Mix with a spoon until a shaggy dough forms.
- Turn the dough out onto a lightly floured surface. Knead the dough for 5 to 7 minutes, adding the remaining flour as needed until the dough is smooth and elastic.
- Lightly oil a clean bowl. Place the dough in the bowl, turning it once to coat. Cover the bowl with plastic wrap or a clean towel and let it rise in a warm place for 1 to 1.5 hours, or until doubled in size.
- Preheat your oven to 400 degrees F. Line a large baking sheet with parchment paper.
- Punch down the risen dough gently. Divide the dough into 12 equal pieces. Roll each piece into a long, thin stick shape, about 10 to 12 inches long. Place the breadsticks on the prepared baking sheet, leaving about 1 inch between them.
- Bake the breadsticks for 10 to 12 minutes, or until they are lightly golden brown.
- While the breadsticks bake, prepare the garlic butter topping. In a small bowl, whisk together the melted butter, minced garlic, Italian seasoning, and 1/2 teaspoon of salt.
- Immediately after removing the hot breadsticks from the oven, brush the tops generously with the garlic butter mixture.
- Sprinkle the grated Parmesan cheese evenly over the buttered breadsticks while they are still warm so the cheese adheres.
- Serve the homemade breadsticks warm.
Notes
- For extra soft dinner rolls texture, you can brush the dough lightly with olive oil before the final rise.
- If you want cheesy breadsticks, sprinkle mozzarella cheese over the tops during the last 3 minutes of baking before applying the garlic butter.
- This recipe makes excellent appetizer bread sticks that pair well with pasta dishes.
Nutrition
- Serving Size: 1 breadstick
- Calories: 195
- Sugar: 1.5
- Sodium: 310
- Fat: 8.5
- Saturated Fat: 4.1
- Unsaturated Fat: 4.4
- Trans Fat: 0.1
- Carbohydrates: 26.5
- Fiber: 1.2
- Protein: 4.0
- Cholesterol: 15