
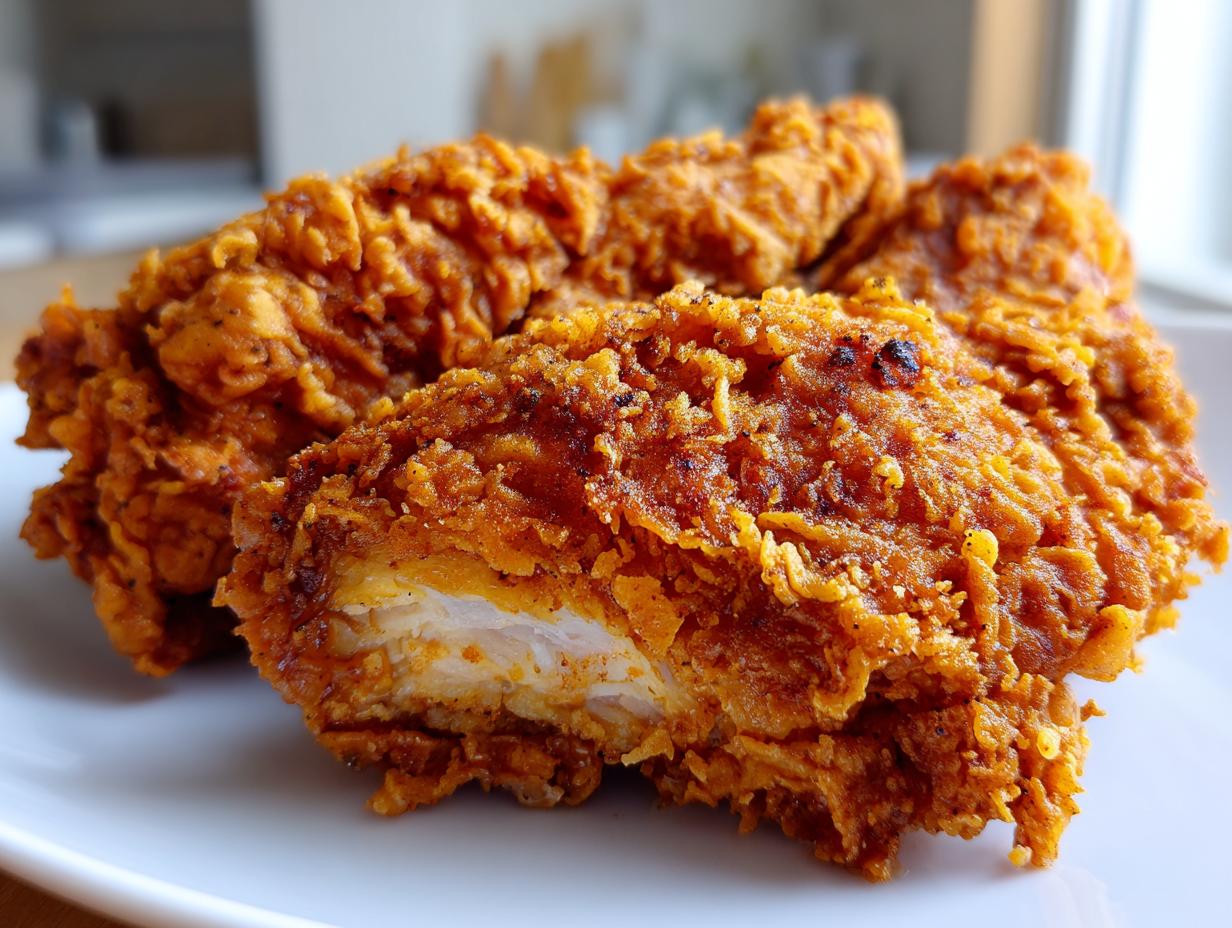
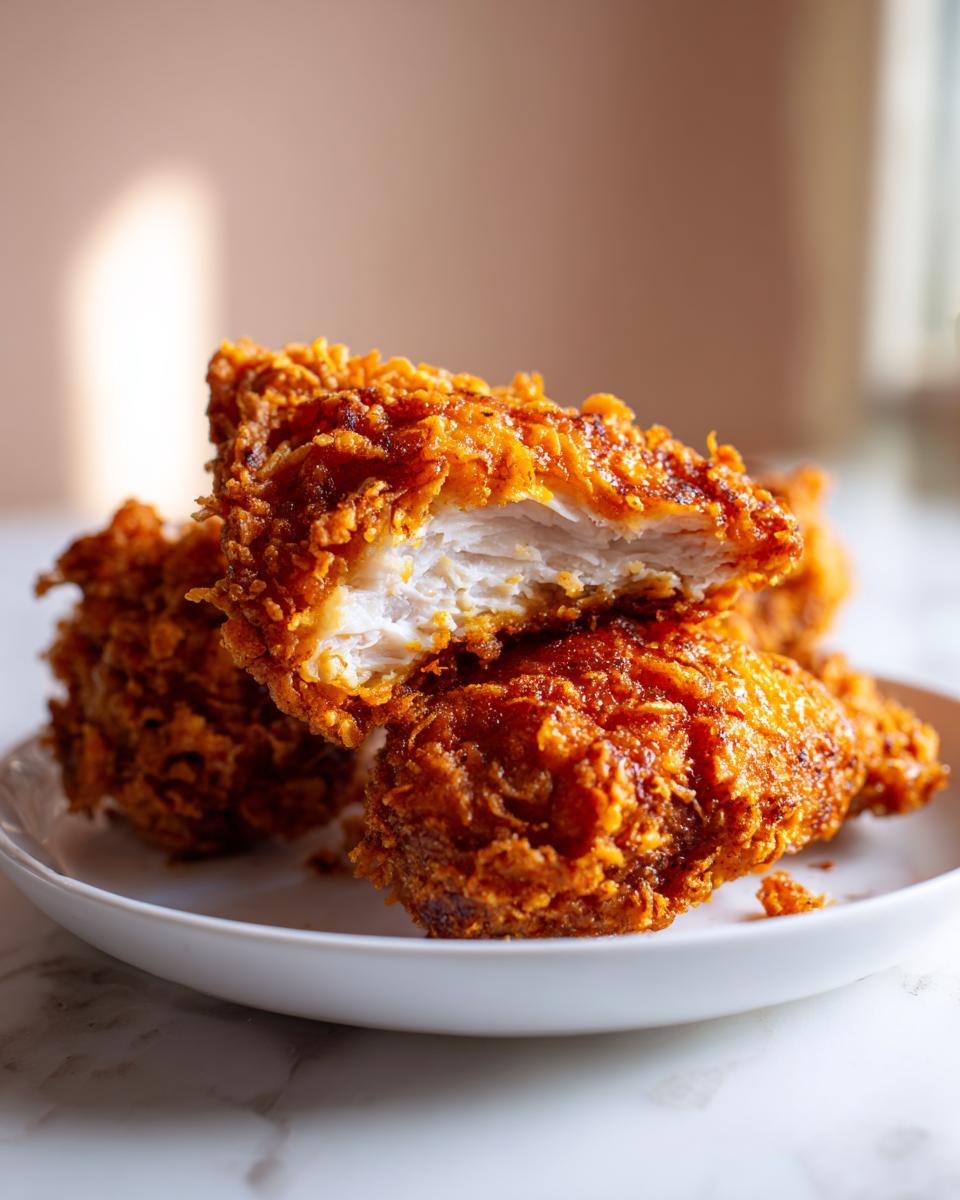
There is just something fundamentally soul-satisfying about sitting down to a plate piled high with incredible, homemade comfort food, right? For me, growing up steeped in Southern culinary traditions, nothing hits the spot quite like truly spectacular fried chicken. Forget those soggy, bland attempts you might have had before! My mission here is simple: I want you to master the kind of impossibly golden, ultra-crispy, and unbelievably juicy Southern fried chicken that makes people stop talking mid-sentence.
Thanks to a long, slow buttermilk soak and a dredging technique I learned from my mother’s kitchen playbook, this isn’t just good chicken—it’s the best homemade fried chicken you’ll ever pull out of your skillet. My background in food science, combined with that heritage flavor, means we’re balancing the science of crispiness with pure, savory comfort. You can read more about my journey, blending that Southern love with my formal training, over at Cooking by Mia. Come on into the kitchen; let’s get that perfect crunch!
- Why This Buttermilk Southern Fried Chicken Recipe Delivers Maximum Crunch
- Ingredients for the Best Homemade Fried Chicken
- How To Make Fried Chicken: Step-by-Step Instructions
- Expert Tips for Foolproof Fried Chicken Success
- Serving Suggestions for Your Southern Fried Chicken
- Variations: Beyond Classic Fried Chicken
- Storage and Reheating Instructions for Crispy Fried Chicken Recipe
- Frequently Asked Questions About Making Fried Chicken
- Nutritional Estimate for This Comfort Food Chicken Recipe
- Share Your Golden Brown Chicken Creations
- Share Your Golden Brown Chicken Creations
Why This Buttermilk Southern Fried Chicken Recipe Delivers Maximum Crunch
If you want truly amazing fried chicken, you can’t skip the foundational steps. Trust me, they are worth every minute! This recipe focuses squarely on texture—we want it golden, shatteringly crisp, and impossibly juicy beneath that crust. Here’s what sets this method apart:
- We guarantee a tender interior with our long, dairy-rich soak.
- We build exterior architecture so the coating fights back against the oil.
Achieving Juicy and Crispy Chicken Through Brining
That long soak in buttermilk is non-negotiable for making guaranteed Juicy and Crispy Chicken. The lactic acid in the buttermilk gently breaks down the tough muscle fibers in the meat. This tenderizing process ensures every bite is succulent—it’s like giving your chicken a spa treatment before it hits the fryer!
The Secret to a Crunchy Chicken Coating
This is where we build the armor! We aren’t just dusting the chicken once. That cornstarch mixed into the flour is the secret weapon for that extra jagged, ultra-crunchy texture you look for in perfect fried chicken. When you double-dip—back into the buttermilk, then back into the flour—you create crags and ridges that puff up into that glorious, crunchy chicken coating when they hit the hot oil.
Ingredients for the Best Homemade Fried Chicken
Okay, let’s talk about what you actually need to pull off this beautiful, Crispy Fried Chicken Recipe. Because we are taking our time with that brine, the prep work is actually super straightforward. Every single ingredient listed here plays a vital role in making sure this is the best experience you have with chicken all year!
Buttermilk Brine Components
- 4 lbs bone-in, skin-on chicken pieces (thighs, drumsticks, breasts)
- 4 cups buttermilk
- 2 tablespoons kosher salt (Don’t skimp on the salt here; it does heavy lifting in the brine!)
- 1 tablespoon black pepper
- 1 tablespoon garlic powder
- 1 teaspoon cayenne pepper
Dredge and Seasoning Mix
This is where the serious crunch factor comes from. Make sure you combine this really well before you start dipping!
- 4 cups all-purpose flour
- 1/2 cup cornstarch (Remember, this is the secret to that craggy crust!)
- 1 tablespoon paprika
- 1 teaspoon onion powder
- Remaining salt and pepper from the recipe list
- Vegetable oil or shortening, for frying (Get plenty of this ready!)
How To Make Fried Chicken: Step-by-Step Instructions
This is the main event! While the marinating does the heavy lifting on flavor and moisture, the next steps are where we earn that incredible, Golden Brown Chicken crust. Remember, making the best fried chicken is all about managing temperature and mastering the coating technique. If you’re looking for quick family meals later in the week, I promise this effort pays off! If you need quick weeknight dinners in a pinch later, we can talk about that, but for now, focus on this glorious crunch!
Step 1: Preparing the Buttermilk Brined Chicken
First things first: we need that long soak! Combine your buttermilk and all those lovely spices in a giant bowl. Submerge your chicken pieces completely. Now, patience is a virtue here. You absolutely must cover this and refrigerate it for a minimum of four hours. If you can plan ahead, let it swim overnight—that’s when the magic really happens and the meat gets ultra-tender.
Step 2: Creating the Crunchy Chicken Coating
Once your chicken is perfectly brined, pull it out, letting the excess buttermilk drip off—but don’t rinse it! Next, dredge it heavily in your flour/cornstarch mixture. Press that flour on! Now for my favorite part for achieving the Crunchy Chicken Coating: Dip the floured piece *back* into the leftover buttermilk for just a quick second, then immediately back into the flour one last time. This double layer creates those beautiful, craggy flakes.
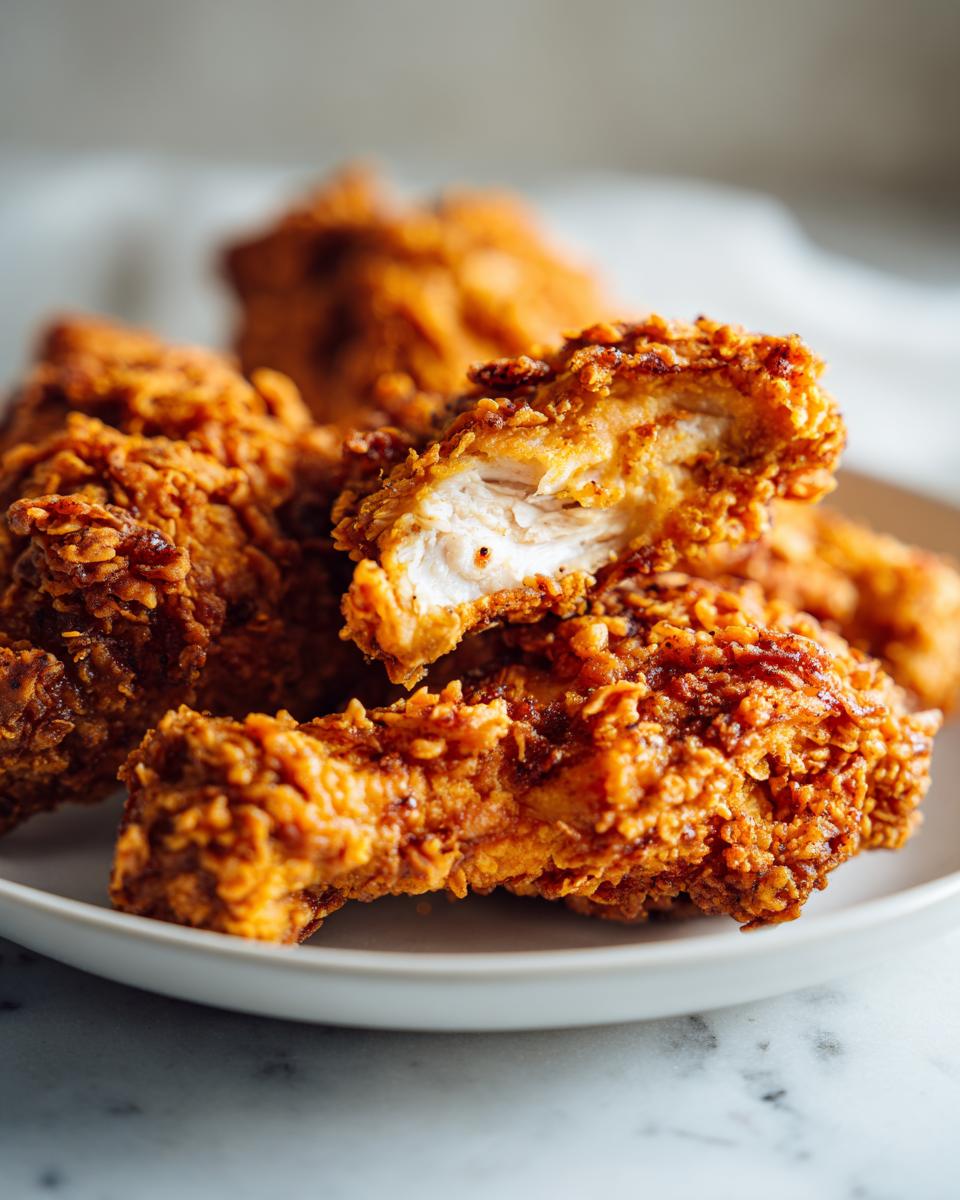
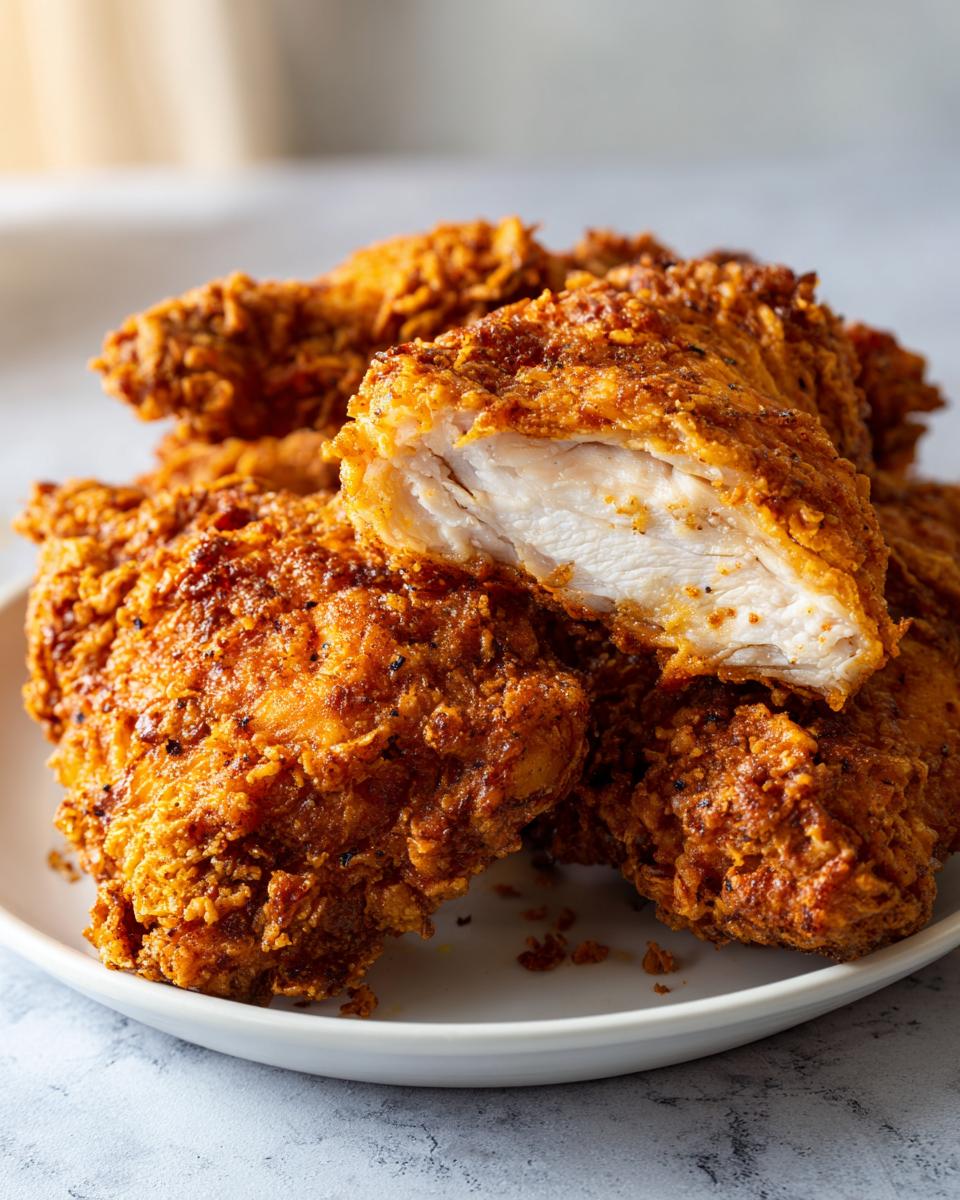
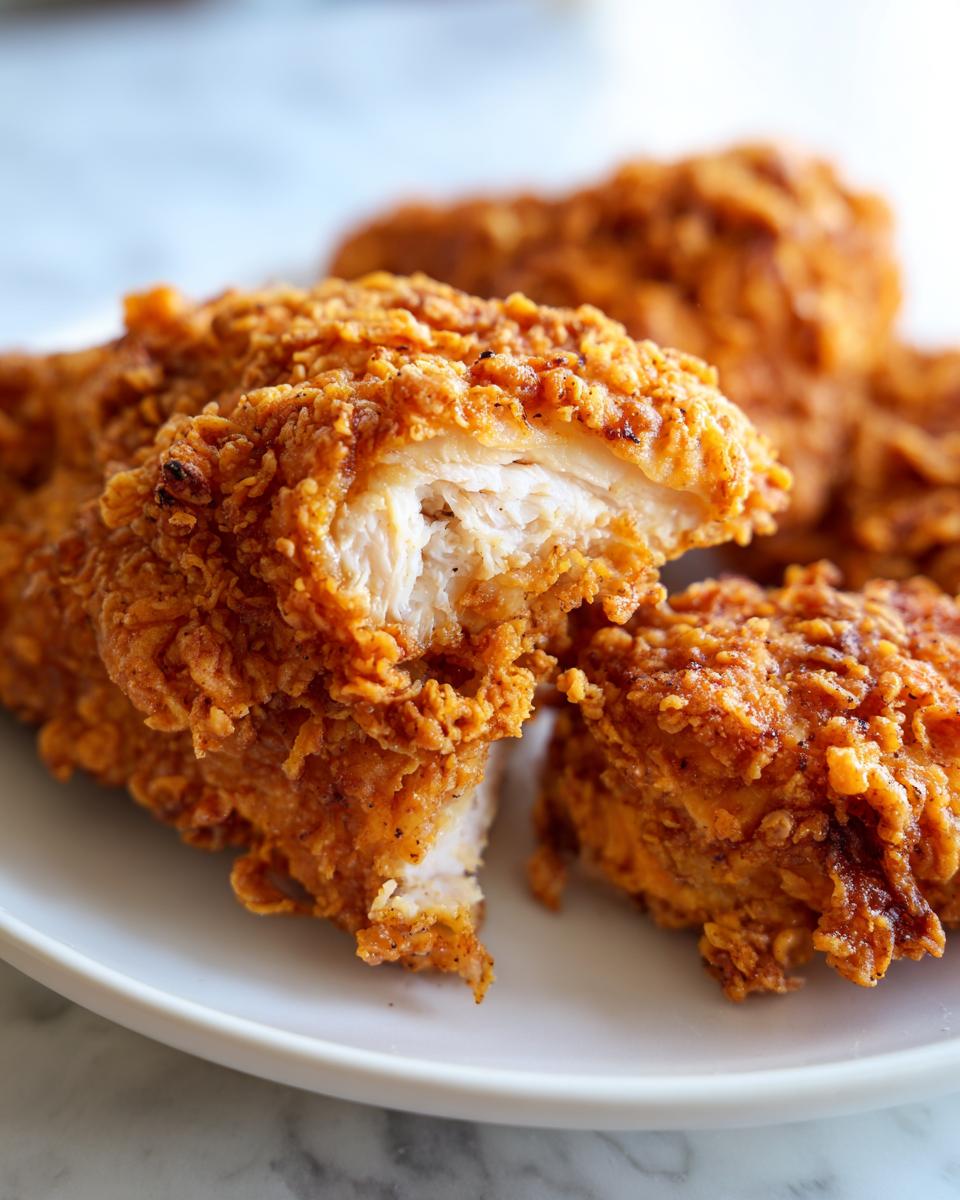
Step 3: Frying for Golden Brown Chicken Perfection
Get your oil heated—you want a good two or three inches in a heavy skillet, aiming for exactly 325°F. Use that thermometer, seriously! Fry in batches so you don’t drop the oil temperature too much, which leads to greasy chicken. Turn the pieces gently after about six or seven minutes until they hit a deep golden color and an internal temperature of 165°F. Once they look perfect, pull them out and set them on a wire rack to drain. Never use paper towels; they smother the crust!
Expert Tips for Foolproof Fried Chicken Success
I’m always telling folks that the difference between good fried chicken and legendary fried chicken is often just a few minutes and a couple of key steps you do *after* you finish dredging. These professional pointers, which I picked up testing recipes endlessly, are what elevate this from a simple recipe to something you’ll make every time you crave comfort food.
Resting Time for Adhesion
This tip is pure gold, so please listen up! After you perform that second heavy dredge in the flour, don’t rush your chicken straight into the oil. Let those coated pieces sit out on your wire rack for a full 15 minutes. I know, it feels counterintuitive when you’re hungry, but this resting period lets the flour absorb residual moisture from the buttermilk. This helps that gorgeous, craggy coating truly set and adhere to the meat. If you skip this, your beautiful coating is going to flake right off into the hot oil, which is just sad.
Temperature Control: The Key to Perfect Fried Chicken
If there’s one thing that ruins a batch of chicken faster than anything, it’s letting the oil temperature wander. You simply must keep that temperature locked in between 315°F and 330°F during the entire frying process. If the oil dips too low, say below 315°F, the chicken soaks up oil like a sponge, and you get greasy, heavy meat. If it gets too hot, way above 330°F, the outside burns to a dark brown long before the center is fully cooked. Keeping it steady guarantees that perfectly Golden Brown Chicken skin and that juicy interior. If your temperature starts to drop while frying a new batch, just give the oil a minute to recover before adding more pieces. Feel free to reach out if you ever have questions about your setup; you can always contact me here at Cooking by Mia!
Serving Suggestions for Your Southern Fried Chicken
Now that you have achieved the pinnacle of Southern Fried Chicken—crispy, juicy, and deeply savory—it’s time to build the perfect plate! This type of rich comfort food deserves sides that can stand up to its flavor, but also soak up a little of that goodness. I always suggest leaning into those classic pairings that make a dinner feel like an event.
When I serve this, I usually pair it with my unbelievably silky collard greens; they add a necessary brightness to cut through the richness. You can find my secret to perfect texture for those here: collard greens. Or if it’s a cooler evening, you simply can’t beat my cornbread dressing on the side. These combinations create truly fantastic Savory Chicken Dinner Ideas that feel both traditional and deeply satisfying.
Variations: Beyond Classic Fried Chicken
Who says you have to stick to tradition every single time? While this buttermilk recipe is my absolute favorite for that classic crunch, sometimes you’re in the mood for something a little bolder, or maybe you just want to repurpose this technique for a different feel. Don’t worry, we can twist this recipe around a bit! These simple tweaks can turn your dinner into something totally new—perfect for using up leftovers or just shaking things up on a Tuesday night. If you’re looking for something easy for a weekday meal, check out my ideas for easy lunch leftovers!
Adding Heat: Spicy Fried Chicken
If you like your comfort food with a little kick—and I certainly do sometimes—you don’t need a whole new recipe. You just need to jazz up that dredge mix! Once you’ve combined your flour and cornstarch, go ahead and toss in another teaspoon of cayenne pepper. Want that smoky heat? Swap out a tablespoon of the regular paprika for smoked paprika. That’s it! You get that beautiful, familiar crust, but every bite has a little warmth that just sings. It turns this into fantastic Spicy Fried Chicken in about 30 seconds flat.
Country Fried Chicken Style Preparation
If you’ve ever thought about how different it is from Country Fried Chicken, I have good news: the base texture we built is perfect for it! Remember how I mentioned gravy in the notes? That’s because the traditional path for Chicken Fried Chicken often involves a lightly dredged piece of meat, pan-fried, and then smothered. For this adaptation, skip the double dip step—just give the chicken one good, solid coating in the dredge mix, press it on lightly, and fry it up. The crust will be a little thinner and less craggy than our buttermilk version.
The real magic happens after it comes out of the oil. Set it aside and use those pan drippings (after draining most of the oil out, of course!) to make a hearty white gravy right in the same skillet. Pour that thick, peppery gravy right over the fried chicken pieces. Instant, delicious Chicken Fried Chicken dinner!
Storage and Reheating Instructions for Crispy Fried Chicken Recipe
This magnificent Crispy Fried Chicken Recipe tastes best right out of the oil, I won’t lie! But if you have leftovers—and sometimes we do—you need to treat them right so that crust stays happy. First, don’t you dare store it in an airtight plastic container. That traps moisture, and moisture is the enemy of crunch! Place the cooled chicken on a plate lined with paper towels, then cover it loosely with foil and stick it in the fridge for up to three days.
When you’re ready to reheat, skip the microwave entirely; it turns that lovely coating soggy and chewy. The very best way is in a 375°F oven on a wire rack, just like we drained it on initially. This lets the heat circulate. You can also use an air fryer for a quick blast of heat. It only takes about 10 minutes to bring back that glorious, shatteringly golden crust!
Frequently Asked Questions About Making Fried Chicken
It’s totally normal to have a few questions swirling around when you’re tackling a recipe like this! I get asked the same things all the time, especially when people are diving into deep frying for the first time. Whether you’re worried about the temperature or what kind of meat to use, I’ve got you covered so you can achieve that perfect Crispy Fried Chicken Recipe every single time.
What is the best oil to use for deep fried chicken?
For the absolute best results, you need a neutral oil with a high smoke point so it doesn’t burn up on you while you’re frying. I stick to vegetable shortening or vegetable oil, just like in the recipe details. These oils keep the flavor of the chicken pure and can handle the heat we need to maintain that perfect 325°F. Skip the olive oils or other flavored oils, trust me—you want that delicious Southern Fried Chicken flavor to shine through, not something nutty!
Can I use chicken breasts instead of bone-in pieces for this fried chicken?
Oh, absolutely, you can! Chicken breasts are wonderful, especially if you’re aiming for a super lean piece of meat, but they cook much faster and are leaner than thighs or drumsticks. If you use breasts, make sure they are pounded or cut to an even thickness before brining. Because they cook so quickly, keep a close eye on them! You might only need 5 or 6 minutes per side to reach that safe internal temperature, otherwise you risk drying out that good, Juicy and Crispy Chicken we worked so hard to brine. You can find some fun dinner ideas that use different cuts over with my appetizers and snacks section!
Nutritional Estimate for This Comfort Food Chicken Recipe
I always check the nutrition when I’m thinking about how often I can make my favorite meals—because let’s be real, this Comfort Food Chicken Recipe is rich! Please remember that these numbers are only estimates based on the ingredients used and the fact that this is deep-fried chicken. The actual counts can vary depending on your oil absorption and exact cuts!
- Serving Size: 1 piece (mixed)
- Calories: 450
- Fat: 28g
- Protein: 30g
- Carbohydrates: 18g
- Sodium: 750mg
Share Your Golden Brown Chicken Creations
Honestly, looking at that gorgeous, Golden Brown Chicken cooking up is the best part of my week, and I truly hope you feel that same pride when you pull yours from the oil! Once you sit down to that perfect fried chicken, I want to hear all about it. Did the buttermilk soak really make a difference for you? Did you try my spicy variation?
Please snap a picture, tag me on social media, and leave a star rating right here on the recipe card! Sharing your experience helps other home cooks feel confident trying this classic Southern dish. If you’re already planning your next big showstopper meal, check out my favorite recipes for desserts to round out the feast!
PrintUltra-Crispy Buttermilk Southern Fried Chicken

Make the best homemade fried chicken with this foolproof recipe. We use a buttermilk brine and a special dredging technique to achieve a juicy interior and an ultra-crispy, golden-brown crust.
- Prep Time: 30 min
- Cook Time: 35 min
- Total Time: 7 hours 5 min
- Yield: 6 servings 1x
- Category: Dinner
- Method: Deep Frying
- Cuisine: Southern American
- Diet: Non-Vegetarian
Ingredients
- 4 lbs bone-in, skin-on chicken pieces (thighs, drumsticks, breasts)
- 4 cups buttermilk
- 2 tablespoons kosher salt
- 1 tablespoon black pepper
- 1 tablespoon garlic powder
- 1 teaspoon cayenne pepper
- 4 cups all-purpose flour
- 1/2 cup cornstarch
- 1 tablespoon paprika
- 1 teaspoon onion powder
- Vegetable oil or shortening, for frying
Instructions
- Combine the buttermilk, kosher salt, black pepper, garlic powder, and cayenne pepper in a large bowl. Add the chicken pieces, ensuring they are fully submerged. Cover and refrigerate for at least 4 hours, or preferably overnight, for the best results.
- In a separate shallow dish, whisk together the flour, cornstarch, paprika, onion powder, and remaining salt and pepper. This is your dredge mixture.
- Remove the chicken from the buttermilk, allowing excess to drip off, but do not rinse.
- Dredge each piece of chicken thoroughly in the flour mixture, pressing the flour onto the chicken to create a thick, craggy coating. For extra crispiness, dip the floured chicken back into the remaining buttermilk for a quick second dip, then return it to the flour mixture for a second, heavy coating.
- Heat 2 to 3 inches of vegetable oil or shortening in a large, heavy-bottomed skillet or Dutch oven to 325 degrees Fahrenheit. Use a thermometer to monitor the temperature closely.
- Carefully place the chicken pieces into the hot oil, ensuring you do not overcrowd the pan. Work in batches.
- Fry the chicken for about 6 to 8 minutes per side, turning occasionally, until it reaches a deep golden brown color and an internal temperature of 165 degrees Fahrenheit. Thicker pieces may require slightly longer cooking times.
- Remove the cooked fried chicken from the oil and place it on a wire rack set over a baking sheet to drain excess oil. Do not place it directly on paper towels, as this can steam the crust and reduce crispiness.
- Serve your crispy fried chicken immediately as a classic comfort food dinner.
Notes
- For the crispiest coating, let the dredged chicken rest on the wire rack for 15 minutes before frying. This allows the coating to adhere better.
- Maintain the oil temperature between 315°F and 330°F during frying. If the oil is too cool, the chicken will absorb too much oil; if too hot, the outside will burn before the inside cooks.
- If you prefer a Chicken Fried Chicken style, serve this golden brown chicken smothered in country gravy.
Nutrition
- Serving Size: 1 piece (mixed)
- Calories: 450
- Sugar: 2
- Sodium: 750
- Fat: 28
- Saturated Fat: 8
- Unsaturated Fat: 20
- Trans Fat: 0
- Carbohydrates: 18
- Fiber: 1
- Protein: 30
- Cholesterol: 110