
Mornings can just turn into chaos, right? Between getting everyone out the door and making sure we actually eat something that fuels us, whipping up individual omelets feels impossible. That’s where I lean hard on making a big batch of sheet pan eggs. Trust me, this recipe changed my whole routine!
Because of my background in food science and recipe development, I’ve perfected the technique here to ensure these eggs bake up incredibly fluffy, even when I’m making an enormous quantity for serving a crowd. This isn’t just baking eggs; it’s creating perfect, customizable squares ready for the week’s meal prep. We are talking about texture and convenience baked right onto one single pan.
- Why This Customizable Sheet Pan Eggs Recipe is Your New Breakfast Meal Prep Solution
- Ingredients for Fluffy Sheet Pan Eggs
- How to Prepare Sheet Pan Eggs: Step-by-Step Instructions
- Tips for Perfect Oven Baked Egg Squares
- Serving Sheet Pan Eggs for a Crowd and the Breakfast Sandwich Hack
- Storage and Make Ahead Breakfast Options for Sheet Pan Eggs
- Variations on This Baked Eggs Recipe
- Frequently Asked Questions About Sheet Pan Eggs
- Nutrition Estimates for Your Sheet Pan Egg Bake
Why This Customizable Sheet Pan Eggs Recipe is Your New Breakfast Meal Prep Solution
Look, I’m all about flavor, but I’m even more about sanity when 7 AM rolls around. This entire recipe concept is centered on delivering a truly low mess egg recipe. You mix everything in one bowl and pour it onto one sheet pan. That’s it! When you’re done, you just slide the leftovers out or soak the pan—no stacks of dirty skillets left crusted on the counter afterward. It’s the ultimate breakfast meal prep solution I found when my schedule got completely slammed.
I remember needing to feed my nieces and nephews one morning before soccer practice; traditional scrambling would have taken forever and resulted in a huge mess. Using this oven method saved the day. We got 15 perfect squares out of it, and everyone had seconds. It truly shines as a way to create eggs for a crowd without breaking a sweat.
Quick Oven Breakfast Timing Breakdown
This is what makes it an easy morning routine breakfast. The hands-on time is ridiculously short. You’re only actively working for about 10 minutes total to whisk and pour your mixture. Then, the oven takes over! The total bake time is consistently around 25 minutes. That means while the eggs are baking, you can be showering, packing lunches, or just enjoying a few quiet minutes of coffee. It’s the perfect quick oven breakfast because the minute it’s done, you have a massive batch ready to go. If you love my easy egg bites, you’ll love how much faster this sheet pan version is!
Ingredients for Fluffy Sheet Pan Eggs
When you’re making something this large, precision matters. I’ve included everything here based on making enough for a big family or for freezing portions later. Remember, these are customizable baked eggs, so feel free to adjust the spice blend a tiny bit if you want more kick!
- 18 large eggs – Yes, 18! Don’t skimp here; the egg quantity gives us the base structure.
- 1 cup cottage cheese (optional, but trust me on this for a high protein egg bake)
- 1/2 cup milk or half-and-half – This helps keep things creamy, not dry.
- 1 teaspoon salt
- 1/2 teaspoon black pepper
- 1/4 teaspoon garlic powder – Just a little warmth, nothing overpowering.
- 1 cup shredded cheese (I usually go for sharp cheddar or Monterey Jack)
- 1/4 cup chopped fresh chives or green onions – These go on top near the end for color.
- 1 tablespoon butter or cooking spray for the pan – This is your insurance policy against sticking!
Optional Add-ins for Your Sheet Pan Eggs
This is where you really make the recipe *yours*. These additions are folded in right before the eggs go into the oven for the first time. If you’re adding in any veggies, make sure they are finely chopped or pre-cooked so they don’t release a ton of water while the eggs set. We want tender, delicious sheet pan eggs, not soggy ones!
- Finely chopped cooked bacon or ham (about 1 cup total)
- Sautéed bell peppers and onions (sautéing them first removes extra moisture—a good trick!)
How to Prepare Sheet Pan Eggs: Step-by-Step Instructions
Okay, let’s get these beauties into the oven! This method is designed to be straightforward because we’re aiming for maximum flavor and minimum fuss. We’re keeping things organized so that when you pull this out, it looks like a perfectly uniform sheet cake, but savory, of course! Following these steps, especially the timeline, is key to fitting this into your easy morning routine breakfast.
- First thing: Crank that oven up to 375°F (190°C). While it’s heating up, grab your standard half-sheet pan—you know, the big 18×13 inch one. Give it a really good coating of butter or spray. We don’t want any sticking complaints later!
- Now for the wet mixture. In a big bowl, this is where you combine everything. I usually start with the eggs first, then add in your milk, salt, pepper, and garlic powder.
- Time to incorporate that optional but amazing cottage cheese. Pour it all in and whisk until it’s mostly smooth. Don’t stress about every tiny lump disappearing completely; we’ll handle the final texture in the next step.
- Pour that entire liquid mixture evenly across your prepared sheet pan. Make sure it covers every corner so you get consistent squares later on.
- Slide that pan into the hot oven and let it bake, untouched, for about 15 minutes. This initial bake sets the structure of the eggs.
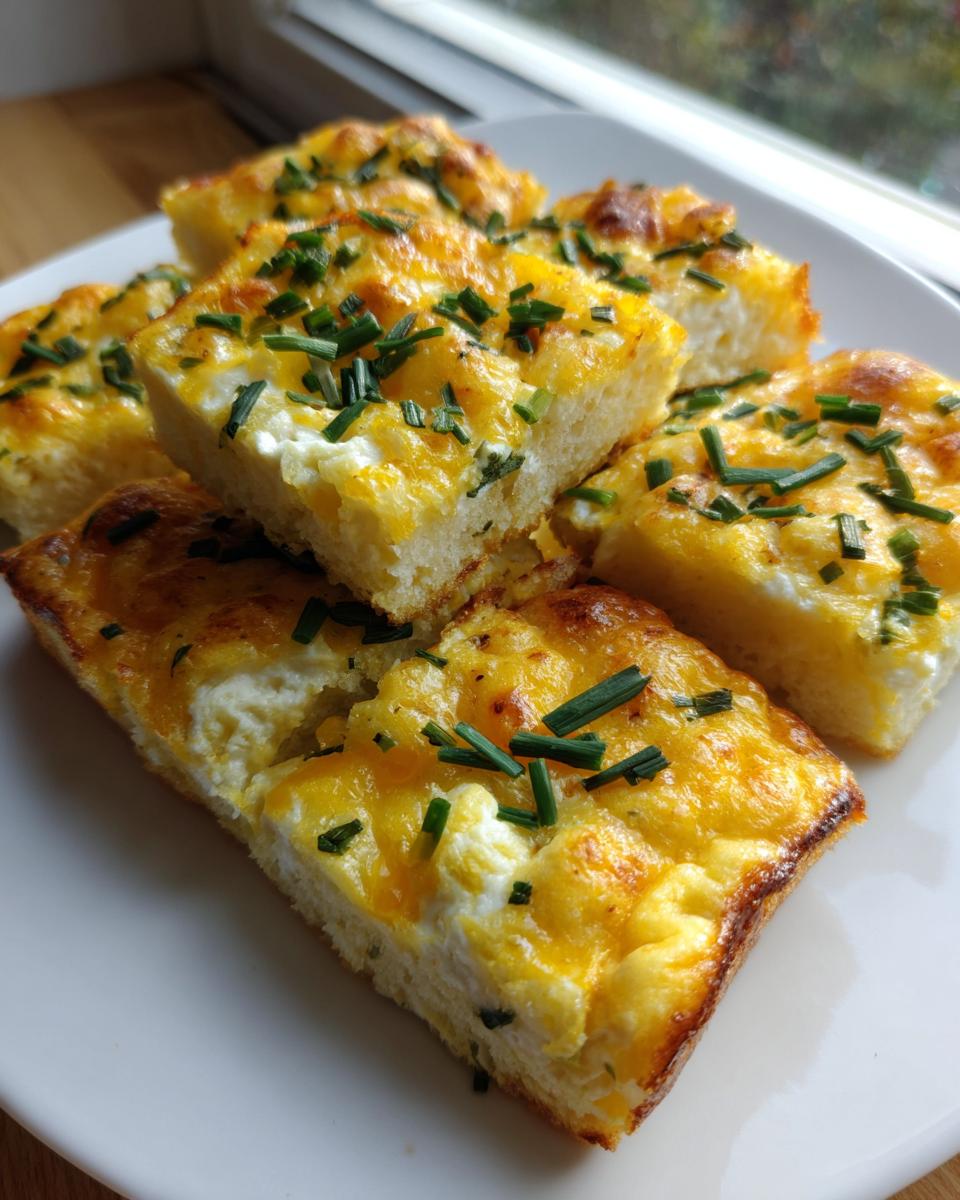
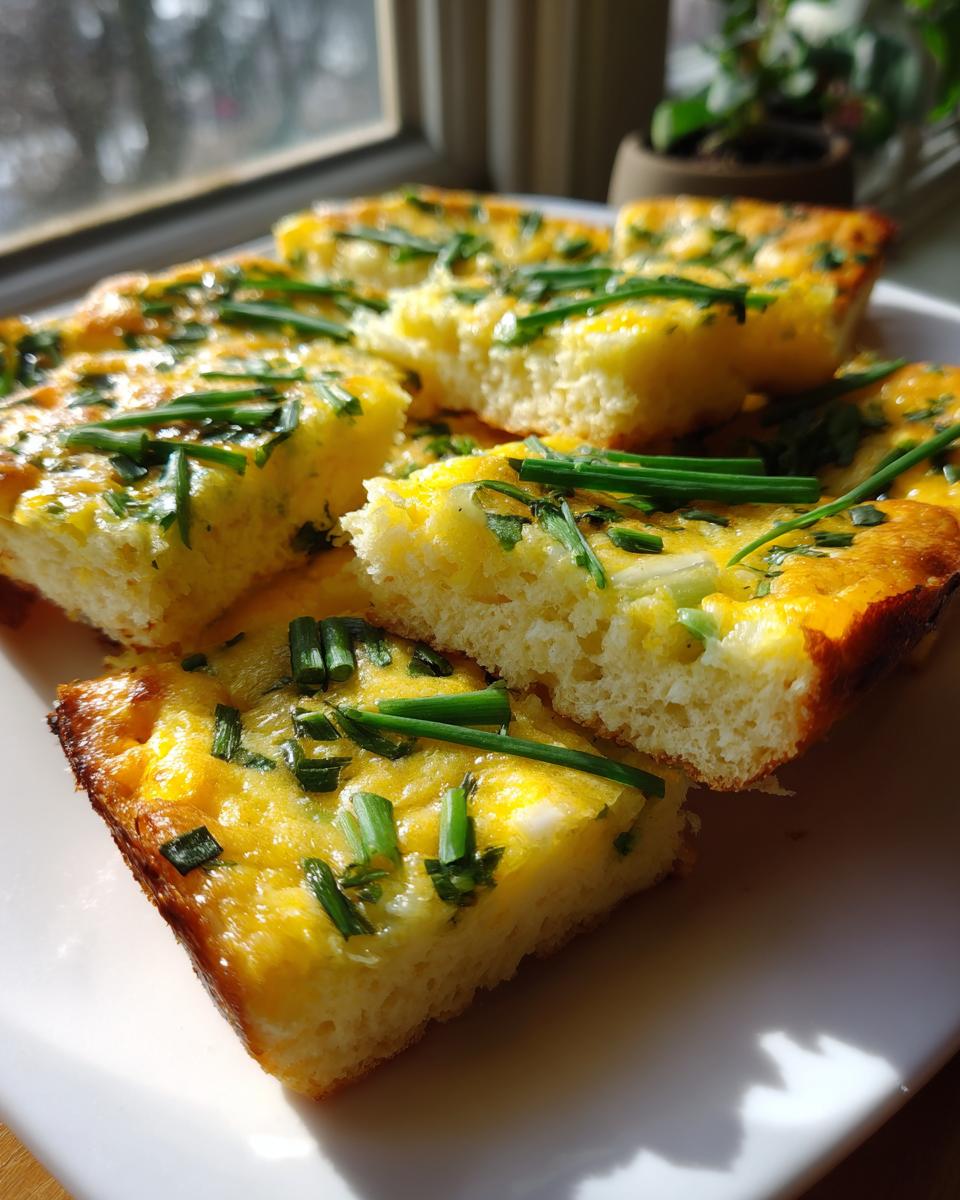
- After 15 minutes, carefully pull that tray out—use those oven mitts! Sprinkle your shredded cheese and your fresh chives evenly over the semi-set eggs.
- Pop it back in the oven for another 5 to 10 minutes. You’re checking until the cheese is bubbly and golden, and the eggs are totally firm. Total cook time usually lands right around 20 to 25 minutes.
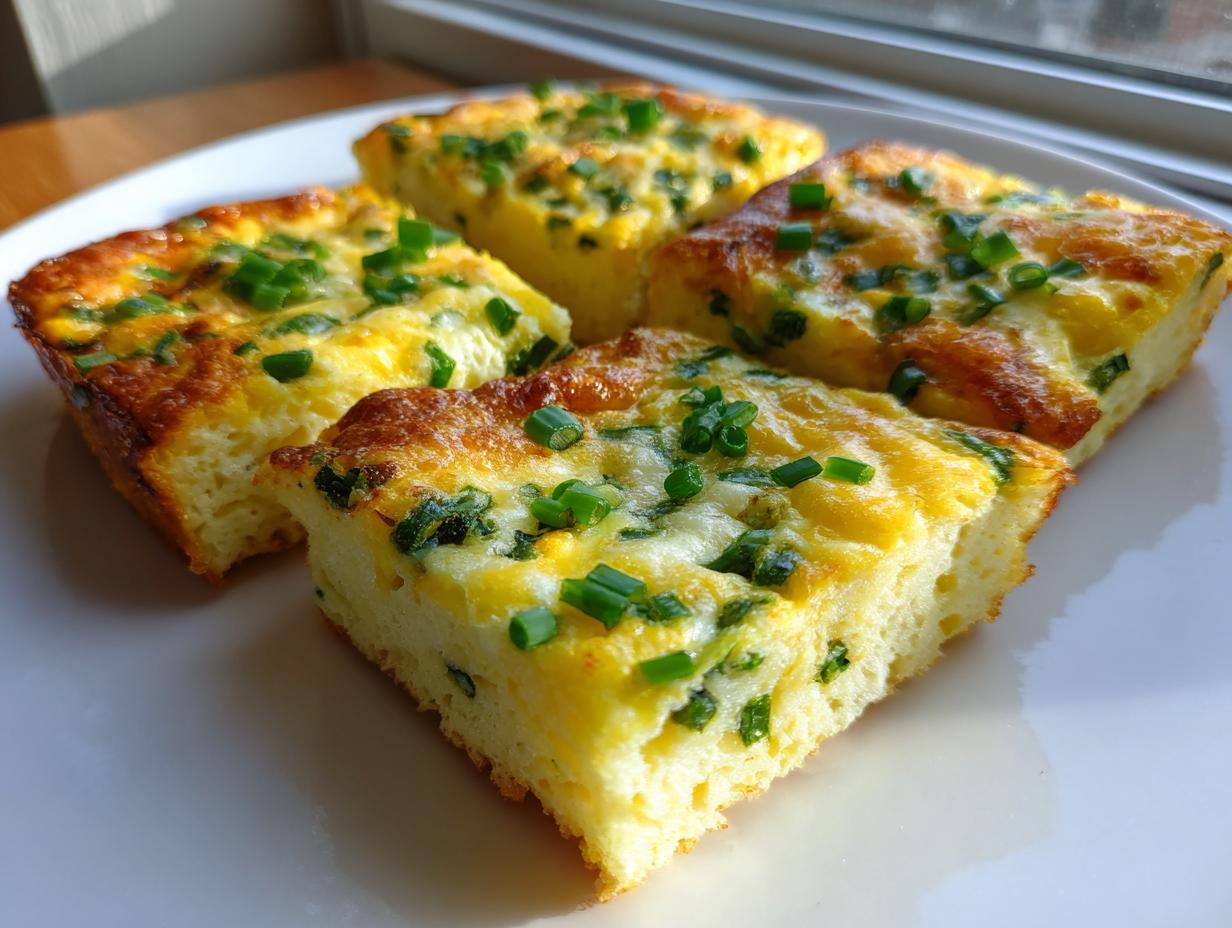
- When it’s done, pull it out, let it cool just a tiny bit until you can handle it, and then slice it into squares. This should give you 12 to 15 nice servings!
Achieving the Perfect High Protein Egg Bake
If you decided to add that cup of cottage cheese, listen up—this is the science part! When I developed this version, I found that cottage cheese adds such a beautiful, light texture, which is why it’s fantastic for a high protein egg bake. Because I have that background in food science, I know that blending the cottage cheese helps break down the curds seamlessly with the eggs and milk.
It emulsifies slightly, creating these tiny air pockets that expand while baking. The result? Eggs that are airy, almost puffy, instead of dense or rubbery! If you skip the cottage cheese, just whisk the eggs and milk really well until you see small bubbles forming on the surface—that initial whisking is what guarantees a softer set, even without the extra protein boost.

Tips for Perfect Oven Baked Egg Squares
Even though this is an incredibly straightforward recipe, there are a couple of little tricks I picked up in the test kitchen that make sure your results are always fantastic. We’re aiming for tender, savory squares every time—no rubbery edges allowed!
The absolute most important thing? Stick to that full half-sheet pan size (that’s usually 18×13 inches). If you use a much smaller pan, say a 9×13 casserole dish, your egg layer will be much thicker. Thicker layers mean you’ll have to bake them for ages, and the bottom will likely get tough and dry before the middle is set. If you absolutely must use a smaller pan, you’ll need to reduce the temperature slightly and add maybe 10 minutes to the total cook time. But honestly, spreading it out on the big pan is what gives you those perfect, thin oven baked egg squares.
My biggest fear when making any big batch of eggs is overbaking them. Once those center squares are firm, they will continue to cook for a minute or two once you take them out of the oven due to residual heat. That carryover cooking is real! So, pull the pan out when the cheese is bubbly and the center *just* barely jiggles when you nudge the pan. A little bit of wiggle room ensures they stay soft!
When you’re cutting, let them cool for about five minutes first. Hot eggs stick differently than slightly cooled ones. A sharp knife is also your friend here. You should get clean, perfect squares ready for assembling your easy morning routine breakfast sandwiches without all the messy tearing!
Serving Sheet Pan Eggs for a Crowd and the Breakfast Sandwich Hack
This recipe is truly a lifesaver when you need to feed a noisy house or if you’re hosting a huge weekend sheet pan brunch. Since we baked this on a large half-sheet, we get between 12 and 15 nice, uniform squares—that’s a lot of happy eaters from one tray! Letting the eggs cool for just a moment before slicing helps keep those edges clean, which is important if you’re trying to make things look neat for guests.
Once sliced, serving is just a matter of arranging them on a platter. They hold their heat surprisingly well, too! But honestly, my favorite way to use these is for whipping up my weekly supply of grab-and-go sandwiches. This is the ultimate breakfast sandwich hack for busy days.
To make the hack work, grab your favorite bread—I love using a slightly sturdy whole wheat one, like the one in my honey sandwich recipe, but any roll or English muffin works! Toast it up lightly, grab a warm egg square, and assemble. Because the square is perfectly flat, it fits right onto the bread without needing a ton of folding or tearing like individual omelets do. A little smear of hot sauce or some simple mustard, cheese if you didn’t put enough on top, and you are out the door!
It’s so easy, in fact, that my kids can assemble their own when I pull these out of the fridge for reheating later in the week. It cuts down so much morning stress. If you see people raving about these on social media, it’s probably because they realized this simple technique is the key to effortless large batch cooking. Seriously, I don’t know how I managed without this for so long!

Storage and Make Ahead Breakfast Options for Sheet Pan Eggs
This is where I really sing the praises of making a ginormous batch of these sheet pan eggs. If you’re doing the work once, you might as well reap the rewards for days, right? These squares are brilliant for your weekly rotation. This recipe is designed to be your go-to make ahead breakfast solution, whether you’re planning for a busy week or just stocking up for effortless weekend breakfasts.
The most crucial step for storage is cooling them down fast. You definitely don’t want to wrap up hot eggs; that just creates steam and turns them soggy later—ugh! Once the tray has cooled down on the counter for about 20 minutes, you can start portioning them out. I usually slice them into the individual squares we cut earlier.
For the fridge, wrap each square tightly in plastic wrap or place them in an airtight container. They stay perfectly good, tasting fresh, for about 4 to 5 days. I keep mine in the fridge for easy grabbing. If you want to see how others manage their weekly haul, take a peek at some quick ideas over here; everyone has a slightly different system!
But what about longer term? They freeze beautifully, which is my secret weapon for days when I know I won’t even have time to microwave breakfast! Make sure they are completely cool before you wrap them individually in plastic wrap first, then pop them all into a large freezer-safe bag. They can hang out in the freezer for up to a month.
When it’s time to eat those frozen squares, you have a couple of reheating options. The microwave is fastest—just place a square on a plate and zap it for 45 to 60 seconds. If you want to bring back that slightly fluffy texture, the oven is better. Pop them on a baking sheet at 350°F (175°C) for about 10 minutes until heated through. Either way, you have a perfect, savory, high-protein meal ready to go. It makes planning your healthy breakfast simple!
Variations on This Baked Eggs Recipe
I love that this recipe is such a great canvas. Because the base of sheet pan eggs is so simple, you can totally customize it to whatever you have sitting in the fridge that needs using up! This flexibility is why I keep calling them customizable baked eggs; they adapt to you, not the other way around.
When it comes to cheese, don’t feel you have to stick to cheddar every single time. If you like a little heat, swap in some Pepper Jack—it melts beautifully and gives it this wonderful hidden spice that wakes up the flavor profile. Or, if you’re serving this to kids who prefer something milder, try Gruyère; it gives a surprisingly nutty depth without being sharp. My professional culinary training always taught me that even small swaps can change the whole experience.
Herbs make such a difference, too! If I’m using leftover smoked ham, I’ll often skip the chives and toss in finely minced fresh dill right before the final bake. Dill and eggs are just magic together. Parsley is always a safe, bright addition if you want to punch up the color after they come out of the oven. Just don’t cook your delicate herbs for too long, or they lose their vibrant freshness!
Speaking of making things your own, if you’re looking for other ways to use cottage cheese in satisfying comfort meals, you have to check out my lasagna with cottage cheese recipe. It uses that creamy texture in a totally different way, but the principle of adding unnoticed moisture and protein is the same. Remember, you can find a ton of inspiration for taking these simple bases and running with them by checking out other home cooks who love customization, like the ideas here!
Frequently Asked Questions About Sheet Pan Eggs
I get so many great questions every time I share these! It usually means people are super excited to try this easy sheet pan breakfast hack for themselves. Here are the few things I hear most often when people are getting ready to dive into their first batch of sheet pan scrambled eggs.
Can I use a smaller baking pan if I don’t have a half-sheet pan?
Yes, you certainly can, but you have to adjust, or you’ll end up with thick, rubbery eggs! My recipe is designed for that large 18×13 inch pan because it keeps the egg layer thin—about an inch high. If you use a standard 9×13 inch casserole dish, the depth of the egg mixture will be much thicker. This means you absolutely must drop your oven temperature down closer to 350°F (175°C) and add at least 10 to 15 minutes to the bake time. I recommend sticking to the big pan if you can, though, because thin eggs cook evenly and quickly!
Can I add raw vegetables, like spinach or mushrooms, straight into the eggs?
This is where my food science background kicks in! Moisture is the enemy of a fluffy egg bake. If you toss raw vegetables like spinach, mushrooms, or zucchini into the egg mixture, they will release a lot of water while baking. This will leave you with soupy pockets around those veggies instead of lovely, set squares. My rule of thumb is: if it’s high in water content, you must sauté it first! It takes just five minutes to cook off that extra moisture before you chop it up and fold it into your mixture. It saves you from a watery disaster!
What is the best cleanup hack for these pans?
Ah, the cleanup! I hate soaking pans, too. The best way to deal with sticky eggs is to line that sheet pan *completely* with parchment paper before you even grease it (or use a silicone baking mat if you have one). Even though the recipe calls for greasing, the parchment paper creates a barrier that lifts right off once the eggs cool a bit. Most of the time, I can fold up the paper and toss it, leaving only a tiny bit of cheese residue on the pan which wipes clean in seconds. If you’re looking for more simple kitchen tricks, check out this amazing guide on a specific cleanup hack!
How do I make sure the cottage cheese disappears for a smooth texture?
If you want that fluffy lift from the optional cottage cheese without texture issues, you have to use an immersion blender or a regular blender for the egg mixture! Don’t just whisk it by hand. When you blend it completely—meaning you can’t see distinct white curds anymore—it integrates perfectly. This blending process ensures you get that amazing high-protein boost hidden inside a smooth, seemingly ordinary bake. If you have trouble getting great results, don’t hesitate to reach out; I’m always happy to help troubleshoot over on my contact page!
Nutrition Estimates for Your Sheet Pan Egg Bake
I always try to be as transparent as possible when it comes to what we’re eating! Since this recipe is so versatile—you might skip the cottage cheese or load up on extra cheddar—these numbers are just my best educated guess based on using the exact proportions listed in the main recipe, using one square as the serving size.
Think of this as a great baseline for planning your meals. Because this is such a fantastic healthy sheet pan breakfast option, it’s nice to know what you’re starting with before you begin customizing it with bacon or extra cheese!
- Serving Size: 1 square
- Calories: 110
- Protein: 10g
- Fat: 7g
- Carbohydrates: 2g
- Sugar: 1g
- Sodium: 250mg
Now, here’s the important part, because I base my cooking on science! This calculation is based on the core eggs, milk, and standard seasonings. If you skip that optional high-protein cottage cheese, your numbers will shift slightly, especially protein and fat content. Similarly, adding a big handful of bacon or doubling up on sharp cheddar means your calories and saturated fat will definitely go up. That’s what makes this recipe so adaptable—you control the final nutritional outcome for your perfect breakfast meal prep solution!
PrintHigh-Protein Sheet Pan Eggs for Easy Meal Prep and Breakfast Sandwiches

Make a large batch of fluffy, customizable sheet pan eggs using your oven. This low-mess recipe is perfect for feeding a crowd, meal prepping for the week, or quickly assembling breakfast sandwiches.
- Prep Time: 10 min
- Cook Time: 25 min
- Total Time: 35 min
- Yield: 12 servings 1x
- Category: Breakfast
- Method: Baking
- Cuisine: American
- Diet: Vegetarian
Ingredients
- 18 large eggs
- 1 cup cottage cheese (optional, for high protein)
- 1/2 cup milk or half-and-half
- 1 teaspoon salt
- 1/2 teaspoon black pepper
- 1/4 teaspoon garlic powder
- 1/4 cup chopped fresh chives or green onions
- 1 cup shredded cheese (cheddar or Monterey Jack)
- 1 tablespoon butter or cooking spray for the pan
Instructions
- Preheat your oven to 375°F (190°C). Lightly grease a standard half-sheet pan (about 18×13 inches) with butter or cooking spray.
- If using cottage cheese, blend the eggs, cottage cheese, milk, salt, pepper, and garlic powder in a large bowl until mostly smooth. If skipping cottage cheese, simply whisk the eggs and milk with seasonings.
- Pour the egg mixture evenly onto the prepared sheet pan.
- Bake for 15 minutes.
- Remove the pan from the oven. Sprinkle the shredded cheese and chopped chives evenly over the top of the eggs.
- Return the pan to the oven and bake for another 5 to 10 minutes, or until the eggs are set and the cheese is melted and lightly golden. The total cook time will be around 20 to 25 minutes.
- Remove from the oven and let cool slightly. Slice the egg bake into squares. This recipe yields about 12 to 15 servings.
- Use these squares immediately for breakfast sandwiches or store them for your breakfast meal prep solution.
Notes
- For added flavor and color, add 1 cup of finely chopped cooked bacon, ham, or sautéed vegetables like bell peppers and onions before baking.
- To make breakfast sandwiches, place one egg square on a toasted English muffin or roll with your favorite condiments.
- These baked egg squares freeze well. Cool completely, wrap individually, and freeze for up to one month. Reheat in the microwave or oven.
Nutrition
- Serving Size: 1 square
- Calories: 110
- Sugar: 1
- Sodium: 250
- Fat: 7
- Saturated Fat: 3
- Unsaturated Fat: 4
- Trans Fat: 0
- Carbohydrates: 2
- Fiber: 0
- Protein: 10
- Cholesterol: 180