
Oh, you know those desserts that just instantly transport you back to childhood parties or grand holiday spreads? I live for that kind of nostalgia in baking! If you’ve been searching high and low for that perfect, decadent treat that requires zero fuss but delivers huge flavor payoff, stop right here. We’re making the authentic, ultimate gooey **magic cookie bars**, often called the classic 7-layer bars. My background in developing reliable recipes, coming from both traditional methods and food science, means every layer in this batch is tested and true. Trust me, this simple layered bar recipe is going to become your go-to for everything from bake sales to quiet Tuesday night cravings. Check out all my favorites in my best dessert recipes collection, but first, get that graham cracker box ready!
- Why This Classic Magic Cookie Bars Recipe Works Every Time
- Gathering Your Ingredients for Ultimate Magic Cookie Bars
- Step-by-Step Instructions for Easy Dessert Bars
- Tips for Success with Classic Bar Recipes
- Serving Suggestions for Your Crowd Pleasing Dessert Bars
- Storage and Reheating Instructions for Magic Cookie Bars
- Frequently Asked Questions About Seven Layer Magic Bars
- Estimated Nutritional Data for These Gooey Cookie Bars
- Share Your Experience Making Magic Cookie Bars
Why This Classic Magic Cookie Bars Recipe Works Every Time
You might wonder why these simple bars are such a massive hit year after year. It really comes down to chemistry and comfort! When you follow this formula, you get the perfect balance: a solid, buttery base holding together a wildly gooey, chewy center. It’s the definition of **magic cookie bars** perfection. They’re inherently nostalgic because they use simple pantry staples, but the way they come together feels like actual magic.
- They require almost no prep work—just layering and pouring.
- The texture is unbeatable: solid yet spectacularly soft in the middle.
- This recipe has been refined over years to ensure the perfect chewiness for serving at large gatherings.
The Secret to Gooey Cookie Bars: Sweetened Condensed Milk
If there’s one non-negotiable ingredient here, it’s the sweetened condensed milk, or SCM. This sticky, sweet liquid is doing heavy lifting! It’s much thicker than regular evaporated milk, which means it acts as our primary binder, keeping the layers from separating. It delivers intense sweetness and moisture that caramelizes beautifully during baking. If you’ve seen people mention Eagle Brand, that’s the classic version many of us grew up with; it ensures these are truly the *best* **gooey cookie bars** you’ll ever make.
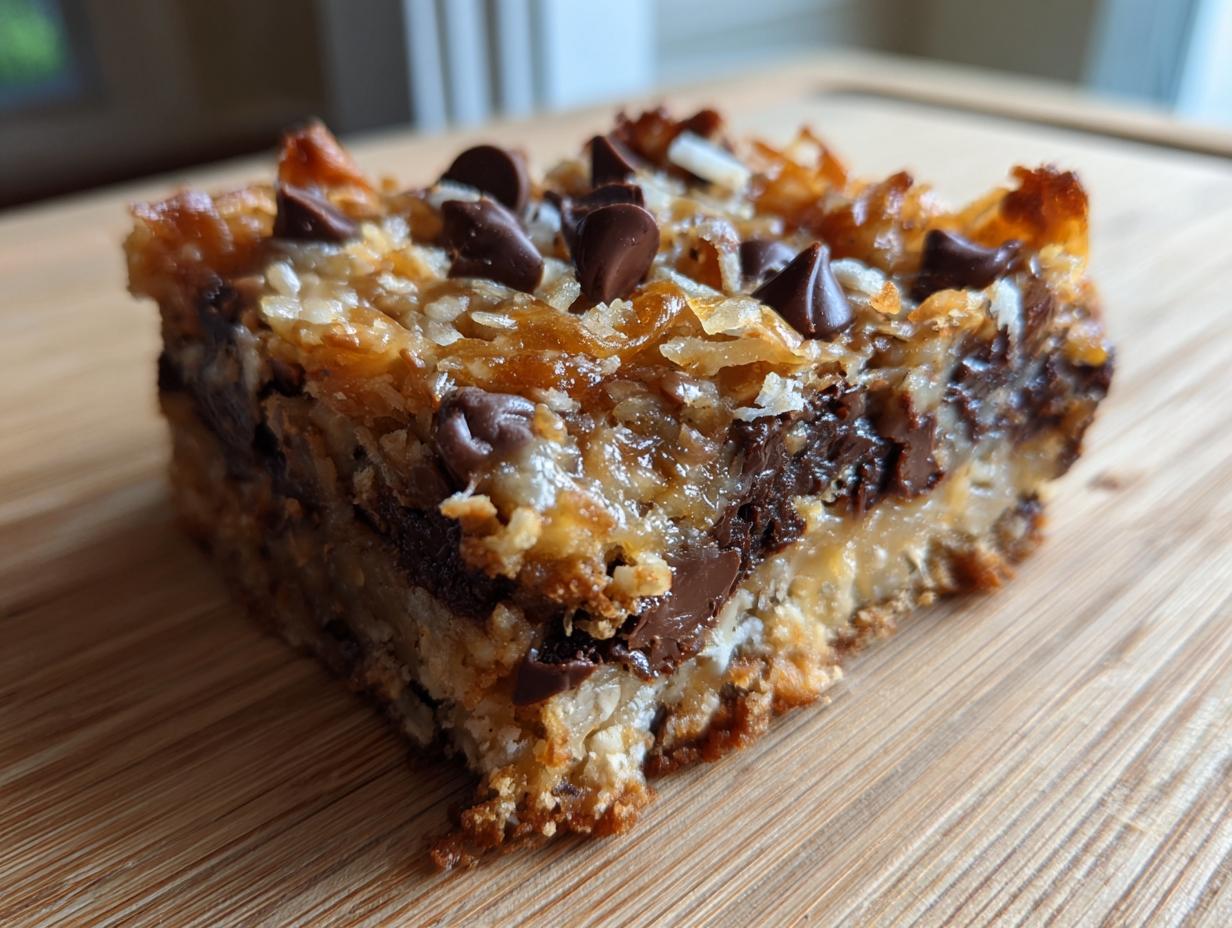
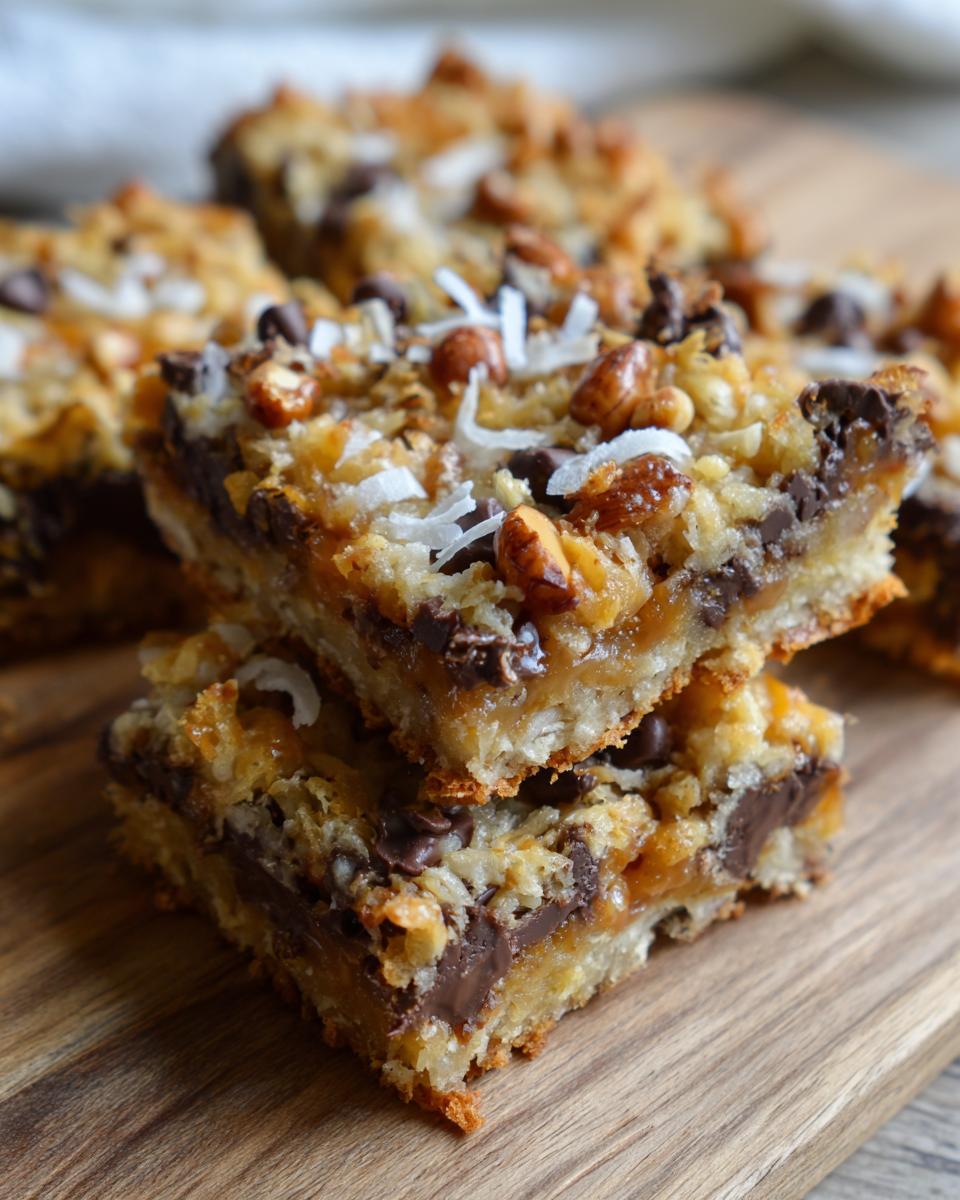
Achieving the Perfect Seven Layer Bars Composition
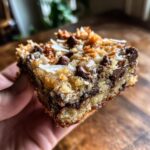
The appeal of the **Seven Layer Bars** is seeing all those delicious textures nestled together, and sticking to the core layers ensures you get that satisfying bite every single time. We build from the bottom up:
- Graham Cracker Crust (for structure)
- Melted Butter (to bind the crust)
- Chocolate Chips (the melty goodness)
- Flaked Coconut (for chewy texture)
- Chopped Nuts (the crucial crunch)
- Butterscotch Chips (for extra depth—totally optional but highly recommended!)
- Sweetened Condensed Milk (the glue that marries them all)
Gathering Your Ingredients for Ultimate Magic Cookie Bars
Alright, let’s talk business: ingredients! Because this is a layered bar cookie, precision matters, but gathering everything is wonderfully straightforward. I’ve personally tested every measurement in this recipe, ensuring that when you follow the directions exactly, you get those reliable, crowd-pleasing results I promise. Don’t worry; this isn’t fussy baking! It’s mainly a matter of having the seven standard components ready to go before you even turn on the oven. Having everything measured out beforehand—what we call *mise en place*—makes the assembly process so quick, usually under fifteen minutes once the oven is warming up. You can find tons of great ideas in my easy lunch and snack ideas, but these bars are truly in their own league!
Ingredient Notes and Substitutions for Your Magic Cookie Bars Recipe
Even though the recipe is classic, I know kitchens look different everywhere! I want you to feel confident in making substitutions if you need to. The core four—graham crumbs, butter, SCM, and chocolate—are sacred, but we can play with the extras.
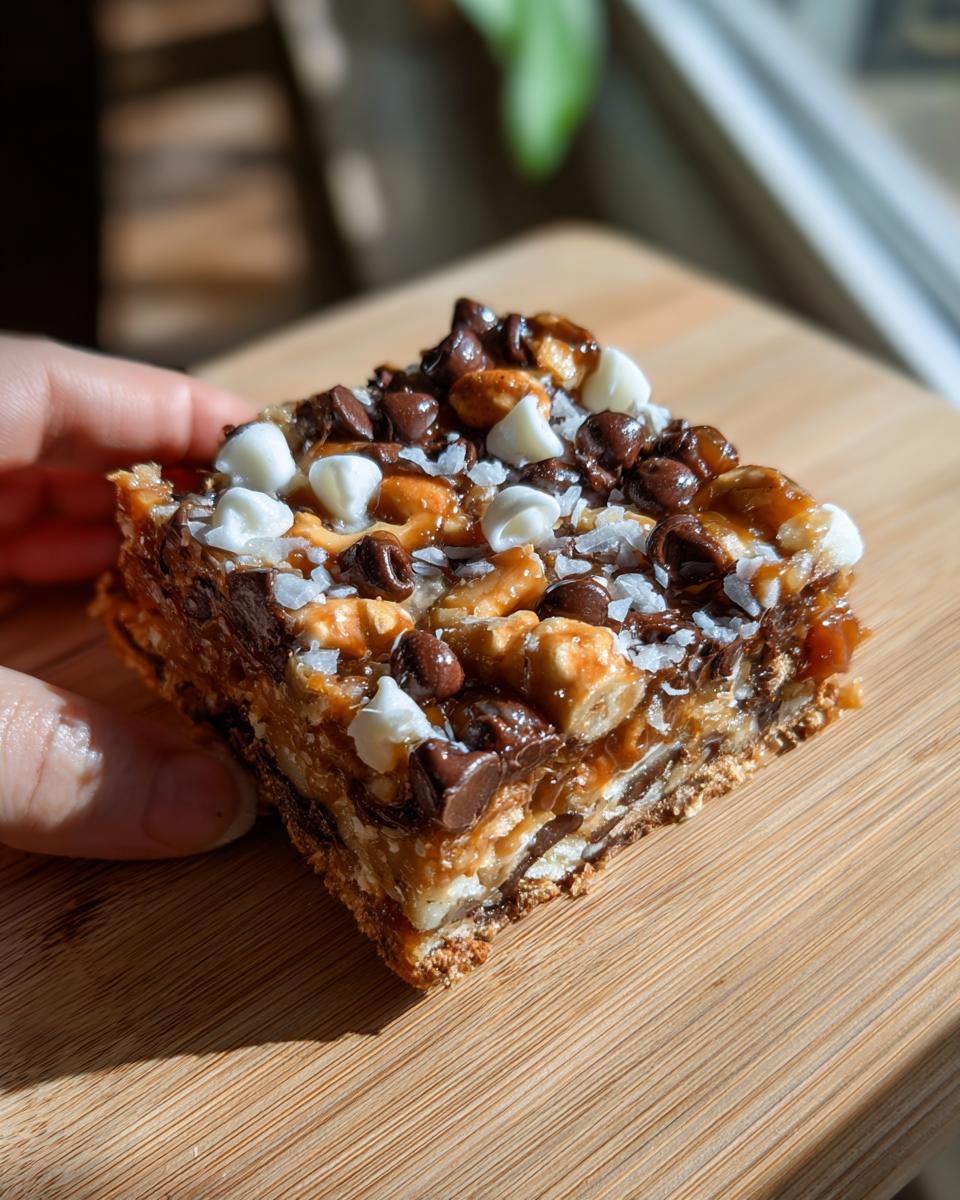
For the nuts, I highly recommend pecans or walnuts. Pecans give a slightly sweeter, buttery crunch, but walnuts are excellent if you prefer that earthier bite. If you end up with zero nuts in your pantry? No huge disaster! Just replace the nut measurement with an equal amount of extra chocolate chips or butterscotch chips. You’ll just have a sweeter, even gooier bar, which isn’t really a bad outcome, is it?
Also, regarding the chocolate: I always use standard semi-sweet chips because they balance the intense sweetness of the condensed milk. Milk chocolate tends to make the bars almost *too* sweet, in my professional opinion! If you happen to have darker chocolate chips on hand, definitely use those; they provide a richer flavor contrast that I adore. Don’t sweat it if you forgot the butterscotch chips; they add a lovely caramel note, but omitting them only means you’ve created the very popular 6-layer version instead of the 7-layer classic. You really can’t go wrong!
Step-by-Step Instructions for Easy Dessert Bars
This is where the real ‘magic’ happens, and honestly, it’s so satisfying because there’s barely any effort involved. Before we start layering, make sure your oven is set to 350 degrees F. I insist you line your 9×13 pan with parchment paper, leaving a good overhang on two sides—this is the trick to lifting these out cleanly later! You can find some of my favorite weeknight dinner prep hacks that also work great here, like getting your prep done early. Once that oven is ready and the pan is lined, we just build!
Building the Layers and Pouring the Sweetened Condensed Milk
First things first: you need that graham cracker crust pressed firmly into the base. You want it dense so it doesn’t crumble when you cut it later. After that, it’s just a quick sprinkle, sprinkle, sprinkle! Go ahead and distribute your chocolate chips first, then the coconut, followed by your nuts and any optional butterscotch chips. Make sure everything looks evenly spread; we don’t want one corner getting overloaded!
Now, for the famous part! Take your can of **sweetened condensed milk** and pour it slowly and evenly over the entire surface. Don’t dump it all in one spot! Use a spatula if necessary to gently nudge it so that every single topping—especially the coconut—gets a nice, thick coating of that sweet, golden liquid. This is what transforms everything into one gorgeous, sticky slab.

Baking Time and Cooling for Chewy Dessert Bars
Into the oven they go for about 25 to 30 minutes. You’re looking for the edges to turn just slightly golden brown, and the top should definitely look bubbly and set. Be careful not to overbake these! If they look dry coming out, they will be dry once cool, and we want that perfect gooey texture that makes **magic cookie bars** famous.
The hardest part, bar none, is cooling. You absolutely must let these bars cool completely—I mean *completely*—on the counter before you even think about touching them with a knife. If you try to cut them warm, they will just ooze into a sad puddle because the SCM hasn’t fully re-set. Patience, my friends! Once they are firm at room temperature, you can easily lift the whole slab out using that parchment paper overhang and slice them into beautiful squares.
Tips for Success with Classic Bar Recipes
I’ve made hundreds of batches of these treats over the years, testing every variation imaginable, so I want to pass on my favorite shortcuts and warnings for these **magic cookie bars**. Getting that textbook chewy, gooey middle is all about timing and texture management. Even for such an easy dessert, these little habits make all the difference between good and absolutely unforgettable.
Here are my top three rules for nailing these **classic bar recipes** every single time:
- Don’t Skimp on Pressing the Crust: When you mix those graham crumbs and melted butter, pack them down *hard* into your prepared 9×13 pan. I like to use the bottom of a measuring cup to really compact it. If the base is loose, your final bars will crumble when you go to slice them, and nobody wants that messy situation!
- Listen to the Gooey Cue: This is the most important tip, especially if you are looking for that rich, chewy center. As I mentioned above, do not chase a fully dry center! Pull these out when they are bubbly and the edges look set, even if the very center jiggles slightly. They continue to cook as they cool on the rack. A slightly under-baked center guarantees that wonderful, soft texture. If you’re curious about how other major sites handle this classic, you can check out the famous version over at Allrecipes for comparison.
- Cool Completely, No Exceptions: I know, I know, waiting is the worst when something smells this good! But if you try to slice them while they are even slightly warm, that glorious SCM layer turns back into liquid, and you end up with a mess that sticks to your knife. Give them a solid two hours on the counter, or speed it up in the fridge once they are mostly set.
If you’ve got leftovers (which I seriously doubt!), these freeze beautifully. Wrap the cut squares tightly and tuck them away. They are wonderful for having on hand for unexpected guests, and they freeze much better than most other cookies. Remember to check out my handy guide on easy appetizers and snacks for party planning!
Serving Suggestions for Your Crowd Pleasing Dessert Bars
These **magic cookie bars** are intensely rich—that’s the whole charm, right? Because they are packed with chocolate, coconut, and that wonderful condensed milk sugar rush, they pair best with something simple and grounding. Honestly, a tall, cold glass of whole milk is my go-to pairing; it just cuts through the sweetness perfectly for that classic, comforting experience.
If you are serving these at a party or after a big dinner, I highly recommend offering a cup of strong, black coffee alongside them. The slight bitterness of the coffee really enhances the flavors of the chocolate and the toasted coconut. It keeps the whole dessert from feeling overwhelmingly sweet.
For a slightly brighter, more balanced approach, especially if these are part of a larger spread, serving them alongside something tart actually works wonders! Think fresh raspberry slices or a small bowl of mandarin orange segments. I know it sounds strange next to a cookie bar, but that little bit of fresh acidity cleanses the palate beautifully. You can find some other great pairings in my guide to serving baked goods that you might want to try out!
For holiday gatherings, don’t hesitate to dust the serving platter lightly with powdered sugar before placing the bars down. It just gives those dark, caramelized edges a beautiful little snow-capped look—very festive!
Storage and Reheating Instructions for Magic Cookie Bars
Okay, so you have baked the absolute best **gooey cookie bars** known to humankind, and you have leftovers. Congrats! Now, how do we keep that gooey factor intact? Because of that lovely blanket of sweetened condensed milk, these bars are naturally pretty moist, but they can get a little hard if left out too long in dry air. Proper storage is key to making sure they taste just as good on day three as they did fresh out of the oven.
The best way to store them, hands down, is airtight. Once they are completely cooled—and I mean stone cold; do not skip that step!—you want to transfer them to an airtight container. You can layer them between sheets of wax paper or parchment paper to stop them from sticking together, which I highly recommend if you’re making a big batch.
Now, the big question: fridge or counter? For short-term—say, three to four days—they do great sitting on the counter at room temperature because the sugar content acts as a preservative. However, if your kitchen is hot, or if you want them to last a week or more, you should pop that sealed container into the refrigerator. They will firm up quite a bit in the cold, and that’s totally normal.
If you’ve refrigerated them and they seem a little too stiff when you go to grab one? No panic! Don’t try to eat them rock-hard; you want that delightful chew we worked so hard for. Just let them sit on the counter for about 20 to 30 minutes before serving. That’s usually enough time for the butter and SCM to soften back up into that perfect, gooey texture. If you are really in a rush, a quick 10-second zap in the microwave can also do the trick to bring back the softness, but be careful not to overheat, or things get messy!
Have freezer space? These bars actually freeze wonderfully! Wrap individual squares tightly in plastic wrap, then place them all into a heavy-duty freezer bag. They hold up beautifully for about two to three months. When you want one, just pull it out of the freezer and let it thaw slowly on the counter. It’s like finding an unexpected treat later on—instant gratification!
Frequently Asked Questions About Seven Layer Magic Bars
I know when you look at a recipe this popular, you naturally have questions about getting it just right. We want these **Seven Layer Magic Bars** to be perfect for your gathering, whether it’s a holiday party or just a random Tuesday craving! Here is the rundown on the common issues I hear about from fellow home bakers.
Can I skip the nuts in this Magic Cookie Bars Recipe?
Absolutely, you can skip the nuts! While I love the textural complexity nuts bring—especially pecans—these bars are delicious as a 6-layer bar if you need to avoid them for allergy reasons or just preference. The **sweetened condensed milk desserts** magic doesn’t rely on the nuts; they just add a nice earthy crunch. If you skip them, just make sure you replace that space with a little extra chocolate or coconut to keep the layers balanced. It just turns into a glorious **chocolate coconut bars** situation!
Are these truly no-bake cookie bars?
No, sweetie, these are not strictly no-bake, even though people sometimes lump them into that category because assembly is so simple! The graham cracker crust requires being pressed, but the entire bar relies heavily on the baking process to activate the SCM and set everything up nicely. If you try to just chill them, you end up with a sloppy, sticky mess on a plate, not the clean squares you want. We bake them precisely so they are **chewy dessert bars** coming out of the oven, not a pudding! For true no-bake options, you’d need a different formula, usually involving melted marshmallows or peanut butter as the main binder.
What if I don’t have butterscotch chips? Do I need them for the 7 layers?
This is a very common question when people are staring down their pantry! The butterscotch chips are absolutely delicious, adding a lovely toffee note that works well with the chocolate, but they are easily the most optional layer in the whole construction. If you don’t have them, don’t run to the store! Just proceed with the other six layers. You still end up with a phenomenal, rich treat. I sometimes substitute them with peanut butter chips, too, if I’m feeling adventurous. If you want to see how some others approach these, check out some popular takes on easy holiday treats, because these are perfect for sharing!
How do I ensure they stay gooey and don’t get hard?
I stress this all the time: do not overbake! Overbaking is the number one killer of the *gooey* factor in these bars. You are baking them just long enough for the exterior to set and the SCM to start bubbling and caramelizing slightly around the edges. When you pull them out, the very center should look slightly soft and maybe even a little wobbly. That residual heat will finish the cooking once they are cooling on the rack. If you bake them until a toothpick comes out totally clean, you’ve made a dry, crumbly bar instead of the expected soft texture. Remember, we are aiming for **ultimate gooey cookie bars**!
Estimated Nutritional Data for These Gooey Cookie Bars
I always like to give a heads-up about what we’re diving into nutritionally when we make something this rich and delicious! As a food scientist, I know that these **magic cookie bars** are a major treat, definitely categorized as an indulgence, but they are worth every single bite when you’re craving that comforting flavor profile.
Below is the estimated nutritional breakdown based on the recipe as written, accounting for all seven layers. Please remember this is a general guide. The actual values can swing a bit depending on the brands of chocolate chips or the specific kind of nuts you use for your **graham cracker crust desserts**.
We’re looking at a serving size of one standard square:
- Serving Size: 1 bar
- Calories: 195
- Sugar: 18g (That’s where all the goodness is hiding!)
- Sodium: 85mg
- Fat: 11g
- Saturated Fat: 6g
- Unsaturated Fat: 5g
- Trans Fat: 0.1g
- Carbohydrates: 22g
- Fiber: 1g
- Protein: 3g
- Cholesterol: 15mg
This data is based on dividing the total batch into 24 even pieces. If you cut your **easy dessert bars** into smaller squares, naturally, the numbers per serving will decrease, but nobody is cutting these tiny, trust me! Enjoy them mindfully, knowing they are packed with flavor derived from real ingredients.
Share Your Experience Making Magic Cookie Bars
Now that you’ve seen just how simple it is to pull together these divine layers, I’m just dying to know how yours turned out! Baking is something we should always share, and honestly, seeing your results is the best part of my job here at Cooking by Mia.
Did you stick to the absolute classic seven layers, or did you sneak in a variation? Maybe you swapped the pecans for macadamia nuts, or perhaps you even tried using white chocolate chips instead of semi-sweet? Don’t be shy! Head down to the comments section right now and tell me everything.
I absolutely love hearing how these **magic cookie bars** fit into your family traditions—whether they were a hit at a busy potluck or just made your kitchen smell incredible on a rainy afternoon. Your feedback helps me continue developing reliable, delicious recipes for everyone in this community.
If you snapped a gorgeous photo of your perfectly gooey, chocolate-laden squares, please share it! Tag me on social media; I want to proudly show off your baking success. If you have any lingering questions about technique or storage that weren’t covered, that’s the perfect place to ask them, too. I’m always here to help you feel more confident in your kitchen. Ready to get in touch or just want to share the love? You can always reach out via my contact page!
PrintUltimate Gooey Magic Cookie Bars (Classic 7-Layer Recipe)
Make the classic, nostalgic Magic Cookie Bars, also known as Seven Layer Bars. This easy dessert uses sweetened condensed milk to create rich, chewy, and gooey layers perfect for any gathering.
- Prep Time: 15 min
- Cook Time: 30 min
- Total Time: 45 min
- Yield: 24 servings 1x
- Category: Dessert
- Method: Baking
- Cuisine: American
- Diet: Vegetarian
Ingredients
- 1 1/2 cups graham cracker crumbs
- 1/2 cup unsalted butter, melted
- 1 (14 ounce) can sweetened condensed milk
- 1 cup semi-sweet chocolate chips
- 1 cup flaked coconut
- 3/4 cup chopped pecans or walnuts
- 1/2 cup butterscotch chips (optional layer)
Instructions
- Preheat your oven to 350 degrees F. Line a 9×13 inch baking pan with parchment paper, leaving an overhang for easy removal.
- In a medium bowl, combine the graham cracker crumbs and melted butter. Press this mixture firmly and evenly into the bottom of the prepared pan to form the crust.
- Sprinkle the chocolate chips evenly over the crust layer.
- Sprinkle the flaked coconut over the chocolate chips.
- Sprinkle the chopped nuts over the coconut layer.
- If using, sprinkle the butterscotch chips over the nuts.
- Slowly pour the entire can of sweetened condensed milk evenly over all the layers. Distribute it gently to cover everything.
- Bake for 25 to 30 minutes, or until the edges are lightly golden brown and the condensed milk is bubbly.
- Remove the pan from the oven and let the bars cool completely in the pan on a wire rack. Cooling is important for clean cutting.
- Once cool, lift the bars out using the parchment paper overhang and cut into squares.
Notes
- For the best gooey texture, do not overbake. The center should still look slightly soft when you remove it from the oven.
- You can substitute the nuts with an equal amount of crushed pretzels for a salty crunch variation.
- If you omit the butterscotch chips, you still have a delicious 6-layer bar.
Nutrition
- Serving Size: 1 bar
- Calories: 195
- Sugar: 18g
- Sodium: 85mg
- Fat: 11g
- Saturated Fat: 6g
- Unsaturated Fat: 5g
- Trans Fat: 0.1g
- Carbohydrates: 22g
- Fiber: 1g
- Protein: 3g
- Cholesterol: 15mg