
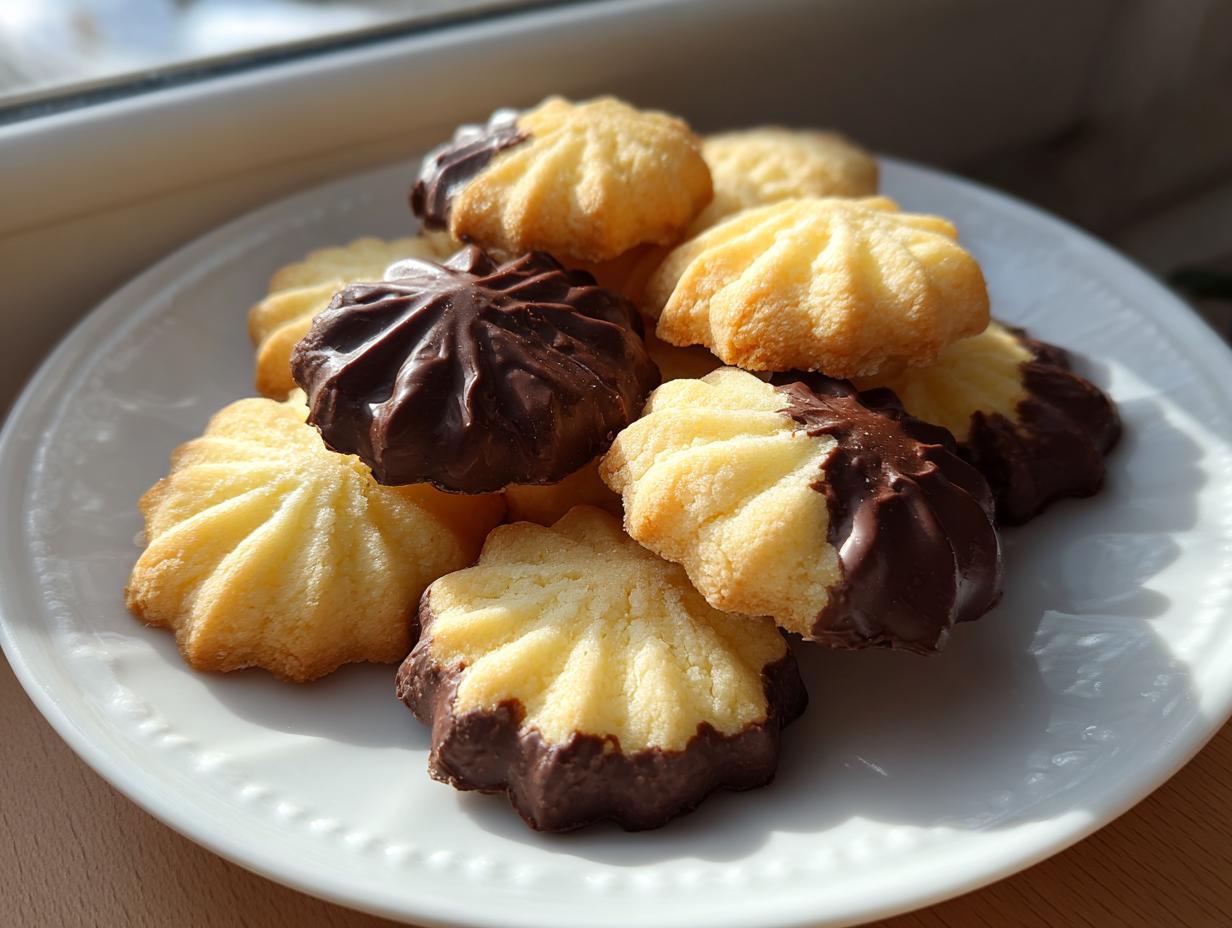
You know that moment when you bite into a cookie from a fantastic Italian bakery? It’s that perfect balance—so buttery it practically dissolves on your tongue, yet substantial enough to hold its delicate shape. It’s magic, right? Well, I’m here to tell you that you don’t need a plane ticket or a glass display case for that experience. My goal here at Cooking by Mia is always to bring that exceptional quality home, and these italian butter cookies are proof that tradition and richness are completely achievable on a Tuesday afternoon. We’re skipping the fuss and getting straight to that melt-in-your-mouth texture. If you loved the simplicity of my 3-ingredient butter cookies, you’ll adore the depth of flavor here. Trust me, once you taste these homemade versions, you’ll put that bakery down for good!
- Why You Will Make These Bakery Style Cookies Again and Again
- Gathering Ingredients for Authentic Italian Butter Cookies
- Step-by-Step Instructions for Perfect Italian Butter Cookies
- Mia’s Expert Tips for Superior Italian Butter Cookies
- Variations on Classic Italian Butter Cookies
- Serving Suggestions for Your Italian Butter Cookies Recipe
- Storage and Keeping These Italian Butter Cookies Fresh
- Frequently Asked Questions About Homemade Butter Cookies
- Share Your Italian Butter Cookies Creations
Why You Will Make These Bakery Style Cookies Again and Again
I know you have a stack of cookie recipes floating around, so why should you bookmark this one? Because these homemade butter cookies give you that authentic, buttery punch without all the complicated steps you sometimes see with classic Italian baking. These aren’t just cookies; they’re tiny bites of pure comfort!
- That Famous Texture: Seriously, they are the definition of “melt in your mouth cookies.” We use classic techniques that break down the flour just enough to give you that incredibly tender experience every single time. They are delicate, but not fussy!
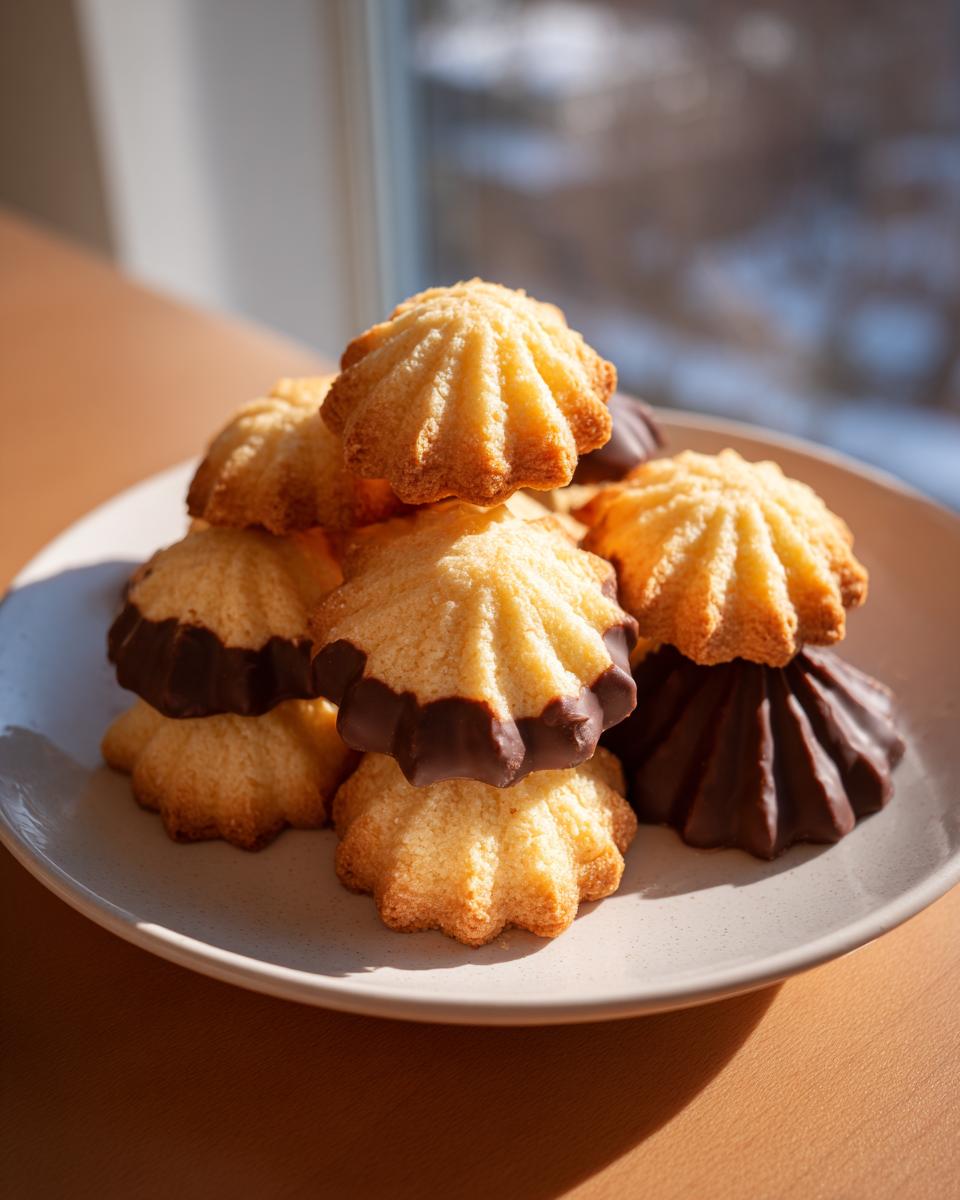
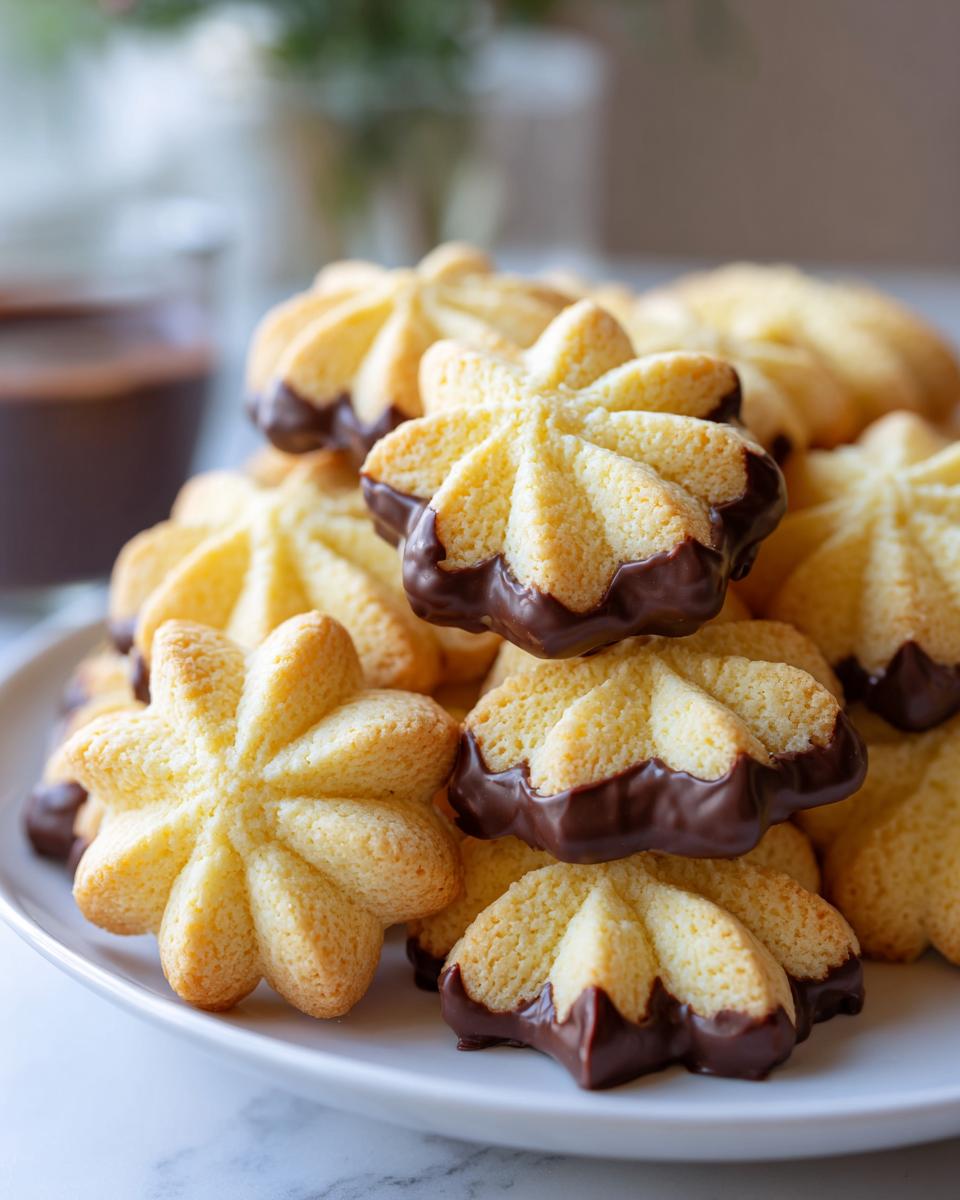
- Bakery Quality at Home: Forget the price tag at the Italian pastry shop down the street. Once you pipe these little swirly beauties, you’ll realize you can replicate that glossy, rich finish in your own kitchen. It’s such a confidence boost!
- Perfect for Any Occasion: While they are absolutely mandatory for our Christmas baking marathon (hello, Christmas Italian Cookies!), these vanilla butter cookies are just as wonderful paired with a good cup of coffee on a rainy Tuesday. They keep well, so you can always have a treat ready. Don’t forget to check out my ideas for maple brown sugar cookies if you’re looking for another stable favorite!
- Easy Customization: The base dough is your canvas. Whether you love a simple sugar dusting, rich chocolate dipping, or a dollop of tart jam, this recipe handles those additions beautifully. It’s easy Italian baking at its sweetest.
Gathering Ingredients for Authentic Italian Butter Cookies
When we talk about achieving that truly “bakery style” result, it all comes down to the quality and preparation of what goes into the bowl. My mother always said you can’t make a silk purse out of a sow’s ear, and the sentiment carries over to baking! The base dough is surprisingly simple, relying on high quality fat and sugar ratios to get that signature tender butter cookies crumb. Don’t worry if you don’t have a fancy cookie press; if you can pipe it, we can shape it!
For the Tender Butter Cookies Dough
The butter has to be right—softened until it gives just a little when pressed, but it absolutely cannot be melted or oily. That’s the secret handshake for creating that delicate, melt-in-your-mouth texture we are aiming for here.
- 1 cup unsalted butter, softened nicely to room temperature
- 1 cup powdered sugar (that’s confectioner’s sugar, folks!)
- 1 large egg yolk (just the yolk—this adds richness without too much liquid)
- 1 teaspoon vanilla extract (use the good stuff, if you can!)
- 1/4 teaspoon almond extract (this is what gives it that classic Italian hint)
- 2 cups all-purpose flour, sifted to keep things light
- 1/4 teaspoon salt
Optional Finishes: Chocolate Dipping and Jam Filling
If you want to step up these cookies into the showstopper category, having these few extra items on hand makes the finishing process super fun. This is where you can really make them your own, deciding if you want jam-filled cookies or those perfect chocolate-dipped cookies that everyone fights over.
- 1/2 cup granulated sugar (if you want to sprinkle tops before baking)
- 4 ounces semi-sweet chocolate, melted down gently (for dipping)
- 1/2 cup raspberry jam (look for a good quality, seedless kind if you can!)
If you’re looking for more ways to use up that good butter, you simply must check out my recipe for cream cheese chocolate chip cookies. It uses a similar concept of creaming fat, but delivers a totally different, creamy payoff!
Step-by-Step Instructions for Perfect Italian Butter Cookies
Okay, let’s get baking! This process flows beautifully from mixing to shaping, and I promise you, watching that rich dough come together is half the fun. Remember, the goal here is to create beautiful, **melt-in-your-mouth cookies**, so be gentle when we incorporate the flour. We are looking for that signature pale color, so don’t be tempted to leave them in the oven too long!
Mixing the Rich Butter Flavor Dough
This initial mixing stage is super important for developing that high-fat, buttery flavor profile. Don’t rush the creaming part—it’s what makes these treats so unbelievably tender!
- First things first: grab your mixing bowl and beat that beautiful softened butter until it looks nice and creamy. Scrape down the sides, naturally.
- Now, slowly add in your powdered sugar. I mean slowly. Beat it on medium speed until the mixture gets light, fluffy, and almost pale yellow. It should look airy, like a cloud ready for baking.
- Next, mix in your egg yolk, vanilla extract, and that little bit of almond extract until everything is just incorporated. Don’t beat it too much here, we are taking it easy!
- In a separate bowl, give the flour and salt a quick whisk together. Now, here’s the important part for our tender butter cookies: add the dry mixture to the wet mixture gradually while mixing on the lowest speed. You want to mix just until you can barely see any flour streaks left. Seriously, stop mixing then! Overmixing develops gluten, and we want tender, not tough.
Shaping and Baking Your Italian Butter Cookies
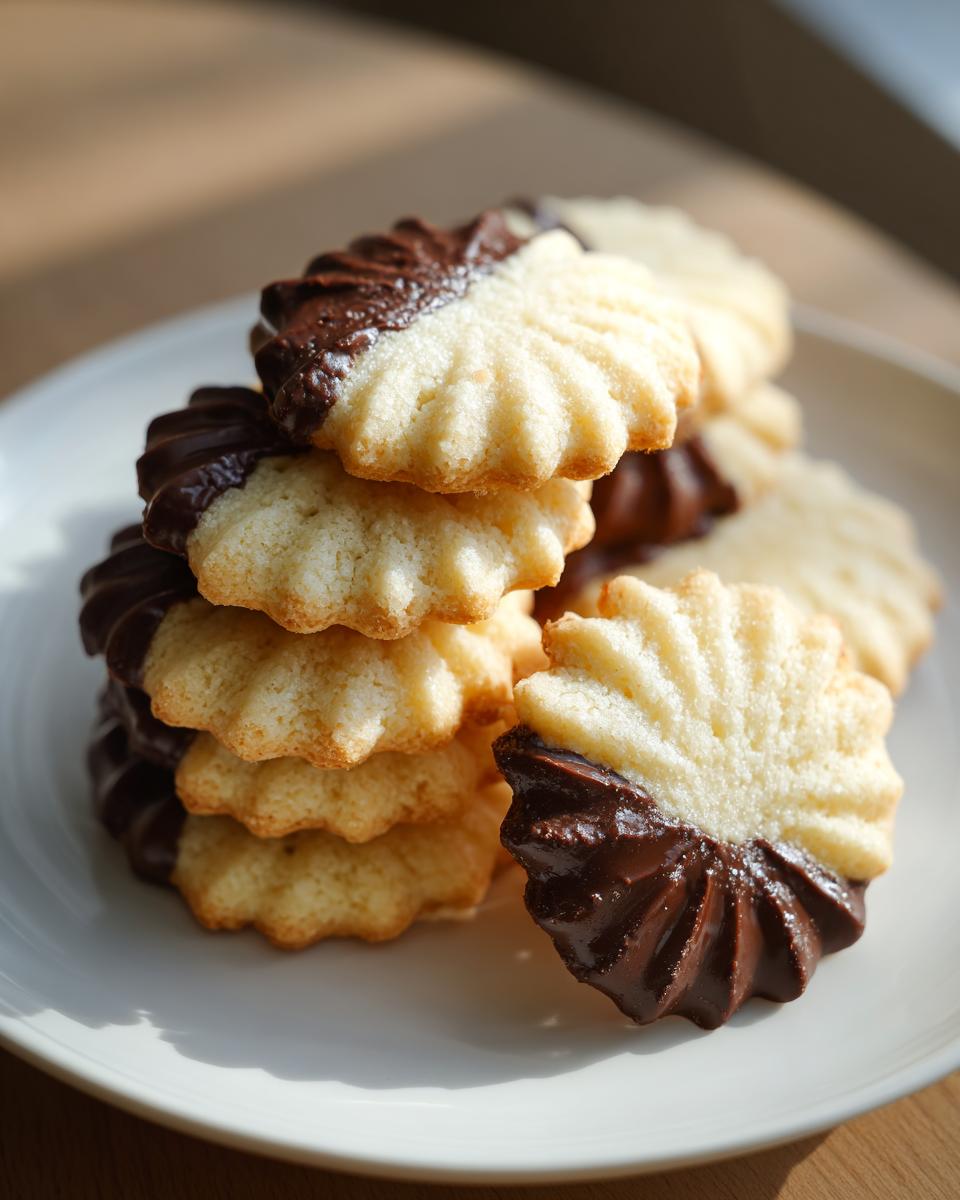
This is where you get to play pastry chef! Whether you want the pretty swirls or the neat little slipper shapes (sometimes called cat’s tongues), you’ll need a sturdy piping bag. If you’re looking for a great way to decorate them later, I have a fantastic post on sugar cookie icing that hardens that you might want to bookmark!
- Load your dough into a piping bag fitted with a large star tip—that 1M tip is my favorite for those classic rosettes. If you want the oblong ‘cat’s tongue’ shape, use a plain round tip and pipe short strips.
- Pipe small, uniform shapes onto baking sheets lined with parchment paper. If you decided on the easy route, now is the time to sprinkle the tops lightly with granulated sugar for a little crunch.
- Pop those trays into your preheated oven at 350°F (175°C). Set your timer for 10 minutes. You’re looking for the edges to just barely start turning golden—maybe 10 to 12 minutes total. Remember, these cookies should stay pale to maintain that bakery look and melt-in-your-mouth quality.
- Let them cool right there on the sheet for about five minutes. They are fragile when hot! Then, carefully transfer them to a wire rack to cool completely before you even think about dipping or filling them.
Finishing Your Homemade Butter Cookies: Dipping and Filling
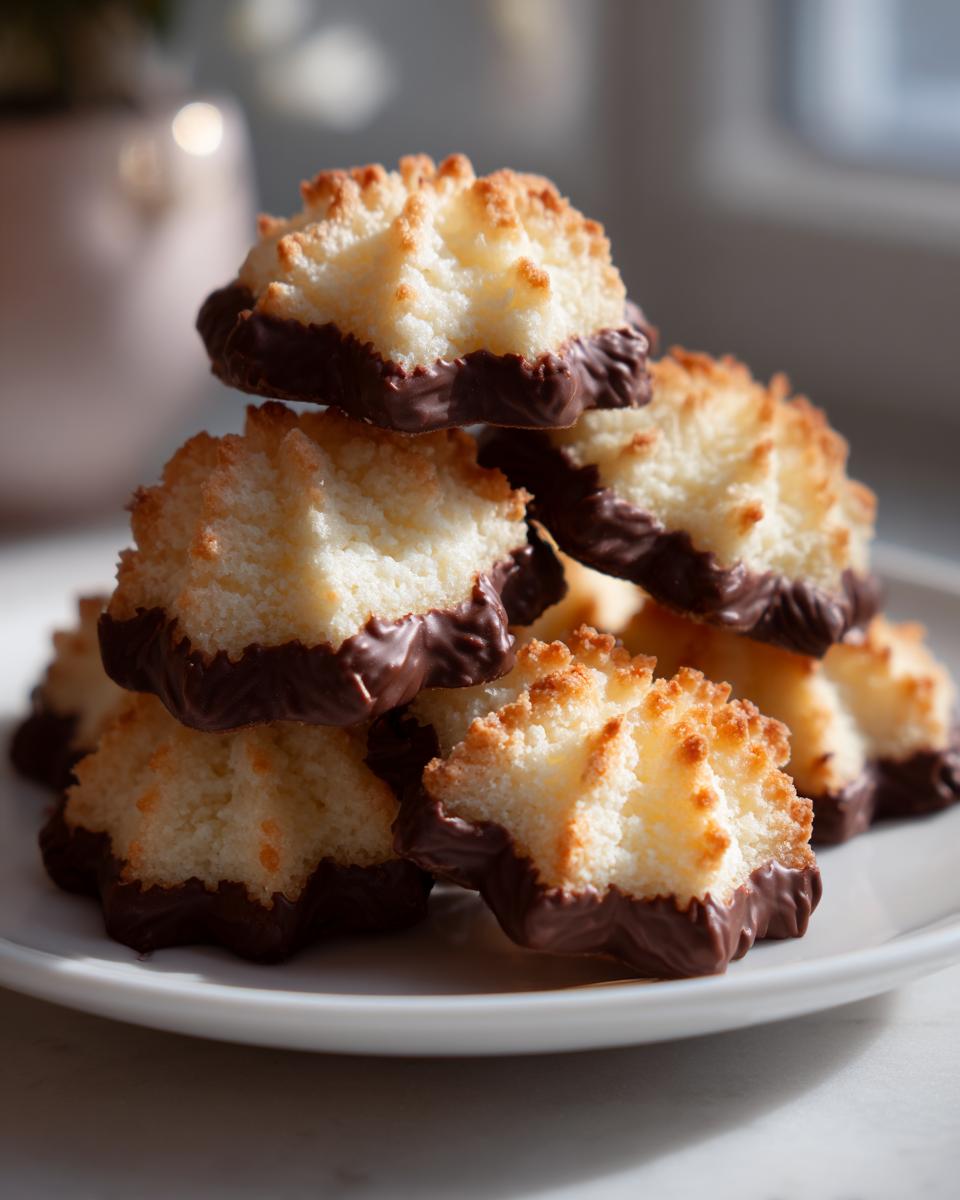
These finishing touches take your basic dough and turn it into that gorgeous platter of Authentic Italian Desserts you see in the window. If you’re feeling adventurous, check out this simple Italian Butter Cookie Recipe for another angle on the process!
- For the chocolate-dipped cookies: Once fully cooled, gently dip half of each cookie—straight on—into your melted semi-sweet chocolate. Lay them back on fresh parchment paper and let that chocolate set up completely at room temperature.
- For the jam-filled cookies: This is such a lovely way to use your raspberry jam. Take two cooled cookies, spread a small teaspoon of jam onto the flat side of one, and gently press the other cookie on top to create a perfect sandwich. Don’t use too much jam, or it squishes out the sides!
Mia’s Expert Tips for Superior Italian Butter Cookies
Even though this recipe for italian butter cookies is straightforward, there are just a few things I learned over the years—especially when I was working in those busy farm-to-table spots—that take these from ‘good’ to ‘why don’t I ever get to eat cookies this good?’ Mastering these little nuances turns them into true classic Italian pastry.
The biggest thing I took away from recipe developing is balance. We want rich butter flavor, but we need structure, too. If you’re looking for another recipe that nails that rich fat content perfectly, you should check out my 3-ingredient butter cookies for comparison!
The secret to that ‘Melt in Your Mouth’ Texture
This is non-negotiable, folks: Room temperature butter is your best friend. If your butter is too cold, it won’t cream properly with the powdered sugar, and you won’t get those crucial air pockets that make the cookie light. If it’s too warm or greasy, the cookie spreads way too much in the oven. You want soft, but still cool. Also, please, for the love of all that is buttery, do not overbake them! These cookies are done when they look pale with just the faintest kiss of gold on the edges. Honestly, a minute too long and you’ll lose that signature tenderness!
Equipment Watch: Piping bags versus Cookie Presses
Most people associate these cookies with those fancy plungers—the cookie press. That is absolutely a fantastic tool if you have one because it ensures uniform size and shape, which is great for presentation. However, if you don’t own one, don’t panic! We made these work perfectly well using just a piping bag fitted with a sturdy star tip throughout my professional recipe testing. You can also press the dough into small logs or balls by hand if piping seems fiddly. If you roll them into balls, just gently flatten them slightly with a fork before they go into the oven. For a peek at someone who nails the bakery presentation, take a look at this gorgeous batch from Our Salty Kitchen.
Flavor Adjustments for a New Twist
The almond extract is key for that traditional feel, but I know some of you aren’t fans! You can easily swap that out. Maybe you want a brighter flavor? Try adding the zest of one lemon when you add the vanilla. If you are making these for a holiday spread, sometimes I’ll add just a tiny pinch of espresso powder to the base dough to give it a sophisticated, slightly bitter counterpoint to the sweetness. It’s a small change, but it adds amazing depth to the overall flavor!
Variations on Classic Italian Butter Cookies
The foundation of these italian butter cookies—all that butter and sugar—is just the start. What I love most about this dough is how beautifully it accepts flavor variations without losing that essential melt-in-your-mouth texture we worked so hard to achieve. It’s honestly a very forgiving base for easy Italian baking, making it perfect for creating a fun, diverse platter, especially when you’re assembling your holiday trays. Imagine mixing it up to create unique Christmas Italian Cookies!
If you’re looking for other ways to bring bright, zesty flavors to your cookie game, you have to try my recipe for lemon crinkle cookies. It uses citrus in a totally different way, but the bright flavor is irresistible.
Swapping Out the Nutty Notes
That little bit of almond extract is what many folks associate with that true bakery-style flavor, but if nuts aren’t your thing, swapping it out is simple. You can replace the 1/4 teaspoon of almond extract with an equal amount of extra vanilla extract for a richer, straightforward vanilla butter cookie taste. Or, for something completely different, try adding the finely grated zest of one small lemon right along with your vanilla. It gives the cookie a beautiful, subtle perfume that pairs wonderfully with coffee.
Adding Dark Chocolate and Espresso Depth
Since we already handle the chocolate dipping as an optional step, why not bake the chocolate flavor right into the dough itself? For a sophisticated take on these classic treats, try this: For every batch of dough, whisk in one tablespoon of unsweetened cocoa powder—sifted, please!—along with your flour mixture. This creates a wonderful chocolate cookie base.
If you want to keep the vanilla flavor but add a little kick—perfect for those post-dinner coffee pairings—try adding 1/2 teaspoon of finely ground espresso powder to your dry ingredients. It doesn’t make the cookie taste like coffee, but it deepens the overall flavor profile wonderfully. It adds such a complexity to that rich butter flavor!
Creating Colorful Holiday Spritz Variations
Because this dough is so manageable, you can easily divide it into two or three small bowls and color each portion. I like to keep one bowl white (vanilla), one bowl lightly tinted pink or red (maybe with a tiny drop of food coloring or a teaspoon of strawberry powder), and one bowl that I’ve made into that chocolate version mentioned above. This is fantastic for making a visually impressive platter of traditional Italian treats for Christmas!
Serving Suggestions for Your Italian Butter Cookies Recipe
Now that you’ve gone to the effort of making truly authentic Italian desserts that look and taste like they came straight from an artisan bakery, how should you serve them? My family has such strong traditions around these cookies, especially once the weather cools down and the holidays approach. They look beautiful stacked high on a tiered platter when we host family!
These are the ultimate coffee pairing desserts, bar none. The rich, buttery base just sings next to a strong espresso, a creamy latte, or even just a simple cup of hot Italian roast coffee. When I’m not eating them standing over the cooling rack, I usually set up a little station where friends can dip their cookies into their mugs. It’s heavenly!
If you are looking for a rich, decadent partner to these delicate cookies, you absolutely have to try my recipe for easy chocolate mousse. The mousse is dark and intense, offering a perfect contrast to the pure vanilla flavor in our tender butter cookies. It’s a showstopper dessert combo!
The Perfect Holiday Gifting Solution
Honestly, these homemade butter cookies make the best presents because they feel so personal and luxurious, but we know how easy the base dough is! Mix and match your dipped and jam-filled ones and pack them into small cellophane bags, tied with a pretty ribbon. They are instant edible gifts.
For a really classic presentation, especially when grouping these with other traditional Italian treats, I like to use small, flat boxes lined with decorative wax paper. You can fit quite a few cookies in there, and because they are sturdy little things, they travel wonderfully. They’re a million times better than any store-bought tin!
Pairing with Tea and Post-Dinner Treats
While coffee is my go-to, these vanilla butter cookies are fantastic with tea, too. A strong black tea, like an Earl Grey, cuts through the richness of the butter beautifully. And honestly, they require almost no extra work. You just pipe, bake until barely golden, and you have sophisticated tea party fare!
If you are looking for other holiday recipes that bring that beautiful, crisp texture, you should check out what the folks at Recipestasteful are doing with similar buttery spritz ideas. It’s always fun to see how others interpret these classic shapes!
Storage and Keeping These Italian Butter Cookies Fresh
If you manage to have any leftover—which, let’s be honest, is often the hardest part of this whole process—storing these italian butter cookies correctly is crucial if you want them to maintain that fresh, melt-in-your-mouth tenderness.
The simplest rule I can give you is consistency. Since these cookies are high in fat and sugar, they hold up quite well, provided you keep the air out! My notes always emphasize that these store beautifully, which is why they are such a fantastic cookie for making ahead of time for holiday events, or even just for the week ahead when you need a reliable quick treat.
The Airtight Container Rule
You absolutely must use an airtight container. If you stick them in a bag that isn’t fully sealed or a container with a lid that doesn’t close tight, they will start to absorb moisture from the air, and poof—that delicate, crisp-yet-tender texture disappears. You want them sealed tight to preserve that amazing, rich butter flavor!
Layering them is the tricky part, especially if you’ve dipped some in chocolate or sandwiched some with jam. If you’re stacking them, you need a barrier between the layers. I use small squares of parchment paper or wax paper to separate the layers. This prevents them from sticking together, especially the jam-filled ones, and keeps your chocolate coating looking sleek and professional. Chocolate-dipped cookies are much happier staying single layer, but if you must stack, use that paper!
How Long Do These Tender Butter Cookies Last?
Honestly, if they are stored correctly in a cool, dry place—like your pantry—you can expect them to stay absolutely delicious for about a week. I’ve found day four or five is often when they feel the *most* integrated in flavor, even though they taste wonderful right out of the oven!
If you are making a huge Christmas haul and need them to last longer than a week, you can freeze them. Make sure they are completely cooled—and if they are dipped or filled, make sure that chocolate/jam is totally set and hard. Wrap the stack tightly in plastic wrap first (two layers is best), and then tuck them into a freezer-safe bag or container. They should last up to two months this way. When you’re ready to enjoy them, just let them thaw slowly on the counter inside that wrapping so condensation doesn’t make them soggy—that’s how we keep them like fresh homemade butter cookies!
Frequently Asked Questions About Homemade Butter Cookies
It’s totally normal to have a few questions when you’re trying to achieve that perfect bakery look! Don’t worry if you are new to this style of piecing cookies together; that’s why I’m here. We want these vanilla butter cookies to be flawless, and sometimes a little troubleshooting makes all the difference in your easy Italian baking adventures.
Can I make the dough for these Italian Butter Cookies ahead of time?
Yes, you absolutely can! The dough is wonderful for making ahead. Once you mix it up (following step 3), wrap the dough tightly in plastic wrap—make sure it’s double-wrapped—and keep it in the fridge for up to three days. When you’re ready to bake, just let it sit on the counter for about 15 to 20 minutes to soften up just enough to pipe easily. You don’t want it warm, just pliable enough to move through your piping tip!
Why are my cookies spreading too much?
Ah, the dreaded spread! This is nearly always about temperature control, and it’s the number one thing that stops you from getting those gorgeous, high-sided swirls that look like bakery style cookies. If your cookies are spreading flat, your butter was likely too warm when you creamed it with the sugar, or perhaps it was too warm when the dough went into the oven. Make sure your oven is preheated fully, and if you notice the dough getting soft while you’re piping, pop the tray into the fridge for 10 minutes before baking. A cold tray hitting a hot oven helps lock in the shape immediately!
How can I ensure I get that rich butter flavor without overbaking?
This is the million-dollar question for any buttery treat! We are aiming for pale and tender, not brown and crisp. The key here is watching the edges, not the tops. Once you see the very edges of the cookies turn the *tiniest* shade of pale gold—I mean barely golden—pull them immediately. They will continue to set up on the hot baking sheet for about five minutes after they leave the oven. If you wait until the tops look golden brown, you’ve gone too far and will have lost that glorious melt-in-your-mouth quality. If you want some tips on making a perfect stabilizing frosting for other baked goods, check out my recipe for stable vanilla buttercream!
What is the proper ratio of almond to vanilla extract?
We use just a little bit of almond extract (1/4 tsp) because it’s potent and gives that signature *zing* that screams Italian pastry shop. If you accidentally use too much, it can taste medicinal! If you’re nervous about using almond entirely, stick to the full teaspoon of vanilla extract and add the zest of half a non-sprayed lemon instead. That keeps the flavor profile bright and delicious. For more classic ideas, see how the folks at Best Cookie Recipe handle their classic versions.
Share Your Italian Butter Cookies Creations
Alright, now the magic sits in your hands! I’ve given you all my best secrets, from getting that room-temperature butter just right to perfecting the chocolate dip. But the story of this recipe doesn’t end with me—it starts when you bring them out of your own oven. I absolutely get so much joy seeing your bakes!
I’d love for you to come back here and leave a rating. Did you go for the jam-filled assembly, or are you a strict chocolate-dipped cookie fan? Let me know down in the comments which version of these italian butter cookies you loved making the most!
If you’re sharing pictures on social media—and you totally should, because these are gorgeous—tag me so I can marvel at your handiwork! Seeing your photos of these tender butter cookies on your holiday plates or stacked up ready for coffee truly makes my day. Use those photos on your next batch of the best chocolate chip cookies too, just so I know you’re well-stocked for dessert!
Happy baking, my friends. I truly hope these bring a little taste of that authentic Italian bakery charm right to your table!
PrintAuthentic Bakery-Style Italian Butter Cookies
Make rich, tender Italian Butter Cookies at home that melt in your mouth. This recipe yields bakery-style quality and is perfect for holidays or enjoying with coffee.
- Prep Time: 25 min
- Cook Time: 12 min
- Total Time: 37 min
- Yield: About 3 dozen 1x
- Category: Dessert
- Method: Baking
- Cuisine: Italian
- Diet: Vegetarian
Ingredients
- 1 cup unsalted butter, softened
- 1 cup powdered sugar
- 1 large egg yolk
- 1 teaspoon vanilla extract
- 1/4 teaspoon almond extract
- 2 cups all-purpose flour
- 1/4 teaspoon salt
- 1/2 cup granulated sugar (for dipping/topping, optional)
- 4 ounces semi-sweet chocolate, melted (for dipping, optional)
- 1/2 cup raspberry jam (for filling, optional)
Instructions
- Beat the softened butter in a large bowl until creamy. Add the powdered sugar and beat until light and fluffy.
- Mix in the egg yolk, vanilla extract, and almond extract until fully combined.
- In a separate bowl, whisk together the flour and salt. Gradually add the dry ingredients to the wet ingredients, mixing on low speed until just combined into a soft dough. Do not overmix.
- Transfer the dough to a piping bag fitted with a large star tip (like a Wilton 1M) for swirls or a plain round tip for ‘cat’s tongue’ shapes.
- Pipe small rosettes or strips onto baking sheets lined with parchment paper. If making jam-filled cookies, pipe small rounds.
- If desired, sprinkle the tops with granulated sugar before baking.
- Bake in a preheated oven at 350°F (175°C) for 10 to 12 minutes, or until the edges are lightly golden. These cookies should remain pale.
- Let the cookies cool on the baking sheet for 5 minutes before transferring them to a wire rack to cool completely.
- For chocolate-dipped cookies, dip the cooled cookies halfway into melted semi-sweet chocolate. Let the chocolate set on parchment paper.
- For jam-filled cookies, sandwich two cooled cookies together using about 1/2 teaspoon of raspberry jam.
Notes
- For the best ‘melt in your mouth’ texture, use room temperature butter and do not overbake the cookies.
- You can substitute almond extract with more vanilla or use lemon zest for a different flavor profile.
- These cookies store well in an airtight container at room temperature for up to one week.
- If you do not have a piping bag, you can press the dough through a cookie press or shape small logs by hand.
Nutrition
- Serving Size: 1 cookie
- Calories: 120
- Sugar: 8g
- Sodium: 35mg
- Fat: 7g
- Saturated Fat: 4g
- Unsaturated Fat: 3g
- Trans Fat: 0g
- Carbohydrates: 14g
- Fiber: 0g
- Protein: 1g
- Cholesterol: 25mg