

There are meals, and then there are *centerpiece* meals—the ones that stop conversation when they hit the table and make everyone feel instantly ready for a celebration. For me, that showstopper is always the **rib roast**. I know what you’re thinking: Prime Rib sounds intimidating, right? Expensive meat, high stakes, what if I mess up that perfect medium-rare color?
Well, my friends, that hesitation ends today. This Cooking by Mia method is genuinely the Best Foolproof Herb-Crusted Prime Rib Roast you will ever try. We’re layering on garlic and herbs, using a reliable roasting temperature guide, and I promise you’ll nail that juicy, melt-in-your-mouth center every single time. I developed this technique through countless hours in professional kitchens and my own home testing to make sure complex comfort food is accessible to you.
- Why This Herb-Crusted rib roast Recipe Guarantees Success (E-E-A-T Focus)
- Essential Ingredients for Your Showstopper rib roast
- How to Prepare the Herb Crusted rib roast
- Oven Roasted rib roast Instructions: Sear and Slow Roast Method
- Determining Doneness for Your rib roast
- The Non-Negotiable Resting Period for a Juicy Beef Roast
- Expert Tips for Carving a rib roast Like a Professional
- Frequently Asked Questions About Cooking Your rib roast
- Serving Suggestions for Your Holiday roast Dinner
Why This Herb-Crusted rib roast Recipe Guarantees Success (E-E-A-T Focus)
Making an incredible standing rib roast shouldn’t feel like winning the lottery. That’s why I perfected this technique over years, ensuring it’s genuinely foolproof. We use a two-stage temperature method that delivers both that deeply flavorful crust and an edge-to-edge tender beef roast. This isn’t guesswork; it’s science I learned during my time as a recipe developer, which is why I feel confident linking you to other reliable resources like this modern low-and-slow technique. Every home cook deserves a reliably juicy beef roast.
The secret sauce to this method lies in patience with high heat, followed by a steady, controlled roast. I’ve tested many ways to cook this expensive cut, and this sequence is the one that consistently yields the results I expect from a high-end restaurant experience.
Achieving the Perfect Medium Rare rib roast Every Time
The absolute key to perfection here is your meat thermometer—trust an instrument over your oven clock, always! For that dream perfect medium rare roast, you must start checking the temperature early and pull it out *before* you think it’s quite done. Remember, that roast continues cooking while it rests, which is where those final internal degrees tick up to perfection. Mastering this temperature control is the single most important skill you’ll gain from this guide.
Essential Ingredients for Your Showstopper rib roast
You only need a few stellar ingredients to create a showstopper, but make sure you grab the best quality you can find, especially for the meat itself! Since this rib roast is the star, its quality dictates the final outcome. Don’t skimp here; this is a special occasion dish, after all. I’ve broken the components down so you know exactly what goes where.
When you’re shopping, look for a Standing Rib Roast, sometimes called a Prime Rib. Three ribs usually yield a perfect size for most gatherings.
For the Garlic Herb Butter Rub
- ½ cup unsalted butter, softened (Remember, real butter makes a huge difference in browning!)
- 6 cloves garlic, minced (Seriously, use fresh, not the jarred stuff if you can!)
- 2 tablespoons fresh parsley, chopped
- 1 tablespoon fresh rosemary, chopped
- 1 tablespoon fresh thyme, chopped
For Seasoning the rib roast
- 1 (5-7 lb) standing rib roast (prime rib), 3 ribs recommended
- 3 tablespoons kosher salt
- 2 tablespoons freshly ground black pepper
- 1 tablespoon dried thyme
- 1 tablespoon dried rosemary
- 1 tablespoon garlic powder
How to Prepare the Herb Crusted rib roast
We need to get this gorgeous rib roast ready for its close-up! Prep work is where we earn our results here, especially because we want that crust to be truly fantastic and stick perfectly. My biggest tip—and this is something my professional training really drilled into me—is making sure the meat is relaxed before it hits a hot oven. You simply can’t rush this part!
If you try to season a cold roast straight from the fridge, you end up with uneven cooking, and nobody wants a weird grey band around the outside, right? That’s why tempering is key! For more foolproof tips on getting that crust just right, check out this great foolproof method.
Tempering and Drying the Beef
First things first: take the roast out of the fridge a good two to three hours before you plan to start cooking. I used to think that was overkill, but I learned the hard way that letting that cold leach out ensures even cooking—it’s vital for getting that even, beautiful internal color. Once it’s tempered, you absolutely must pat the entire surface bone-dry with paper towels. Moisture is the enemy of a good crust; if the surface is wet, the salt and spices steam instead of searing.
Creating the Flavorful Garlic Butter
While the meat is warming up, whip up that incredible garlic herb butter. This is where all that deep, savory flavor comes from! In a bowl, mix your very soft butter with the minced garlic and all those lovely fresh herbs—parsley, rosemary, and thyme. You need to mix this until it’s completely smooth and uniform. I always make sure I use my hands or a sturdy spoon until there are no lumps of butter left. This paste spreads like a dream and locks in moisture while providing the perfect vehicle for the dry seasonings.
Oven Roasted rib roast Instructions: Sear and Slow Roast Method
Okay, we’ve got our perfectly tempered, seasoned, and buttered rib roast ready for the oven. This is where my foolproof method really shines, and it’s what brings you that gorgeous oven roasted rib roast look without all the stress. We are using a two-step temperature approach to get the best of both worlds: a dark, rich crust and a perfectly cooked interior. Before you put this beauty in, crank that oven up—we need serious heat to start!
Place the roast bone-side down (if applicable) on a rack in your roasting pan. Don’t skip the rack; airflow is important! We want to sear that herb butter right onto the meat surface. For the exact times and temperatures you need, remember to rely on your roast temperature guide, but the initial blast of heat is non-negotiable for flavor development.
The Crucial Temperature Reduction Step
When your oven hits 450°F (232°C), gently slide that roast in. Let it sear for exactly 15 minutes. Trust me on this timing; this initial high heat caramelizes those crust flavors beautifully. But here’s the pivot point of this method: Immediately after those 15 minutes are up, reduce the oven temperature down to 325°F (163°C). Do not open the oven door when you’re adjusting the temperature! You want to keep all that wonderful heat trapped inside generating steam and tenderness. From this point on, we let the lower temperature do the patient work until we near our target pull temperature.
Determining Doneness for Your rib roast
This is probably the part that throws most people off when cooking a big, beautiful rib roast—knowing exactly when to pull it out of the oven. I cannot stress this enough: invest in a good, instant-read meat thermometer! It’s not just a recommendation; it’s essential kitchen hardware when dealing with an expensive cut like this. Forget the time estimates you see everywhere; every oven and every roast is slightly different in density and size.
My goal for this recipe is always medium-rare, and I use my thermometer like a seasoned chef to guarantee it. You’ll want to start checking about an hour before the recipe *says* it should be done. For more guidance on using your thermometer correctly without losing all that lovely heat, check out the detailed tips in this great oven method guide. Remember, we are pulling it slightly early!
Here is the guide for pulling your roast based on your desired final outcome after resting:
- Rare: Pull the roast when the thermometer reads 120°F (49°C).
- Medium Rare (Recommended!): Pull the roast when the thermometer reads 125°F (52°C).
- Medium: Pull the roast when the thermometer reads 132°F (56°C).
The Non-Negotiable Resting Period for a Juicy Beef Roast
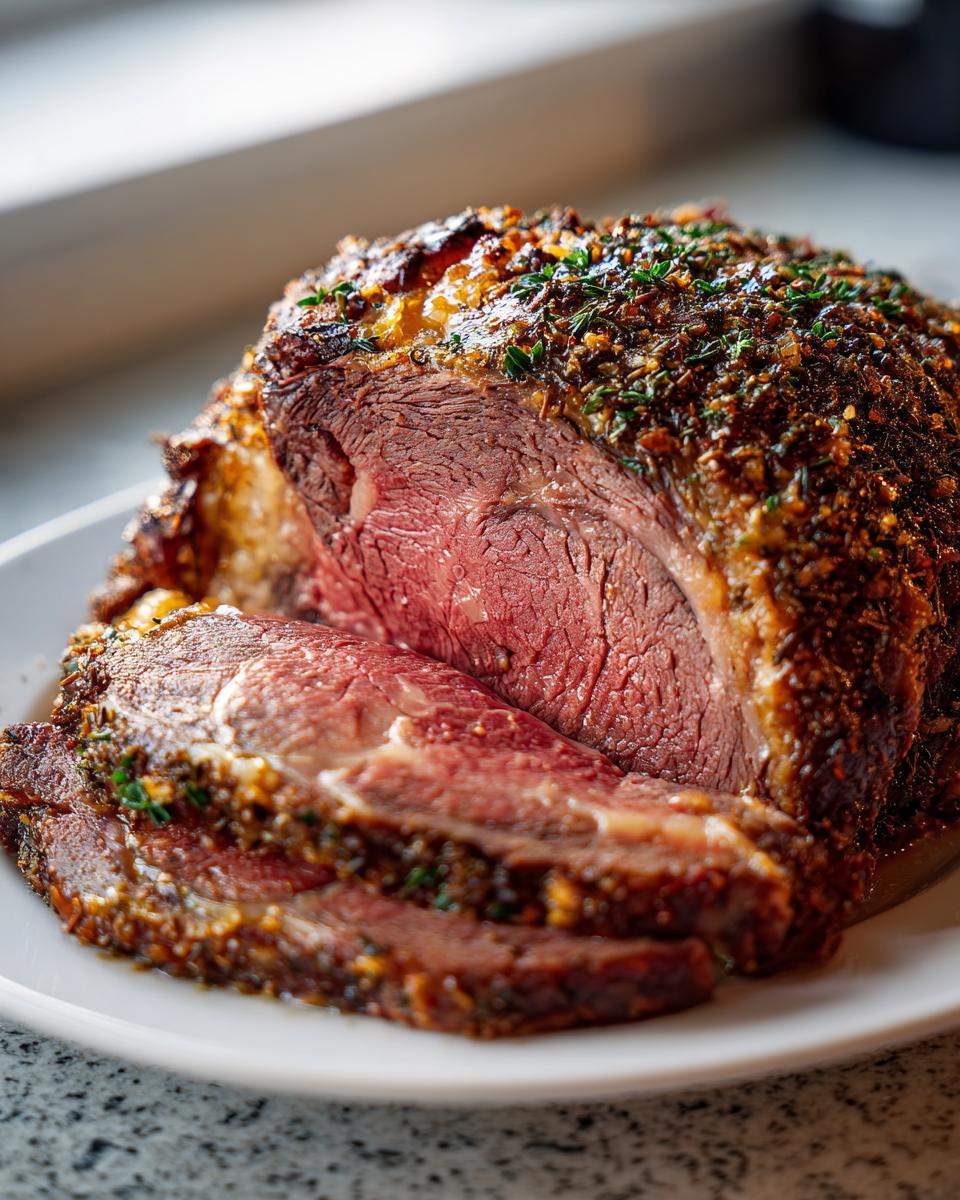
Okay, you’ve pulled that glorious meat out of the oven at 125°F, and it smells divine. Now, the hardest part of this entire process begins: walking away! Resist the urge to carve immediately. I know, I know, you want to see that perfect pink center and start slicing right away. But if you cut into that roast now, all those beautiful juices we worked so hard to keep inside are going to rush out onto your cutting board, leaving you with a dry centerpiece.
This resting step—20 to 30 minutes, minimum—is pure science, and it’s the final step for ensuring a truly juicy beef roast. When the meat is hot, the muscle fibers squeeze tight, trapping the moisture. Resting allows those fibers to gently relax and essentially reabsorb all those liquids back into the meat. Think of it like a sponge slowly soaking up water.
Tent that roast loosely with foil—don’t wrap it tightly, or you’ll sweat off the amazing crust we just spent an hour building! I often use this downtime to finish up my sauce or chop some fresh herbs for garnish. If you’re looking for inspiration on how professional chefs treat their roasts post-oven, I found some fantastic professional pointers right here. Twenty minutes later, and you’ll be slicing into the most tender meat you’ve ever made!
Expert Tips for Carving a rib roast Like a Professional
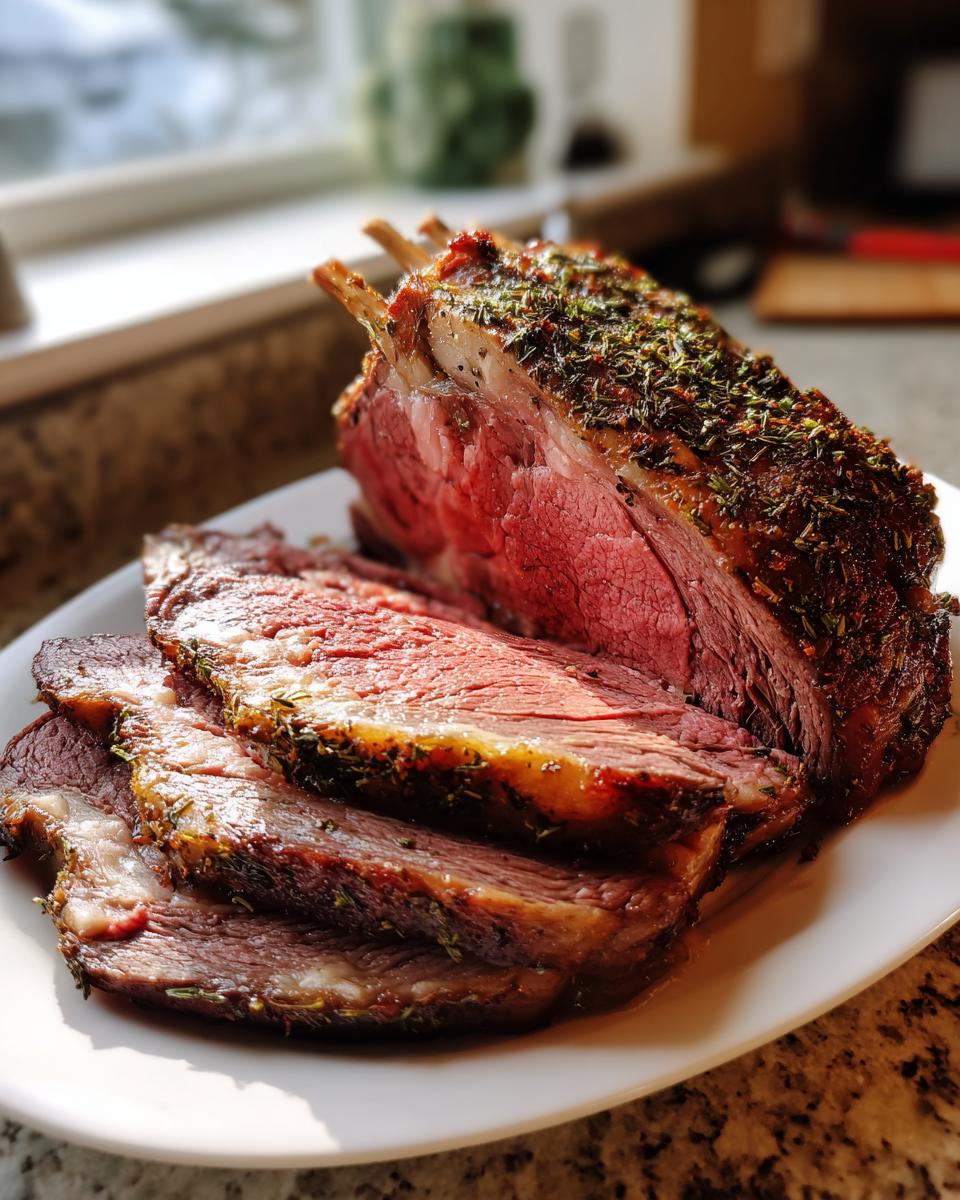
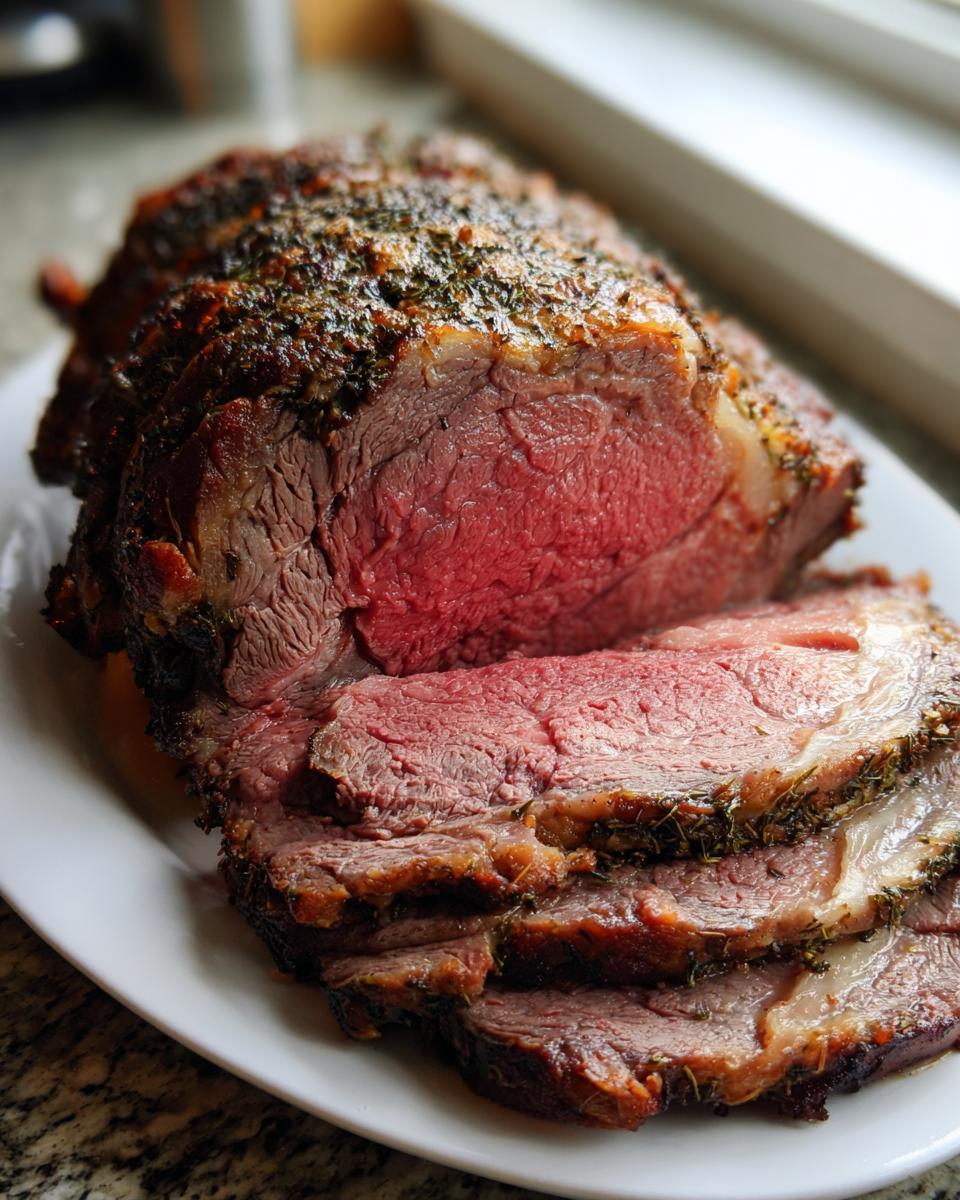
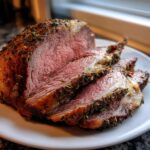
Now for the grand finale of our perfect oven prime rib roast! The aroma alone should tell you this is going to be heavenly. But carving a giant hunk of meat can make anyone nervous. Hey, I get it; after all that work, you don’t want to botch the presentation. Remember to take off any twine holding the bones in place first. If you tied the bones back on before roasting, carefully slice that string away so the bones are free.
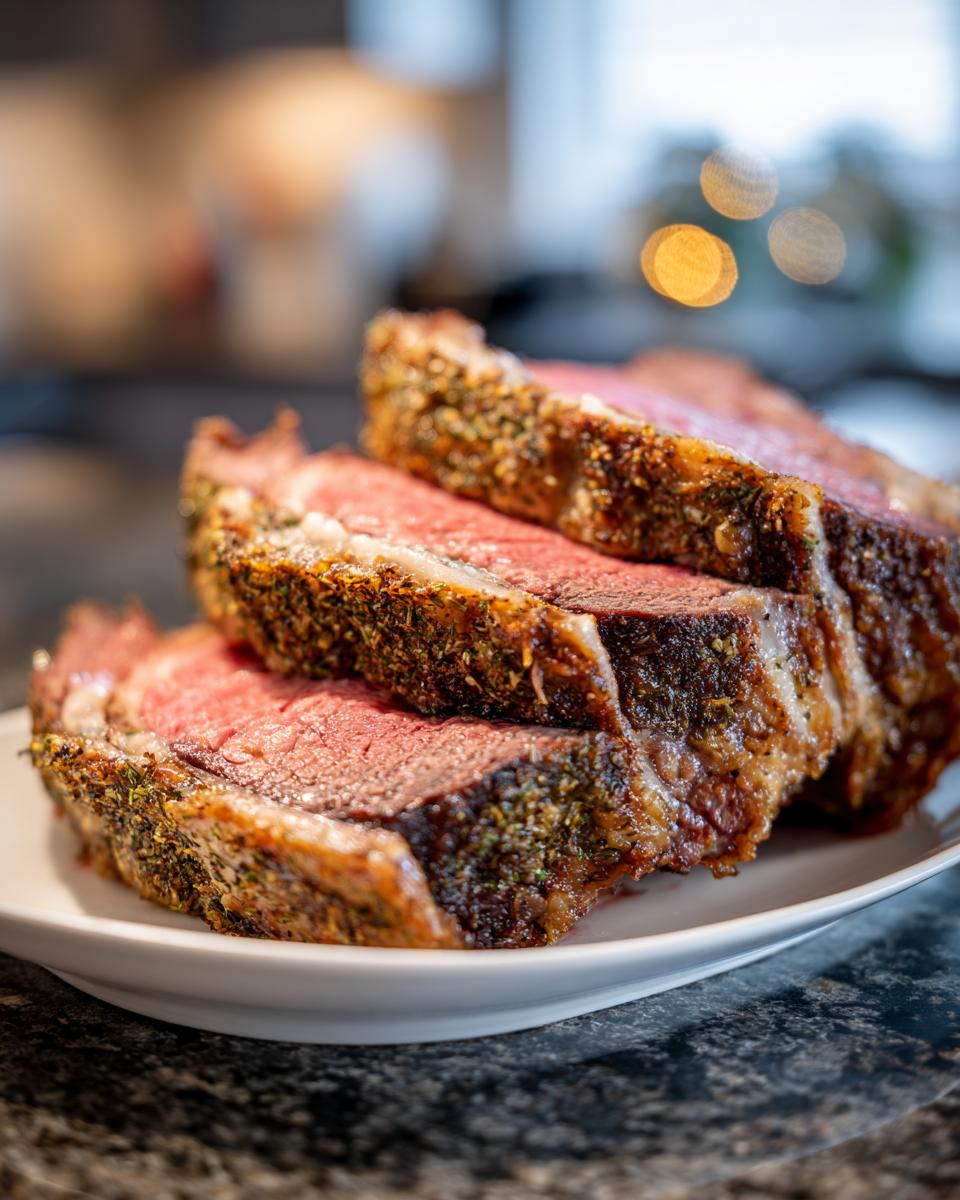
The trick to beautiful slices when carving a rib roast is getting a long, sharp knife. You want to slice *between* the bones, not try to cut through them! Use your knife to gently follow the natural curve where the meat meets the bone. Once the section of roast is free of the bones, flip it over—big side up—and slice against the grain into beautiful, thin pieces. This unlocks that melt-in-your-mouth tenderness we worked so hard for!
Frequently Asked Questions About Cooking Your rib roast
I know you might still have a few lingering questions, and when you’re dealing with a gorgeous cut of beef like this, you absolutely should ask! It’s my job, as someone who’s spent years perfecting these techniques, to make sure you feel completely confident before that big dinner. Don’t worry about sounding silly; these questions are often the difference between a good roast and the best prime rib ever!
Can I use a bone-in rib roast instead of a standing rib roast?
That’s a great question about terminology! Honestly, they are usually the same thing—a ribeye roast is just another name for a standing rib roast when the bones are left in (which I always recommend for extra flavor and moisture). When you buy a prime rib, you’re getting those prime ribeye sections attached to the bones. If you get the bones already taken out, you have a boneless roast, which is fine, but you might need to adjust your cooking time slightly since the bone acts as an insulator.
What is the best way to reheat leftover rib roast?
Oh, leftovers! That beautiful roast tastes amazing the next day, too. The absolute worst move is nuking a slice in the microwave; it dries it out instantly! For the best result, you want to use low, moist heat. I like to take the slices, place them in a baking dish, and pour just a tiny bit of beef broth or au jus in the bottom—maybe an eighth of an inch deep. Tent it tightly with foil and warm it gently in a 300°F oven until just heated through. If you want to see some alternative methods like using a slow cooker for moisture, I found some helpful advice over at A Spiced Life.
Do I need to sear my rib roast if I am using the low and slow method?
That is the beauty of options! If you choose the low and slow variation mentioned in the notes—where you start the oven at 250°F—you *do not* need that initial high-heat sear. The sear is specifically for the high-heat method we detailed above because it sets that crust quickly before the meat cooks through slowly. If you go low and slow, you bake at that low temperature until you are about 15 degrees shy of your target, and *then* you crank the heat to 450°F for those final 15 minutes to build the crust on the already perfectly cooked interior. Both ways work wonders for a tender beef roast!
Serving Suggestions for Your Holiday roast Dinner
A magnificent centerpiece like this deserves sides that shine right alongside it! When you’ve got a rich, savory roast as the main event, you need those accompaniments to balance the plate. I always default to classic, comforting flavors. Rich potatoes are a must; you absolutely have to try my recipe for creamy baked mashed potatoes—they never fail to get rave reviews!
For something green, I love adding a textural contrast. If you’re having a slightly more Southern feel, my silky collard greens are fantastic, soaking up all those delicious pan drippings. Don’t forget a bright, tart element, like a horseradish cream sauce, to cut through all that richness!
PrintThe Best Foolproof Herb-Crusted Prime Rib Roast (Standing Rib Roast)
Make an impressive, tender, and juicy standing rib roast with this foolproof oven method. This recipe features a savory garlic herb butter rub for a flavorful crust, perfect for your holiday centerpiece.
- Prep Time: 25 min
- Cook Time: 2 hr 30 min
- Total Time: 3 hr 10 min
- Yield: 6 servings 1x
- Category: Main Course
- Method: Oven Roasting
- Cuisine: American
- Diet: Low Fat
Ingredients
- 1 (5-7 lb) standing rib roast (prime rib), 3 ribs recommended
- 3 tablespoons kosher salt
- 2 tablespoons freshly ground black pepper
- 1 tablespoon dried thyme
- 1 tablespoon dried rosemary
- 1 tablespoon garlic powder
- 1/2 cup unsalted butter, softened
- 6 cloves garlic, minced
- 2 tablespoons fresh parsley, chopped
- 1 tablespoon fresh rosemary, chopped
- 1 tablespoon fresh thyme, chopped
Instructions
- Remove the rib roast from the refrigerator 2 to 3 hours before cooking to allow it to come to room temperature. Pat the roast completely dry with paper towels.
- Prepare the herb butter: In a small bowl, combine the softened butter, minced garlic, fresh parsley, fresh rosemary, and fresh thyme. Mix until fully incorporated.
- Season the roast: Sprinkle the entire surface of the roast evenly with kosher salt, black pepper, dried thyme, dried rosemary, and garlic powder. Rub the seasoning mixture into the meat.
- Spread the herb butter evenly over the entire surface of the roast.
- Preheat your oven to 450°F (232°C). Place the roast, fat-side up, on a roasting rack set inside a sturdy roasting pan.
- Sear the roast: Place the roast in the preheated 450°F oven and cook for 15 minutes. This high heat helps create a flavorful crust.
- Reduce the temperature: After 15 minutes, reduce the oven temperature to 325°F (163°C). Do not open the oven door.
- Continue roasting: Cook at 325°F until the internal temperature reaches your desired doneness (see temperature guide below). Use a reliable meat thermometer inserted into the thickest part of the roast, avoiding bone.
- Rest the roast: Once the target temperature is reached, immediately remove the roast from the oven. Tent it loosely with aluminum foil and let it rest on a cutting board for at least 20 to 30 minutes before carving. Resting is essential for a juicy beef roast.
- Carve the rib roast: Remove the twine. If the bones were tied back, remove the string holding them. Slice between the bones to separate the roast into individual ribeye roast portions or slice thinly against the grain for serving.
Notes
- For a perfect medium rare roast, remove the roast when the thermometer reads 125°F (52°C). The temperature will rise during resting.
- Temperature Guide (Remove from oven at this temperature): Rare: 120°F (49°C); Medium Rare: 125°F (52°C); Medium: 135°F (57°C).
- If you prefer a low and slow method, start the oven at 250°F (121°C) and cook until the internal temperature is 15 degrees below your target, then increase the heat to 450°F (232°C) for the final 15 minutes to brown the crust.
Nutrition
- Serving Size: 6 oz cooked meat
- Calories: 450
- Sugar: 0
- Sodium: 450
- Fat: 30
- Saturated Fat: 15
- Unsaturated Fat: 15
- Trans Fat: 1
- Carbohydrates: 0
- Fiber: 0
- Protein: 40
- Cholesterol: 150