
There is something incredibly special about a dessert that tastes exactly like childhood – familiar, comforting, and made with real love. For me, that’s the Old Fashioned banana cream pie From Scratch. Forget those powdery, instant fillings you grab on a busy afternoon; this recipe is about creating that velvety, soul-soothing texture that only comes from taking the time to cook a proper vanilla custard.
Back in my kitchen, inspired by my mother’s Sunday spreads, every perfect slice of this banana cream pie reminds me that patience pays off. With my background in Food Science, I can tell you exactly why the fresh ingredients matter, but more importantly, I can guide you through making it successfully every single time. If you want the true, classic experience, you need to try this homemade version. You can read a bit more about my culinary journey right here.
- Why This Old Fashioned banana cream pie is a Family Favorite Dessert
- Ingredients for Homemade banana cream pie From Scratch
- Preparing the Flaky Crust for Your banana cream pie
- Making the Velvety Custard: The Heart of the banana cream pie
- Assembling the Classic banana cream pie Recipe
- Topping Your banana cream pie with Fresh Whipped Cream
- Storage & Make Ahead Pie Tips for Your banana cream pie
- Frequently Asked Questions About banana cream pie
- Nutritional Information for this Creamy Banana Dessert
- Nutritional Information for this Creamy Banana Dessert
Why This Old Fashioned banana cream pie is a Family Favorite Dessert
When you’re seeking that Classic Banana Cream Pie Recipe, you’re usually looking for something that tastes like it came straight from a celebrated bakery, but made by someone who cares. That’s what we have here!
- It starts with a stunning, flaky crust that shatters just right—no soggy bottoms here!
- The custard filling is incredibly dense without being heavy; we’re talking pure velvet.
- It relies only on fresh bananas, ensuring that bright, authentic fruit flavor shines through.
If you browse my collection of favorite dessert recipes, you’ll see that classics like this are my specialty!
Achieving the Best banana cream pie Filling Texture
The secret to that utterly luxurious mouthfeel isn’t luck; it’s chemistry! We rely on a careful blend of egg yolks and cornstarch when cooking the milk mixture. The yolks bring the richness and color we absolutely need, while the cornstarch locks everything in place, ensuring stability. When you whisk it right on the stovetop, you create a structure that chills into the smoothest, creamiest filling you’ve ever tasted.
Ingredients for Homemade banana cream pie From Scratch
Since we’re making this pie completely from scratch, we need quality ingredients for every layer. This isn’t the place to cut corners if you want that deep, authentic flavor! I’ve broken down exactly what you need below. Just make sure you have everything measured out before you start cooking the custard—it moves fast once it gets going!
- 1 recipe for double-crust pie dough (for a 9-inch pie)
- 4 large egg yolks
- 1/2 cup granulated sugar
- 1/4 cup cornstarch
- 1/4 teaspoon salt
- 2 cups whole milk
- 2 tablespoons unsalted butter
- 1 teaspoon vanilla extract
- 3 medium ripe bananas, sliced
- 2 cups heavy whipping cream
- 1/4 cup powdered sugar
- 1/2 teaspoon vanilla extract
Notes on Key Components for Your banana cream pie
I always get questions about substitutions, so let’s talk specifics right now. I know some of you might be looking for an Easy Banana Cream Pie or maybe a change in texture, but stick close to these notes for the best result when going Old Fashioned Banana Cream Pie!
- For the best flavor, use bananas that are ripe but still firm enough to slice without falling apart. If they’re too soft, they’ll turn to mush when the custard hits them.
- To make this a Southern Banana Pie variation, you can substitute 1/2 cup of the milk with evaporated milk for a richer custard. That little addition really boosts the creaminess!
- If you prefer a Nilla Wafer Crust Banana Pie, you can skip the pastry dough altogether! Just use 1 1/2 cups of finely crushed vanilla wafers mixed with 6 tablespoons of melted butter. Press that mixture firmly into the pie plate and chill it well instead of baking a pastry crust.
Preparing the Flaky Crust for Your banana cream pie
Okay, we have our star ingredients assembled, but for a truly Old Fashioned banana cream pie, we absolutely need that perfect foundation. We aren’t messing around with graham cracker dust here—though I do love a good substitute sometimes! For this from-scratch version, we are committing to a beautiful, flaky pastry shell.
Since everyone has *that one* pie crust recipe they swear by—whether it’s the one that uses lard for extra flakiness or one that calls for ice-cold butter—I’m letting you use your favorite double-crust dough recipe here. Just make sure you’re only preparing the bottom crust for our 9-inch pie plate. If you need a recipe that guarantees incredible flakiness and you want to learn my secrets for that perfect texture, you can check out my guide for the best flaky crust.
Blind-bake that shell according to your recipe’s instructions, making sure to properly weigh it down so it doesn’t puff up on you. This step is crucial! Once it comes out of the oven golden brown, you *must* let it cool completely before we even think about adding the bananas or the custard. Hot crust equals melty, runny filling, and trust me, we want firm, decadent slices of this amazing banana cream pie.
Making the Velvety Custard: The Heart of the banana cream pie
Alright, listen up, because this is where the magic really happens, and where my food science training really comes in handy! We are making the custard base for your banana cream pie from scratch, and it needs your full attention for about ten minutes. This step is what separates a good pie from the Best Banana Cream Pie Filling you can imagine—silky smooth, deeply flavored, and holding its shape perfectly.
First, grab a medium saucepan. In there, you’ll whisk together your egg yolks, the granulated sugar, cornstarch, and that tiny pinch of salt until they are beautifully incorporated and smooth. Don’t skimp on this mixing step; we want zero lumps sitting in there. Then, we slowly whisk in the cold milk until everything is homogenous.
Now, place that saucepan over medium heat. This is critical: you must stir constantly. I mean it—if you walk away, you’ll burn the bottom, and that taste will ruin the whole banana cream pie. Use a whisk or a sturdy wooden spoon and keep things moving for about 8 to 10 minutes until it thickens up like pudding and starts bubbling steadily. Once it hits that bubbling stage, you know the starch has activated correctly, creating that stable structure I love.
Immediately pull it off the heat! Stir in the butter until it melts right in, making it glossy, and then your teaspoon of vanilla. We need to halt the cooking process right away, so pour that hot custard into a separate bowl.
Custard Cooling Tip to Prevent Skin
Don’t you absolutely hate that rubbery skin that forms on top of pudding or custard when it cools? Me too! It ruins the smooth texture we worked so hard to build. So, here’s the trick my chef instructors hammered into us: as soon as the custard is in that chilling bowl, take a large sheet of plastic wrap and press it *directly* onto the surface of the custard. I mean press it down until it’s touching the filling everywhere. This blocks air contact, and ta-da—no skin forms!
Now, this creamy filling needs to chill for at least two hours, or until it’s truly cold and set firm. Once it’s thoroughly chilled, give it a good, vigorous whisk again before you layer it with the bananas. Trust me, beating that cold custard until it’s smooth and creamy again will make your final banana cream pie the creamiest dessert ever!
For more foundational baking tips, especially around sauces and bases, you can check out my favorite recipe for creamy ricotta egg toast—it shares some similar principles of smooth setting!
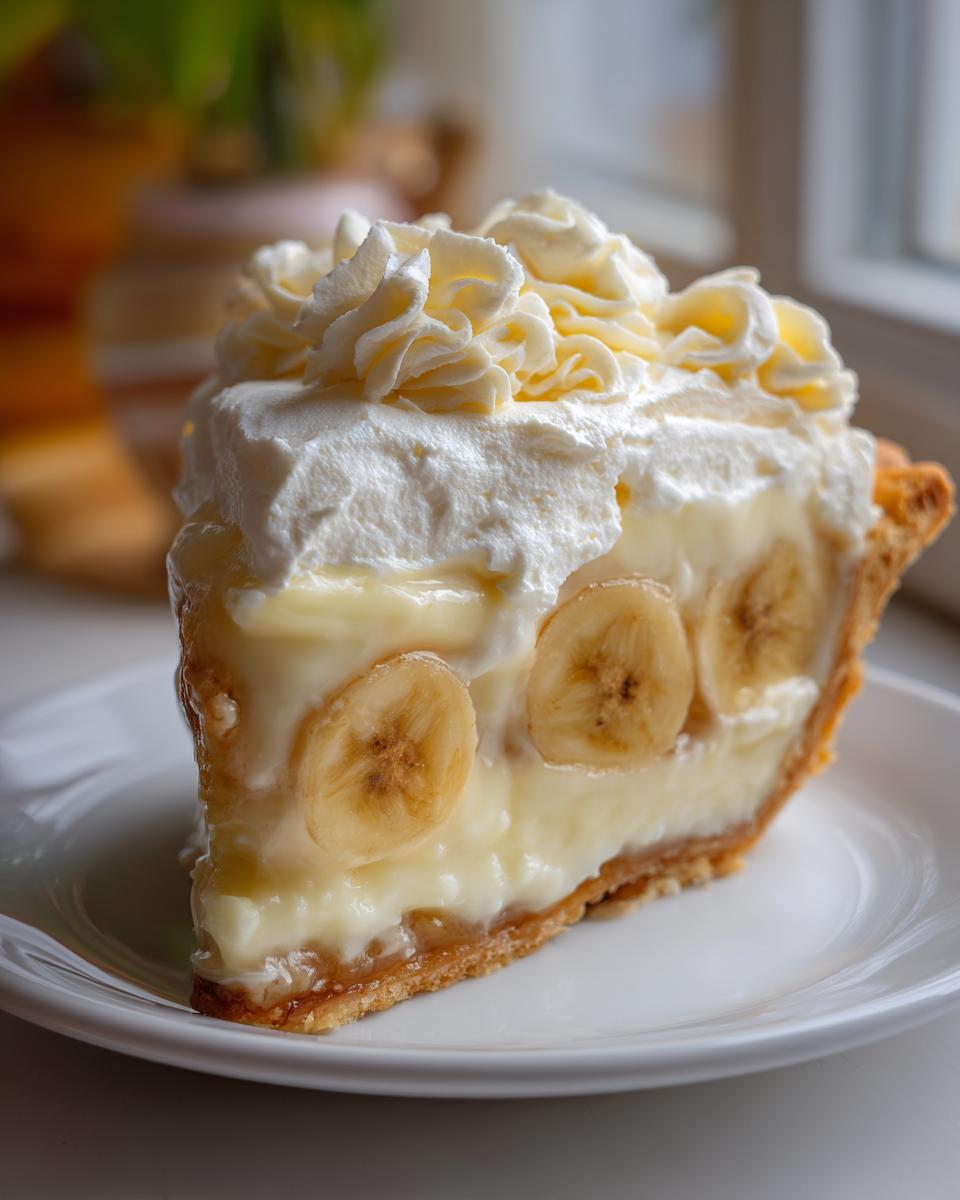
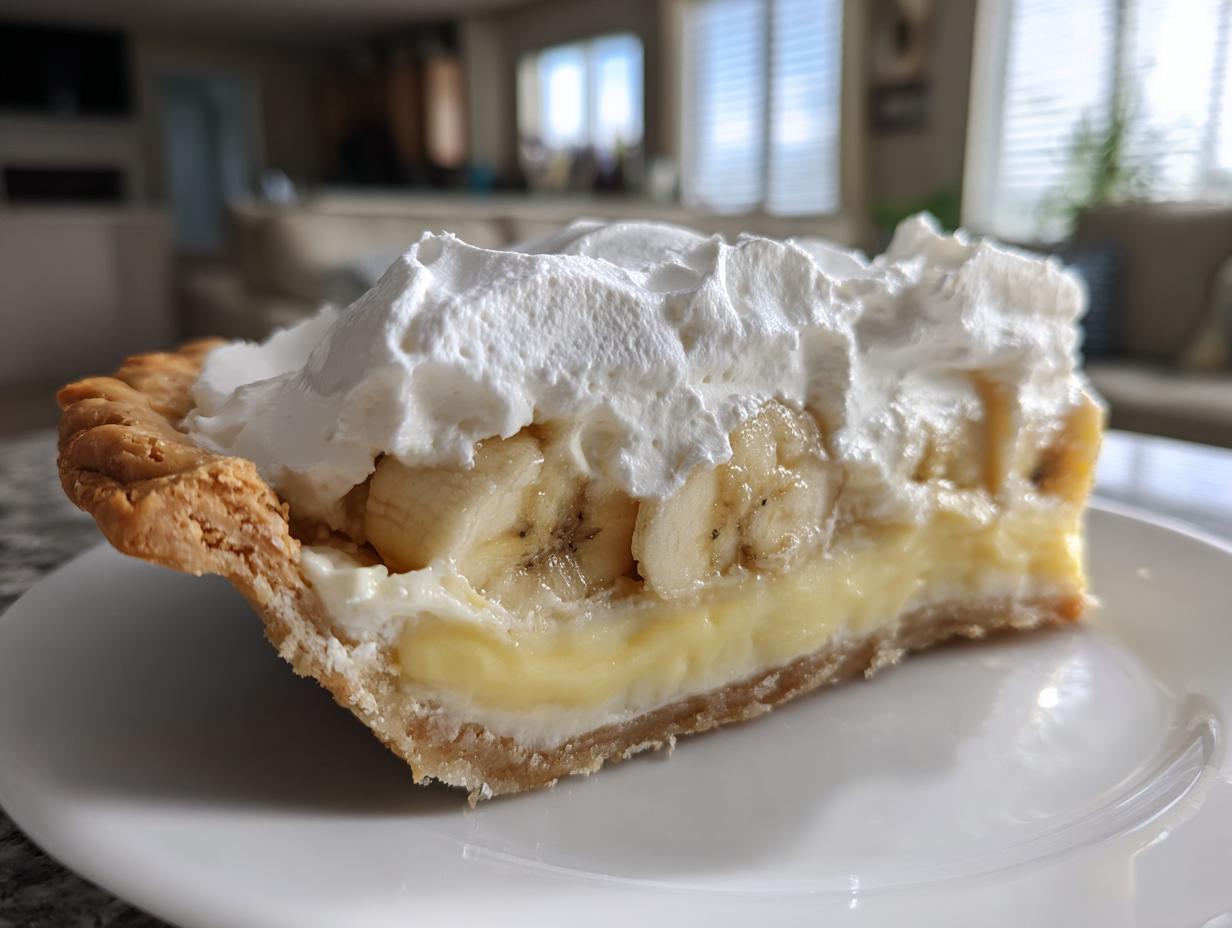
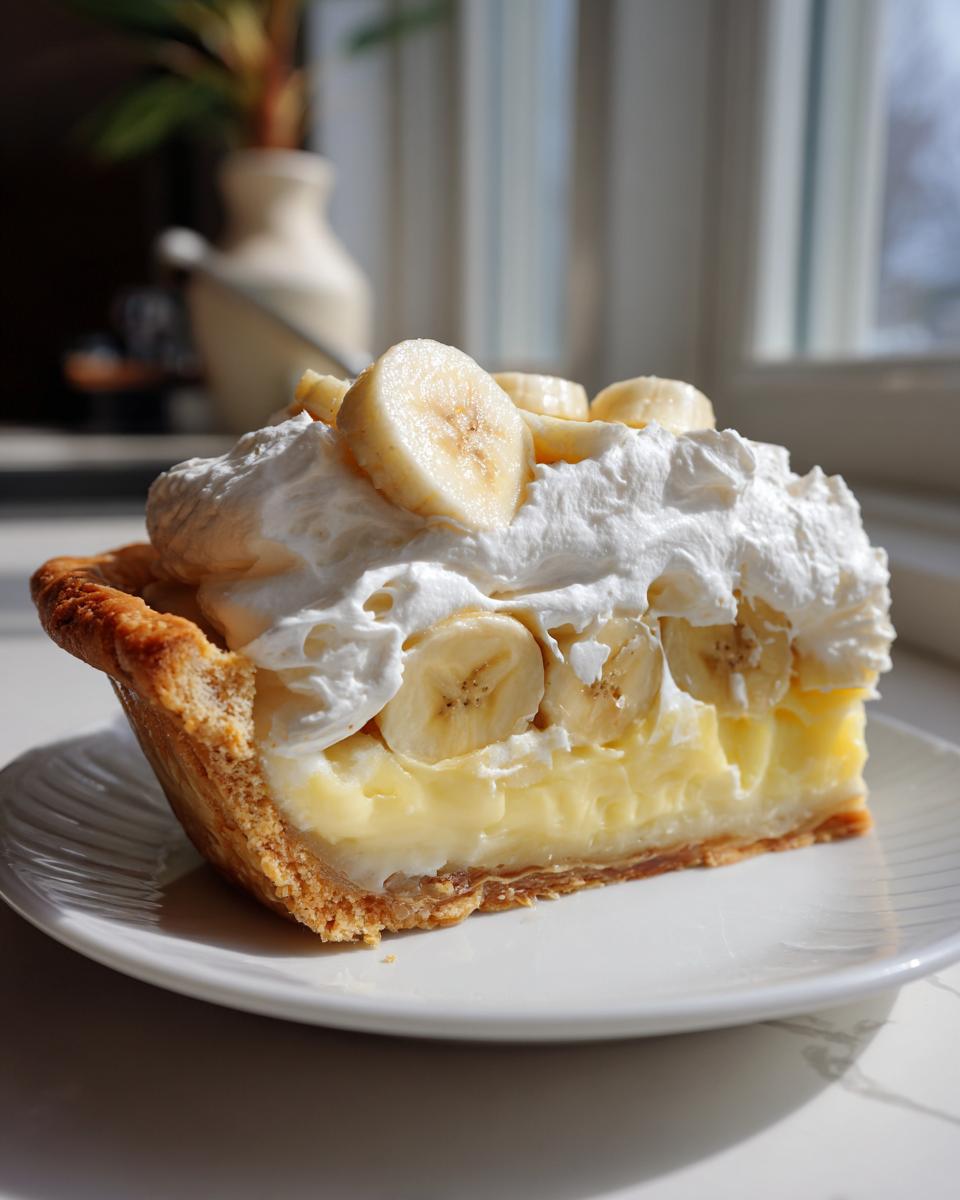
Assembling the Classic banana cream pie Recipe
Now that you have your cooled, perfectly baked crust and your cold, magically smooth custard filling, it’s time for the fun—and slightly urgent—part: assembly! This is where we turn our components into the ultimate banana cream pie. Speed matters a little here, but don’t panic!
First, grab those three lovely, ripe bananas. Slice them up—you want nice, even rounds that will cover the bottom of your crust without overlapping too much. Arrange this layer of fresh banana slices evenly across the bottom of that totally cool pastry shell. This layer acts as a marvelous buffer between the crust and the filling, which helps keep things from getting soggy too fast!
Next, you need to tackle that chilled custard. Remember how I told you to whisk it vigorously after it came out of the fridge? Good! Do that now until it’s completely smooth again. You want it losing any stiffness it developed while chilling so it pours beautifully.
Spoon this luscious, velvety custard right over the bananas in the pie shell. Spread it gently with an offset spatula, making sure you get an even, nice surface. My biggest tip here is this: once the custard hits the bananas, work steadily. You don’t want to sit the custard around too long before smoothing it out, especially since it’s cold against the room-temp bananas. You are building layers of texture now! I promise, once you see that smooth custard layer, you’ll know you are very close to the best banana cream pie ever. If you need a great recipe for a hearty savory pie while you wait for this sweet masterpiece to set, check out my easy tamale pie recipe!
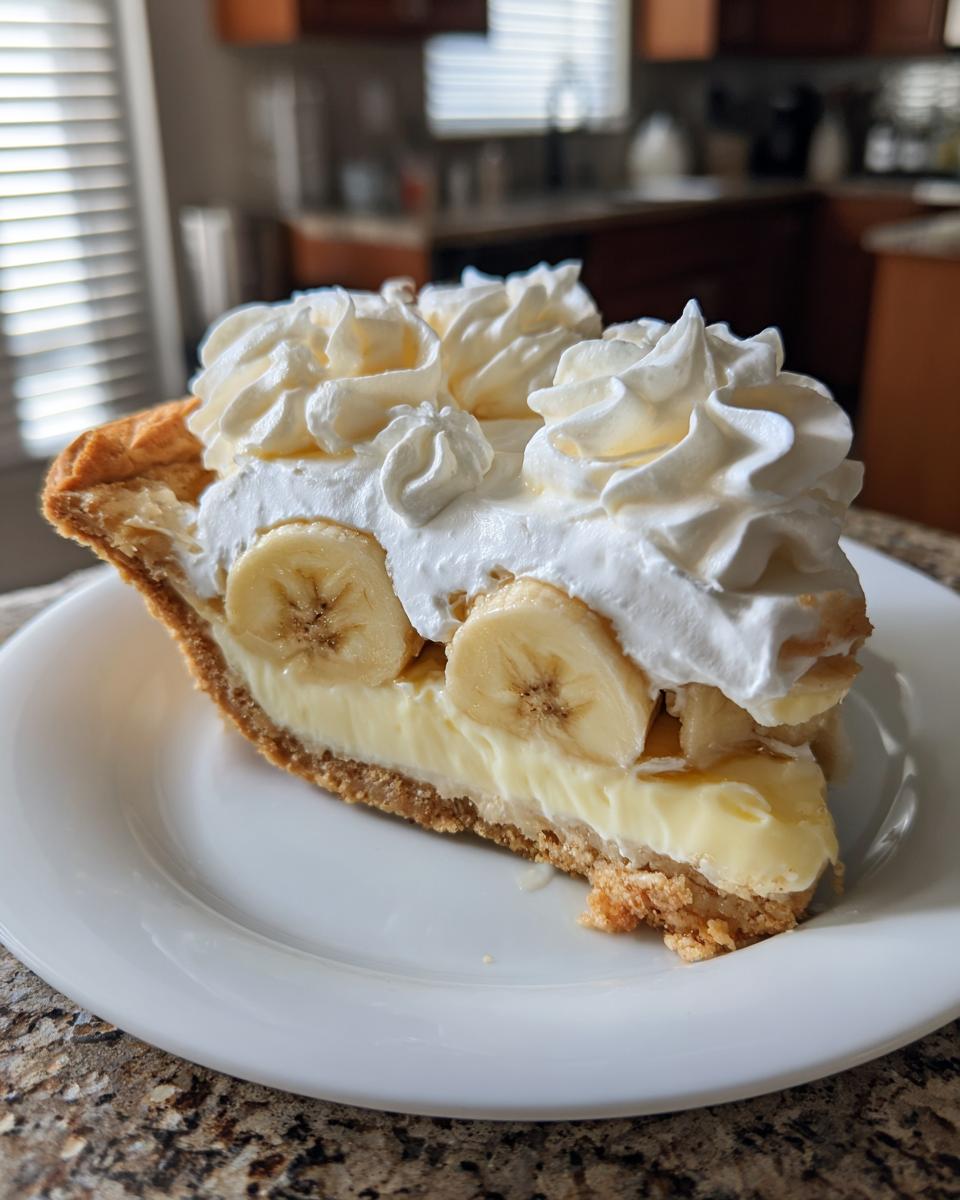
Topping Your banana cream pie with Fresh Whipped Cream
We’ve got the flaky crust, we’ve got the perfect banana-custard base—now it’s time for the crowning glory! Nothing says classic American dessert quite like a glorious cloud of homemade whipped cream on top of your banana cream pie. Please, please, please tell me you aren’t reaching for that spray can! Homemade is so fast and tastes a thousand times better.
This is where we bring in our heavy whipping cream. Measure out two cups and toss it into a nice, cold bowl—I usually pop my bowl and beaters into the freezer for about ten minutes just to make sure everything is extra frosty. That cold temperature whips the cream up faster and keeps it stable.
Add your powdered sugar and that last teaspoon of vanilla extract. Now, start mixing! If you’re using a stand mixer, start on low speed so you don’t end up wearing a white beard, and then gradually increase the speed until you see stiff peaks forming. You are looking for the cream to hold its shape firmly when you lift the beaters. This is a key visual step for any topping, whether it’s our whipped cream or a stable vanilla buttercream frosting!
Once it’s stiff, you need to work quickly. Gently spread that gorgeous, voluminous whipped cream right over the top of your chilled custard layer. Think of it as tucking in the pie for a long nap in the fridge! You can use the back of a spoon to create lovely swirls and peaks—this makes the pie look fantastic!
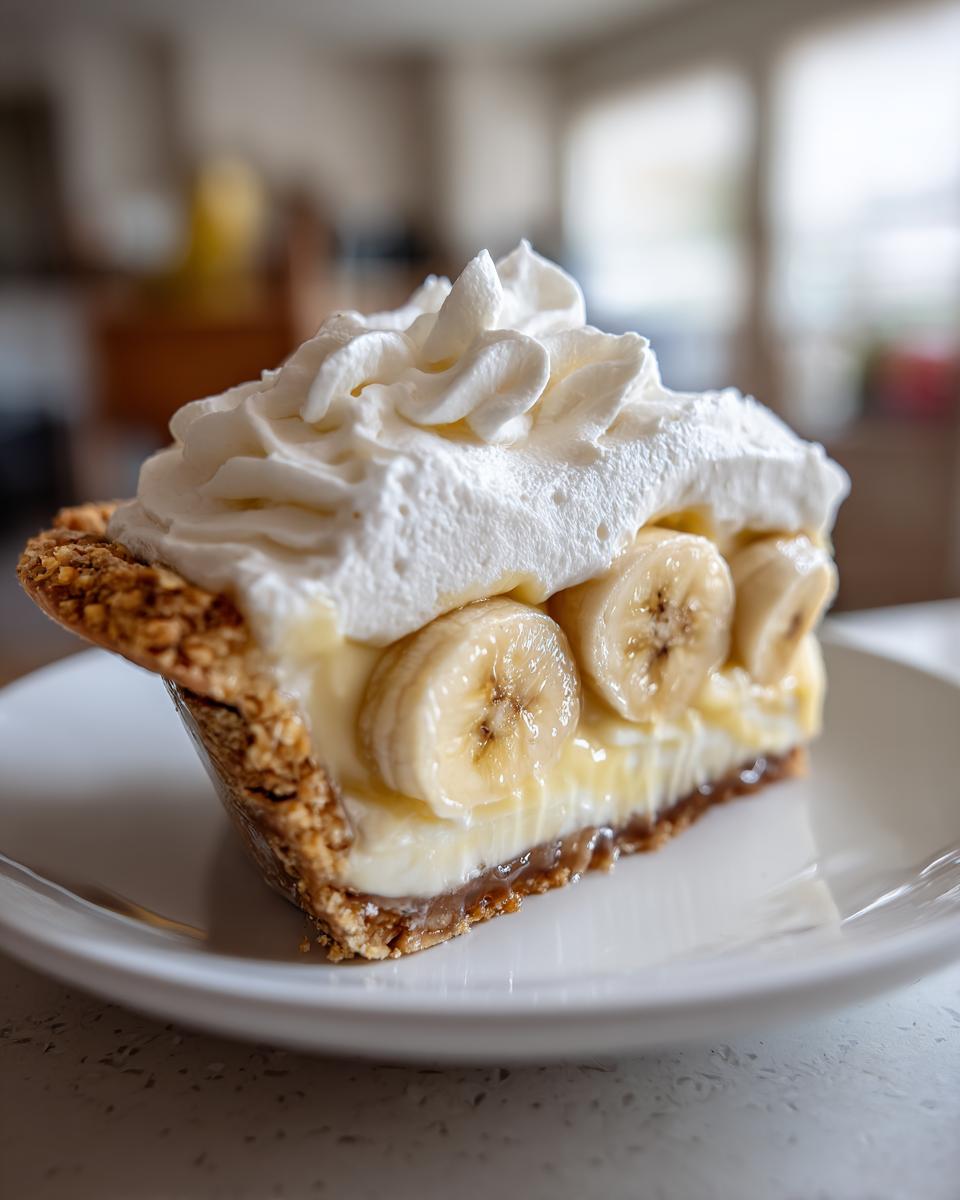
If you want to get extra fancy, you can slice a few of your reserved bananas—make sure they are the firm ones—and arrange them decoratively on the very top before the final chill. Honestly though, just a gorgeous blanket of white cream is breathtaking enough for this magnificent banana cream pie!
Storage & Make Ahead Pie Tips for Your banana cream pie
We’ve made it! The final product—the glorious, towering banana cream pie—is assembled and smelling incredible. But here’s where we have to practice a little more patience, which is always the hardest part of baking, right?
Remember Step 12? That final chill is non-negotiable! You absolutely must let this finished pie rest in the refrigerator for a minimum of four full hours. Honestly, if you can manage overnight? Even better. This chilling time isn’t just about making the pie cold; it allows the structure of the custard to firm up completely against the bananas and the crust. If you try to slice it too early, you’re asking for a messy, runny disaster, and we worked too hard for that!
Once it’s firm, slicing requires a hot knife. That’s my secret weapon! Run a sharp, thin knife under very hot water for about ten seconds, quickly wipe it dry, and make your cut. Repeat that process for every single slice. It glides right through the custard and the whipped cream topping beautifully, giving you those clean wedges that look just like the bakery versions.
The good news is that this is an incredible Make Ahead Pie option. You can assemble the entire banana cream pie the day before you plan to serve it. Think about how easy that makes planning for big events, like all those upcoming Holiday Dessert Ideas! Because the structure is so stable (thanks to that sturdy custard we made!), it travels well and holds up great in the fridge for about two days. For more ideas on planning your dessert schedule, take a look at my tips on making pies ahead of time!
Frequently Asked Questions About banana cream pie
I know when you’re tackling a classic like this, your mind starts buzzing with all sorts of possibilities and worries! Don’t fret; since I’ve been tinkering with recipes my whole life, I’ve already run into just about every issue you can imagine. Here are some quick answers to the most common things folks ask about their Homemade Banana Cream Pie.
Can I use instant pudding for the banana cream pie filling?
Oh, I get this one a lot, especially if someone is looking for an Easy Banana Cream Pie shortcut! While instant pudding works fine for a quick fix, it just won’t give you that deep, rich, velvety custard pie flavor that our Old Fashioned banana cream pie boasts. The custard we cook on the stovetop uses real eggs and milk, which provides a richer mouthfeel and better flavor absorption from the bananas. If you need something slightly faster, try making our recipe, but skip the whole chilling/re-whisking process and substitute instant vanilla pudding right at the end, but the results won’t be quite as luxurious!
How do I stop my crust from getting soggy?
This is the eternal struggle when working with any fresh fruit dessert! The best defense for your flaky crust is two-fold. First, you have to blind-bake it completely until it’s golden brown, not just lightly pale. Second, and this is crucial: make sure that baked crust is **completely cool** before you add even one single banana slice. But here’s my favorite hack for keeping things crisp: after the crust cools, quickly brush the inside bottom surface with one egg white—just one! Bake that egg white layer for about five minutes until it sets. This creates a thin, waterproof seal before you even layer the bananas. It creates a fantastic barrier for your Family Favorite Dessert!
Can I make a No Bake Banana Cream Pie version of this recipe?
Yes, you absolutely can turn this into a No Bake Desserts superstar! The easiest way is to stick with the Nilla Wafer substitution I mentioned in the notes above. You just press the crumb mixture into the plate and chill it until firm—no oven time needed for the crust. For the filling, you can skip the stovetop process entirely and use a great store-bought instant vanilla pudding, just bulk it up slightly with a little extra heavy cream mixed in for richness. It’s a fantastic option when it’s too hot to turn on the oven for a Summer Pie Recipes treat!
Can I substitute the pastry crust for a Graham Cracker Crust Banana Pie?
You totally can leap over the whole pie dough effort if you need a faster route! A Graham Cracker Crust Banana Pie is a wonderful, slightly sweeter base that works beautifully with the creamy layers. As I mentioned earlier, you just need about 1 1/2 cups of finely crushed graham crackers mixed with 6 tablespoons of melted butter. Press that mixture firmly into your pie plate—make sure you press it high up the sides—and chill it in the freezer for about 30 minutes until it’s rock hard. It’s a perfect way to adapt this into a delightful Simple Pie Recipes version!
How far ahead can I make this banana cream pie?
Because this banana cream pie relies on fresh bananas, the answer is a little tricky! The custard and crust are perfect for making a day ahead, but the bananas are best added the day you plan to serve it, or at the latest, within 12 hours of serving. Bananas oxidize super fast, even under custard! If you are making this for a truly big gathering, prepare the crust and the custard completely (through Step 7). Then, in the morning of your party, slice the bananas, layer them, fill with custard, and top with whipped cream. This keeps everything looking perfectly beautiful for your guests.
If you ever have more general questions about timing recipes or substitutions in the kitchen, please don’t hesitate to reach out to my team or me via my contact page!
Nutritional Information for this Creamy Banana Dessert
Now, I always say that when you’re making something this delicious, we don’t eat it for the nutritional value—we eat it because it brings joy! However, because I have that food science background, I always run the numbers just to give you a full picture of this incredible Creamy Banana Dessert. Please remember these are estimates, as they rely on the specific ingredients you choose for your homemade crust, for example.
This calculation is based on the recipe yielding 8 generous servings.
- Serving Size: 1 slice
- Calories: 380
- Fat: 20g (with about 10g saturated fat)
- Carbohydrates: 48g
- Sugar: 30g
- Protein: 6g
- Cholesterol: 110mg
It’s a treat, for sure, but made with real butter and fresh fruit, you know exactly what’s in every satisfying bite!
PrintOld Fashioned Banana Cream Pie From Scratch

This recipe delivers a classic, homemade banana cream pie featuring a flaky crust, velvety vanilla custard, fresh bananas, and a light whipped cream topping. It is a family favorite dessert.
- Prep Time: 30 min
- Cook Time: 20 min
- Total Time: 250 min
- Yield: 8 servings 1x
- Category: Dessert
- Method: Chilling
- Cuisine: American
- Diet: Vegetarian
Ingredients
- 1 recipe for double-crust pie dough (for a 9-inch pie)
- 4 large egg yolks
- 1/2 cup granulated sugar
- 1/4 cup cornstarch
- 1/4 teaspoon salt
- 2 cups whole milk
- 2 tablespoons unsalted butter
- 1 teaspoon vanilla extract
- 3 medium ripe bananas, sliced
- 2 cups heavy whipping cream
- 1/4 cup powdered sugar
- 1/2 teaspoon vanilla extract
Instructions
- Prepare and bake your double-crust pie dough according to your preferred recipe for a single bottom crust. Cool the baked crust completely.
- For the custard filling, whisk together the egg yolks, granulated sugar, cornstarch, and salt in a medium saucepan until smooth.
- Gradually whisk in the whole milk until fully combined.
- Place the saucepan over medium heat. Cook, stirring constantly with a wooden spoon or whisk, until the mixture thickens significantly and begins to bubble. This takes about 8 to 10 minutes. Do not stop stirring to prevent scorching.
- Remove the custard from the heat. Stir in the butter until melted and smooth. Stir in the vanilla extract.
- Pour the hot custard into a bowl. Press plastic wrap directly onto the surface of the custard to prevent a skin from forming. Chill the custard in the refrigerator for at least 2 hours, or until completely cold and set.
- Once the custard is chilled, whisk it vigorously until it is smooth and creamy again.
- Arrange a layer of sliced bananas evenly over the bottom of the cooled pie crust.
- Spoon the chilled banana custard over the bananas, spreading it evenly.
- In a separate bowl, beat the heavy whipping cream, powdered sugar, and vanilla extract until stiff peaks form.
- Spread or pipe the whipped cream topping over the custard layer. You can decorate the top with extra banana slices if desired.
- Chill the finished pie for at least 4 hours before slicing and serving. This allows the filling to firm up completely.
Notes
- For the best flavor, use bananas that are ripe but still firm enough to slice without falling apart.
- To make this a Southern Banana Pie variation, you can substitute 1/2 cup of the milk with evaporated milk for a richer custard.
- If you prefer a Nilla Wafer Crust Banana Pie, use 1 1/2 cups of finely crushed vanilla wafers mixed with 6 tablespoons of melted butter, pressed into the pie plate, and chilled instead of baking a pastry crust.
Nutrition
- Serving Size: 1 slice
- Calories: 380
- Sugar: 30g
- Sodium: 210mg
- Fat: 20g
- Saturated Fat: 10g
- Unsaturated Fat: 10g
- Trans Fat: 0g
- Carbohydrates: 48g
- Fiber: 2g
- Protein: 6g
- Cholesterol: 110mg