
If you’re anything like me, sometimes you just can’t face turning on the oven, especially when it’s hot outside, or maybe you just need a stunning dessert ready fast without any fuss! That’s where icebox cakes shine, and trust me, this one is the king of the category. We are diving deep into the ultimate no-bake chocolate eclair cake recipe today. This isn’t just any dessert; it’s layers of crunchy graham crackers soaked just right in a cloud-like vanilla cream, all hidden under a shimmering blanket of rich chocolate. After years spent developing reliable, practical recipes—from my early days to working in professional test kitchens—I can confidently say this simple layered cake delivers that beautiful, classic eclair flavor without touching a pre-heat button.
You can find more amazing, tested dessert ideas over at my main Dessert Recipes page.
- Why This No Bake Chocolate Eclair Cake is Your New Favorite Dessert
- Gathering Ingredients for the Ultimate Chocolate Eclair Cake
- How to Prepare Your No Bake Chocolate Eclair Cake Step-by-Step
- Expert Tips for the Perfect Chocolate Eclair Cake
- Ingredient Notes and Substitutions for Your Easy Eclair Cake Recipe
- Serving Suggestions for This Decadent Layered Cake
- Storage and Reheating Instructions for Your Make Ahead Dessert
- Frequently Asked Questions About the Chocolate Eclair Cake
- Share Your Experience Making This Simple Party Dessert
Why This No Bake Chocolate Eclair Cake is Your New Favorite Dessert
I promise you, once you make this dessert, it’s going straight into heavy rotation. This isn’t one of those recipes where you trade flavor for speed; you get the best of both worlds. It’s a genuinely impressive **decadent layered cake** that comes together faster than most sheet cakes!
I love how this recipe captures that nostalgic taste. When you cut into those softened graham crackers, it absolutely tastes like you spent hours piping pastry cream. Here’s why everyone loves this dessert:
- It is the definition of a **quick chocolate dessert**—prep time is under 20 minutes, and that’s including getting out the mixer!
- It’s completely baked-free! This is the perfect **no oven dessert idea** for summer cookouts or when your oven is already full of, well, oven stuff.
- It knocks it out of the park at gatherings. Seriously, these are **crowd pleasing desserts** that vanish first at any potluck.
- The layers of cream and cracker create that signature, unmistakable **classic eclair flavor** we all crave.
If you enjoy simple, impressive **no bake classics** like this, you absolutely have to check out my recipe for No-Bake Sugar Cookie Truffles next!
Gathering Ingredients for the Ultimate Chocolate Eclair Cake
Okay, so the beauty of this easy eclair cake recipe is that it relies on pantry staples, which means you probably have most of this on hand already! This is truly one of those desserts where simple, good-quality ingredients step up and do all the heavy lifting. Remember, reliability is key when you skip the baking, so measuring precisely here makes a huge difference in getting that perfect texture.
I’ve broken the list down so it’s super clear where everything goes. These measurements are what I use every single time to guarantee that perfect, thick, creamy layer you’re looking for. If you want more simple, reliable recipes, you should definitely take a peek at my No-Bake Oreo Fudge!
For the Simple Vanilla Cream Filling
This is the heart of the whole thing—that rich, fluffy layer that turns the crackers soft and delicious. Make sure your cream cheese is nice and soft before you start!
- 1 (14.4 ounce) package instant vanilla pudding mix
- 3 cups cold milk
- 1 (8 ounce) container frozen whipped topping, thawed (Make sure this is fully thawed so it folds in nicely!)
- 1 (8 ounce) package cream cheese, softened
- 1 teaspoon vanilla extract
For the Graham Cracker Layers and Chocolate Glaze Dessert
These components bring the structure and that shiny, indulgent finish to our **chocolate eclair cake**.
- 2 packages (14.4 ounces total) graham crackers
- 1 (12 ounce) package semi-sweet chocolate chips
- 1/2 cup heavy cream
How to Prepare Your No Bake Chocolate Eclair Cake Step-by-Step
Alright, this is where the magic happens, and I want you to breathe easy because there’s absolutely no preheating required—we are sticking strictly to the **no oven dessert ideas** category! The steps are broken down into making the filling, whipping up the topping, assembling the layers, and then the hardest part: waiting for it to chill. Follow these closely, and you’ll have what I consider the best **chocolate icebox cake** around.
Creating the Creamy Layered Dessert Filling
First up is our glorious, smooth filling. Grab your biggest mixing bowl. Start by taking that softened cream cheese and beating it until it is unbelievably smooth—no lumps allowed! This is so important because lumps ruin the elegance of this **creamy layered dessert**. Once it looks perfect, beat in the sweetened condensed milk and the vanilla extract.
Next, handle the pudding. Whisk your instant vanilla pudding mix and the cold milk together until everything thickens up nicely, usually about five minutes. Now for the gentle part! Take your fully thawed whipped topping and fold it carefully into your cream cheese mixture. See how fluffy that gets? Then, gently fold that pudding mixture in last. I cannot stress this enough: Fold it, don’t beat it! We want to keep all those lovely air bubbles we just created in the whipped topping.
Making the Rich Chocolate Glaze Dessert Topping
For an unbelievably glossy finish, we’re making a simple, professional-grade topping using just two ingredients. Toss your semi-sweet chocolate chips into a bowl. Heat the heavy cream in a little saucepan until it’s just starting to bubble around the edges—you don’t want a hard boil! Pour that hot cream right over the chips.
Let it sit undisturbed for five full minutes. Trust Mia on this one; this resting period melts the chips perfectly. Then, whisk it slowly until you get that smooth, beautiful, shiny glaze you’d expect on a bakery éclair. Set this aside while you assemble so it cools slightly; we don’t want hot glaze soaking into our nice cracker layers too fast!
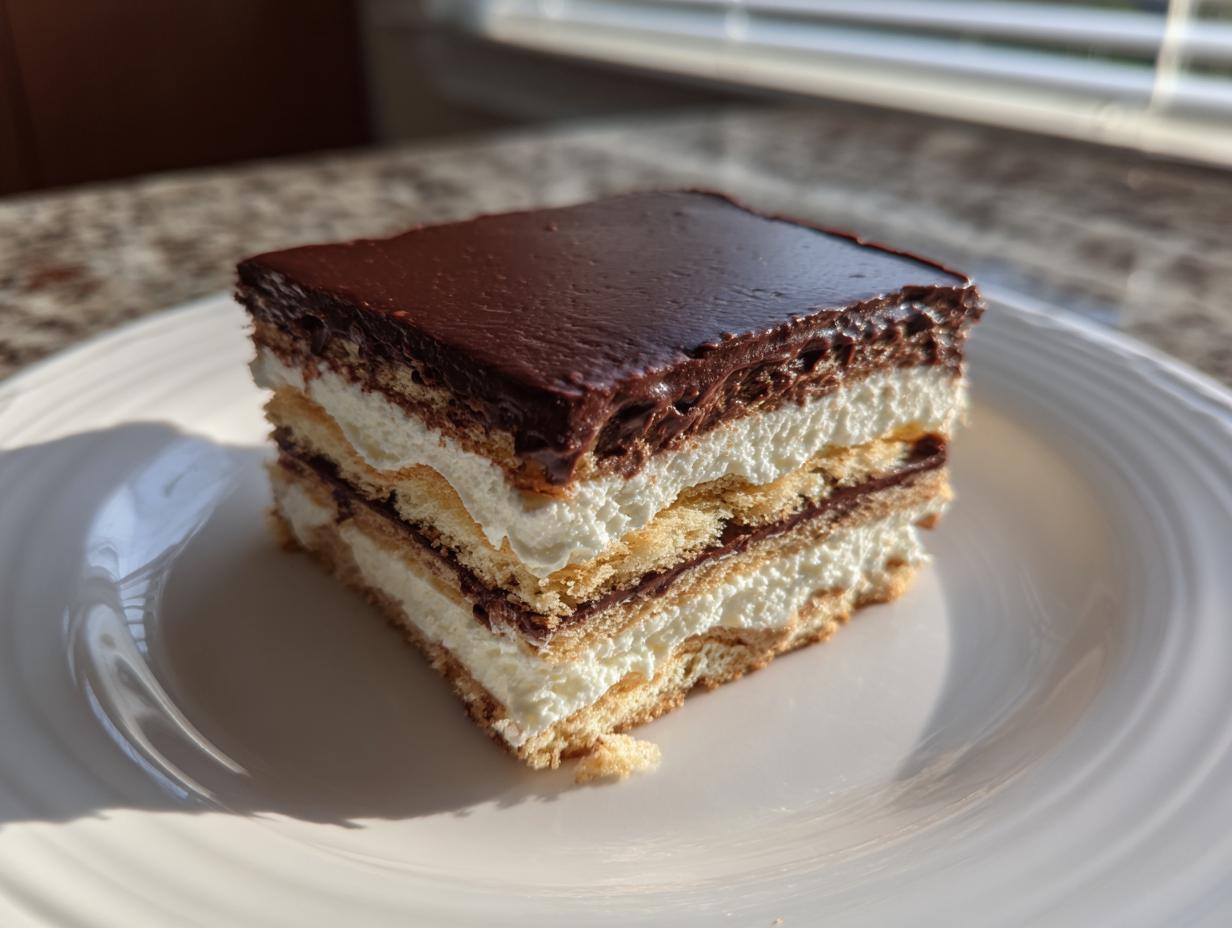
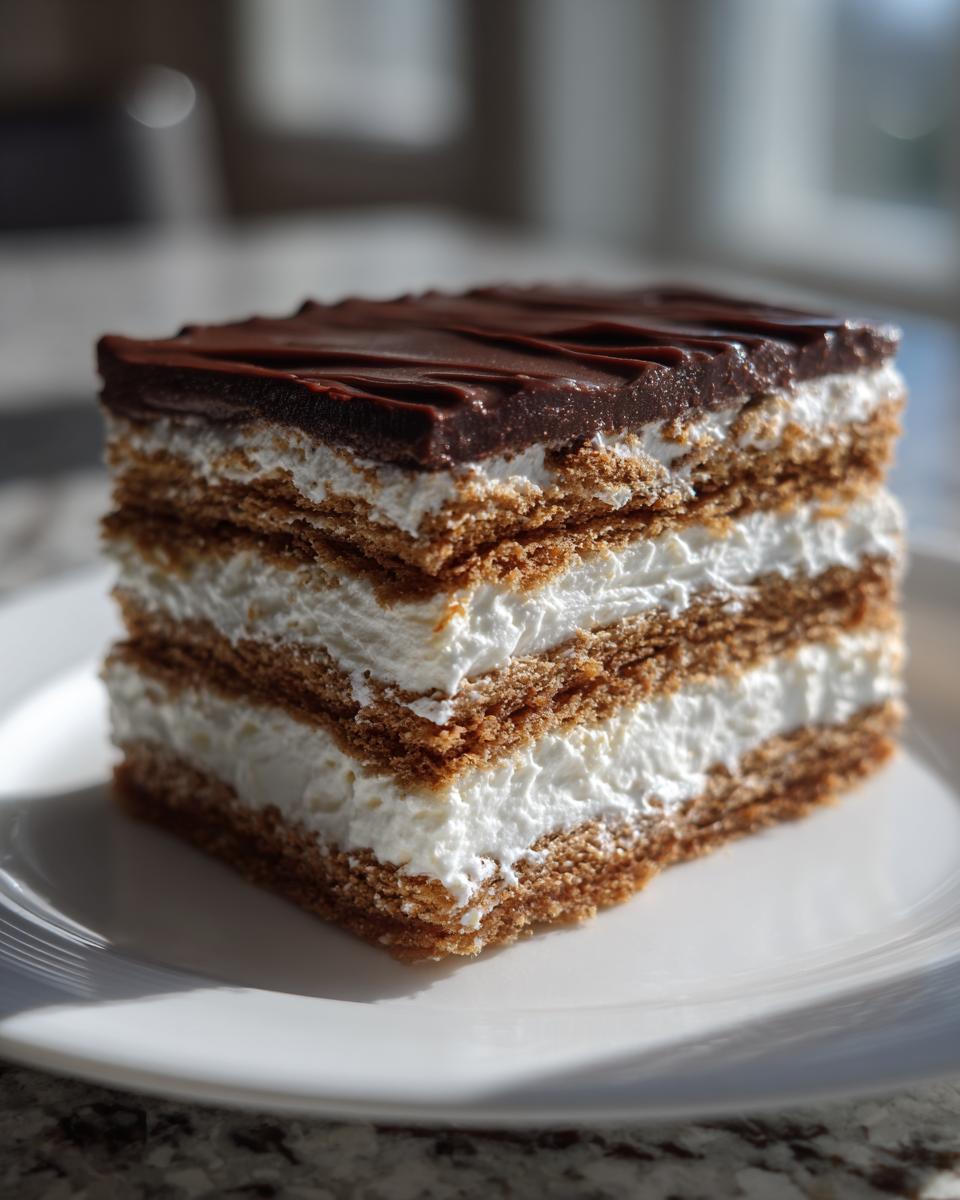
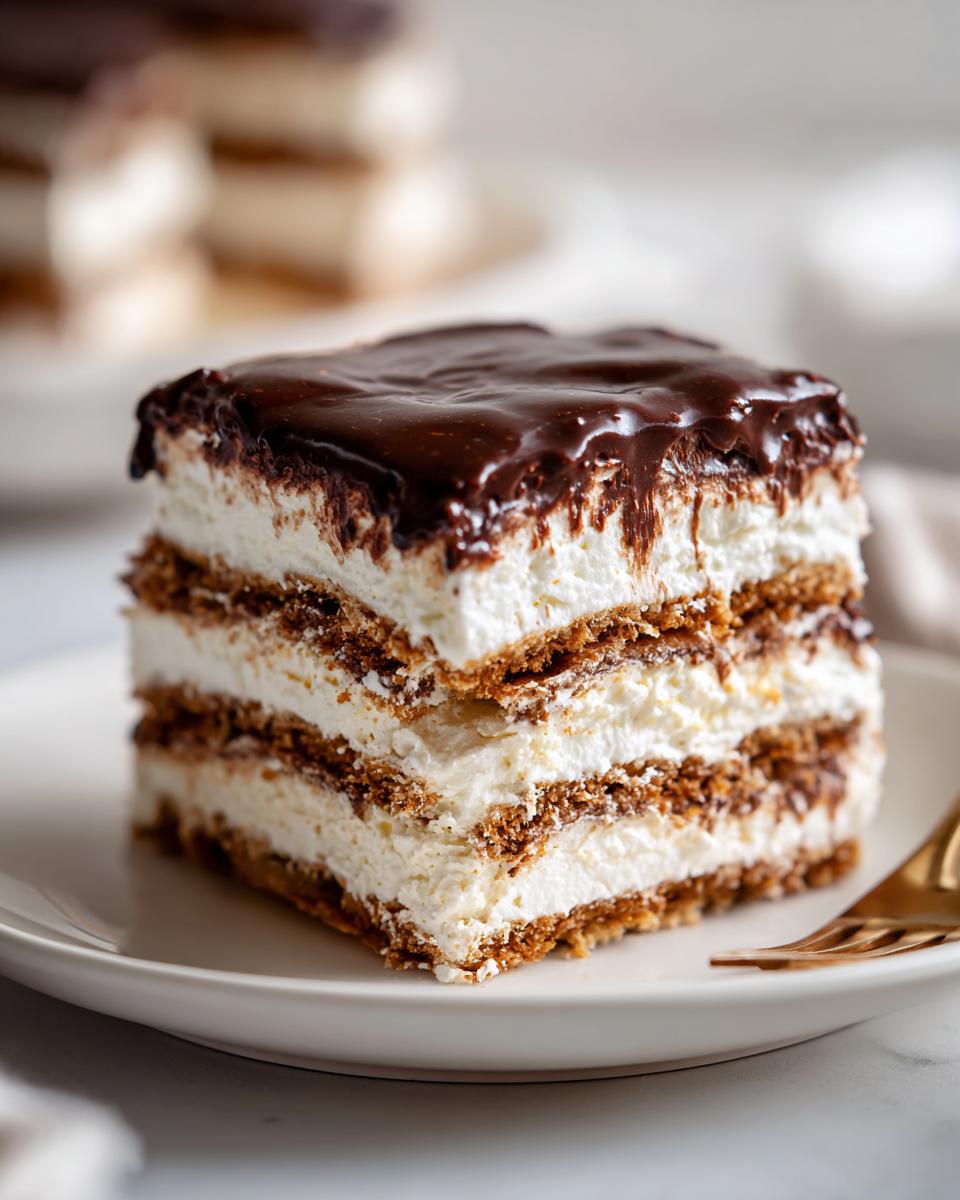
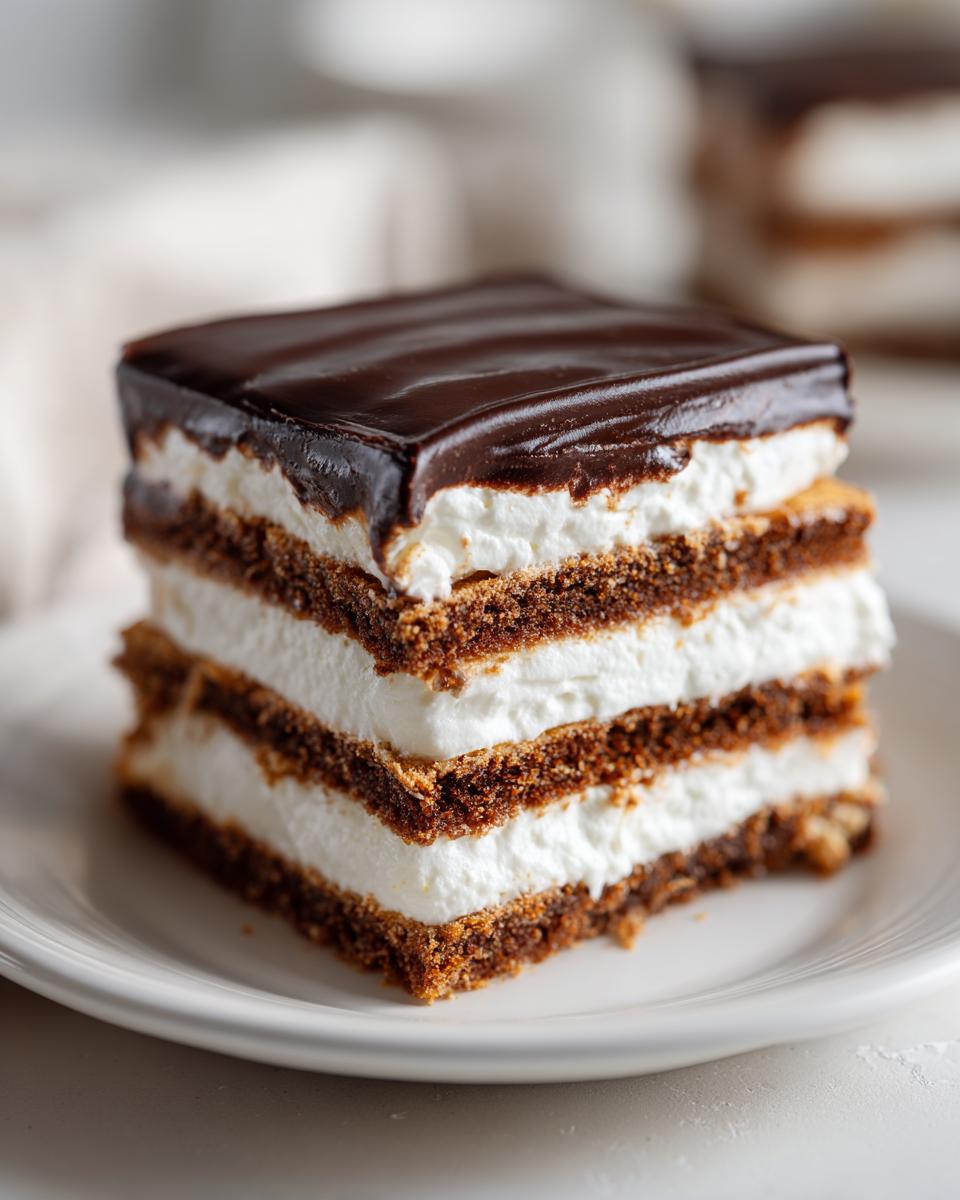
Assembling and Chilling the Chocolate Eclair Cake
Time to build our structure in that 9×13 dish. Lay down the first layer of graham crackers, breaking them to fit any gaps. Spread exactly half of your airy vanilla cream mixture evenly over that first cracker layer. Top that with your second layer of crackers.
Spread the remaining cream over that second layer. Top it one last time with your final layer of graham crackers. Now, pour that slightly cooled chocolate glaze right over the top, gently coaxing it to cover every edge. This is vital for achieving that perfect **classic eclair flavor**.
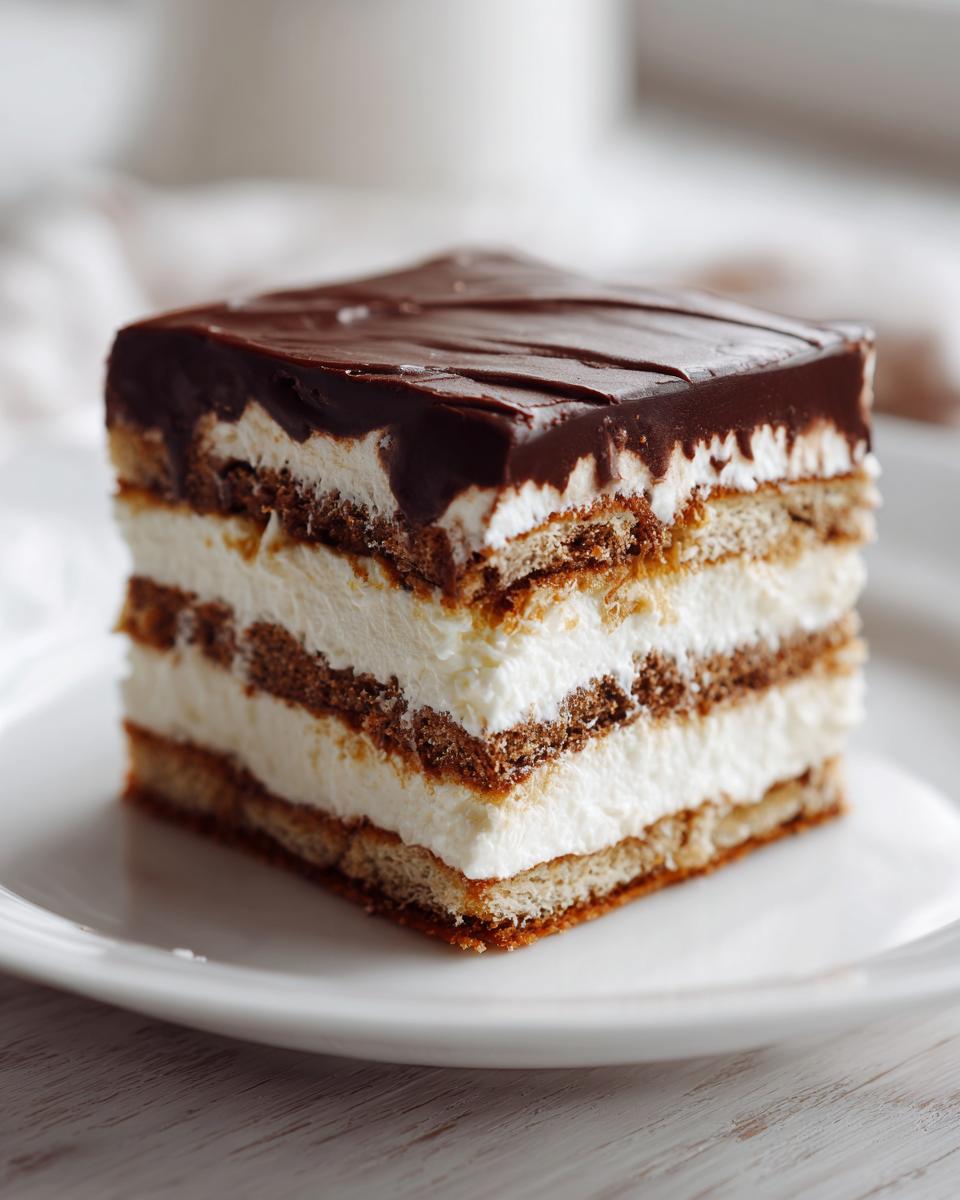
The absolute final, non-negotiable step? Cover it tightly and put it into the fridge for a minimum of six hours. Honestly, overnight is where the magic really happens. That chilling time softens those graham crackers beautifully, turning the whole thing into a moist, spoonable, cake-like delight. Because this dessert relies on that softening time, reheating it isn’t a good idea at all! If you’re looking for other great ways to use those crackers, perhaps you’ll enjoy my Graham Cracker Toffee Bars, or maybe you’d like to see how I make my soft pudding cookies!
Expert Tips for the Perfect Chocolate Eclair Cake
When you’re making a no-bake dessert that relies on ambient moisture to do the heavy lifting, every little tip counts! Based on all my hours spent testing this **chocolate eclair cake** for texture and flavor reliability, I have a few non-negotiables that guarantee you nail that perfect cake-like consistency in your **graham cracker dessert** layers.
My academic background in Food Science really comes in handy here because a few ingredients absolutely need to be used in their proper format. Don’t get lazy, even though this is easy! Trust me, these details turn a good eclair cake into the ultimate one.
First, let’s talk about the cream layer. You absolutely must use full-fat dairy when making the glaze—that 1/2 cup of heavy cream is essential. If you try to substitute it with regular milk or fat-free milk, the chocolate chips won’t emulsify properly with the fat content, and you’ll end up with a grainy, oily topping instead of that beautiful, shiny glaze.
Next, pay attention to the graham crackers. They need to be in a slightly dry environment before being covered by the filling. While assembling, try not to let the cream filling sit out for too long before you layer it. The goal is to introduce moisture slowly to the crackers, not drown them prematurely. This slow softening is what gives you that signature cake texture by the time it’s fully chilled.
Since this is the perfect **make ahead dessert**, plan for success! Don’t try to rush the chilling. Six hours is the bare minimum to slightly soften the crackers, but if you can let it sit overnight, the reward is texturally superior. The crackers fully absorb the cream flavor and become tender, achieving that perfect marriage of custard and crunch base.
If you ever need a stable, traditional frosting for another project, I have a great recipe for a classic Vanilla Buttercream, but honestly, for this **no bake chocolate eclair cake**, the simple glaze reigns supreme!
Ingredient Notes and Substitutions for Your Easy Eclair Cake Recipe
I know sometimes we run short on one little ingredient, and it stops us from making something amazing! Don’t let that happen here, because this is meant to be an easy eclair cake recipe, after all. While my core measurement list gives you the perfect result, I want to give you the green light on a few swaps that still honor that beautiful texture we are aiming for. Remember, the foundation—the graham crackers and the chill time—is key, but we can play around with the extras!
The original recipe calls for vanilla pudding, which nails that traditional pastry cream flavor, but if you’re feeling adventurous, go for it! You can absolutely swap that out for chocolate instant pudding mix if you want a double dose of dairy goodness in the center. Just combine it with the milk and proceed as directed. Just be aware that if you use chocolate pudding, I highly recommend sticking to the semi-sweet chips for the topping, otherwise the chocolate flavor might get a little muddy.
When we talk about the topping, the notes mention switching the homemade glaze for store-bought frosting. I always encourage using the fresh ganache because it sets up so beautifully shiny, but if you need a **quick chocolate dessert** fix? Go for a can of your favorite chocolate frosting. It’s a different texture—a little thicker and less brittle when cold—but it certainly gets the job done in seconds. Just make sure you use enough to cover those top crackers completely!
And speaking of the crackers, while standard graham crackers are perfect for the structure of this **graham cracker dessert**, sometimes people ask if they can use vanilla wafers or even Oreos (minus the filling!). Yes, you can! If you use Oreos, skip the extra vanilla extract in the cream mixture, and expect the final product to be sweeter and a bit darker, pushing it closer to a true **chocolate icebox cake** feel. Just ensure whatever you use, you break them into pieces so the cream can seep in evenly during that crucial chilling phase.
For anyone who loves experimenting with textures, if you have leftover pudding from another project, definitely check out my soft pudding cookies—they are fantastic!
Serving Suggestions for This Decadent Layered Cake
Since this **decadent layered cake** is incredibly rich and creamy—that’s the point, after all!—I like to serve it with something that cuts through that richness a little bit. You want that perfect bite where the sweet creaminess is balanced out by a little sharpness.
When I bring this out for a party, I always set out a bowl of fresh raspberries or sliced strawberries on the side. The tartness of the berries makes the chocolate and vanilla layers sing! If you’re having a truly summer gathering and need a cool drink to go with it, you have to try my recipe for a Frozen Strawberry Daiquiri; it’s the perfect counterpoint.
Remember, keep the cake chilled until the moment you serve it! This is an icebox cake, and it’s best eaten straight from the cold. The texture holds up beautifully when it’s cold, making those graham cracker layers perfectly firm but yielding.
Storage and Reheating Instructions for Your Make Ahead Dessert
This is where knowing this is a **make ahead dessert** really pays off! You can whip this whole **chocolate eclair cake** up the day before your big event, which is my secret weapon for staying calm on party day. Because it’s an icebox style cake, storage is super simple but you have to be diligent about keeping it cold.
Once you’ve poured that final layer of glossy chocolate glaze over the top, you need to cover the entire dish tightly. I always use plastic wrap first, pressing it gently over the chocolate topping *just* enough so that it doesn’t stick to the wrap, and then I cover the whole dish with aluminum foil or a tight-fitting lid. This prevents any fridge smells from sneaking into our sweet cream and keeps the edges from drying out.
Keep it in the coldest part of your refrigerator for up to three days. Three days is my max, honestly. While the graham crackers will keep softening throughout days one and two, after day three, the texture starts to get a little too mushy for my liking. Remember, the goal here is that perfect blend of soft crumb and firm cream!
Now, let’s talk reheating—and please, hear me out! You absolutely should not try to reheat this. This isn’t like a traditional baked cake where a little warmth brings out the flavors. Since the structure relies on the cold temperature to keep the cream firm and the crackers slightly structured, warming it up means the cream filling will totally collapse into soup. Stick to serving this **chocolate eclair cake** cold straight from the fridge for the best experience. If you’re looking for something warm and comforting to bake later, maybe try my delicious Easy Chicken Pot Casserole for dinner!
Frequently Asked Questions About the Chocolate Eclair Cake
I always get so many great questions once people start needing **no oven dessert ideas** for parties! Here are the top things I hear about perfecting this **chocolate eclair cake**:
Do I really have to chill this cake for six hours?
Yes, you absolutely do! This is the most crucial step for any **chocolate icebox cake**. If you cut into it too soon, around the three-hour mark, you’ll just have soft graham crackers sitting in a puddle of filling. Those six hours—or preferably overnight—are when the moisture from the cream slowly migrates into the crackers, making them tender and cake-like. Don’t rush the setting process; it’s not baking, but it is necessary transformation time!
Can I use chocolate pudding instead of vanilla for the instant pudding dessert base?
You certainly can! If you love chocolate from top to bottom, feel free to swap that 14.4-ounce box of vanilla pudding for chocolate. It works perfectly well with the ingredients we are using. The only thing I’d caution you about is the topping. If you use chocolate pudding and the chocolate glaze, it might be a little too rich for some people. If you do this swap, you might want to consider topping it with a plain whipped cream layer instead of chocolate for contrast!
What happens if I use Nilla Wafers instead of graham crackers?
That’s a fun idea, and yes, this recipe is definitely flexible! Swapping the crackers for Nilla Wafers turns this into a more traditional layered wafer experience, very similar to a classic banana pudding layered dessert. The wafers are smaller, so you might need slightly more of them to cover the pan evenly, and they might soften even faster than the sturdier graham crackers. It’s a perfectly delicious variation on this **creamy layered dessert**!
Can I make the cream filling ahead of time?
You can make the filling component (steps 1 through 4 of the filling instructions) up to a day ahead of time, but here’s the catch: you can’t assemble the cake until you are ready to use it. If you assemble the layers and then chill them for more than 12 hours, the crackers can sometimes get too saturated and start breaking down awkwardly. For the best results as a stunning **simple party dessert**, assemble completely the day you plan to serve it, and then chill it overnight or for at least 6 hours right before you plan to slice and eat!
For more reliable meal planning, check out my thoughts on preparing ahead with my Easy Tamale Pie Casserole recipe!
Share Your Experience Making This Simple Party Dessert
Now that you have the ultimate, no-fuss recipe for the **chocolate eclair cake**—a spectacular **simple party dessert** that requires zero sweat near a hot oven—it’s your turn to shine! I genuinely hope you get to enjoy the look on everyone’s faces when they realize this creamy, layered masterpiece came straight from your fridge.
I put my heart into testing this method to ensure it’s reliable every single time, whether you need a **make ahead dessert** for a big holiday or just want a fantastic, quick treat on a Tuesday night. Did you use the homemade glaze, or did you opt for a tub of frosting for lightning speed?
I’d absolutely love to hear how it turned out for you and your family! Please leave a star rating for this **easy eclair cake recipe** right below and drop a comment telling me your favorite layer—is it the cool vanilla cream, the chocolate topping, or the softened cracker base?
If you took a picture of your finished dessert squares, please consider sharing it! You can always tag me or get in touch with any extra tips or questions you might have over on my Contact Page. Happy chilling, and I hope this **quick chocolate dessert** becomes a favorite in your home, just like it is in mine!
PrintThe Ultimate No-Bake Chocolate Eclair Cake
Make this easy, crowd-pleasing No-Bake Chocolate Eclair Cake. It features layers of graham crackers, a simple vanilla cream filling, and a rich chocolate glaze, mimicking classic eclair flavor without using the oven.
- Prep Time: 20 min
- Cook Time: 0 min
- Total Time: 6 hr 20 min
- Yield: 12 servings 1x
- Category: Dessert
- Method: No-Bake
- Cuisine: American
- Diet: Vegetarian
Ingredients
- 1 (14.4 ounce) package instant vanilla pudding mix
- 3 cups cold milk
- 1 (8 ounce) container frozen whipped topping, thawed
- 1 (14 ounce) can sweetened condensed milk
- 1 (8 ounce) package cream cheese, softened
- 1 teaspoon vanilla extract
- 2 packages (14.4 ounces total) graham crackers
- 1 (12 ounce) package semi-sweet chocolate chips
- 1/2 cup heavy cream
Instructions
- Prepare the vanilla cream filling: In a large bowl, whisk together the instant vanilla pudding mix and cold milk until smooth. Let it sit for 5 minutes to thicken.
- In a separate bowl, beat the softened cream cheese until smooth. Add the sweetened condensed milk, vanilla extract, and beat until combined.
- Gently fold the thawed whipped topping into the cream cheese mixture.
- Fold the pudding mixture into the cream cheese mixture until fully incorporated. This is your simple vanilla cream filling.
- Prepare the chocolate glaze: Place the chocolate chips in a medium, heat-safe bowl. Heat the heavy cream in a small saucepan until it just begins to simmer. Pour the hot cream over the chocolate chips. Let it sit for 5 minutes, then whisk until the mixture is smooth and glossy. Set aside to cool slightly.
- Assemble the cake: Line the bottom of a 9×13 inch baking dish with one layer of graham crackers. Break crackers as needed to fit the bottom.
- Spread half of the vanilla cream filling evenly over the graham crackers.
- Place a second layer of graham crackers over the cream filling.
- Spread the remaining half of the vanilla cream filling over the second cracker layer.
- Top with a final layer of graham crackers.
- Pour the slightly cooled chocolate glaze evenly over the top layer of graham crackers, spreading it to cover the entire surface.
- Cover the dish tightly with plastic wrap and refrigerate for at least 6 hours, or preferably overnight, to allow the graham crackers to soften and the flavors to meld. This make ahead dessert is best served cold.
- Slice and serve your decadent layered cake.
Notes
- For a richer chocolate topping, use a ganache made with 1 cup of semi-sweet chocolate chips and 1/2 cup of heavy cream.
- If you prefer a thicker cream layer, use two boxes of instant pudding mix instead of one.
- This no oven dessert idea works well if you use chocolate frosting instead of making a glaze from scratch.
- Chill time is essential for this icebox cake; do not rush the setting process.
Nutrition
- Serving Size: 1 square
- Calories: 450
- Sugar: 45
- Sodium: 350
- Fat: 22
- Saturated Fat: 12
- Unsaturated Fat: 10
- Trans Fat: 0.5
- Carbohydrates: 60
- Fiber: 2
- Protein: 7
- Cholesterol: 45