
When the sun is high and the thought of running the oven makes you break out in a sweat, you need a dessert that’s pure nostalgia served ice-cold. Forget fancy tiered cakes; we are diving headfirst into the easiest, creamiest trip down memory lane you can imagine: the ultimate No-Bake Banana Split Cake. I’m Mia Rodriguez, and growing up between a Mexican grandmother who taught me soulful patience and a mom who loved tinkering with classic Southern recipes, I learned quickly that the best dishes are those that adapt perfectly to real life. This recipe is one of my greatest hits for making that classic ice cream parlor treat accessible to every home cook, no preheating required!
- Why This No-Bake Banana Split Cake is Your New Favorite Summer Dessert
- Essential Ingredients for a Perfect No-Bake Banana Split Cake
- Step-by-Step Instructions to Make Your No-Bake Banana Split Cake
- Tips for Success When Making a Creamy Chilled Dessert banana split cake
- Make Ahead Dessert and Storage for Your banana split cake
- Variations on the Retro Dessert Recipe banana split cake
- Serving Suggestions for This Easy Banana Split Dessert
- Frequently Asked Questions About the banana split cake
- Nutritional Estimate for the banana split cake
- Share Your Experience Making This Banana Split Inspired Treat
- Nutritional Estimate for the banana split cake
- Share Your Experience Making This Banana Split Inspired Treat
Why This No-Bake Banana Split Cake is Your New Favorite Summer Dessert
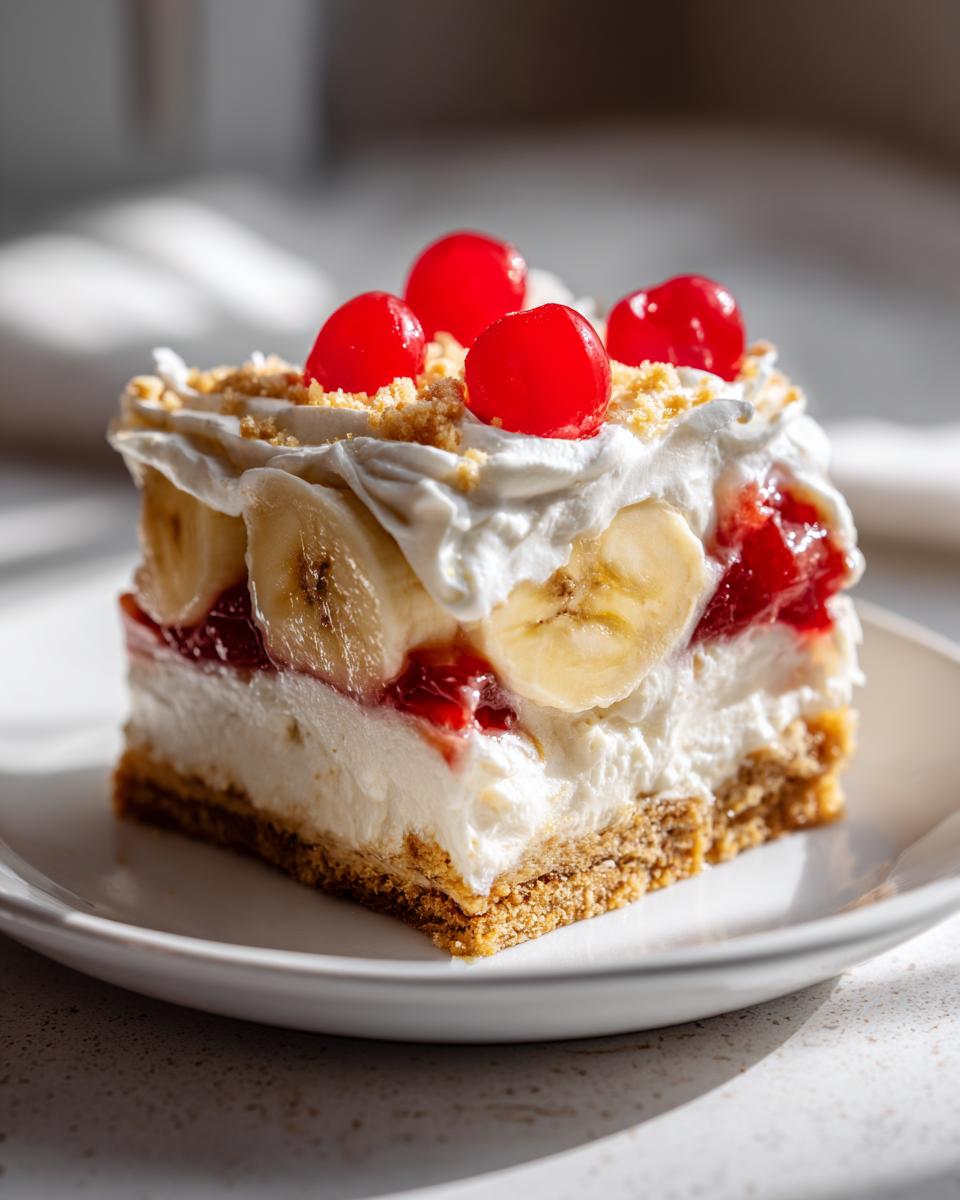
Honestly, if you are looking for a way to wow a crowd without spending your entire afternoon hovering over a hot oven, this is it. Trust me, this No-Bake Banana Split Cake isn’t just a dessert; it’s a whole mood for summer gatherings and potlucks. It captures every single wonderful flavor profile of that classic sundae we all grew up begging for, but in a portable, sliceable format.
We developed this specifically because sometimes you just need a fantastic, creamy chilled dessert that comes together fast. When you serve this creamy, layered creation, you know you’re bringing the best kind of heat—the kind that keeps things cool.
- Zero Oven Time: Since it’s a no-bake recipe, you can put the oven on vacation! This cooling process is perfect for those blazing hot summer days or when you just don’t feel like turning things on.
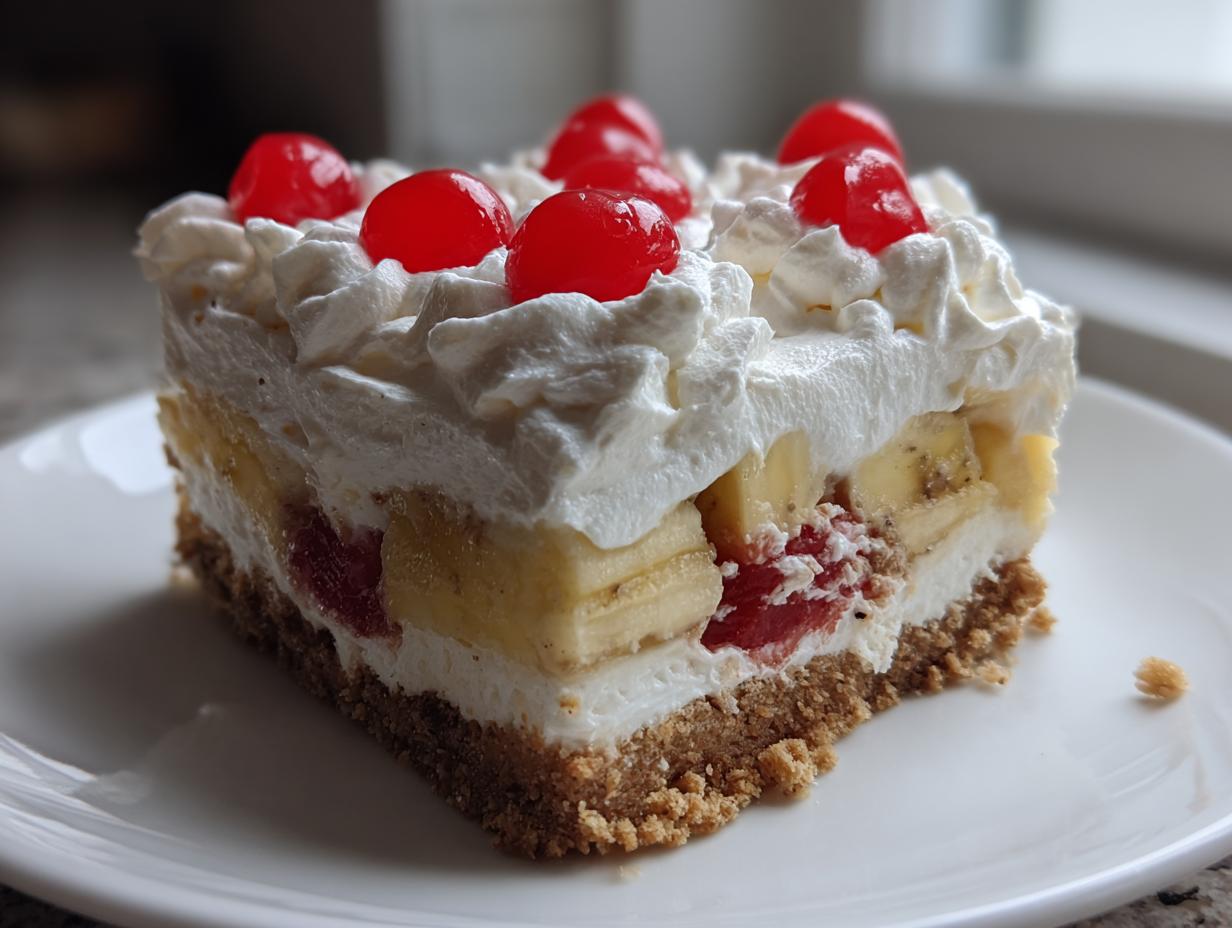
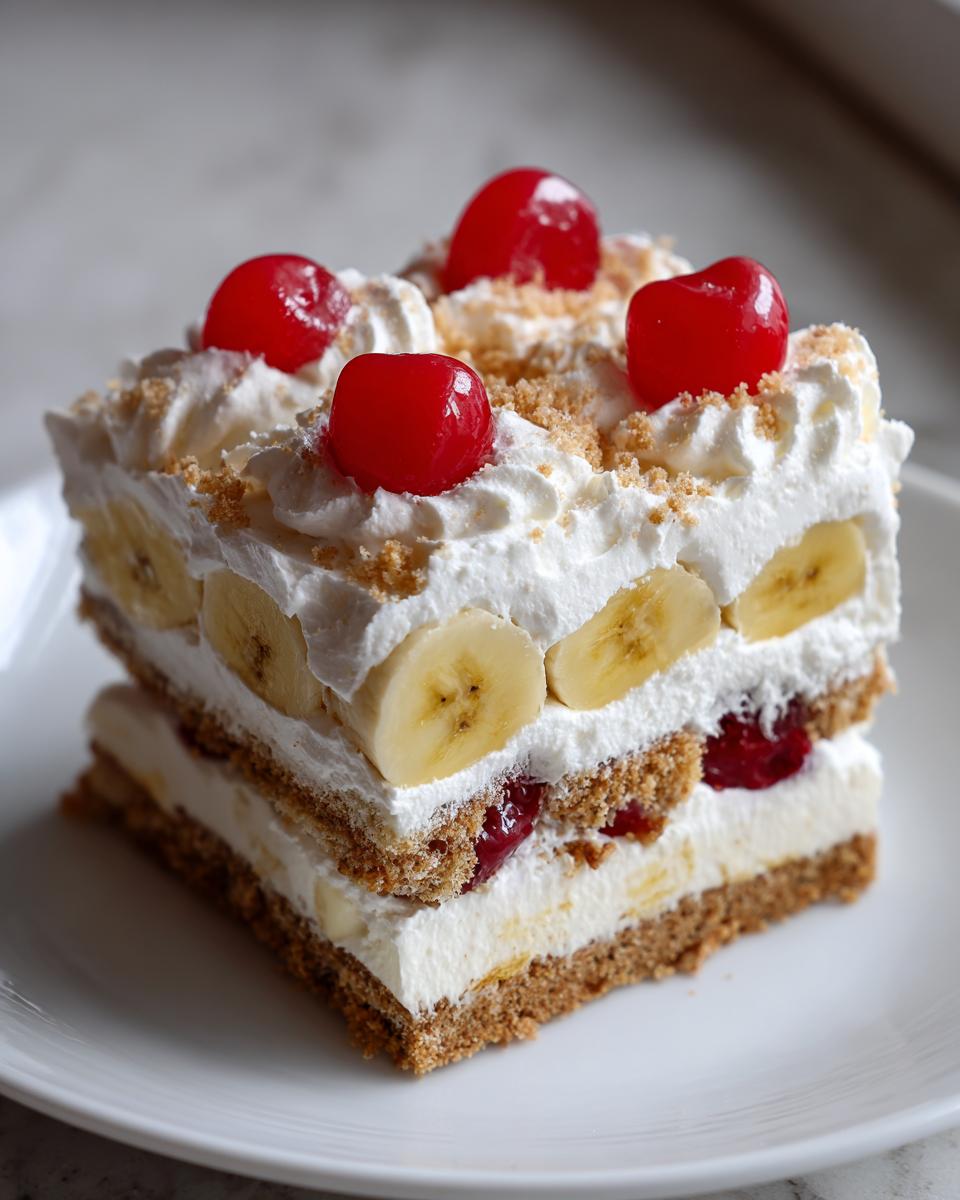
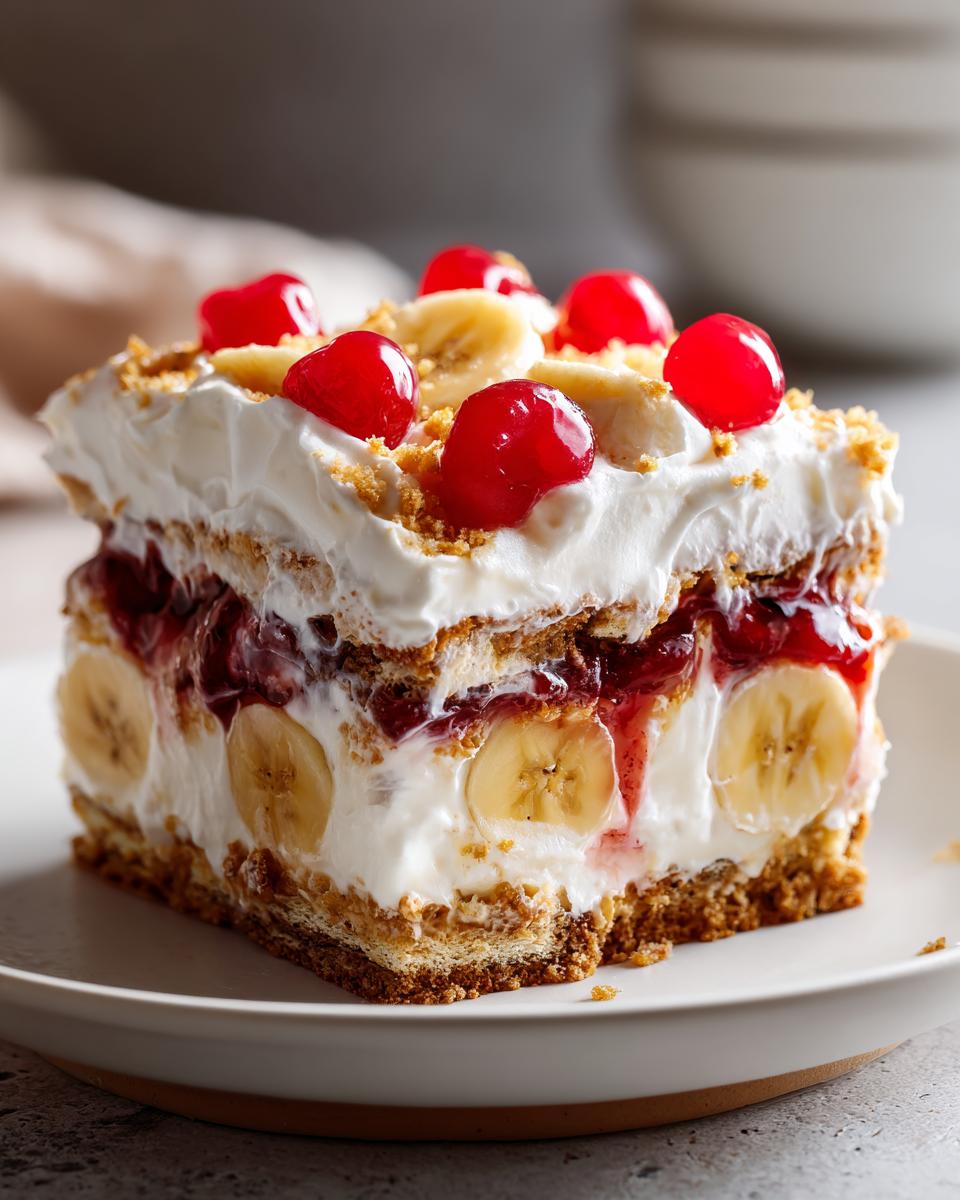
- Incredible Layered Structure: This isn’t just a mushy bowl of fruit, no sir! The defined layers—crust, cream cheese filling, fruit, whipped topping—make it visually stunning and texturally perfect.
- Potluck Perfect: It holds up beautifully in the cooler, making it the ultimate Simple Party Treat to take anywhere.
- Totally Refreshing Dessert: It’s bright, fruity, and wonderfully cold. It feels so much lighter than a traditional cake, making it the perfect ending to any heavy meal.
If you love easy, make-ahead desserts that look way fancier than they actually are, you need to bookmark this one right now. You can find more of my favorite easy recipes, including other chilled treats, over at my main dessert recipes index.
Essential Ingredients for a Perfect No-Bake Banana Split Cake
When you’re ditching the oven, the quality of what goes *into* the dish matters even more, right? Since this No-Bake Banana Split Cake relies on creamy components and fresh fruit, we need to be precise with our lineup. I’ve broken down everything you need below, organized by layer, so assembly goes smoothly. This entire combination is what turns a simple layered dessert into the ultimate Graham Cracker Crust Dessert dream.
My biggest advice here, and I learned this the hard way after one runny summer attempt: you absolutely must drain the canned fruit thoroughly! Excess liquid is the quickest way to sabotage your perfect layers and turn your great dessert into a soupy mess.
For the Graham Cracker Crust Base
- 1 1/2 cups graham cracker crumbs (Use fine crumbs; if you buy the large squares, pulse them in the food processor until they look like coarse sand.)
- 1/2 cup unsalted butter, melted (Make sure it’s measured correctly; too much butter makes the crust oily.)
For the Creamy Filling and Fruit Layers of the banana split cake
This is where the magic happens! The key to making sure the center sets up like a dreamy, no-bake cheesecake style dessert is room-temperature cream cheese.
- 1 (8 ounce) package cream cheese, softened (Crucial! Set this out at least an hour before you plan to start mixing.)
- 1 cup granulated sugar
- 1 (12 ounce) container frozen whipped topping, thawed, divided (We are dividing this so we can use half for richness and half for the top layer.)
- 2 large bananas, sliced (Firm is better than mushy here!)
- 1 (8 ounce) can crushed pineapple, drained well (I mean *very* well—pour it into a fine-mesh sieve and press down hard.)
- 1 (10 ounce) jar maraschino cherries, drained and halved (Make sure you get the juice off those bright red beauties!)
For the Classic Toppings
These final touches bring that authentic sundae flavor straight into your chilled cake.
- 1/2 cup chocolate chips or hot fudge sauce (Hot fudge is richer, but chips melt nicely when you drizzle them warm.)
- 1/2 cup chopped pecans or walnuts (Optional, but the crunch is so good against the soft cream.)
Step-by-Step Instructions to Make Your No-Bake Banana Split Cake
Alright, this is my favorite part—the assembly! Since we aren’t dealing with heat, speed is essential, but we still need precision so that your final Easy Banana Split Dessert has those beautiful, distinct layers we talked about. Grab your 9×13 dish, because we are putting this beauty together now. Remember, every great structure starts with a solid base! If you want to see how other people tackle this same recipe, check out this one I found that uses a similar approach: delicious no-bake banana split cake recipe.
Preparing and Chilling the Graham Cracker Crust Dessert
First things first, let’s nail that crust. You need to mix up your graham cracker crumbs and that melted butter until everything is evenly moistened. It should look like wet sand. Now, press the mixture firmly into the bottom of your 9×13 dish. This is where I always put my elbow grease in; press it down hard and evenly so it doesn’t crumble when you go to slice it later. Slide that base into the fridge for just 15 minutes to firm up while you make the next layer. Chilling the crust is key for the integrity of the whole banana split cake.
Creating the Creamy Layers for the banana split cake
While the crust chills, get your filling ready. In a medium bowl, beat that softened cream cheese with the sugar until it is perfectly smooth—no lumps allowed! Next, gently fold in *half* of your thawed whipped topping. I say gently because we are trying to keep the air in there, not knock it out. Once that’s just combined, spread this gorgeous, fluffy layer evenly right over your chilled graham cracker crust dessert.
Now for the fun fruit layers! Arrange those sliced bananas neatly across the cream cheese base. Then, take your well-drained crushed pineapple and sprinkle it evenly over the bananas. Don’t pile it up in one spot; we want balanced flavor in every slice!
Assembling and Chilling the Final banana split cake
Time to top it! Take the remaining half of your whipped topping and spread it gently over the fruit layers. We are nearly done assembling the main body of this treat. Next, get creative with those classic ice cream parlor toppings: arrange your halved maraschino cherries artfully, and drizzle that rich chocolate fudge or sprinkle those chips right across the top. If you’re using nuts, sneak them on last.
Here’s the longest stretch, but the most important step for getting that perfect ‘Layered Ice Cream Cake’ texture: cover the dish loosely and get it into the refrigerator. You need a minimum of 4 hours for this dessert to set up correctly. Honestly, overnight is even better! A proper chill time ensures clean slices of this delicious Easy Banana Split Dessert. If you want to see some of my go-to weeknight fixes, check out my weeknight dinners page.
Tips for Success When Making a Creamy Chilled Dessert banana split cake
Even though this is one of my favorite No Oven Recipes because it’s so straightforward, a few little secrets can take your banana split cake from good to absolutely legendary. I learned these little nuances over years of testing desserts for texture when you can’t rely on baking to set things right.
My number one tip, and I can’t stress this enough, is focusing on draining that pineapple. Seriously! If you use crushed pineapple straight from the can, all that extra liquid weeps out while chilling and turns your beautiful cream cheese layer into a runny mess. I use a fine-mesh sieve and physically press down with the back of a spoon—I mean work it until it seems like you’ve squeezed all the moisture out. Excess liquid is the enemy of a firm, creamy chilled dessert!
Also, please respect the chilling time. That minimum four-hour chill isn’t just a suggestion to let the flavors meld; it’s structural engineering for this dessert! The cream cheese and whipped topping firm up beautifully as they chill, giving you those clean slices you want. I often make mine the day before, which makes it the perfect Make Ahead Dessert for when company comes over. If you’re looking for more troubleshooting on summer recipes, I’ve linked one of my favorite sources here: Carla’s Banana Split Cake tips.
Finally, if you totally skip the butter in the crust and opt for a store-bought one, make sure you press that crust into the pan *hard*. A solid base means less chance of crumble when you serve up these slices of heaven.
Make Ahead Dessert and Storage for Your banana split cake
One of the best features of this phenomenal banana split cake is that it doubles down as a fantastic make-ahead option. I love getting desserts done the day before a big party so I can actually enjoy my guests! You can absolutely assemble this whole thing, cover it tightly, and keep it chilling happily in your refrigerator for up to two full days. The chilling process actually helps the cream layers solidify and the flavors integrate—it gets better, honestly!
However, I never recommend trying to freeze this one, and here’s why: that light, fluffy whipped topping is going to get icy and weird in texture once frozen and thawed, and the fresh bananas don’t thaw very gracefully either. It’s really designed to be enjoyed chilled, fresh from the fridge.
If you’re planning your menu ahead of time and need some easy savory backups for the day before, check out my roster of easy lunch recipes for quick solutions.
Variations on the Retro Dessert Recipe banana split cake
While the classic combination of banana, pineapple, and cherry is what makes this banana split cake special, honestly, I love tinkering! This recipe is so flexible, which is part of why it’s such a reliable family favorite. Don’t feel tied down by the original ingredients; feel free to remix them a little bit.
If you aren’t a huge fan of tart pineapple, try swapping it out for fresh diced strawberries—or even better, use raspberries for a slightly deeper berry flavor! The sharpness of raspberries cuts through that rich cream cheese filling beautifully. Also, feel free to swap up that nutty crunch on top. I sometimes skip the pecans and use mini chocolate covered pretzels for a salty kick. Yum!
For the crust, if you’re feeling extra creative, ditch the graham crackers for vanilla wafer crumbs or even crushed shortbread cookies next time! That small change completely alters the base flavor profile while keeping the spirit of this easy chilled dessert alive. If you want to explore more ways to mix up your sweets, hop over to my full dessert recipes index!
Serving Suggestions for This Easy Banana Split Dessert
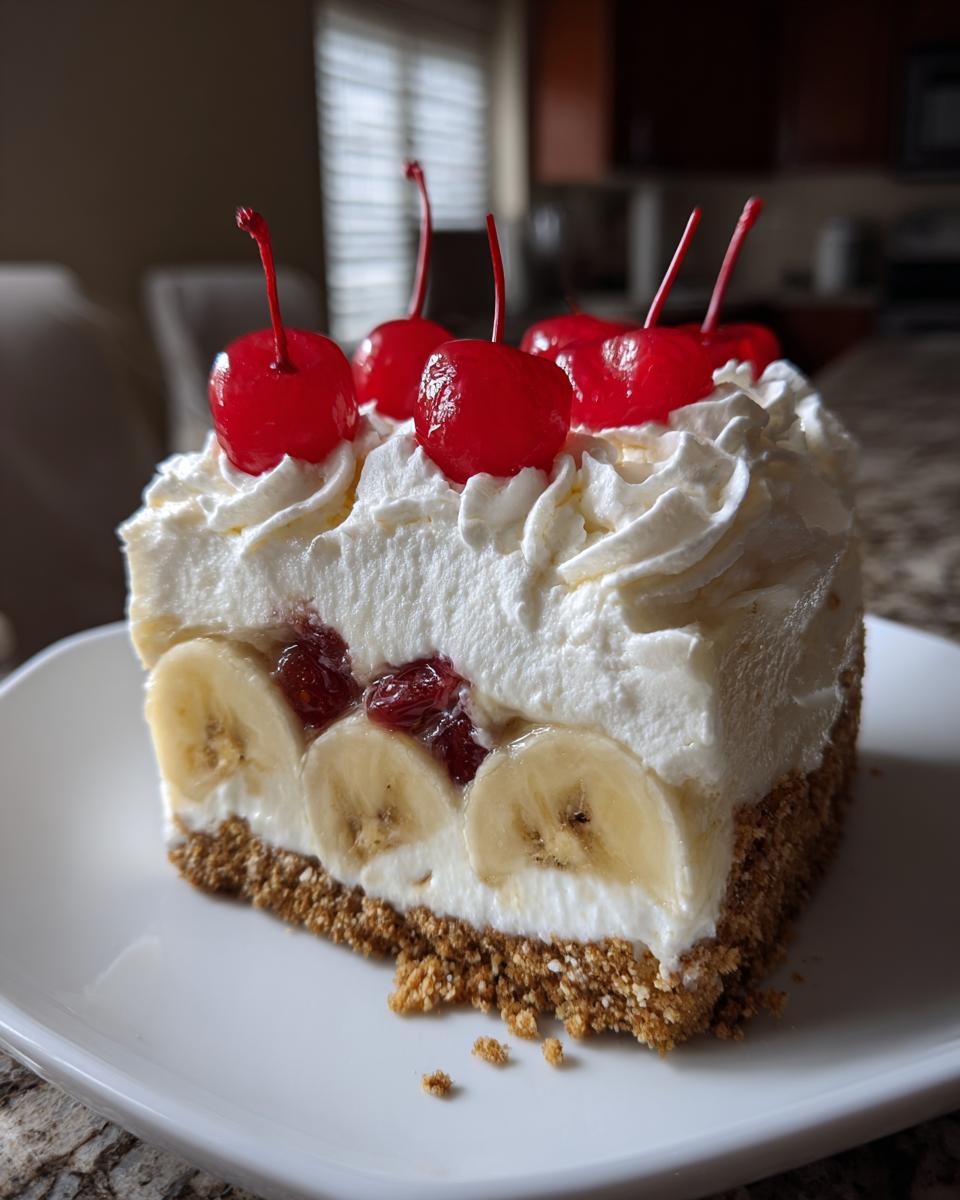
Since this banana split cake is already fully loaded with everything delicious—crust, cream, and fruit—the final step is all about making it look spectacular when you cut into it. Presentation really matters when you serve something this colorful!
Honestly, the best advice I can give you is to make sure you are serving this on chilled plates if you can. It keeps that creamy temperature perfect until the last bite. Before you bring the platter out, grab a few extra maraschino cherries and place one right on top of each cut slice for that classic, retro look. If you didn’t drizzle on fudge before chilling, give each person a little extra warm fudge sauce or a small drizzle of chocolate right before they dig in. It’s those little finishing touches that turn an easy dessert into something truly memorable.
Frequently Asked Questions About the banana split cake
Can I use fresh pineapple instead of canned in this No Bake Banana Split Cake?
That’s a great question! Since the canned crushed pineapple has that beautifully consistent texture and soft consistency, it’s my top recommendation. If you decide to use fresh pineapple, you need to chop it finely, and then—this is important—you must sauté it briefly to remove some of the excess water, followed by cooling it completely. If you skip draining/cooking the fresh fruit, you risk getting a watery layer because fresh fruit releases a lot more moisture than the canned variety in a No Bake Cheesecake Style Dessert like this.
My cream cheese layer seems too firm after chilling. What went wrong?
That usually happens for one of two reasons, both related to temperature! First, did you make sure your cream cheese was fully softened before you beat it with the sugar? If it’s too cold, you get lumps. Second, and more often, it happens if you didn’t fold the whipped topping in gently enough, knocking all the air out. We want it light! Always treat that whipped topping gently to keep the filling airy and soft, which is key for this banana split cake.
Can I make this layered dessert vegan or dairy-free?
It takes a little swapping, but you absolutely can! You would need to substitute the butter in the crust with a vegan butter alternative. For the creamy filling, swap the cream cheese for a good quality dairy-free cream cheese block. The toughest part is the whipped topping—look for a coconut cream-based or soy-based whipped topping, but be aware they might not stabilize quite as firmly as the traditional kind. You might need extra chilling time if you try substitutions.
What’s the best way to add a middle chocolate layer to my banana split cake?
I love people thinking creatively! If you want a center chocolate layer, I suggest making a simple fudge sauce thinner than what we drizzle on top. After you spread the first cream cheese layer (Step 3 in the instructions), drizzle about half of your chocolate/fudge sauce lightly over that layer before topping with the bananas. Then, continue with the fruit and the final whipped topping layer. It sets up nicely once chilled!
For more tips on adapting recipes or for general kitchen questions, feel free to reach out on my contact page. Also, here is an example of a slightly different take on the recipe from Recipe by Diva.
Nutritional Estimate for the banana split cake
When you are making a retro, creamy, fruit-loaded dessert, we know it’s going to be a treat! Please remember that these numbers are just estimates, based on using standard ingredients and following my recipe guide closely. Calorie counts can shift significantly depending on the brand of graham crackers or the amount of fudge you choose to drizzle on your slices.
| Nutrient | Estimate Per Slice |
|---|---|
| Serving Size | 1 slice |
| Calories | 350 |
| Sugar | 30 |
| Sodium | 210 |
| Fat | 20 |
| Saturated Fat | 10 |
| Unsaturated Fat | 10 |
| Trans Fat | 0 |
| Carbohydrates | 42 |
| Fiber | 2 |
| Protein | 4 |
| Cholesterol | 35 |
Share Your Experience Making This Banana Split Inspired Treat
I just hope you loved making this super effortless, super retro Banana Split Inspired dessert as much as I love sharing it with you! Seriously, I want to know what you think. Did the graham cracker crust hold up? What was your favorite part of the creamy layers? Take a moment to give this recipe a quick star rating right below this section!
And please, if you snap a photo of your perfectly chilled, sliceable creation, tag me on social media so I can see your gorgeous work. Seeing your takes on classic American recipes is honestly what keeps me inspired to keep testing and perfecting these family favorites. If you want to read more about my own culinary story and what inspires my cooking philosophy, check out my About Page!
PrintNo-Bake Banana Split Cake
Make this easy, layered No-Bake Banana Split Cake for a refreshing summer dessert. It captures all the classic banana split flavors with a graham cracker crust and creamy fruit layers, requiring no oven time.
- Prep Time: 25 min
- Cook Time: 0 min
- Total Time: 4 hr 25 min
- Yield: 12 servings 1x
- Category: Dessert
- Method: No-Bake/Chilling
- Cuisine: American
- Diet: Vegetarian
Ingredients
- 1 1/2 cups graham cracker crumbs
- 1/2 cup unsalted butter, melted
- 1 (8 ounce) package cream cheese, softened
- 1 cup granulated sugar
- 1 (12 ounce) container frozen whipped topping, thawed, divided
- 2 large bananas, sliced
- 1 (8 ounce) can crushed pineapple, drained well
- 1 (10 ounce) jar maraschino cherries, drained and halved
- 1/2 cup chocolate chips or hot fudge sauce
- 1/2 cup chopped pecans or walnuts (optional)
Instructions
- Prepare the crust: Mix graham cracker crumbs and melted butter. Press the mixture firmly into the bottom of a 9×13 inch baking dish. Chill the crust for 15 minutes.
- Make the cream cheese layer: In a medium bowl, beat the softened cream cheese and granulated sugar until smooth. Gently fold in half of the thawed whipped topping until just combined.
- Spread the cream cheese mixture evenly over the chilled graham cracker crust.
- Layer the fruit: Arrange the sliced bananas over the cream cheese layer. Sprinkle the drained crushed pineapple evenly over the bananas.
- Top with remaining whipped topping: Spread the remaining half of the whipped topping over the pineapple layer.
- Add toppings: Arrange the halved maraschino cherries over the whipped topping. Drizzle with chocolate chips or hot fudge sauce. Sprinkle with chopped nuts, if using.
- Chill the dessert: Cover the dish loosely and refrigerate for at least 4 hours, or until firm. This chilling time is essential for a firm, creamy dessert.
- Slice and serve cold.
Notes
- Drain the crushed pineapple very well; excess liquid will make the layers runny.
- For the best texture, use fresh, firm bananas.
- You can substitute store-bought graham cracker crust if you prefer to skip mixing the crumbs and butter.
- This is a great make ahead dessert; it holds up well in the refrigerator for up to two days.
Nutrition
- Serving Size: 1 slice
- Calories: 350
- Sugar: 30
- Sodium: 210
- Fat: 20
- Saturated Fat: 10
- Unsaturated Fat: 10
- Trans Fat: 0
- Carbohydrates: 42
- Fiber: 2
- Protein: 4
- Cholesterol: 35