
Oh, friends, there is simply no smell in the world that says “home” quite like warm, yeasty bread baking in the oven. Forget those fancy candles; if you want real comfort, you need to bake! When I first started figuring out how to bring bakery magic into my own kitchen, the French loaves were always the trickiest. They either came out too dense or too pale. But I finally cracked the code, blending my grandmother’s love for tender structure with my food science background.
This recipe for French bread gives you exactly what you’re dreaming of: that satisfying, crackly, crusty exterior, but with a soft, fluffy interior that melts when you dunk it in soup. Trust me, darling, this is the easy homemade solution you’ve been searching for. It’s my go-to when I need a little culinary joy in the middle of a busy week!
- Why This Homemade French Bread Recipe Delivers Bakery Style Bread
- Ingredients for Your Easy French Bread
- Step-by-Step Guide to Make French Bread from Scratch
- Baking Homemade Bread Tips from Mia
- Variations for Your French Bread
- Serving Suggestions for Dinner Side Bread
- Storage and Reheating Instructions for Homemade French Bread Recipe
- Frequently Asked Questions About Making French Bread
- Nutritional Estimate for This Simple Yeast Bread
- Share Your Homemade French Bread Success
Why This Homemade French Bread Recipe Delivers Bakery Style Bread
I know what you’re thinking: “Bakery style? In my oven?” Yes, you absolutely can! The secret to making unbelievable French bread at home without a professional oven comes down to two major focusing points: texture development and steam management. We don’t just mix things and hope for the best here; we manage the environment!
- Delivers that sought-after crispy shell.
- Guarantees a light, airy texture inside.
- Uses simple ingredients you likely already keep stocked.
Achieving the Soft French Bread at Home Texture
That wonderfully soft interior begins right at the start! I am so strict about water temperature; it needs to be warm enough to wake up the yeast, but not so hot that you kill it off. That yeast activity creates all those lovely bubbles, which means you need to give the dough a good, solid knead—about 7 or 8 minutes—to build structure. That structure is how you get that beautiful, **soft French bread at home** you’re craving. Trust me, don’t skimp on the kneading!
Creating the Perfect Crusty Exterior Bread
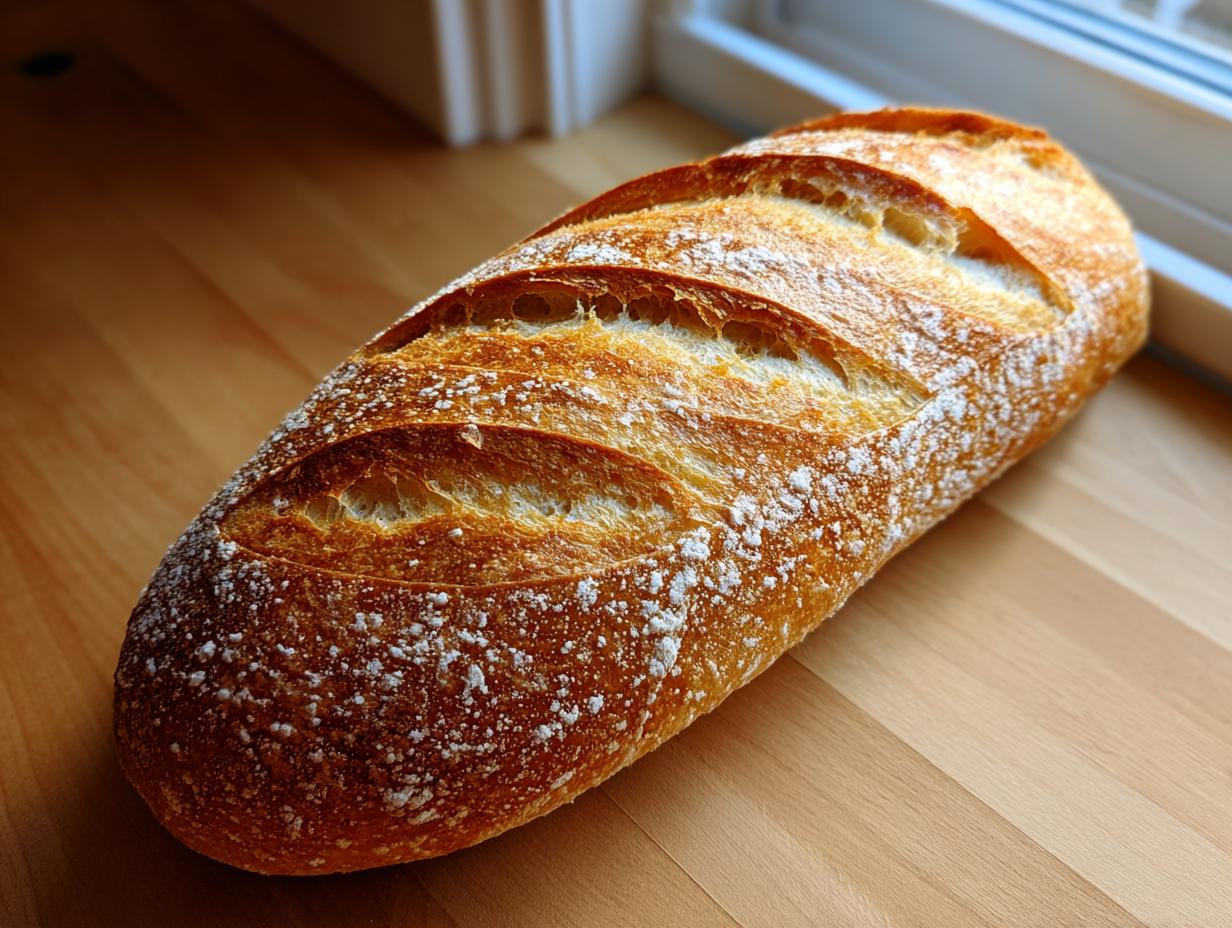
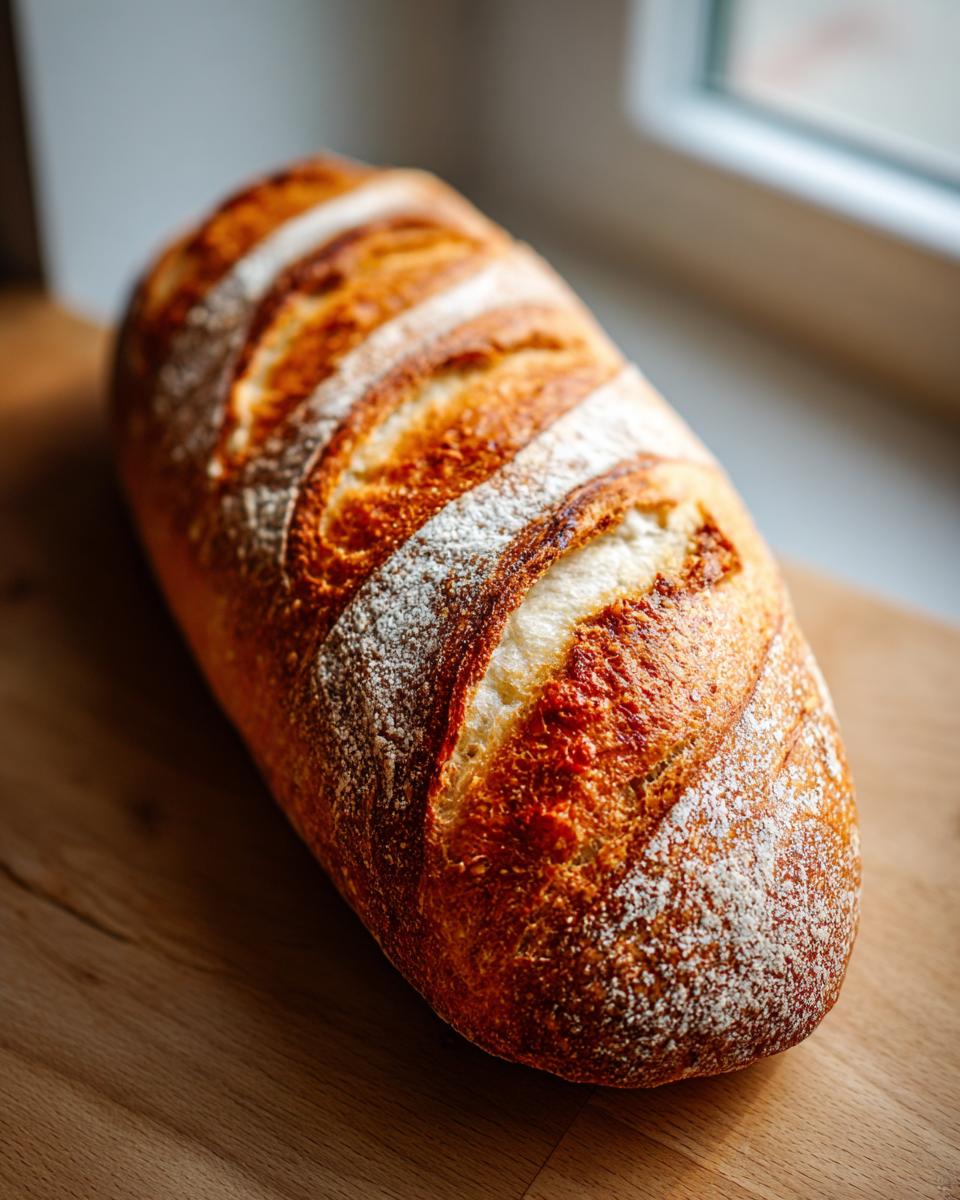
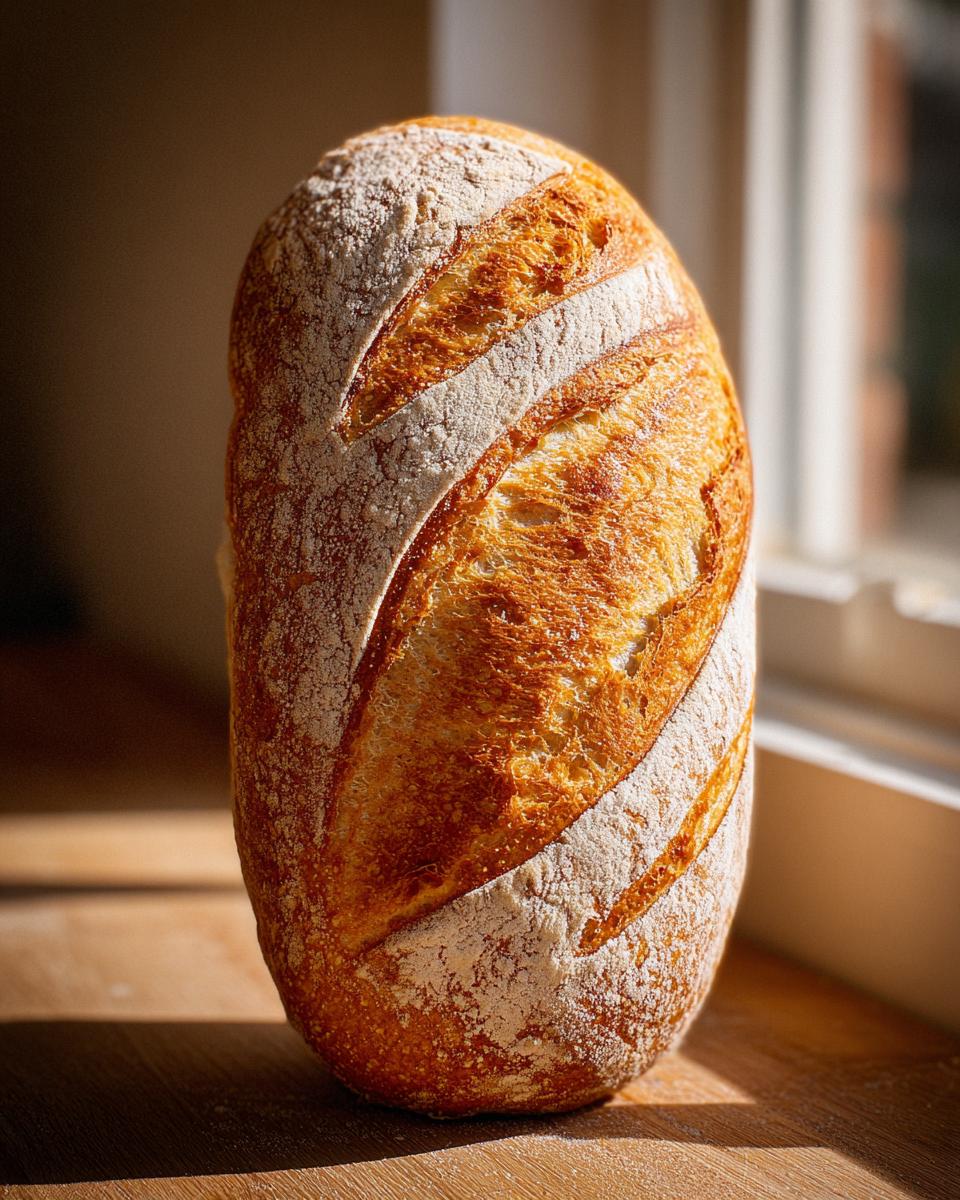
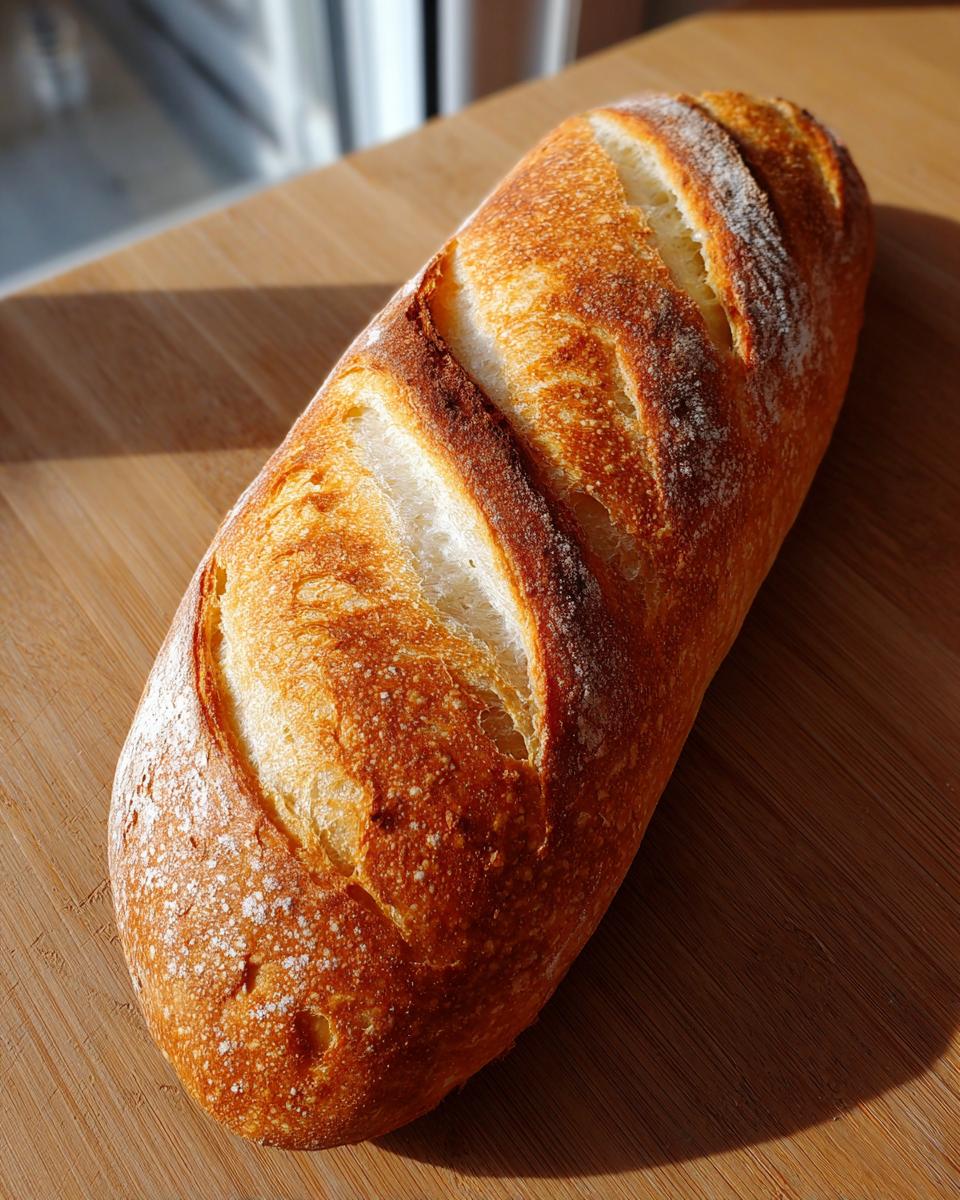
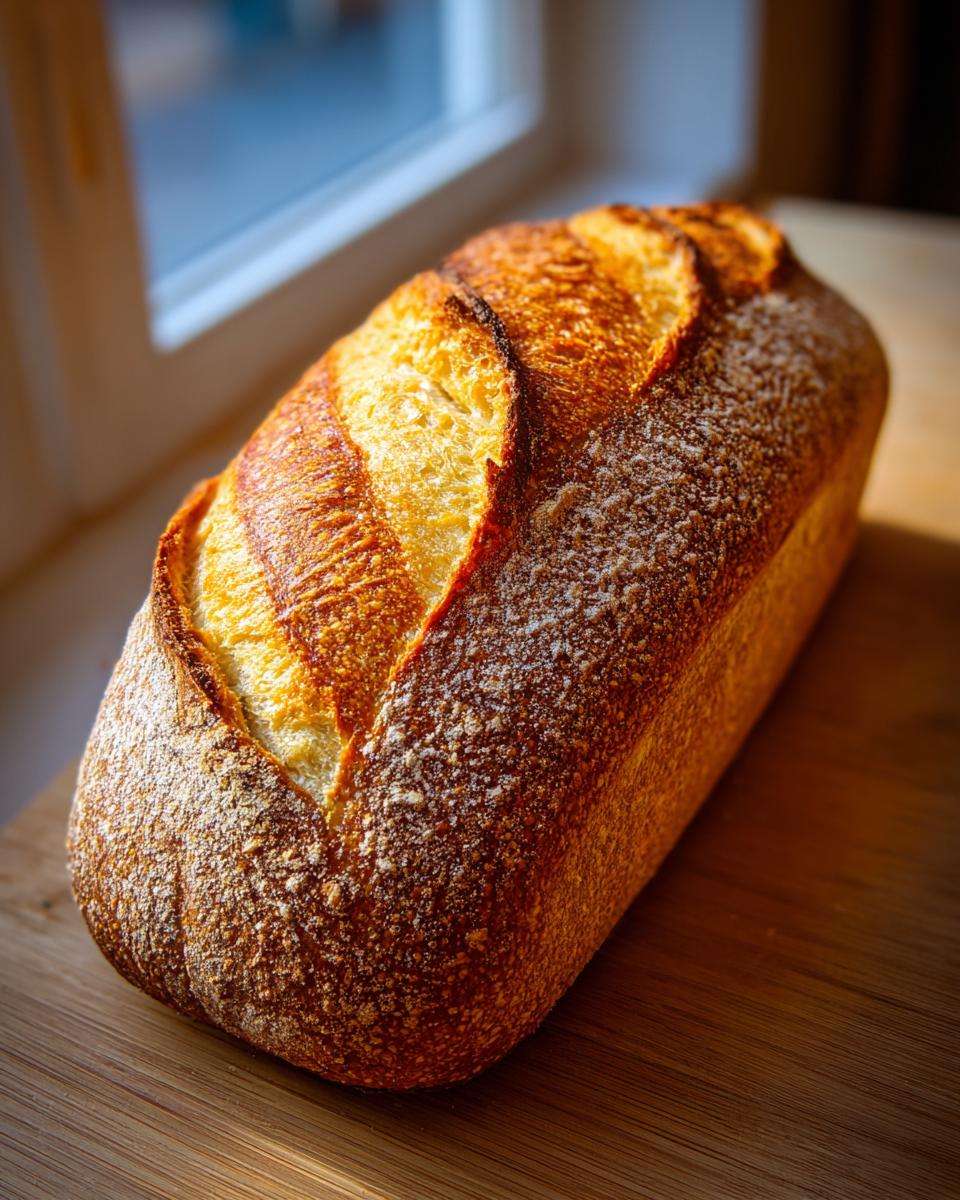
If you want true cracker-like crunch, you must introduce steam when you bake. I use the shallow pan trick—preheating a pan on the bottom rack and adding hot water right as the loaves go in. That quick burst of steam keeps the surface moist long enough for the bread to expand fully before the shell hardens. The light egg wash gives it that classic golden sheen, but if you want an even sharper crackle, try skipping the wash and just spritzing the loaves with water a couple of times early in the bake for a truly **crusty artisan bread** experience.
Ingredients for Your Easy French Bread
Okay, let’s talk about what you need to pull this magic off. Part of what makes this recipe feel achievable is that we’re not hunting down specialty flours or weird additives! It’s all standard stuff, but how we list it matters because baking is chemistry, just dressed up pretty. For reference, this recipe is perfect for making two beautiful loaves.
You will need 1 1/2 cups of warm water, and I mean *warm*—aim for that sweet spot between 105°F and 115°F. Too hot, and we are wasting our time! You’ll use 2 1/4 teaspoons of active dry yeast, just a standard packet, and 1 teaspoon of granulated sugar to feed that yeast. For the dry stuff, grab 3 1/2 cups of all-purpose flour, plus some extra for dusting your surface later, and 1 1/2 teaspoons of salt for flavor balance. Finally, we need 1 tablespoon of olive oil for mixing in, plus a little extra to grease the bowl. And for that gorgeous, professional finish, 1 egg white, lightly beaten for the wash.
Step-by-Step Guide to Make French Bread from Scratch
Alright, let’s get our hands floury! This is where you see instant gratification in baking. I’ve timed these stages precisely over dozens of batches to make sure you get the best results, even if you’re brand new to yeast baking. Remember, timing is everything when you are trying to achieve that fantastic, soft crumb in your homemade French bread!
Activating Yeast and Mixing the Dough for Quick French Bread Recipe
First things first: wake up that yeast! Mix your warm water, sugar, and yeast together in a big bowl. Don’t touch it for about ten minutes until it’s foamy and happy—that tells us it’s alive and ready to work! Once it’s bubbly, toss in your flour, salt, and olive oil. Stir it all up with a sturdy spoon until you can’t stir anymore and you’ve got what I call a beautiful, ‘shaggy’ mess. That’s exactly where we want to be!
Kneading and First Rise for Your Fluffy Loaf Recipe
Now comes the fun part! Turn that shaggy dough out onto your floured counter. You have to knead this for a solid 6 to 8 minutes. You’re building strength, so keep going until it feels smooth and stops sticking; the real test is when you poke it, and it slowly springs back. Pop that dough into a lightly oiled bowl, cover it up, and let it chill out in a warm spot for 60 to 75 minutes until it’s doubled. This first rise is essential for that lovely **fluffy loaf recipe** texture we love.
Shaping and Final Proofing the French Bread
Gently punch down that risen mass—try not to deflate all that hard work! Turn it out and divide it right in half. Now, take each half and gently shape it into a long loaf, aim for about 12 to 14 inches. They don’t have to be perfect baguettes; rustic is totally fine! Place them on parchment paper, cover them loosely, and let them rest for just 20 minutes. This final short rest straightens them out before they hit the oven hot.
Baking Instructions for Crusty Artisan Bread
Preheat your oven to 400°F! Remember that shallow pan we talked about? Get that in the bottom rack heating up. This is the steam generator! Right before they go in, gently brush your loaves with that beaten egg white—this helps with browning—and quickly score the top three times diagonally with a razor or very sharp knife. Then, carefully pour about half a cup of hot water into that bottom pan and shut the door fast! Bake for 20 to 25 minutes until they are deep gold. That steam plus that egg wash guarantees you a fantastic **crusty artisan bread** experience.
Baking Homemade Bread Tips from Mia
Since you’ve taken the leap to make this homemade French bread recipe, I want to share a few extra secrets that professionals use—stuff I learned when I was developing recipes professionally! Flour matters, my friends. All-purpose is great, but if you happen to have some bread flour, using about half and half will always give you a slightly chewier, more resilient dough.
My biggest non-recipe tip is humidity adjustment. If your kitchen is super dry in the winter, your dough might rise faster but lack that internal springiness. In those cases, I add just an extra tablespoon of water. When they come out of the oven, you have to tap the bottom! If it sounds hollow like a drum, that’s your sign—it means the inside is perfectly baked through and airy, which is the hallmark of great **baking homemade bread tips**.
Variations for Your French Bread
While this recipe is spot-on for that classic loaf, baking should always be fun, right? If you’re feeling adventurous, try jazzing up the standard French bread dough! My favorite trick is adding about two teaspoons of freshly chopped rosemary or thyme right when you add the salt. Mix it in gently before the first rise.
Also, don’t feel locked into the long loaf shape! If you need something faster or if you just want cute little portions for dipping, divide the dough into 12 equal pieces after the first rise. Roll them into small balls, let them proof for those last 20 minutes, and bake them at the same temperature. You’ll get perfect little rolls that still have that amazing soft center!
Serving Suggestions for Dinner Side Bread
Once you pull those golden loaves out of the oven, you’ll see why this is the ultimate dinner side bread staple. For dipping? Brush the warm loaves lightly with olive oil and some dried oregano, then have them ready for soaking up the juices from my creamy horseradish sauce recipe for prime rib. Seriously, no leftovers!
For something heartier, this bread is sturdy enough for truly epic sandwiches. It holds up beautifully to juicy tomatoes and hearty fillings. Don’t just set it on the table; make it the star of your next meal!
Storage and Reheating Instructions for Homemade French Bread Recipe
You want this bread to stay amazing for days, but let’s be honest, it usually disappears in one evening! If you have leftovers, keep them at room temperature wrapped tightly in plastic wrap—this keeps the interior soft. Don’t store it in the fridge; that dries it out fast, and we worked hard for that fluffy texture!
To reheat and bring back that gorgeous crunch, just wrap the loaf loosely in foil and pop it into a 350°F oven for about 8 to 10 minutes. It brings the crust right back to life! If you need to store it for longer, you can absolutely freeze cooled loaves whole or sliced. Just wrap them super well, and when you’re ready, thaw completely before reheating them in the oven.
Frequently Asked Questions About Making French Bread
I know you might still have questions swirling around, especially when tackling a classic like French bread for the first time. You want that tender crumb bread, and you want it without a whole afternoon commitment! I’ve gathered the most common things folks ask me over on the contact page. Let’s clear up any remaining doubts so you can get baking!
Can I make this a One Hour Bread Recipe?
That’s tempting, isn’t it? The whole recipe is actually closer to an hour and forty minutes total, not strictly one hour, due to our resting times. We need that main rise to build flavor and structure for that light texture. If you try to rush that first rise too much, your **Homemade French Bread Recipe** will likely end up a little dense. Patience during the proofing stage is non-negotiable for that soft result!
What is the difference between this and a Baguette Recipe Easy?
That’s a great question! A true, traditional French baguette is typically made with only the leanest ingredients—flour, water, salt, and yeast—and demands a very long, slow fermentation for maximum openness. I developed this recipe to be an **easy French bread** that is more forgiving for the beginner baker. This means we add a tiny bit of oil and rely on the specific egg wash to help achieve a slightly softer crust than a true, shatteringly crisp baguette loaf would have. It’s bread for sandwiches, not just dipping!
Nutritional Estimate for This Simple Yeast Bread
I always get asked which part of the measuring is most important—calories or flavor! Look, baking for joy means we don’t obsess over the numbers, but I went ahead and got the estimates run, just so you know what you are looking at when you slice into one of these golden loaves. Remember, since this recipe makes two full loaves, these values are based on slicing one loaf into 10 portions. So, one slice is one serving!
These estimates are calculated based on standard ingredient measurements and should be treated as a close guideline. Every kitchen uses slightly different flour density or salt amount, so treat this as helpful information, not gospel truth for your diet plan.
- Serving Size: 1 slice (1/10 loaf)
- Calories: 185
- Sugar: 0.5g
- Sodium: 280mg
- Fat: 1.5g
- Saturated Fat: 0.2g
- Carbohydrates: 38g
- Protein: 5g
See? Not bad at all for something that tastes like it came straight from a Parisian bakery! Enjoy every bit!
Share Your Homemade French Bread Success
Now it’s your turn! Honestly, the best part of my whole process—even better than that first perfect crunch when I slice into a loaf—is hearing from you folks. You’ve conquered the yeast, you’ve mastered the steam, and you’ve created incredible French bread sitting on your own kitchen table.
I absolutely beg you: come back and let me know how it went! Are you team soft crust or team extra crunchy? Give the recipe a star rating right down below so I know you loved it.
And please, please share photos on social media! Tag me so I can see your beautiful loaves. There is nothing better than seeing my recipes out in the wild working their magic for your family dinners. Happy baking, everyone!
PrintEasy Homemade Soft and Crusty French Bread (Ready in Under 2 Hours)
Bake bakery-style French bread at home. This recipe delivers a soft, fluffy interior and a satisfyingly crusty exterior using simple ingredients and straightforward steps perfect for beginners.
- Prep Time: 20 min
- Cook Time: 25 min
- Total Time: 1 hour 40 min
- Yield: 2 loaves 1x
- Category: Bread
- Method: Baking
- Cuisine: French
- Diet: Vegetarian
Ingredients
- 1 1/2 cups warm water (105°F to 115°F)
- 2 1/4 teaspoons active dry yeast
- 1 teaspoon granulated sugar
- 3 1/2 cups all-purpose flour, plus more for dusting
- 1 1/2 teaspoons salt
- 1 tablespoon olive oil, plus more for the bowl
- 1 egg white, lightly beaten (for wash)
Instructions
- In a large bowl, combine the warm water, yeast, and sugar. Let stand for 5 to 10 minutes until foamy. This activates the yeast.
- Add the flour, salt, and olive oil to the yeast mixture. Mix with a wooden spoon until a shaggy dough forms.
- Turn the dough out onto a lightly floured surface. Knead for 6 to 8 minutes until the dough is smooth and elastic. It should spring back when lightly poked.
- Lightly oil a clean large bowl. Place the dough in the bowl, turning to coat. Cover the bowl tightly with plastic wrap or a clean kitchen towel.
- Let the dough rise in a warm place for 60 to 75 minutes, or until it has doubled in size. This is your first rise.
- Gently punch down the risen dough. Turn it out onto a lightly floured surface and divide it into two equal pieces.
- Shape each piece into a long, even loaf, about 12 to 14 inches long. You can gently roll the dough to create a slightly tapered end, similar to a baguette shape.
- Place the shaped loaves on a baking sheet lined with parchment paper, leaving space between them. Cover loosely with plastic wrap or a towel. Let them rest for 20 minutes. This is the second rise.
- Preheat your oven to 400°F (200°C). Place a shallow pan on the bottom rack while the oven preheats to create steam for a better crust.
- Just before baking, brush the tops of the loaves lightly with the beaten egg white. Use a sharp knife to make three diagonal slashes across the top of each loaf.
- Carefully pour about 1/2 cup of hot water into the preheated shallow pan on the bottom rack to create steam, then quickly close the oven door.
- Bake for 20 to 25 minutes, rotating the pans halfway through, until the loaves are deep golden brown and sound hollow when tapped on the bottom.
- Transfer the finished French bread loaves to a wire rack to cool completely before slicing.
Notes
- For an extra crusty exterior, you can lightly spritz the loaves with water every five minutes during the first 15 minutes of baking instead of using the egg wash.
- If you want a softer crust, skip the egg wash and the steam pan entirely.
- This bread is excellent served warm with butter or used for hearty sandwiches.
Nutrition
- Serving Size: 1 slice (1/10 loaf)
- Calories: 185
- Sugar: 0.5
- Sodium: 280
- Fat: 1.5
- Saturated Fat: 0.2
- Unsaturated Fat: 1.3
- Trans Fat: 0
- Carbohydrates: 38
- Fiber: 1.5
- Protein: 5
- Cholesterol: 0