
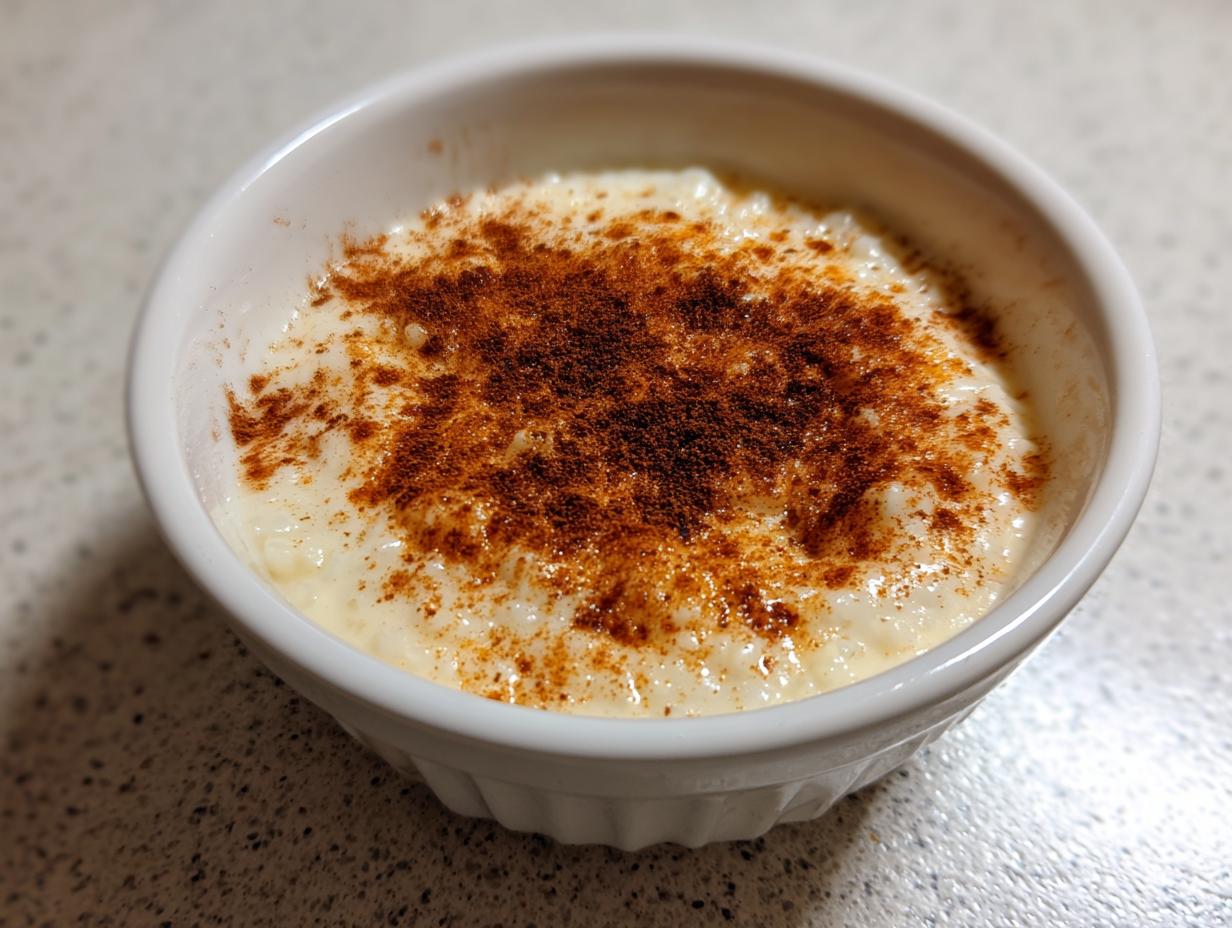
Sometimes, there’s just nothing better than sinking into a bowl of pure, unadulterated comfort. For me, that feeling always smells like simmering milk and sweet vanilla. Forget those stiff, baked versions—we are talking about the real deal here. My absolute favorite is this Old-Fashioned Creamy Stovetop Rice Pudding. It’s rich, velvety, and so simple, yet it tastes like every perfect memory from childhood bundled up together. When I stir this on the stove, I’m instantly back in Mia’s kitchen, learning just how much patience milk needs to turn into magic. This creamy rice pudding is the definition of a hug in a bowl, and I’m thrilled to share my method for making it perfectly every single time.
- Why This Old-Fashioned Creamy Rice Pudding Recipe Stands Out
- Ingredients for the Best Rice Pudding Recipe
- How to Prepare Old-Fashioned Creamy Rice Pudding
- Tips for Success with Your Homemade Pudding Dessert
- Serving Suggestions for Warm Sweet Treats
- Storage and Make Ahead Dessert Rice Instructions
- Rice Pudding Variations: Adding Flavor to Your Simple Pudding Recipe
- Frequently Asked Questions About Creamy Rice Pudding Recipe
- Nutritional Snapshot of This Nostalgic Recipes
Why This Old-Fashioned Creamy Rice Pudding Recipe Stands Out
So many pudding recipes rely on heavy baking or tricky techniques, but this version is different. It’s all about slow, steady stovetop cooking which yields that unbelievably creamy texture everyone searches for. It’s the perfect marriage of old-school flavor and modern, straightforward steps. Seriously, this is the ultimate classic comfort dessert.
- Achieving Ultimate Creaminess in Your Rice Pudding: The secret here is time and temperature control, not a huge ingredient list! We cook low and slow after that initial water absorption. Constant, thoughtful stirring breaks down the starches in the short-grain rice, releasing them slowly into the milk. That’s what creates that impossibly smooth, thick, creamy rice pudding texture that just melts in your mouth.
- The Simplicity of This Stovetop Rice Pudding: Unlike baked puddings that can easily develop a skin or scorch if you forget them for a second, this stovetop version lets you control everything visually. It’s an incredibly easy rice pudding to manage, needing just about an hour total time. You get that nostalgic taste without needing to preheat the oven on a hot day!
Ingredients for the Best Rice Pudding Recipe
Getting the ingredients right is truly the foundation of this creamy dish. You don’t need a massive shopping list for the best rice pudding recipe; you just need the *right* stuff! We are relying on simple pantry staples that work together beautifully. Remember, this isn’t a complicated dessert; it’s about respecting these few key players. Here is exactly what you’ll need to pull together my classic version.
- 1 cup short-grain white rice (Arborio works well)
- 4 cups whole milk
- 1 cup water
- 1/2 cup granulated sugar
- 1 teaspoon vanilla extract
- 1/2 teaspoon ground cinnamon, plus extra for topping
- 1/4 teaspoon salt
Ingredient Notes and Substitutions for Creamy Rice Pudding
The type of rice makes a huge difference here. I insist on using short-grain rice, like Arborio—the kind you might use for risotto! It has more starch, which is exactly what breaks down and thickens our pudding beautifully. Don’t try to substitute with long-grain rice; you’ll end up with soupy rice, not pudding.
For maximum richness that really takes this over the top, remember that little note I included? If you want that truly decadent texture, swap out half a cup of the whole milk for heavy cream. Trust me, it adds another layer of velvety goodness.
And please, use real vanilla extract. Artificial vanilla just doesn’t give you that warm, cozy aroma that makes this such a wonderful vanilla rice pudding.
How to Prepare Old-Fashioned Creamy Rice Pudding
Making this creamy magic is all about following the rhythm of the stovetop. Don’t rush this part; the slow cooking is what separates an okay pudding from an absolutely spectacular one. I’ve broken down the process so you can nail that rich, comforting texture every time. If you’re looking for a fantastic stovetop rice pudding that doesn’t require turning on the oven, this is it!
Step 1: Cooking the Rice Base
First things first, you need to get that rice happy. Grab your medium saucepan—nothing specialized yet. Pour in the cup of water and the rice. Turn the heat up to medium-high and bring it right to a boil. Once it’s bubbling, dial that heat back down just a touch. We need to let the rice absorb all that water completely, which takes about five minutes. Keep an eye on it so it doesn’t boil over!
Step 2: Simmering for Creamy Rice Pudding Texture
This is where the transformation happens, so pay attention! Pour in all four cups of whole milk. Bring the whole thing up to a very gentle simmer, and I mean gentle—we don’t want boiling milk sputtering everywhere. This next part takes patience, usually about 40 to 50 minutes. You must stir often! Seriously, keep that spoon moving along the bottom of the pan so the starches release and nothing sticks or burns. You’ll know it’s getting there when the pudding visibly starts to thicken up and the rice grains look soft.
Step 3: Finishing Touches and Flavoring the Rice Pudding
Once the pudding looks noticeably creamier, but maybe still a tiny bit looser than you think it should be, it’s time for the flavor boost! Stir in your sugar, the vanilla extract, and the salt. We let this cook for just the last ten minutes, stirring until that sugar completely disappears. Here’s a pro tip: take the whole thing off the heat when it looks slightly thinner than you want it served. As it cools down, this incredible creamy rice pudding recipe will firm up into perfection!
Tips for Success with Your Homemade Pudding Dessert
Even though this recipe is so straightforward, there are a couple of little tricks I learned over years of trial and error to guarantee you get that stellar result. Nobody wants scorched milk on the bottom of their pots, right? These few tips elevate your homemade pudding dessert from good to absolutely unforgettable.
My biggest piece of advice revolves around the stirring. When that milk first goes in, reduce the heat to low immediately. Patience is key! If you keep the heat medium, you’re asking for trouble. The rice needs a cozy, gentle simmer to plump up correctly.
To prevent sticking, which is the number one enemy of good pudding, try this: Before you add the water and rice in Step 1, take a teaspoon of your butter (if using heavy cream, use a bit of oil) and swirl it around the bottom of the pan. It creates a tiny, invisible barrier between the milk solids and the metal. It’s an old trick that works like a charm!
Also, always taste early! Once you add the sugar, give it a good stir and taste it. If you want to see my personal favorite way to jazz up any basic pudding recipe, check out this fantastic guide on old-fashioned rice pudding—it might inspire a new tradition for you!
Finally, remember my comment about the thickness. It’s better to pull the pudding off the heat slightly thinner than you think it should be. If it sets up too thick overnight, don’t cry! Just stir in a splash of regular milk or cream when reheating, and it becomes instantly smooth again.
Serving Suggestions for Warm Sweet Treats
Now that you have this glorious, creamy stovetop rice pudding, the real fun begins: deciding how to eat it! This recipe is so versatile, it satisfies completely different cravings depending on the temperature. Some days, I want that comforting warmth right away, and other days, I need a cold, firm dessert straight from the fridge.
When serving it warm, the texture is softer, almost like a rich porridge. Scoop it into little bowls right after it has set for about five minutes off the heat. Do not skip the topping, please! A generous dusting of extra cinnamon right on top is non-negotiable in my book. That spice layer hits your nose right before the sweet heat hits your tongue—it’s heavenly.
But don’t overlook the chilled version! Once this vanilla rice pudding sits in the fridge for a few hours, it gets much thicker, closer to a scoopable custard. When serving it cold, I love adding a little texture contrast. A small dollop of fresh, unsweetened whipped cream cuts through the sweetness perfectly. If you’re feeling fancy, sprinkle a tiny pinch of fresh nutmeg along with the cinnamon. Nutmeg and vanilla are such a classic pairing, giving this simple dish such an elevated, cozy finish. Honestly, either way you eat it, you’re in for a treat!

Storage and Make Ahead Dessert Rice Instructions
Like most dairy-based desserts, this old-fashioned rice pudding truly shines when you make it a day ahead! Since this recipe yields about four delicious servings, you’ll almost certainly have some leftovers—and that’s a good thing! This is a fantastic make ahead dessert rice because the flavors actually seem to deepen overnight.
The most important thing to remember about storing your creamy rice pudding is that it’s going to seize up. It will get significantly thicker as it cools down in the refrigerator because the rice continues to absorb that remaining liquid. Don’t panic when you pull it out the next day; that’s expected!
When you take it out to serve, stir it well. If it’s too dense for your liking—maybe closer to actual pudding than a loose dessert—just stir in a splash of regular whole milk, heavy cream, or even a little water until you reach that perfect, creamy consistency you loved straight off the stove. A quick 30 seconds in the microwave or heating it very gently on the stovetop brings back all that warm comfort instantly.
You can keep this pudding safely stored in an airtight container in the fridge for up to four days. Seriously, it’s delicious cold, too, if you prefer that texture, just adjust the liquid when you wake it up!
Rice Pudding Variations: Adding Flavor to Your Simple Pudding Recipe
Now that you’ve mastered the absolute core of this recipe—the creamy, comforting stovetop base—I love encouraging folks to play around a little bit! While I stand by this classic version, sometimes you want to change things up based on what you have handy or what mood you’re in. This base is so reliable; it’s the foundation for so many fun rice pudding variations. It’s easy to turn this simple pudding recipe into something completely new without messing up that velvety texture we worked so hard to achieve.
For instance, if you’re missing raisins, don’t sweat it! A handful of dried cranberries or even finely chopped dried apricots works beautifully near the end of the cooking time. Just make sure they soak in a little hot water first so they plump up nicely and don’t suck moisture from your pudding!
Making Rice Pudding with Cinnamon and Nutmeg
We already put a half teaspoon of ground cinnamon in the main mix, which already makes this a fantastic rice pudding with cinnamon. But if you want to kick that cozy flavor factor up even higher, adding nutmeg is the natural next step. Nutmeg and cinnamon are practically cousins in the baking world, and they just scream comfort food together.
I suggest replacing about a quarter of that cinnamon with freshly grated nutmeg, or just adding a tiny pinch of nutmeg right when you add the vanilla and sugar. That warm, slightly pungent aroma pairs perfectly with the slow-simmered milk. If you are serving this warm, the aroma that steams up from the bowl is just incredible. It takes this simple recipe and adds that extra layer of aromatic depth that makes people ask, “What is that amazing smell?”
Frequently Asked Questions About Creamy Rice Pudding Recipe
I know you might have a few questions bubbling up—I certainly did when I first started making rice pudding! Getting that perfect texture takes a little bit of know-how, and I want to make sure your experience with this creamy rice pudding recipe is flawless. Here are the top things folks ask me about making this classic, comforting dish perfectly every time.
Can I use long-grain white rice instead of short-grain for this recipe?
Oh, I really hope you don’t! This is one of my few non-negotiable points for an amazing pudding. Long-grain rice, like Jasmine or Basmati, just doesn’t release enough starch into the milk. If you use long-grain, you’ll end up with firm but separate grains swimming in sweetened milk—more like rice in soup than a lush, thick simple pudding recipe. For that ultimate creamy experience, stick to Arborio or any other short-grain white rice.
My rice pudding turned out too thin. Did I do something wrong?
Don’t worry, this happens to everyone! Rice pudding is famous for thickening up more than you expect as it cools down. This is actually a good sign because it means you didn’t scorch the milk solids! If you pull it off the heat and it seems way too runny, just continue simmering gently for another 5 to 10 minutes. If it’s already cooled down and is too solid, remember my advice: just stir in a splash of milk when you reheat it. Instant fix for a perfect, looser consistency!
Can I skip stirring during that long simmer time?
If you want a perfect, even, creamy coating on every grain, nope, you absolutely cannot skip stirring! We need to stir frequently, especially toward the end, to make sure the rice grains rub against each other and the pan bottom. If you leave it alone, the starches settle at the bottom, cook too fast, and you end up with a burnt, crusty layer stuck to your saucepan. That ruins the whole pot, so keep that spoon moving!
Can this recipe be made ahead of time?
Yes, this is truly one of the best make ahead dessert rice options out there! Like I mentioned earlier, it stores beautifully in the fridge for up to four days. Just make sure you put it in an airtight container. When you reheat it, if it seems glued together, just add that splash of milk or cream until it relaxes back into that smooth, comforting spoonful texture.
Nutritional Snapshot of This Nostalgic Recipes
Knowing what’s in our food is important, even when we’re indulging in something delightfully comforting! Keep in mind these figures are just estimates based on the simple ingredients list we used for this classic stovetop preparation. If you add extra cream or more sugar, those numbers will shift, of course! But for a hearty serving of these wonderful nostalgic recipes, here’s the general idea for one cup.
- Serving Size: 1 cup
- Calories: 350
- Fat: 7g (4g saturated)
- Carbohydrates: 65g
- Sugar: 28g
- Protein: 10g
This recipe relies mostly on whole milk and rice, making it a wonderfully satisfying treat that offers a good boost of protein for a dessert!
PrintOld-Fashioned Creamy Stovetop Rice Pudding

Make the creamiest, old-fashioned rice pudding right on your stovetop. This simple recipe delivers rich, comforting flavor perfect for a warm sweet treat.
- Prep Time: 5 min
- Cook Time: 55 min
- Total Time: 60 min
- Yield: 4 servings 1x
- Category: Dessert
- Method: Stovetop
- Cuisine: American
- Diet: Vegetarian
Ingredients
- 1 cup short-grain white rice (Arborio works well)
- 4 cups whole milk
- 1 cup water
- 1/2 cup granulated sugar
- 1 teaspoon vanilla extract
- 1/2 teaspoon ground cinnamon, plus extra for topping
- 1/4 teaspoon salt
Instructions
- Combine the rice and water in a medium saucepan. Bring to a boil over medium-high heat, then reduce heat and simmer until the water is absorbed, about 5 minutes.
- Add the whole milk to the saucepan. Bring the mixture to a gentle simmer, stirring frequently to prevent the rice from sticking to the bottom.
- Reduce the heat to low. Continue to cook, stirring often, for 40 to 50 minutes. The pudding thickens as the rice softens and absorbs the milk. You want a creamy consistency, not dry.
- Stir in the sugar, vanilla extract, and salt during the last 10 minutes of cooking. Continue stirring until the sugar dissolves and the pudding reaches your desired thickness.
- Remove the saucepan from the heat. The pudding will thicken more as it cools.
- Serve the rice pudding warm, sprinkled with extra cinnamon, or chill it completely for a cold dessert.
Notes
- For an even richer flavor, substitute 1/2 cup of the milk with heavy cream.
- If the pudding becomes too thick upon cooling, stir in a splash of milk to reach your preferred texture.
- This recipe is excellent for make ahead dessert storage; it keeps well in the refrigerator for up to four days.
Nutrition
- Serving Size: 1 cup
- Calories: 350
- Sugar: 28g
- Sodium: 150mg
- Fat: 7g
- Saturated Fat: 4g
- Unsaturated Fat: 3g
- Trans Fat: 0g
- Carbohydrates: 65g
- Fiber: 1g
- Protein: 10g
- Cholesterol: 25mg