

If you, like me, swoon over the creamy, citrus-kissed filling of a real Italian cannoli but break into a cold sweat thinking about frying dough, then I have found the absolute perfect compromise for you! These cannoli cookies give you that decadent, authentic Sicilian flavor profile without ever needing a fryer or a pastry bag. When I developed this recipe, my goal—drawing on my professional background in recipe development—was to capture that signature ricotta cream feeling in the easiest possible cookie format. Trust me, these soft, melt-in-your-mouth delights are the dessert recipe you’ve been waiting for. They’re incredibly accessible, packed with flavor, and ready for your next cookie platter!
- Why You Will Love These Easy Cannoli Cookies
- Essential Ingredients for Authentic Cannoli Cookies
- Expert Tips for Perfect Cannoli Cookies
- Step-by-Step Instructions to Make Amazing Cannoli Cookies
- Variations for Your Cannoli Cookies
- Storage and Make-Ahead Tips for Cannoli Cookies
- Serving Suggestions for These Italian Cookies
- Frequently Asked Questions About Cannoli Cookies
- Estimated Nutritional Snapshot for Cannoli Cookies
Why You Will Love These Easy Cannoli Cookies
I know what you’re thinking: cookies that taste like cannoli? Yes, I promise! When I was developing this, I wanted the best of both worlds. You get that incredible, familiar Italian flavor without turning on the deep fryer. Here’s why these are going to be a staple in your rotation:
- They nail the flavor profile: Rich, creamy ricotta flavor with hints of chocolate chips—it’s all there!
- Super easy dessert recipes for the win—seriously, no pastry skills required here.
- Texture contrast is spot on: a soft, almost cake-like cookie base hugging that luscious filling.
- They make amazing party dessert tray ideas because they look so special when dusted with sugar.
- We are talking authentic Italian cookies, but made totally manageable for a weeknight bake.
- The dough chills fast, so you can whip these up faster than you can buy pastries!
Honestly, these are my go-to when I need something special that screams homemade Italian pastries but only takes thirty minutes of active time. You won’t regret ditching the shells for this soft version.
Essential Ingredients for Authentic Cannoli Cookies
Listen, if you use low-quality ingredients, you get a low-quality cookie—that’s just fact, especially when dealing with delicate flavors like ricotta. My professional background taught me that being precise here is what separates a good cookie from an unforgettable one. For these cannoli cookies, we need richness, structure, and that classic hint of citrus. You’ll find these components listed perfectly below. Make sure you grab that orange zest if you want that true, bright Sicilian touch! If you’re looking for recipes that focus heavily on chocolate, check out my thoughts on making the best chocolate chip cookies.
- All-purpose flour (The base structure!)
- Baking powder and salt
- Unsalted butter, softened (Don’t use cold butter, please!)
- Granulated sugar
- One large egg and vanilla extract
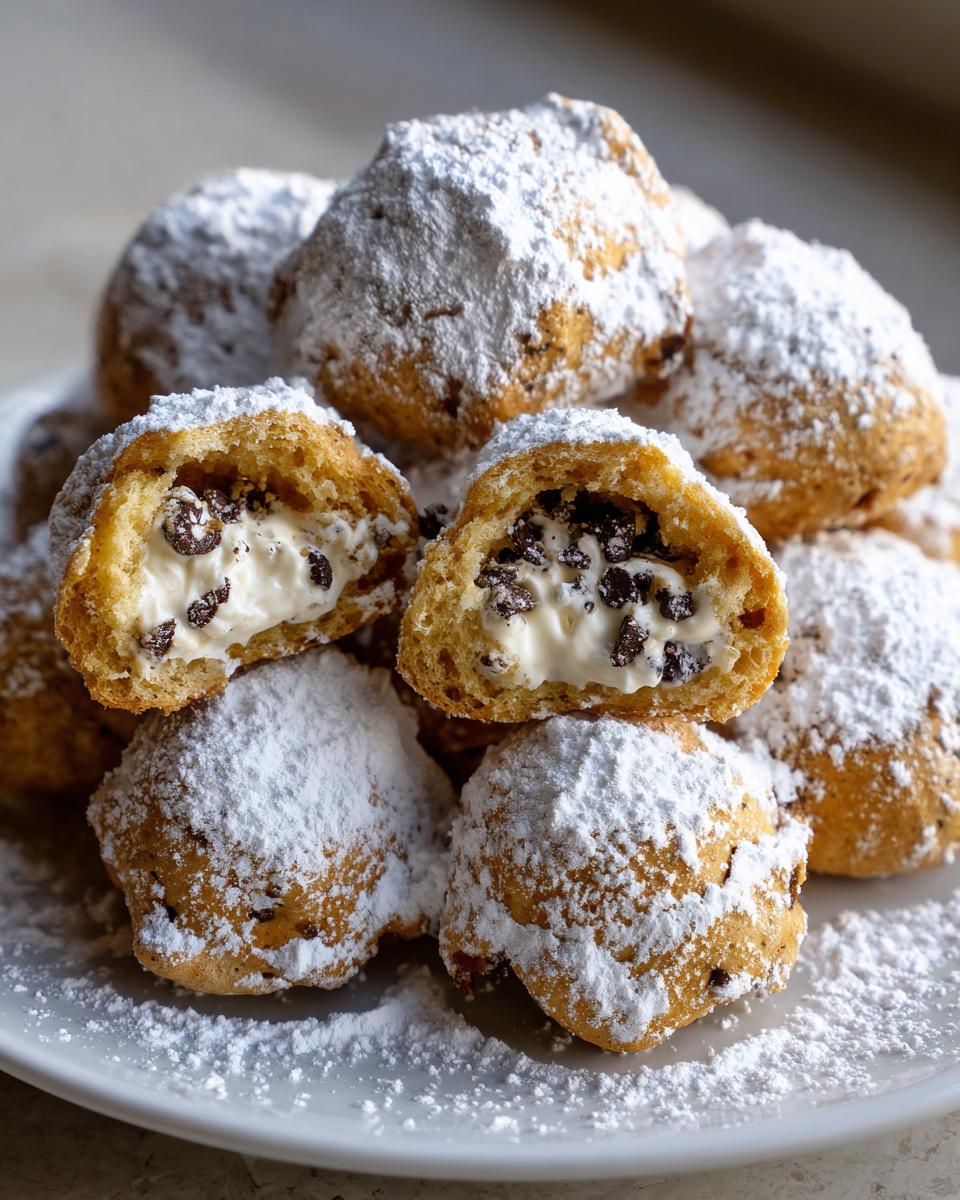
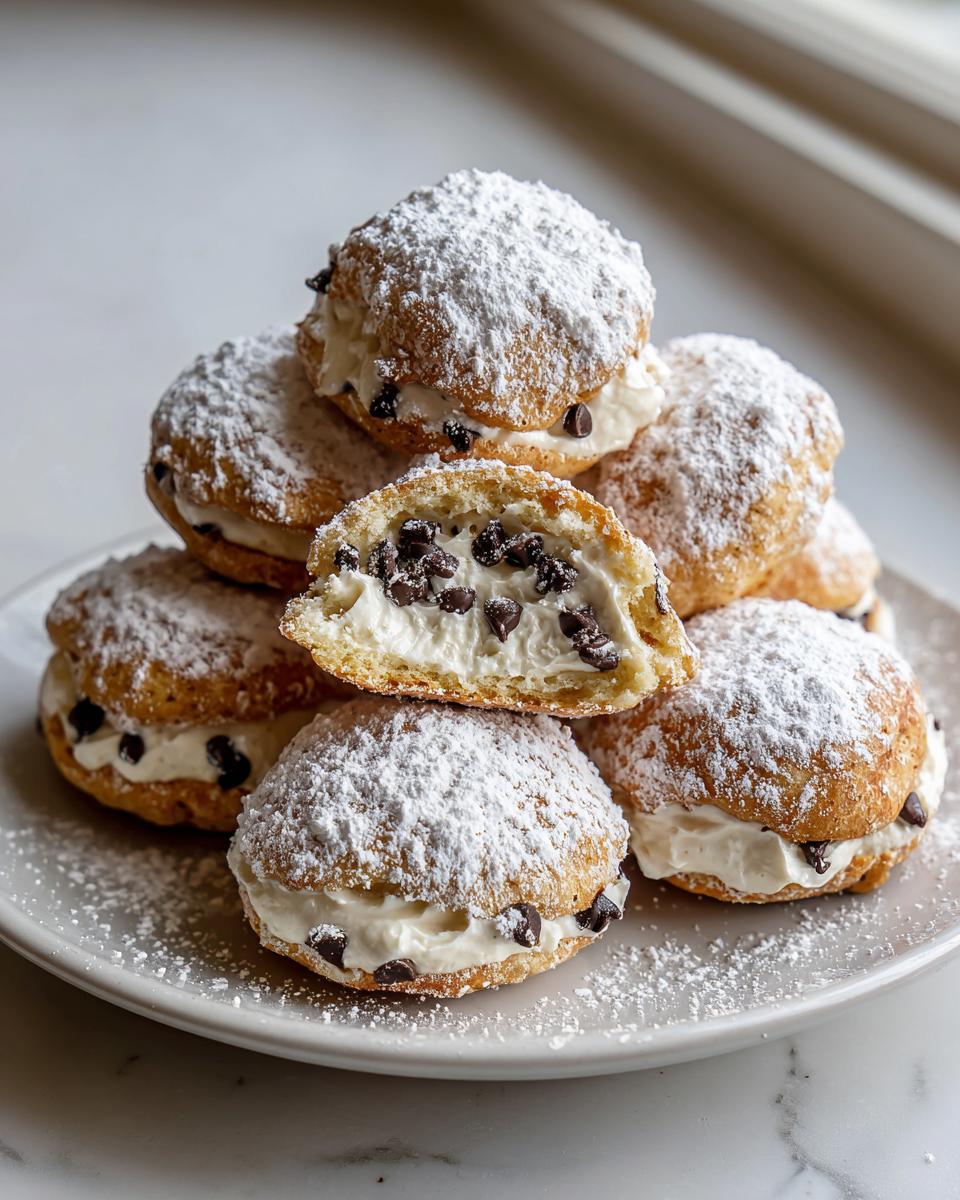
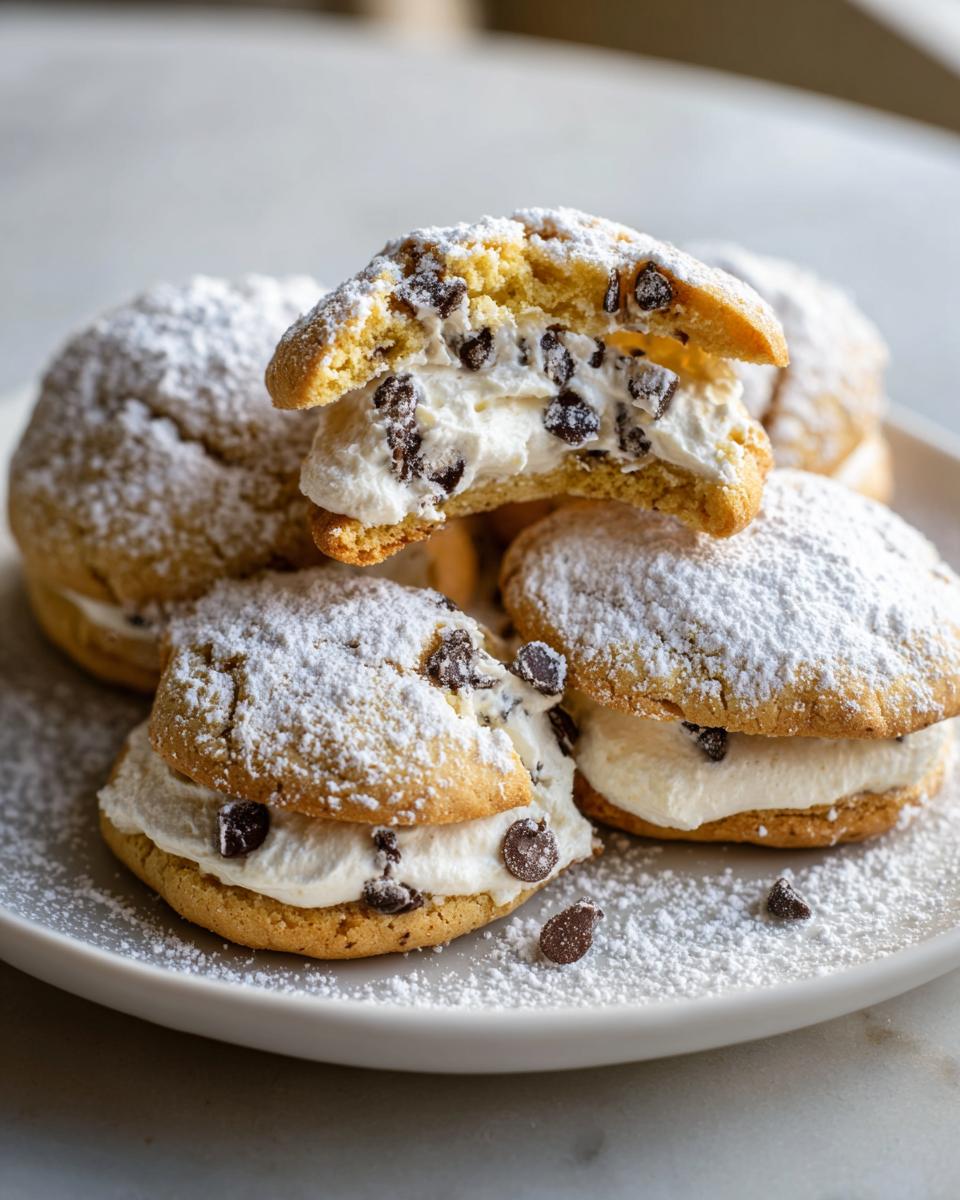
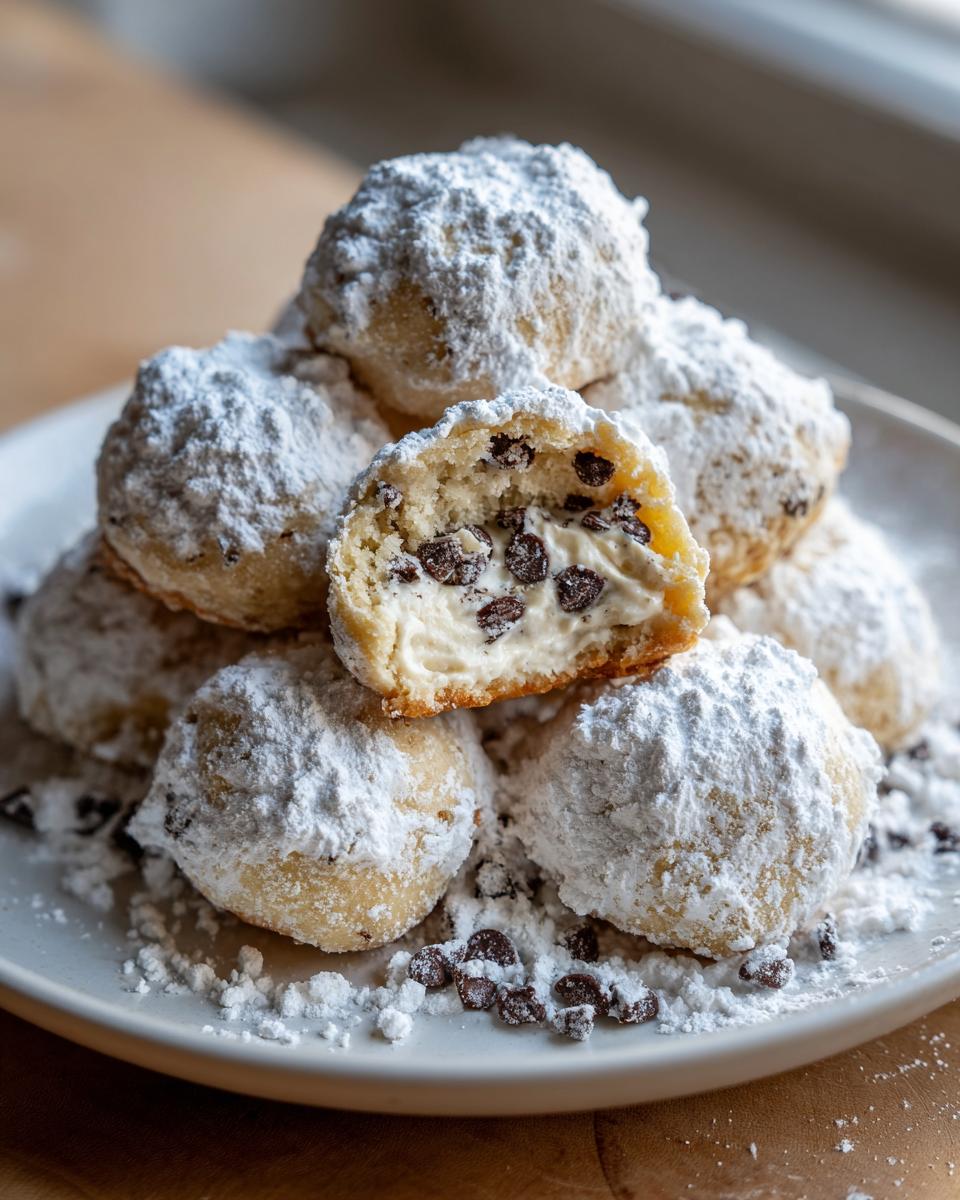
- Whole milk ricotta cheese, drained very well (This is crucial, seriously!)
- Mini semi-sweet chocolate chips (Mini melts better into the dough consistency we’re aiming for.)
- Orange zest (This is optional, but highly recommended for that true Italian flare.)
- Powdered sugar, just for that beautiful final dusting.
Expert Tips for Perfect Cannoli Cookies
Because I spent so much time formally studying food science and then testing recipes professionally, I know exactly where home cooks usually run into trouble with creamy filled cookies like this. It mostly comes down to moisture management. We absolutely must respect the ricotta or we end up with a soupy mess instead of these amazing cannoli cookies. But don’t worry, I’m sharing the secrets that make these easy dessert recipes reliable every time. When you’re looking for the best way to make something special, sometimes you have to consult a few reliable sources; for creamy results, I always trust recipes like the one I found over at this great resource!
Draining Ricotta: The Key to Non-Soggy Cannoli Cookies
If you take one thing away from this, let it be this: you cannot skip draining your ricotta cheese. Traditional cannoli filling requires very thick cheese, and if you just spoon it straight out of the container, you’ll bake a flat, wet cookie. I insist you place your whole milk ricotta in a fine-mesh sieve lined with cheesecloth or even a sturdy coffee filter. Let it drip for at least an hour, or honestly, overnight in the fridge if you can plan ahead. This process pulls out the excess water so your final cookie crumb stays tender without collapsing.
Achieving the Right Cookie Dough Consistency
Once you’ve folded in that beautiful, thick ricotta mixture, the dough will be very soft—don’t panic! This is why we chill it for at least 30 minutes. If you try to scoop it warm, it will be a sticky nightmare. After chilling, the dough should feel much firmer and manageable, almost like thick drop cookie dough. If it still seems too sticky to scoop after chilling, give it another 15 minutes. Also, when mixing in the dry ingredients, stop the mixer the second you see the last streak of flour disappear. Overmixing develops gluten, and we want soft Italian cookies, not little hockey pucks!
Step-by-Step Instructions to Make Amazing Cannoli Cookies
Okay, let’s get down to the actual baking! Once you’ve got that nicely drained ricotta ready to go, the mixing process is straightforward, but you have to respect the order of operations. This isn’t the time to rush, especially when we are striving for those perfect soft Italian cookies. I find setting out all my ingredients first (my French-trained self calls it *mise en place*) really helps keep things moving smoothly. If you want to see another recipe where precision mixing really matters, check out my guide for amazing maple brown sugar cookies!
Preparing the Cookie Base for Your Cannoli Cookies
First things first: grab a medium bowl and whisk together your flour, baking powder, and salt. Set that dry mix aside. Now, in your big mixing bowl, we cream that softened butter and sugar. Beat it well until it looks pale and truly fluffy—that takes about three good minutes with the mixer. Beat in your egg and vanilla extract until everything just hugs together. Then, and this is important, slowly add the dry ingredients to the wet mixture, mixing only on low speed until you just stop seeing flour streaks. I cannot stress this enough: do not overmix, or your cookies will be tough!
Folding in the Filling and Chilling the Dough
This is where the magic happens! Gently fold in that thick, drained ricotta, your mini chocolate chips, and that splash of orange zest if you are using it. The dough will look softer than traditional cookie dough, almost batter-like—that’s okay! Cover that bowl right up with plastic wrap and send it to the fridge for a minimum of half an hour. Chilling is non-negotiable; it firms up the butter and sugar so we can actually scoop these beauties without them melting all over the pan.
Baking and Finishing Your Soft Italian Cookies
When the dough is chilled, preheat your oven to 350°F (175°C) and line your sheets with parchment paper. Scoop tablespoon-sized mounds onto the sheets, leaving a couple of inches between them. Bake them for only about 10 to 12 minutes. You are looking for the edges to be just lightly golden—the center should still feel soft to the touch. Let them sit on the hot sheet for 5 minutes to firm up slightly before carefully moving them to a wire rack to cool completely. Once they are totally cool, give them a generous dusting of powdered sugar. Boom! Instant Italian pastry heaven.
Variations for Your Cannoli Cookies
While the orange zest paired with chocolate chips delivers that quintessential Sicilian flavor I love—check out how I use cherry flavor in my chocolate cherry cookies sometime—you absolutely can play around with these cannoli cookies!
If you want to mimic the pistachio crunch you often find in bakery displays, try folding in about a quarter cup of finely chopped, lightly toasted pistachios along with the chocolate chips. They add an amazing texture against that soft cookie. Another lovely swap is using fresh lemon zest instead of orange zest; it brightens up the ricotta filling beautifully. For more amazing recipes that innovate on Italian flavors, you should see what’s happening over at this site!
Storage and Make-Ahead Tips for Cannoli Cookies
I love these cookies because they truly work for big holiday cookie baking sessions where you need easy dessert recipes that can wait for the right moment. Since these contain that creamy ricotta filling, you can’t just leave them out forever. They store beautifully at room temperature in an airtight container for about four days. Just make sure they are completely cool before you put the lid on, or you’ll trap condensation and ruin that lovely soft texture.
But here’s my secret for getting ahead of the game, especially before Christmas or a big party: freeze the dough! Scoop out your tablespoon-sized balls, place them on a tray, and freeze until solid. Then, transfer those frozen lumps to a freezer bag. When you need them, just pull out as many as you want and bake them straight from frozen—you’ll just need to add a minute or two to the baking time. It’s a lifesaver when you’re juggling too many things, much like how I manage things when testing complicated recipes like my fruitcake cookies!
Serving Suggestions for These Italian Cookies
These gorgeous little cannoli cookies are already star players, but you can totally dress up your dessert spread! Because the filling is creamy and rich, they pair unbelievably well with something strong to cut through that sweetness. I always have a pot of fresh coffee brewing, or better yet, a strong espresso shot to go alongside them. They also look fantastic when grouped with other Sicilian dessert ideas like small biscotti or perhaps a slice of my famous Italian love cake on a big serving platter. For more inspiration on delicious pairings, check out what folks are baking over at this site!
Frequently Asked Questions About Cannoli Cookies
I know you might have a few last-minute questions before you run to grab your ingredients for these wonderful Italian cookies. Getting the technique right, especially with dairy-based fillings, makes all the difference between good and great! Here are the things I get asked most often when people try this recipe for the first time.
Can I use mascarpone instead of ricotta in these cannoli cookies?
Oh, absolutely you can! Using mascarpone is a fantastic upgrade if you want something even richer. Ricotta is traditional, but mascarpone is naturally denser and has a higher fat content. If you swap it in, your creamy filled cookies will have a silkier, more decadent texture, almost like a cheesecake filling but still tasting perfectly Italian. Just make sure you still use drained ricotta if that’s what you have, or use a very well-drained mascarpone!
Are these cookies supposed to be crispy or soft?
That’s a great question, especially since traditional cannoli shells are crispy! With this specific recipe, we are aiming for a soft, almost delicate, cake-like cookie base. We skip the frying entirely, so you won’t get that brittle shell crunch. The result is a tender cookie that melts in your mouth, contrasted by the creamy filling. If you want crispiness, you’d need a different recipe entirely that focuses on the fried dough element, but these are designed to be wonderfully soft Italian cookies.
How do I make these into Keto cannoli cookies?
I totally understand why you’d ask; finding good cookie recipes with ricotta cheese that fit a specific diet can be tricky! This particular recipe relies on standard granulated sugar and all-purpose flour for its structure and balance. Because of that, I can’t honestly tell you this one will work as a Keto cannoli cookies recipe alternative without significant testing and ingredient substitution. If a low-carb version is what you need, I’d suggest searching specifically for recipes that use almond flour and erythritol, as adapting this one might compromise the texture we worked so hard to perfect!
Estimated Nutritional Snapshot for Cannoli Cookies
When I develop recipes, I always try to give you a clear idea of what you’re enjoying, even though baking at home means ingredients can vary slightly. This table breaks down the estimated nutritional information for one of these fantastic cannoli cookies based on the measurements provided in the recipe card. Remember, this is an educated estimate, perfect for keeping track of your treats!
- Serving Size: 1 cookie
- Calories: 185
- Sugar: 14g
- Sodium: 85mg
- Fat: 10g
- Saturated Fat: 6g
- Unsaturated Fat: 4g
- Trans Fat: 0.2g
- Carbohydrates: 21g
- Fiber: 0.5g
- Protein: 3g
- Cholesterol: 35mg
Because we are making these Italian cookies at home, your exact results might shift a little based on the brand of butter or the exact drain on your ricotta, but this gives you a fantastic baseline for these wonderful, creamy filled cookies!
PrintEasy Authentic Cannoli Cookies with Creamy Ricotta Filling

Make these easy cannoli cookies that capture the classic Italian dessert flavor. This recipe uses a soft, cake-like cookie base filled with creamy ricotta and mini chocolate chips, offering a simple alternative to traditional cannoli shells.
- Prep Time: 20 min
- Cook Time: 12 min
- Total Time: 52 min
- Yield: 20 cookies 1x
- Category: Dessert
- Method: Baking
- Cuisine: Italian
- Diet: Vegetarian
Ingredients
- 1 cup all-purpose flour
- 1 teaspoon baking powder
- 1/4 teaspoon salt
- 1/2 cup (1 stick) unsalted butter, softened
- 1/2 cup granulated sugar
- 1 large egg
- 1 teaspoon vanilla extract
- 1/2 cup whole milk ricotta cheese, drained well
- 1/2 cup mini semi-sweet chocolate chips
- 1 tablespoon orange zest (optional, for authentic flavor)
- Powdered sugar, for dusting
Instructions
- In a medium bowl, whisk together the flour, baking powder, and salt. Set the dry ingredients aside.
- In a large bowl, beat the softened butter and granulated sugar with an electric mixer until light and fluffy, about 3 minutes.
- Beat in the egg and vanilla extract until just combined.
- Gradually add the dry ingredients to the wet ingredients, mixing on low speed until just incorporated. Do not overmix.
- Gently fold in the drained ricotta cheese, mini chocolate chips, and orange zest, if using. The dough will be soft.
- Cover the dough and chill in the refrigerator for at least 30 minutes to make it easier to handle.
- Preheat your oven to 350°F (175°C). Line baking sheets with parchment paper.
- Scoop rounded tablespoons of dough and place them 2 inches apart on the prepared baking sheets. You can shape them into simple mounds or slightly flatten them.
- Bake for 10 to 12 minutes, or until the edges are lightly golden. The centers should remain soft.
- Let the cookies cool on the baking sheet for 5 minutes before transferring them to a wire rack to cool completely.
- Once cool, dust generously with powdered sugar before serving.
Notes
- Drain your ricotta cheese thoroughly using a fine-mesh sieve lined with cheesecloth for at least 1 hour to prevent a soggy cookie.
- For a richer flavor, substitute mascarpone cheese for ricotta cheese in the filling.
- These cookies are excellent for holiday cookie exchanges and can be stored in an airtight container at room temperature for up to 4 days.
Nutrition
- Serving Size: 1 cookie
- Calories: 185
- Sugar: 14g
- Sodium: 85mg
- Fat: 10g
- Saturated Fat: 6g
- Unsaturated Fat: 4g
- Trans Fat: 0.2g
- Carbohydrates: 21g
- Fiber: 0.5g
- Protein: 3g
- Cholesterol: 35mg