
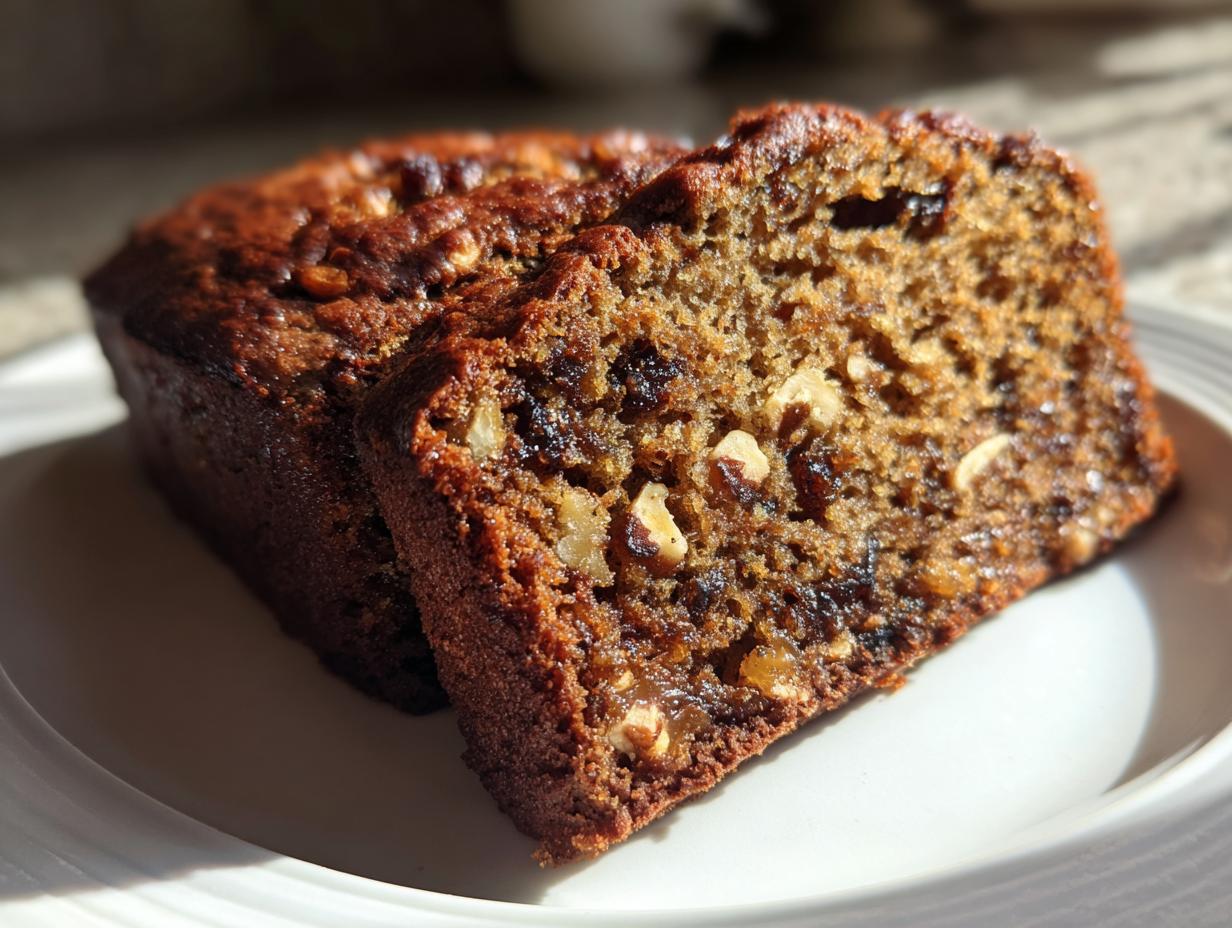
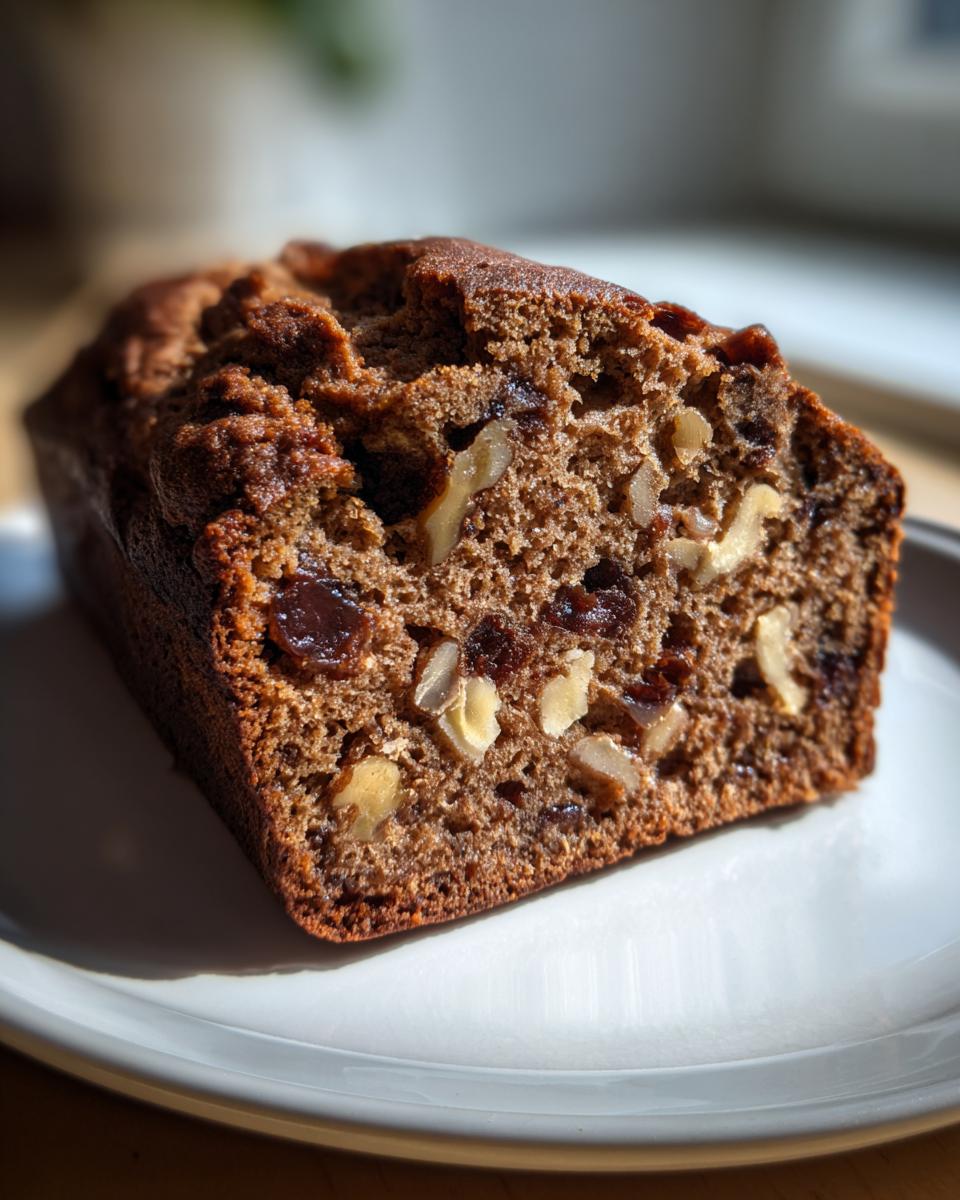
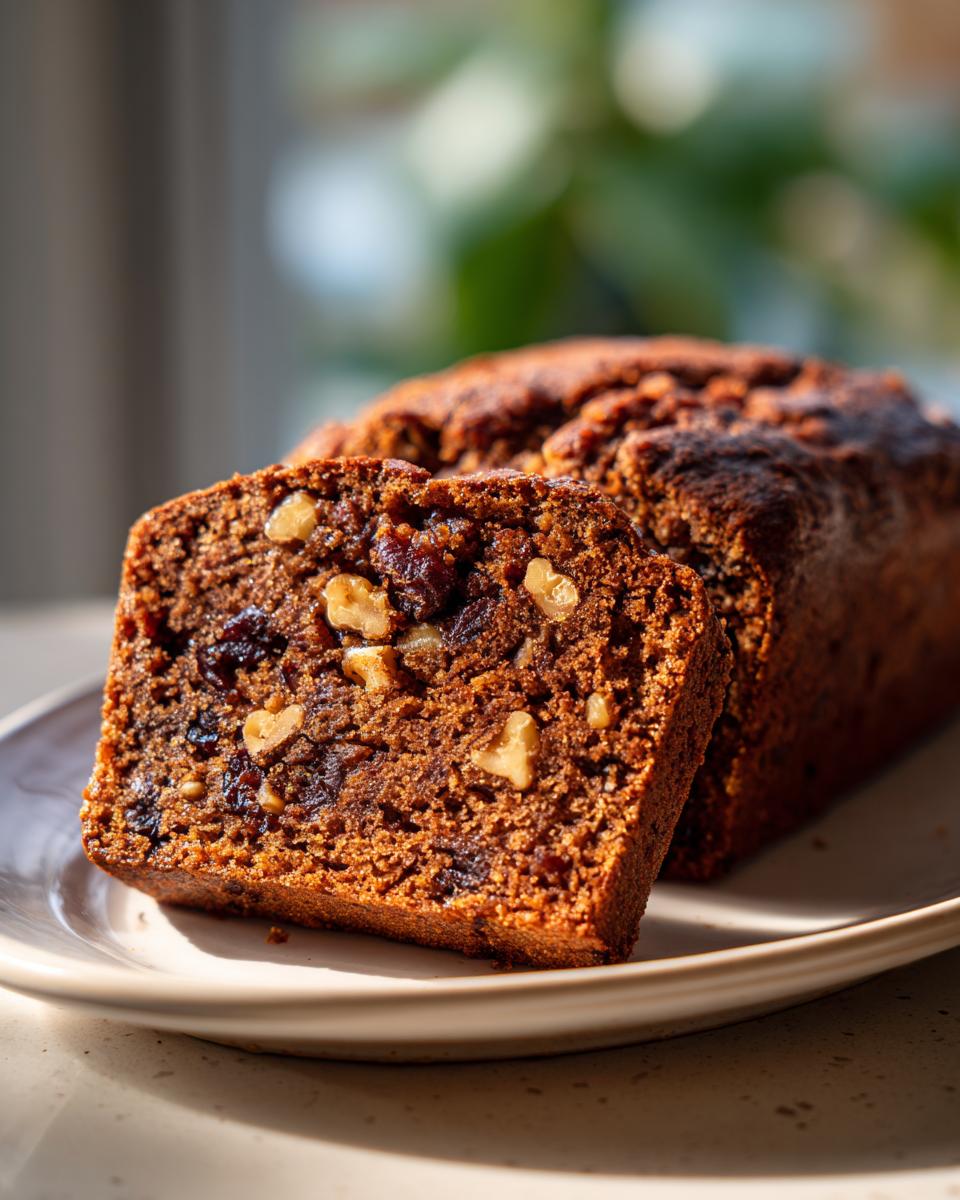
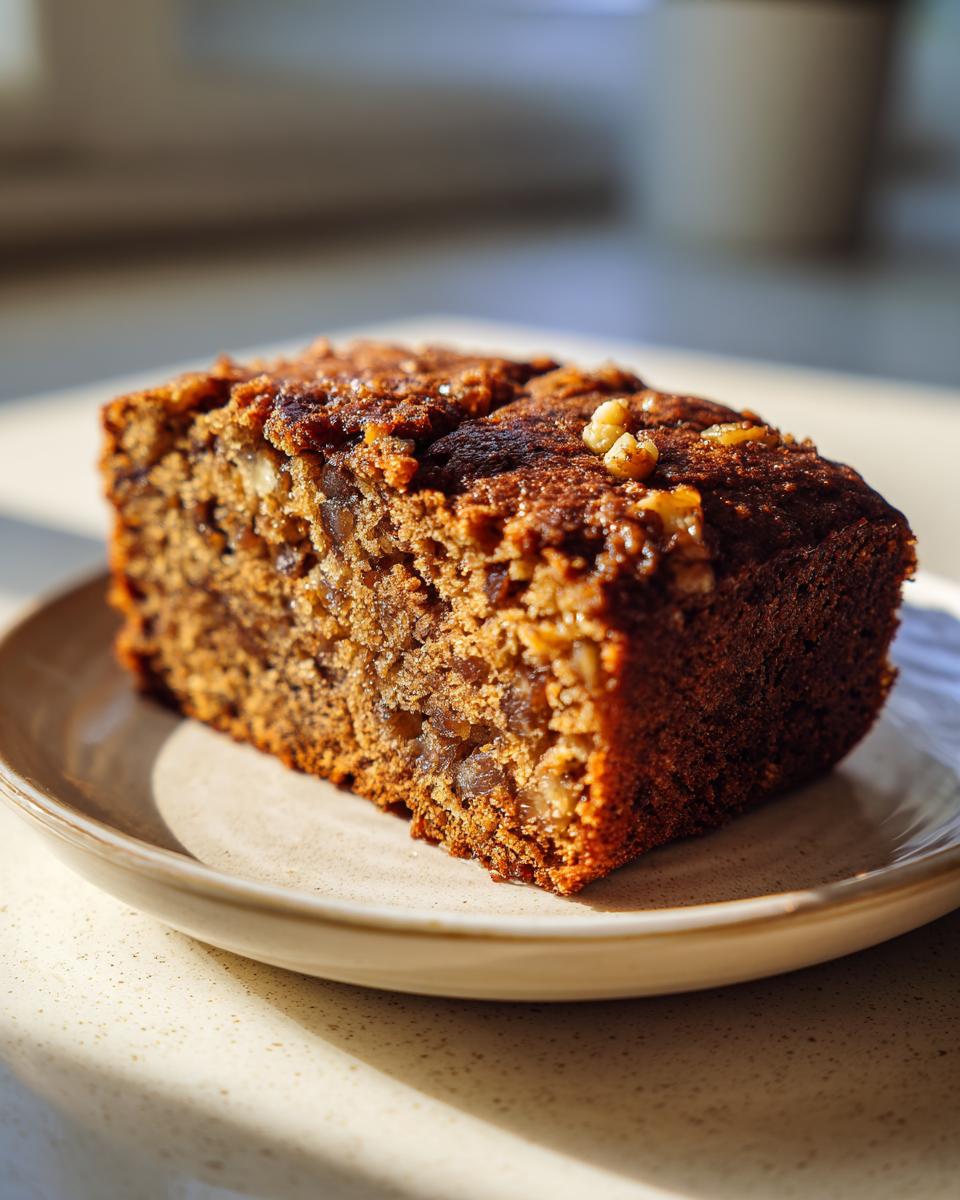
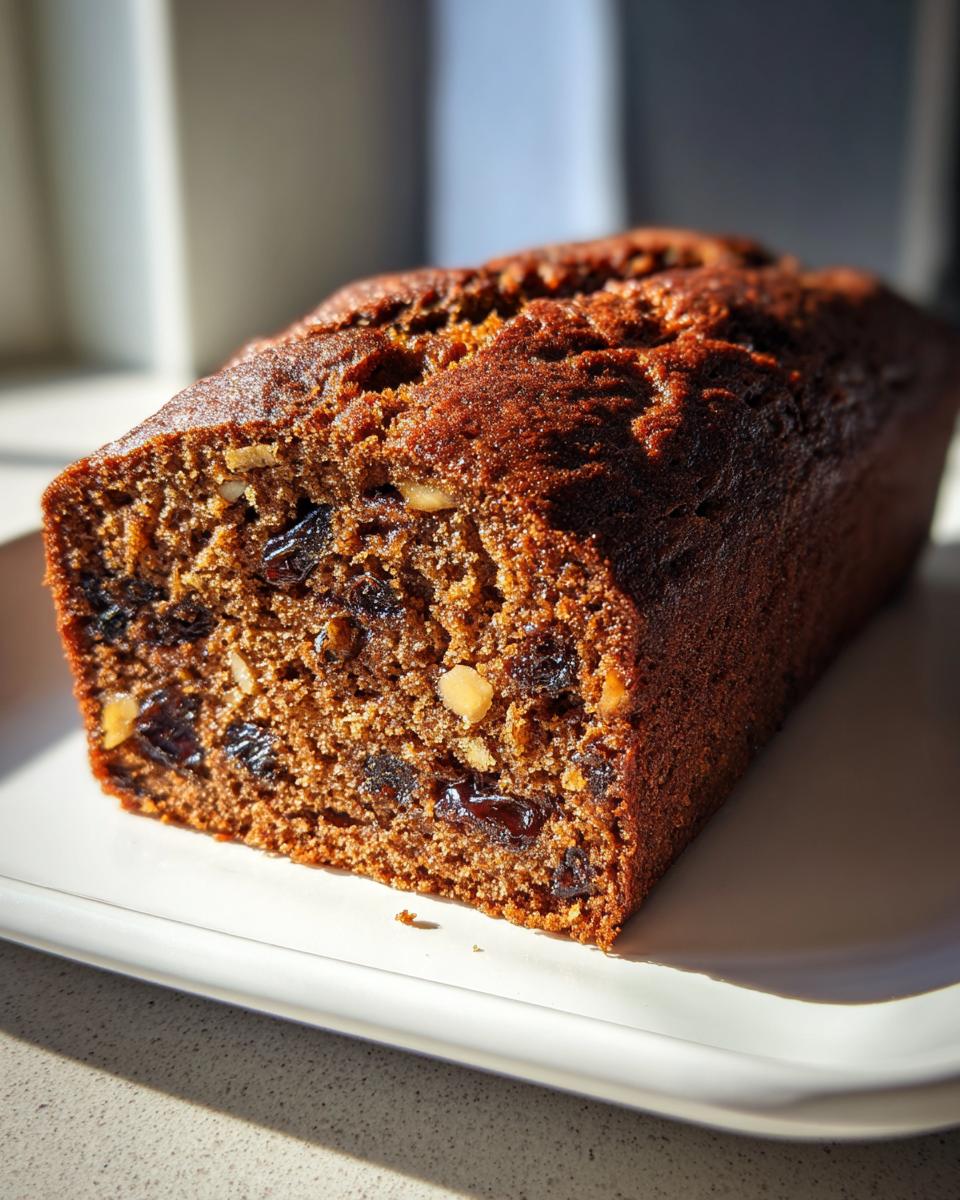
There’s something so grounding about a truly classic quick bread, isn’t there? It takes me right back to cozy mornings and the promise of a great day ahead. If you’ve ever been let down by a loaf that looked amazing but turned out dry and crumbly, well, that stops today. I’m sharing what I truly believe is the Best Moist Old-Fashioned Date Nut Bread Recipe out there, guaranteed to give you that deeply satisfying, tender crumb every single time. As someone who spent years professionally testing recipes and understanding the science behind the perfect texture—a foundation I built during my time developing recipes and studying Food Science—I developed this method to honor the comforting, nostalgic flavors we all love while making sure the finished date nut bread is perfectly soft.
- Why This is the Best Date Nut Bread Recipe for a Tender Crumb
- Ingredients for Your Classic Date Nut Bread
- Step-by-Step Instructions for Homemade Date Bread Baking
- Tips for Success When Making Date Nut Bread
- Variations on the Classic Date Nut Bread
- Serving Suggestions for Your Sweet Date Loaf
- Storage and Reheating Instructions for Date Nut Bread
- Frequently Asked Questions About This Old Fashioned Date Loaf
- Nutritional Information Estimate for Date Nut Bread
Why This is the Best Date Nut Bread Recipe for a Tender Crumb
I know you’re looking for what makes this recipe different from the dozens you’ve probably scrolled past. Honestly, it comes down to dependability. You want bold flavor, a simple process, and absolutely no dryness—and that’s exactly what we deliver here!
- It’s an incredibly Moist Date Nut Bread; I promise you won’t need to fuss with extra syrups.
- The mixing process is straightforward—it’s a true quick bread format, so there’s no fussy yeast work!
- The flavor profile is pure nostalgia, hitting those classic, comfort food notes we all crave.
If you want to dive deeper into keeping your baked goods soft, check out some of my general tender crumb baking tips after you master this loaf.
Achieving the Perfect Old Fashioned Date Loaf Texture
The real game-changer for this date nut bread isn’t just the butter or the nuts, though those help! It’s how we treat the dates. We skip simply tossing them in dry. Instead, we boil them briefly with baking soda.
Sounds weird, right? Trust me! That baking soda reacts with the dates, helping to break down their structure just slightly while the boiling water plumps them up. When you fold that softened, sweet mixture into your batter, it releases moisture evenly during baking, locking in that soft texture all over the loaf.
Ingredients for Your Classic Date Nut Bread
Gathering your components is half the battle, and with quick breads, precision matters because we rely on chemistry for that perfect lift! Having everything measured out and ready minimizes the chance of overmixing later, which is key for a tender result.
Here is exactly what you’ll need for this one beautiful, moist loaf:
- 1 cup boiling water
- 1 cup packed pitted dates, chopped
- 1 teaspoon baking soda
- 1/2 cup (1 stick) unsalted butter, softened
- 1 cup packed light brown sugar
- 2 large eggs
- 1 teaspoon vanilla extract
- 1 3/4 cups all-purpose flour
- 1 teaspoon baking powder
- 1/2 teaspoon salt
- 1 cup chopped walnuts or pecans
Make sure that butter is actually softened—not melted! That little temperature difference makes a huge impact when it comes to creaming later on.
Step-by-Step Instructions for Homemade Date Bread Baking
Putting this recipe into action is super easy, which is why I consider it my go-to Easy Quick Bread Recipe for busy mornings or when I need a quick, comforting bake. We’re going to follow the ingredients list methodically, making sure to dedicate time to that crucial date step. Follow these steps closely for the best success in your Homemade Date Bread Baking adventure!
- First things first, get that oven hot! Preheat to 350°F (175°C). Take a 9×5 inch loaf pan and grease it well, then dust it lightly with flour so your beautiful loaf slides right out later.
- Next, we handle the stars of the show—the dates! Place your chopped dates into a heatproof bowl. Pour that full cup of boiling water right over them. Then, stir in the baking soda. This is where the magic starts happening for moisture retention!
- Now, step away for 15 minutes. Seriously, go make your coffee or wash a dish! This resting time allows the dates to fully soften and absorb that baking soda solution, which is vital for that soft texture we want in our final loaf.
- While the dates are resting, move on to the wet ingredients. In a separate large bowl, you need to cream the softened butter and brown sugar together until it looks airy and light—think fluffy clouds, not paste! Beat in your eggs one at a time, making sure each one is fully incorporated before adding the next, then stir in that vanilla extract.
- In a medium bowl, quickly whisk your dry ingredients together: the flour, baking powder, and salt. You just want them mixed evenly so the leavening is spread out.
- Time to combine! Add the dry ingredients to the wet mixture in three separate additions, mixing only until just combined after each addition. This is so important: Do not overmix! Overmixing develops gluten and makes the bread tough instead of tender.
- Gently fold in your plumped date mixture—please make sure you pour in all the liquid that’s sitting in the bottom of that date bowl! Also, fold in your chopped walnuts or pecans until you don’t see any dry streaks left.
- Pour all that wonderful batter directly into your prepared loaf pan and smooth the top a little bit.
- Bake it for about 55 to 65 minutes. You know it’s done when a wooden skewer inserted right into the very center comes out clean. If you see wet batter, give it five more minutes and check again!
- Patience is the final step! Let the bread cool in the pan for about 10 minutes—no more! Then, carefully turn it out onto a wire rack to finish cooling completely before you slice it up.
Preparing the Dates: The Secret to Moist Date Nut Bread
I can’t stress this enough: skipping step two is the quickest way to end up with dry bread, and nobody wants that sad outcome. The process of pouring boiling water and baking soda over those chopped dates isn’t just about making them soft; it’s chemically engineered to make your final product the king of Moist Date Nut Bread.
That baking soda helps neutralize some of the tartness in the dates, but more importantly, it tenderizes the fruit itself. Think of it like a quick, warm soak that pre-hydrates the dates so they don’t suck moisture from your flour batter while baking. Make sure they rest for the full 15 minutes so that reaction does its job perfectly!
Mixing and Baking Your Easy Quick Bread Recipe
Once the dates are soaking, we move fast! The creaming step where butter and sugar combine is crucial for that slightly dense but springy crumb you get in a good date nut bread. Don’t rush that part!
When you add the flour mixture, stop mixing the second you see the last streak disappear. If you keep going, you’ll develop gluten, and that’s how quick breads turn into tough bricks! After that, you just gently fold in the dates and nuts, pour it into the pan, and get it into that 350°F oven. Sixty minutes is usually the sweet spot, but always trust the skewer test over a timer—especially in my Easy Quick Bread Recipe!
Tips for Success When Making Date Nut Bread
I’ve baked enough loaves to know where things can go slightly wrong, even when following a great recipe. Because a dry loaf is my biggest baking nightmare, I want to make sure you get those wonderfully soft results I mentioned earlier. These little habits are what bridge the gap between a good loaf and that unbelievably soft, tender crumb baking tips level of perfection we are aiming for!
Here are the three non-negotiables for the ultimate moist result:
- Never Skip the Soak: Seriously, I flagged this in the instructions, but it bears repeating. That 15-minute soak with the baking soda is what hydrates the dates so they don’t steal moisture from your batter while baking. It’s the secret weapon!
- Mind Your Nuts: Feel free to swap walnuts for pecans—both taste fantastic! If you use pecans, just make sure they are roughly chopped, not ground up. We want those little bites of crunch throughout the loaf, not a dense, nutty paste.
- Cool It Right: This is where so many people lose their moisture. You have to let the loaf sit in the pan for a solid 10 minutes after it comes out. If you dump it onto the rack right away, the steam escapes too fast, and the crust can stiffen prematurely. Ten minutes allows the residual heat to gently finish cooking without drying out the edges. Then, let it cool completely on the rack before slicing. Yes, it’s hard waiting, but cutting it warm turns the crumb gummy!
For even more tricks on keeping winter bakes deliciously soft, take a look at how I manage moisture in my cranberry orange cake—the principles overlap beautifully!
Variations on the Classic Date Nut Bread
While this recipe stands strong as my favorite date nut bread, half the fun of home baking is making something truly your own! You don’t have to reinvent the wheel, but a few little tweaks can give you a whole new experience—perfect if you’re baking for different people or just want to change things up next week.
People often ask me about the famous versions out there, like the one associated with Pat Nixon, or the simple, elegant style Ina Garten uses. Those are both wonderful starting points!
For instance, you can lean into warmer spices. If you taste your batter and feel like it needs a little more hug, add an extra half-teaspoon of cinnamon or a dash of allspice. It pairs beautifully with the caramel notes from the brown sugar.
If you’re feeling adventurous and want to try something different than nuts, you can increase the date quantity slightly, or check out how I manage chewy textures in my fruitcake cookies—the idea of adding something chewy besides the main fruit works well here too!
And, of course, if you want to try that famous touch, a quick search for Pat Nixon’s Date Nut Bread will show you how simple variations on this classic theme have popped up over the decades. My biggest piece of advice? Stick to the moistening technique we used, and try any flavor additions *before* you add the flour so you don’t upset the delicate balance of the batter!
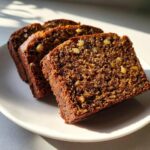
Serving Suggestions for Your Sweet Date Loaf
What do you do once you’ve managed to keep your hands off that perfectly baked loaf long enough for it to cool? You serve it, of course! This versatile bread isn’t just for one occasion; it shines all day long. It smells incredible, which makes it a fantastic, ready-to-go gift, but it’s hearty enough to be the star of your next brunch spread, too.
This Sweet Date Loaf is wonderful warm, straight out of the slightly cooled oven, but honestly, it tastes even better the next day once the flavors have settled in. It feels substantial and comforting, exactly like what I look for in any great breakfast quick bread.
Here are my favorite ways to present this delicious loaf:
- Simple Morning Treat: You can never go wrong with a thick slice, lightly toasted if you like a bit of edge, and topped with a generous smear of good quality, room-temperature salted butter. The salt cuts through the sweetness perfectly!
- Elevated Snack: Cream cheese is my second favorite accompaniment. It’s richer, and if you add a tiny sprinkle of cinnamon to the cream cheese before spreading, it’s just decadent.
- For Gifting: If you’re giving this bread away (and trust me, people will ask for the recipe!), wrap the completely cooled loaf tightly in plastic wrap, then slip it into a cellophane bag tied with a pretty ribbon. It looks incredibly thoughtful and homemade, and because it’s so moist, it stays fresh for days!
- With Your Coffee: Sometimes I just slice it and take it to my desk while I’m working. It pairs beautifully with a strong cup of black coffee or an unsweetened black tea—it mimics that classic coffee cake flavor profile without all the fuss.
No matter how you serve it, just be prepared to share the recipe. This old-fashioned loaf always seems to disappear too fast!
Storage and Reheating Instructions for Date Nut Bread
This is where all that hard work keeping the bread moist really pays off! Because we used that special date-soaking technique, this date nut bread stays wonderfully fresh much longer than standard quick breads. You want to protect that tender crumb we worked so hard to achieve, so proper storage is key.
When it comes to keeping this loaf perfect, remember that air is the enemy of moisture preservation. If you slice into it immediately while it’s still warm, you’ll lose a lot of steam and it will dry out faster, so wait until it’s fully cooled on the rack!
Keeping it Fresh on the Counter
If you plan on eating the entire loaf within three to four days—which might be ambitious, but I won’t judge—simply wrap it tightly. I usually wrap the entire loaf first in plastic wrap, making sure to press the wrap right up against the cut side if you’ve already sliced into it. Then, I slip that whole package into a large zip-top bag or an airtight container.
At room temperature, it should stay perfectly moist for about four days. If your kitchen is super warm or humid, you might want to stick to three days before slicing more.
Freezing Leftover Date Nut Bread
If you aren’t gifting it all away and you know you won’t finish it in four days, freezing is your absolute best friend. Again, we wrap it super tight! Wrap the cooled date nut bread loaf tightly in plastic wrap, then follow that with a layer of aluminum foil. That double layer prevents freezer burn, which is sneaky and notorious for sucking moisture right out of baked goods.
You can freeze it whole or slice it first before wrapping (I suggest slicing it first if you tend to eat slices one at a time!). It keeps beautifully in the freezer for up to three months. Honestly, I’ve forgotten about a loaf for longer than that, and it was still pretty tasty once thawed!
Reheating for That Fresh-From-the-Oven Feel
When you’re ready to enjoy a slice that tastes like it just came out of the oven, reheating is simple. If it’s frozen, just unwrap it completely and let it thaw on the counter for a few hours. Don’t try to bake a frozen loaf!
To reheat a room-temperature or thawed slice, I prefer a quick trip in the toaster oven or a few seconds wrapped in a slightly damp paper towel in the microwave—just until it’s warmed through. That little bit of steam from the damp towel really revives the tenderness and makes a slice of your homemade date nut bread taste brand new again.
Frequently Asked Questions About This Old Fashioned Date Loaf
I always get a flood of questions after I share a recipe this classic, and that’s a good sign! It means you’re excited to bake it, but you want to make sure you get that perfect result we talked about—super moist, sweet, and having that wonderful structure. Don’t worry about asking; anticipating those little hurdles is part of building confidence in your kitchen! Here are some of the most common things folks ask when tackling a good Old Fashioned Date Loaf.
Can I make this date nut bread without nuts?
Absolutely, you can! If you or someone you’re baking for has a nut allergy, or just doesn’t prefer them, you can totally leave them out. However, nuts like walnuts and pecans add great texture and bulk to the batter, so if you eliminate them, you might have a slightly softer loaf.
To help maintain some of that structure and crunch, I suggest replacing the 1 cup of nuts with one of these ideas: either add another half-cup of chopped dates (making it 1.5 cups total) or swap them out for 1 cup of toasted, hulled sunflower seeds. The seeds give a nice little crunch without the nut proteins. Remember, the core moisture comes from the date soak, not the nuts, so your slice won’t dry out!
How do I prevent my date nut bread from sinking in the middle?
Oh, the dreaded dome-and-sink! This happens usually for two reasons when baking any quick bread, and it’s frustrating when you’re aiming for that perfect slice of date nut bread. The main culprit is usually that the top sets before the middle is fully cooked.
My best tip is to check the temperature *and* the center. First, make sure your oven temperature is accurate using an oven thermometer if you have one; if it’s running too cool, the outside will never catch up to the inside. Second, if you see the top browning too quickly before the skewer comes out clean, gently tent a piece of aluminum foil over the top for the last 15-20 minutes of baking. This reflects the heat away from the surface, allowing the center to finish setting up nice and slow. Also, don’t pull it out early! That 55 to 65 minute window is important for the structure to stabilize.
Is this recipe complicated for a beginner baker?
Not at all! I intentionally developed this as an Easy Quick Bread Recipe because everyone deserves a reliable comfort food in their rotation. The only slightly tricky part is making sure you cream the butter and sugar properly, and that’s just a matter of beating them till they’re pale and fluffy—it feels like forever, but it’s key for volume!
The absolute simplest part is the date soak, which does most of the work for you. Just follow the steps in order, don’t overmix the flour, and you’ll have a gorgeous loaf perfect for gifting or enjoying with your morning coffee. If you have any specific questions while you’re baking, feel free to reach out to me here at the contact page; I love hearing from new bakers!
Nutritional Information Estimate for Date Nut Bread
Cooking is fundamentally about balancing flavors, but understanding what goes into your body is just as important, especially with a comforting treat like this old-fashioned loaf cake. I always run my recipes through an analyzer, but I want to be super clear that these numbers are just the baseline estimates based on the ingredients listed.
Since we use a lot of butter and naturally sweet dates, it’s richer than a light muffin! These figures are calculated assuming the whole recipe yields 10 good-sized slices before any toppings.
Here is the breakdown:
- Serving Size: 1 slice
- Calories: 310
- Sugar: 28g
- Sodium: 240mg
- Fat: 14g (5g Saturated)
- Carbohydrates: 45g
- Fiber: 3g
- Protein: 5g
- Cholesterol: 55mg
A quick note, just because I know how important precision can be: Please remember these are estimates based on standard ingredient densities and calculations. They aren’t precise medical data, but they give you a solid idea of what you’re enjoying. This is a comfort food, after all, and knowing roughly what’s in it lets you serve it up with confidence!
PrintThe Best Moist Old-Fashioned Date Nut Bread Recipe
Bake this classic date nut bread for an irresistibly tender crumb and rich, nostalgic flavor. This easy quick bread recipe uses a simple soaking method to guarantee moisture in every slice.
- Prep Time: 20 min
- Cook Time: 60 min
- Total Time: 80 min
- Yield: 1 loaf (about 10 servings) 1x
- Category: Quick Bread
- Method: Baking
- Cuisine: American
- Diet: Vegetarian
Ingredients
- 1 cup boiling water
- 1 cup packed pitted dates, chopped
- 1 teaspoon baking soda
- 1/2 cup (1 stick) unsalted butter, softened
- 1 cup packed light brown sugar
- 2 large eggs
- 1 teaspoon vanilla extract
- 1 3/4 cups all-purpose flour
- 1 teaspoon baking powder
- 1/2 teaspoon salt
- 1 cup chopped walnuts or pecans
Instructions
- Preheat your oven to 350°F (175°C). Grease and flour a 9×5 inch loaf pan.
- Place the chopped dates in a heatproof bowl. Pour 1 cup of boiling water over the dates and stir in the baking soda. Let this mixture sit for 15 minutes to soften the dates.
- In a large bowl, cream together the softened butter and brown sugar until light and fluffy. Beat in the eggs one at a time, then stir in the vanilla extract.
- In a separate medium bowl, whisk together the flour, baking powder, and salt.
- Add the dry ingredients to the wet ingredients in three additions, mixing just until combined after each addition. Do not overmix.
- Gently fold in the softened date mixture (including any remaining liquid) and the chopped nuts until they are evenly distributed throughout the batter.
- Pour the batter into the prepared loaf pan.
- Bake for 55 to 65 minutes, or until a wooden skewer inserted into the center comes out clean.
- Let the bread cool in the pan for 10 minutes before turning it out onto a wire rack to cool completely before slicing.
Notes
- For the best results and a truly moist date loaf, do not skip soaking the dates in hot water with baking soda; this softens them and helps create a tender crumb.
- You can substitute pecans for walnuts if you prefer a different nutty flavor.
- Serve this homemade date bread warm with butter for a comforting breakfast treat.
Nutrition
- Serving Size: 1 slice
- Calories: 310
- Sugar: 28g
- Sodium: 240mg
- Fat: 14g
- Saturated Fat: 5g
- Unsaturated Fat: 9g
- Trans Fat: 0g
- Carbohydrates: 45g
- Fiber: 3g
- Protein: 5g
- Cholesterol: 55mg