
Oh, that craving! You know the one—you want that satisfying crunch, that bold, zesty Tex-Mex flavor that usually means pulling out the deep fryer, but you just don’t want the oil or the cleanup, especially on a Tuesday night. I totally get it. That’s exactly why I spent so much time tinkering in the kitchen, blending my Mexican heritage with my professional need for smart, reliable cooking. After loads of testing, I finally cracked the code for making the perfect weeknight dinners that deliver maximum flavor with minimal mess. Forget soggy tortillas! These Baked Chicken Chimichangas are my secret weapon for getting that amazing, restaurant-quality, golden crispiness using just the oven. Trust me, my background in flavor adaptation guarantees you’re going to love this lighter take!
- Why This is the Best Baked Chicken Chimichangas Recipe
- Ingredients for Your Easy Baked Chicken Chimichangas
- Step-by-Step Instructions for Baked Chicken Chimichangas
- Tips for Making Chi Chis Style Baked Chicken Chimichangas at Home
- Serving Suggestions for Your Quick Chicken Dinner Recipes
- Storage and Reheating Baked Chicken Chimichangas
- Frequently Asked Questions About Baked Chicken Chimichangas
- Serving Suggestions for Your Quick Chicken Dinner Recipes
- Storage and Reheating Baked Chicken Chimichangas
- Nutritional Estimates for this Lightened Up Tex Mex Favorite
- Share Your Crispy Baked Chicken Chimichangas Success
- Nutritional Estimates for this Lightened Up Tex Mex Favorite
- Share Your Crispy Baked Chicken Chimichangas Success
Why This is the Best Baked Chicken Chimichangas Recipe
Honestly, when people hear “baked chimichanga,” they picture something sad and floppy. Not here! My goal was to create a truly healthy chicken chimichanga recipe that still felt indulgent. We’re talking about guilt free chimichangas that stand up to any fried version you’ve had out. I developed these specifically because I wanted that satisfying crunch the whole family loves, but quick enough for a busy night. If you’re looking for easy chicken dinner recipes that taste incredible, this is it.
Here’s what makes this the best approach:
- Incredible Crunch: We nail that “oven fried texture recipes” result every time.
- Speed: We get these on the table fast—perfect for a weeknight meal.
- Flavor Lift: The filling is bold, thanks to that perfect mix of green sauce, spices, and two cheeses.
- Less Fuss: No dangerous hot oil splattering everywhere! It’s simply better for home cooking.
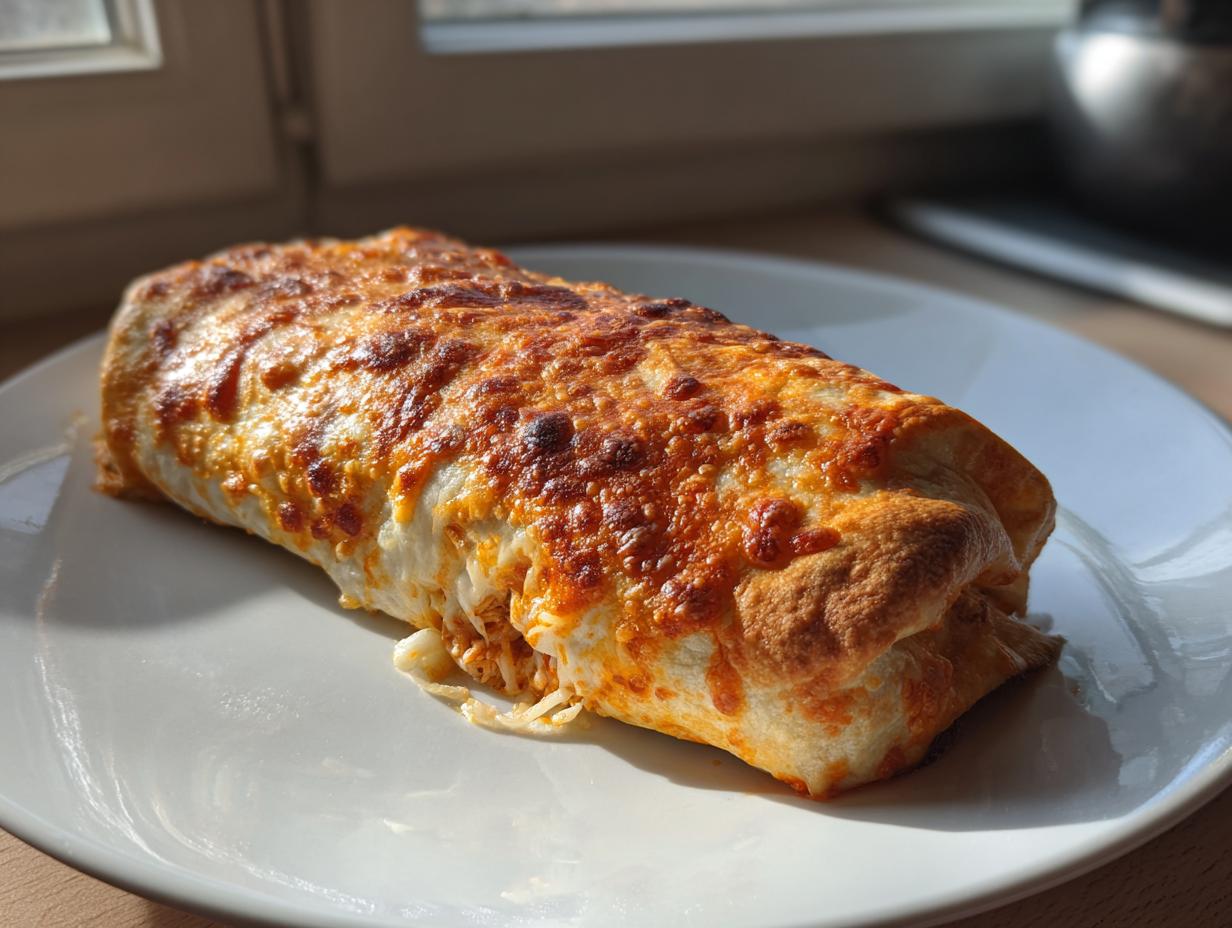
Achieving That Perfect Crispy Baked Chimichangas Texture
The secret sauce to getting these to crisp up isn’t in the filling; it’s all in the finishing move! You absolutely must lightly brush or spray the rolled tortillas with olive oil before they hit the oven. Don’t skip this, or they’ll dry out instead of crisping. Pop them into a hot, preheated 400°F oven, and watch the magic happen. Flipping them halfway through ensures even browning on both sides. This two-sided treatment is non-negotiable if you want that satisfying, shattering crunch that mimics deep frying.
Ingredients for Your Easy Baked Chicken Chimichangas
Getting these baked chicken chimichangas ready is honestly simpler than ordering takeout, and the ingredient list is totally manageable. I broke it down so you can grab everything in one quick trip. Remember, this filling is what gives us that deep comfort food flavor we love, making it a genuine simple mexcian comfort food favorite for any night.
Shredded Chicken Filling Components
This is where the flavor starts! For the best results, make sure your chicken is already cooked and shredded before you start mixing.
- 2 cups cooked, shredded chicken breast
- 1/2 cup green enchilada sauce (use a brand you love!)
- 1/2 cup shredded Monterey Jack cheese
- 1/4 cup shredded cheddar cheese (gotta have that cheddar!)
- 1 teaspoon chili powder
- 1/2 teaspoon ground cumin
- 1/4 teaspoon garlic powder
- 1/4 teaspoon dried oregano
- Salt and black pepper to taste (season generously!)
Tortilla Assembly and Crisping Agents for Baked Chicken Chimichangas
These are the backbone of our chicken chimichangas no fry success. Since we aren’t frying, the oil here is purely for that golden, satisfying crunch.
- 8 large (10-inch) flour tortillas
- 2 tablespoons olive oil or cooking spray (don’t skimp on coating the outside!)
- Optional toppings: Salsa, sour cream, guacamole (because what’s Mexican food without toppings?)
Step-by-Step Instructions for Baked Chicken Chimichangas
Alright, let’s get these into the oven! Since we’re aiming for the best baked chimichanga recipe that tastes like restaurant quality but works for your busy life, timing is everything. Make sure your oven is up to temperature before you start rolling, because we want a blast of heat right away to set those tortillas. This whole process moves really quickly once you get into the rhythm, turning this into fantastic easy oven baked mexican food for any night of the week!
Preparing the Flavorful Chicken Chimichangas Filling
First things first: the filling needs to be cohesive! Grab that bowl with your shredded chicken, the enchilada sauce, and those shredded cheeses. Now toss in all those gorgeous spices—chili powder, cumin, garlic powder, and oregano. My background taught me that seasoning is never one-size-fits-all, so after you mix it all up, give it a small taste. Does it need a little more zip? Maybe a pinch more salt? Always adjust *now* before it goes into the tortilla!
Mix it until everything is evenly coated. You want those cheeses to start getting a little melty from the warmth of the sauce and chicken, just to make sure it all sticks together beautifully when you roll it up. You should have a nice, thick mixture—nothing too soupy!
Rolling and Securing Your Baked Chicken Chimichangas
This step is where most people get frustrated because the tortillas tear! Don’t wrap them straight from the package! You need pliancy. I pop my large flour tortillas in the microwave for about 15 seconds—just until they feel soft and warm, not hot. This makes them super flexible.
Lay one warm tortilla flat. Spoon about a quarter cup of that amazing chicken mixture near the edge. Fold the sides in first—that’s key for keeping the filling contained. Then, roll it up tightly, pulling it back toward you to make a compact cylinder. If you’re worried about having trouble with serving later, you can absolutely secure the seam with a toothpick, just remember to pull those out before serving!
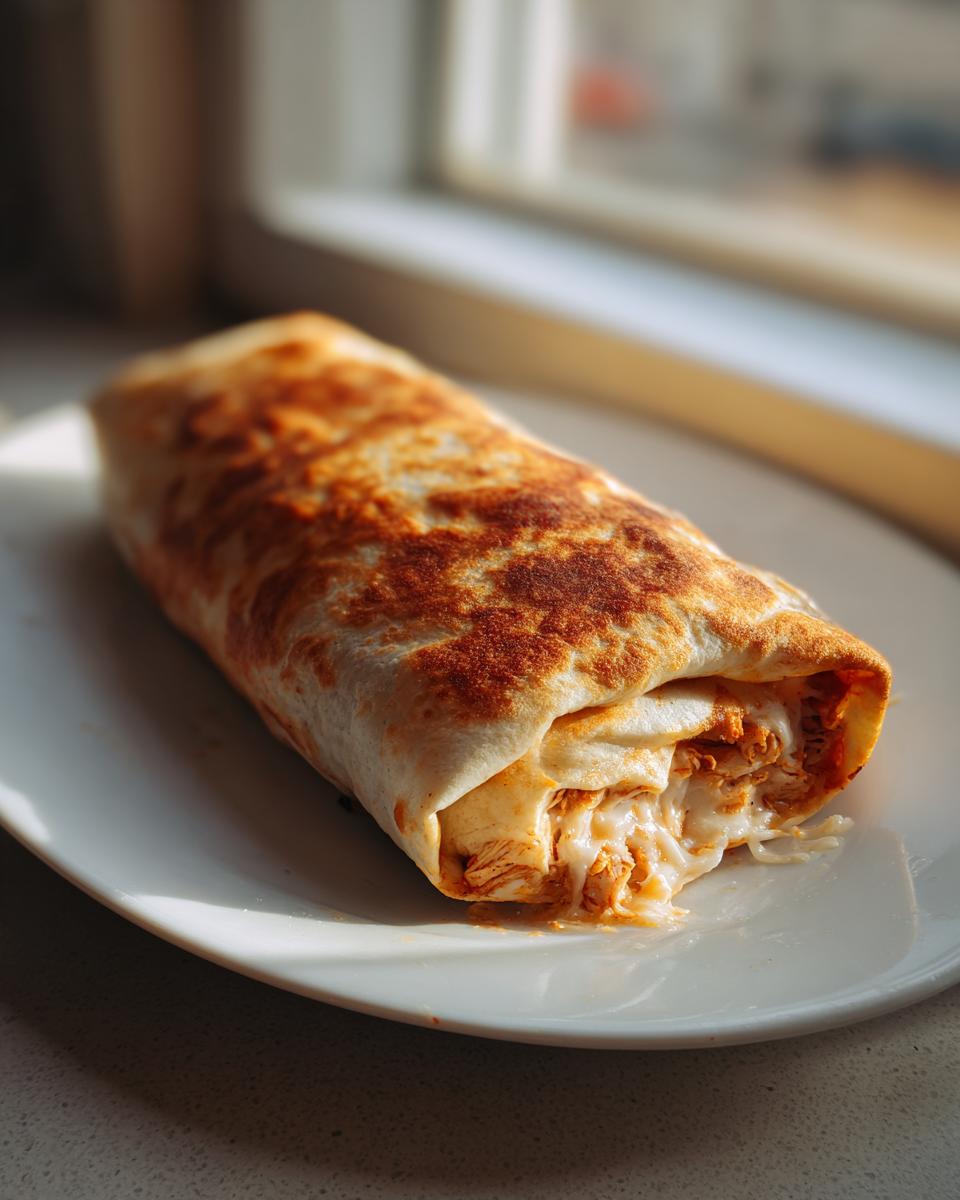
Baking for the Ultimate Crispy Baked Chicken Chimichangas
Okay, here is where we earn that crunch. Lightly grease your baking sheet—I often use a good spray of olive oil for even coverage. Arrange your rolled chimichangas seam-side down on the tray. Now, lightly brush or spray the tops and sides of every single chimichanga with that olive oil. Seriously, this creates an almost oven fried texture recipes result! Bake at 400°F for about 12 to 15 minutes until they start looking golden.
Then, carefully—maybe use tongs—flip each one over. Bake for another 10 to 12 minutes until the other side is equally stunningly golden brown. When they come out, they should sound slightly firm when you tap them. That means they are seriously crispy!
If you want to serve these with my zesty cilantro lime rice, make sure it’s ready to go right when the chimichangas finish baking!
Tips for Making Chi Chis Style Baked Chicken Chimichangas at Home
One of the best parts about home cooking, especially when you’re adapting a restaurant favorite, is making it perfectly *yours*. My mom always taught me that a recipe is just a suggestion until you adjust it for your family’s tastes. When we talk about achieving that authentic Chi-Chi’s style baked chicken chimichangas at home, it’s all about smart swaps. I’ve found that tweaking the filling balance is the easiest way to elevate these from good to absolutely unforgettable.
Ingredient Swaps and Substitutions for Baked Chicken Chimichangas
You don’t need a special grocery run for these upgrades. Look right in your fridge! If you want to amp up the gooey factor and get those truly cheesy baked chimichangas everyone fights over, try swapping the cheddar for Pepper Jack, or mixing in a little Oaxaca cheese if you can find it. The subtle heat works wonders with the green enchilada sauce we already use.
And let’s talk chicken. While I listed chicken breast, using pre-cooked rotisserie chicken is one of my all-time favorite shortcuts. It yields wonderfully flavorful, moist shreds and shaves about 20 minutes off your prep time, turning this into a near-instant family friendly mexican meal. If you want a little more savory depth, use dark meat chicken instead of white meat—it holds up beautifully to the baking process!
Oh, and if you happen to have some diced green chiles hiding in the pantry? Toss them in the filling! That little bit of acid and heat really brightens up the whole dish and makes it taste like it simmered all day, even though it hasn’t!
Serving Suggestions for Your Quick Chicken Dinner Recipes
These Baked Chicken Chimichangas are the main event, naturally, but what are they without the supporting cast? Since these are already rich with chicken and cheese—even though they are a much lighter option—we want bright, cool sides to balance things out. This is where you take your quick chicken dinner recipes from just delicious to completely unforgettable!
First, the mandatory toppings! You need something cool and creamy to cut through the slight spice of the filling. A big dollop of full-fat sour cream is classic, but if you want to get fancy, whip up some cilantro-lime crema instead. A fresh, chunky salsa is a must for that acidic pop; skip the watery jarred stuff if you can, and go for something homemade or fresh from the refrigerated section. And guacamole—do I even need to tell you?
When it comes to sides that make a full meal, I always lean toward something with fresh crunch or tang. You can’t go wrong with a classic wedge salad topped with ranch, but if you want to go Tex-Mex all the way, you absolutely have to try my creamy Elote-style street corn salad. It’s tangy, slightly sweet, and adds such a beautiful texture contrast to the crispy tortilla. If you’re short on time, a quick black bean and corn salad on the side works like a charm too. These pairings make it feel like a feast without adding any actual frying time to your evening!
Storage and Reheating Baked Chicken Chimichangas
Listen, these Baked Chicken Chimichangas taste so good that you might actually have leftovers—though in my house, that’s usually just wishful thinking! But if you do manage to save a few, you have options for keeping them ready for your next weeknight mexican dinner idea. Storing them properly is key to ensuring they still deliver that satisfying crunch when you reheat them later.
If you’re storing them in the fridge, wrap the cooled chimichangas tightly in plastic wrap or tuck them into an airtight container. They’ll be perfectly good for about two or maybe three days. Honestly, they hold up really well because the filling isn’t overly wet to begin with!
For longer storage, you can definitely freeze them! Assemble everything completely, but skip the baking step entirely. Wrap each one individually in plastic wrap, then wrap them all together tightly in foil or place them in a heavy-duty freezer bag. They freeze beautifully for up to two months. Remember the recipe note: when baking from frozen, you’ll need a little extra time in a slightly lower temperature oven, around 375°F, until they are heated through.
Reheating for Maximum Crispness
This is the most important tip for leftovers: we are not using the microwave! If you microwave them, you are guaranteeing a floppy, sad ending to a wonderful meal. We want to refresh that texture, not steam it! So, the absolute best way to reheat is back in the oven. It’s the only way to answer that question of how to make baked chimichangas crispy after they’ve chilled out overnight.
For refrigerated ones, preheat your oven to 350°F. Place them directly on the rack or on a baking sheet and warm them for about 10 to 15 minutes. If they still seem a little dull on the outside, give you a quick light spray of oil and bump the heat up to 400°F for the last 3 minutes. For frozen ones, follow that slightly lower temp advice (375°F for about 30 minutes, flipping halfway). They come out tasting almost exactly like they just came out of the oven the first time! That’s the beauty of well-made baked chicken chimichangas!
Frequently Asked Questions About Baked Chicken Chimichangas
I know sometimes sticking to a new recipe can bring up questions, especially when you’re trying to get a very specific texture out of something that’s usually fried! I’ve put together some of the most common things folks ask me about these Baked Chicken Chimichangas. If you have a question about making this a part of your easy lunch rotation or just need clarification on the crisping process, chances are it’s answered below. We want everyone to feel super confident making these!
Can I use corn tortillas instead of flour for baked chicken chimichangas?
That’s a great question, and sadly, the short answer is maybe, but I wouldn’t recommend it for *this* specific recipe. Corn tortillas are wonderful for tacos or actual fried chimichangas because they hold up to oil bathing. However, when you’re looking for that pliable roll needed for our stuffing process, corn tortillas tend to crack and crumble immediately, especially when you try to roll them tightly around a hearty filling.
Flour tortillas are the winning choice here because they are inherently more elastic. Plus, that delicious, slightly chewy-then-crispy exterior we get from oil-spraying them in the oven? That texture is classic to the large flour wrap. Stick with the large flour ones if you want that authentic *guilt free chimichangas* experience that holds together!
How can I make these baked chicken chimichangas spicier?
I love that you’re ready to turn up the heat! Since we are focusing on a healthy chicken chimichanga recipe that keeps the cook time low, we need to boost the filling flavor. There are a few easy ways to do this without adding a ton of liquid, which could ruin your crispiness!
First, add a small can of diced, mild or hot green chiles right into the filling mixture when you combine the chicken and spices. That gives you little bursts of heat! Second, you can always introduce something hotter directly into that creamy base. Maybe you stir in a teaspoon of your favorite chipotle-flavored hot sauce or even a small pinch of cayenne pepper along with the cumin and chili powder. If you want a serious kick, dice up half a fresh jalapeño (seeds removed, unless you’re really feeling brave!) and mix those tiny pieces right in with the shredded chicken. That way, you get intentional pockets of heat, which is much better than just sprinkling salt on top!
Serving Suggestions for Your Quick Chicken Dinner Recipes
These Baked Chicken Chimichangas are the main event, naturally, but what are they without the supporting cast? Since these are already rich with chicken and cheese—even though they are a much lighter option—we want bright, cool sides to balance things out. This is where you take your quick chicken dinner recipes from just delicious to completely unforgettable!
First, the mandatory toppings! You need something cool and creamy to cut through the slight spice of the filling. A big dollop of full-fat sour cream is classic, but if you want to get fancy, whip up some cilantro-lime crema instead. A fresh, chunky salsa is a must for that acidic pop; skip the watery jarred stuff if you can, and go for something homemade or fresh from the refrigerated section. And guacamole—do I even need to tell you?
When it comes to sides that make a full meal, I always lean toward something with fresh crunch or tang. You can’t go wrong with a classic wedge salad topped with ranch, but if you want to go Tex-Mex all the way, you absolutely have to try my creamy Elote-style street corn salad. It’s tangy, slightly sweet, and adds such a beautiful texture contrast to the crispy tortilla. If you’re short on time, a quick black bean and corn salad on the side works like a charm too. These pairings make it feel like a feast without adding any actual frying time to your evening!
Storage and Reheating Baked Chicken Chimichangas
Listen, these Baked Chicken Chimichangas taste so good that you might actually have leftovers—though in my house, that’s usually just wishful thinking! But if you do manage to save a few, you have options for keeping them ready for your next weeknight mexican dinner idea. Storing them properly is key to ensuring they still deliver that satisfying crunch when you reheat them later.
If you’re storing them in the fridge, wrap the cooled chimichangas tightly in plastic wrap or tuck them into an airtight container. They’ll be perfectly good for about two or maybe three days. Honestly, they hold up really well because the filling isn’t overly wet to begin with!
For longer storage, you can definitely freeze them! Assemble everything completely, but skip the baking step entirely. Wrap each one individually in plastic wrap, then wrap them all together tightly in foil or place them in a heavy-duty freezer bag. They freeze beautifully for up to two months. Remember the recipe note: when baking from frozen, you’ll need a little extra time in a slightly lower temperature oven, around 375°F, until they are heated through.
Reheating for Maximum Crispness
This is the most important tip for leftovers: we are not using the microwave! If you microwave them, you are guaranteeing a floppy, sad ending to a wonderful meal. We want to refresh that texture, not steam it! So, the absolute best way to reheat is back in the oven. It’s the only way to answer that question of how to make baked chimichangas crispy after they’ve chilled out overnight.
For refrigerated ones, preheat your oven to 350°F. Place them directly on the rack or on a baking sheet and warm them for about 10 to 15 minutes. If they still seem a little dull on the outside, give you a quick light spray of oil and bump the heat up to 400°F for the last 3 minutes. For frozen ones, follow that slightly lower temp advice (375°F for about 30 minutes, flipping halfway). They come out tasting almost exactly like they just came out of the oven the first time! That’s the beauty of well-made baked chicken chimichangas!
Nutritional Estimates for this Lightened Up Tex Mex Favorite
As someone with a background in nutrition, I always try to give you a realistic picture of what’s on your plate. Because we are skipping that deep fryer, these Baked Chicken Chimichangas are naturally a much healthier option than their classic counterparts. These estimates are based on using the ingredients listed—flour tortillas, standard cheeses, and lean shredded chicken breast. Keep in mind that piling on a huge amount of sour cream or guacamole will obviously shift those numbers, but this baseline gives you a great idea of what you’re eating!
I always say, knowing what’s in your food is the first step to feeling good about eating it. It’s important to me that my recipes support real life, and these fit right into any plan focused on lightened up tex mex favorites.
- Serving Size: 1 chimichanga
- Calories: 350
- Sugar: 3g
- Sodium: 550mg
- Fat: 14g
- Protein: 22g
That protein content is fantastic, right? That’s why I love them for a satisfying dinner that keeps you full!
Share Your Crispy Baked Chicken Chimichangas Success
I truly hope these instructions help bring that restaurant-style flavor right into your own kitchen without any of the hassle or guilt. I’ve spent so much time perfecting the oil ratio and baking time to ensure you get that unbelievably crispy crunch when you bite into these Baked Chicken Chimichangas. When you whip up a batch for your next meal—whether it’s a quiet Tuesday or a big Tex-Mex Friday—I really want to hear about it!
Did the tortilla get golden brown exactly how you wanted? Was the filling perfectly seasoned? Please hop down to the comments below, leave me a quick star rating, and tell me if you finally nailed that crispiness we talked about! Happy cooking, my friends! I look forward to reading your success stories on making these easy oven baked mexican food favorites!
Nutritional Estimates for this Lightened Up Tex Mex Favorite
As someone with a background in nutrition, I always try to give you a realistic picture of what’s on your plate. Because we are skipping that deep fryer, these Baked Chicken Chimichangas are naturally a much healthier option than their classic counterparts. These estimates are based on using the ingredients listed—flour tortillas, standard cheeses, and lean shredded chicken breast. Keep in mind that piling on a huge amount of sour cream or guacamole will obviously shift those numbers, but this baseline gives you a great idea of what you’re eating!
I always say, knowing what’s in your food is the first step to feeling good about eating it. It’s important to me that my recipes support real life, and these fit right into any plan focused on lightened up tex mex favorites.
- Serving Size: 1 chimichanga
- Calories: 350
- Sugar: 3g
- Sodium: 550mg
- Fat: 14g
- Protein: 22g
That protein content is fantastic, right? That’s why I love them for a satisfying dinner that keeps you full! Check out my tips for healthy breakfast ideas next time you’re planning out your week!
Share Your Crispy Baked Chicken Chimichangas Success
I truly hope these instructions help bring that restaurant-style flavor right into your own kitchen without any of the hassle or guilt. I’ve spent so much time perfecting the oil ratio and baking time to ensure you get that unbelievably crispy crunch when you bite into these Baked Chicken Chimichangas. When you whip up a batch for your next meal—whether it’s a quiet Tuesday or a big Tex-Mex Friday—I really want to hear about it!
Did the tortilla get golden brown exactly how you wanted? Was the filling perfectly seasoned? Please hop down to the comments below, leave me a quick star rating, and tell me if you finally nailed that crispiness we talked about! Happy cooking, my friends! I look forward to reading your success stories on making these easy oven baked mexican food favorites!
Print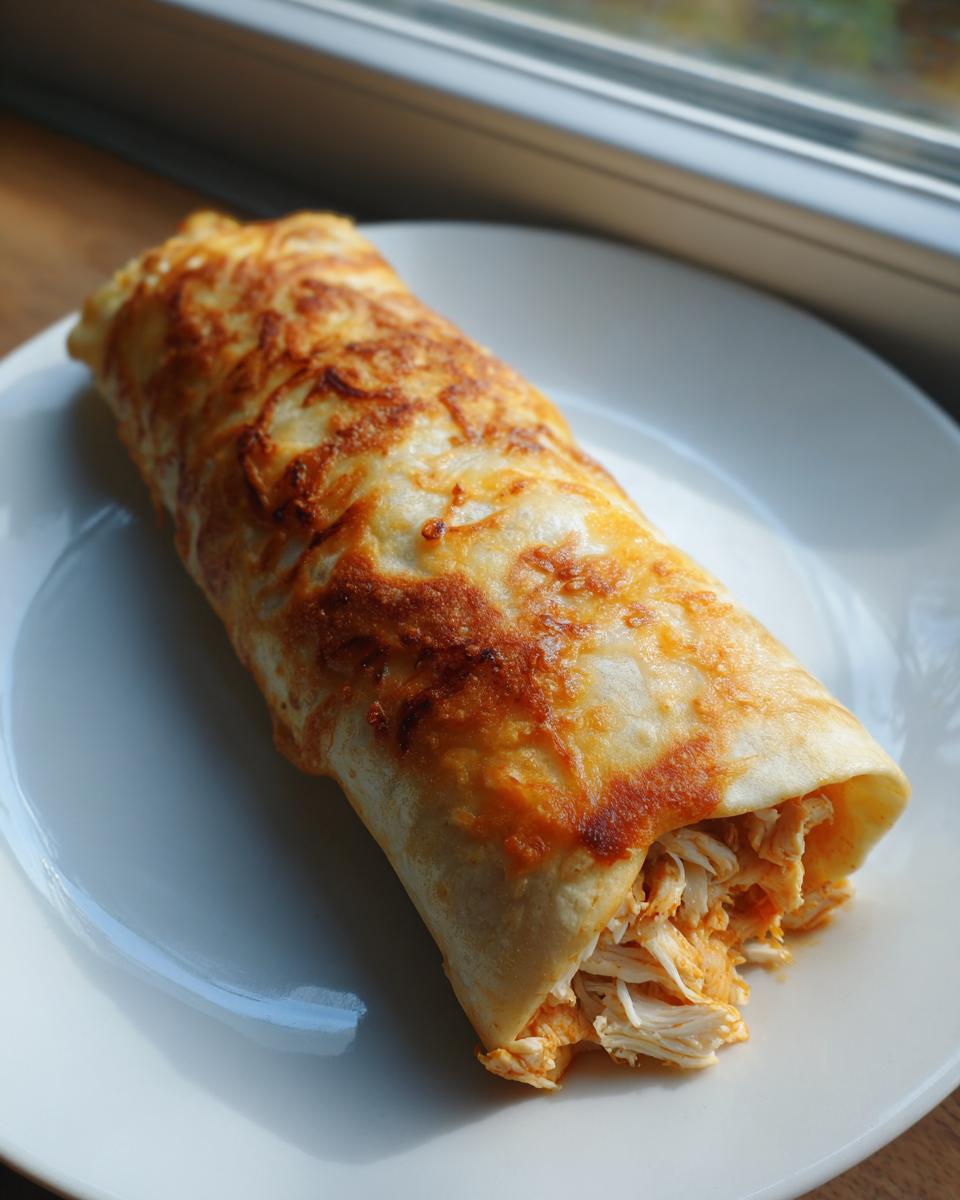
The Crispiest Guilt-Free Baked Chicken Chimichangas (Weeknight Favorite)
Make Chi-Chi’s style baked chicken chimichangas at home. This easy, oven-baked recipe delivers a satisfyingly crispy texture and bold flavor without deep-frying, making it a perfect, lighter option for your weeknight Mexican dinner.
- Prep Time: 15 min
- Cook Time: 27 min
- Total Time: 42 min
- Yield: 8 servings 1x
- Category: Dinner
- Method: Baking
- Cuisine: Tex-Mex
- Diet: Vegetarian
Ingredients
- 2 cups cooked, shredded chicken breast
- 1/2 cup green enchilada sauce
- 1/2 cup shredded Monterey Jack cheese
- 1/4 cup shredded cheddar cheese
- 1 teaspoon chili powder
- 1/2 teaspoon ground cumin
- 1/4 teaspoon garlic powder
- 1/4 teaspoon dried oregano
- Salt and black pepper to taste
- 8 large (10-inch) flour tortillas
- 2 tablespoons olive oil or cooking spray (for crisping)
- Optional toppings: Salsa, sour cream, guacamole
Instructions
- Preheat your oven to 400°F (200°C). Lightly grease a baking sheet or line it with parchment paper.
- In a medium bowl, combine the shredded chicken, green enchilada sauce, Monterey Jack cheese, cheddar cheese, chili powder, cumin, garlic powder, and oregano. Mix until the chicken is evenly coated and the cheese is distributed. Season with salt and pepper.
- Warm the tortillas briefly in the microwave (about 15 seconds) to make them pliable and prevent tearing.
- Place about 1/4 cup of the chicken mixture near one edge of a tortilla. Fold the sides of the tortilla inward over the filling. Roll the tortilla tightly away from you, creating a compact cylinder. Secure the seam with a toothpick if necessary. Repeat with the remaining filling and tortillas.
- Place the rolled chimichangas seam-side down on the prepared baking sheet.
- To achieve the crispy baked texture, lightly brush the tops and sides of each chimichanga with olive oil or spray generously with cooking spray. This step is key for an oven-fried texture.
- Bake for 12 to 15 minutes, then carefully flip each chimichanga. Bake for another 10 to 12 minutes, or until the tortillas are golden brown and crisp.
- Remove the toothpicks before serving. Serve immediately with your preferred toppings like salsa, sour cream, or guacamole for a complete family friendly Mexican meal.
Notes
- For the crispiest results, ensure your oven is fully preheated before placing the chimichangas inside. A higher initial heat helps set the tortilla quickly.
- If you are meal prepping, assemble the chimichangas but do not bake them. Store them tightly wrapped in the refrigerator for up to two days, or freeze them. Bake from frozen at 375°F for about 30 minutes, flipping halfway through.
- You can substitute pre-cooked rotisserie chicken for quick shredded chicken to make this a quick 30 minute chimichanga option.
Nutrition
- Serving Size: 1 chimichanga
- Calories: 350
- Sugar: 3
- Sodium: 550
- Fat: 14
- Saturated Fat: 6
- Unsaturated Fat: 8
- Trans Fat: 0
- Carbohydrates: 35
- Fiber: 2
- Protein: 22
- Cholesterol: 65