
Tell me if this sounds familiar: You spend hours cutting out perfect little shapes, baking them flawlessly, and then you mix up that simple powdered sugar and milk icing. You decorate beautifully, but when you go to stack them for storage or put them in a box for a friend, the whole thing turns into a sticky, smeared mess! Ugh, I hate that! That’s why I spent years—honing my background in food science and professional recipe development—to crack the code on the ultimate sugar cookie icing that hardens. Trust me, once you use this Royal Icing formula, your decorating game changes completely. If you need a base cookie that stands up well to this fantastic icing, check out my recipe for brown butter sugar cookies. We’re achieving that signature bakery look that sets hard and stays gorgeous.
- Why This Is The Best Sugar Cookie Icing That Hardens For Decorating
- Ingredients for Hardening Cookie Icing Recipe
- How to Make Sugar Cookie Icing That Hardens Completely
- Tips for Success with Bakery Style Cookie Icing That Dries Hard
- Coloring and Decorating with Your Stackable Cookie Icing
- Storage and Making Ahead for Cookie Icing for Gifting
- Troubleshooting Common Issues with Sugar Cookie Icing That Hardens
- Frequently Asked Questions About Hardening Cookie Icing Recipe
- Nutritional Estimates for This Icing
Why This Is The Best Sugar Cookie Icing That Hardens For Decorating
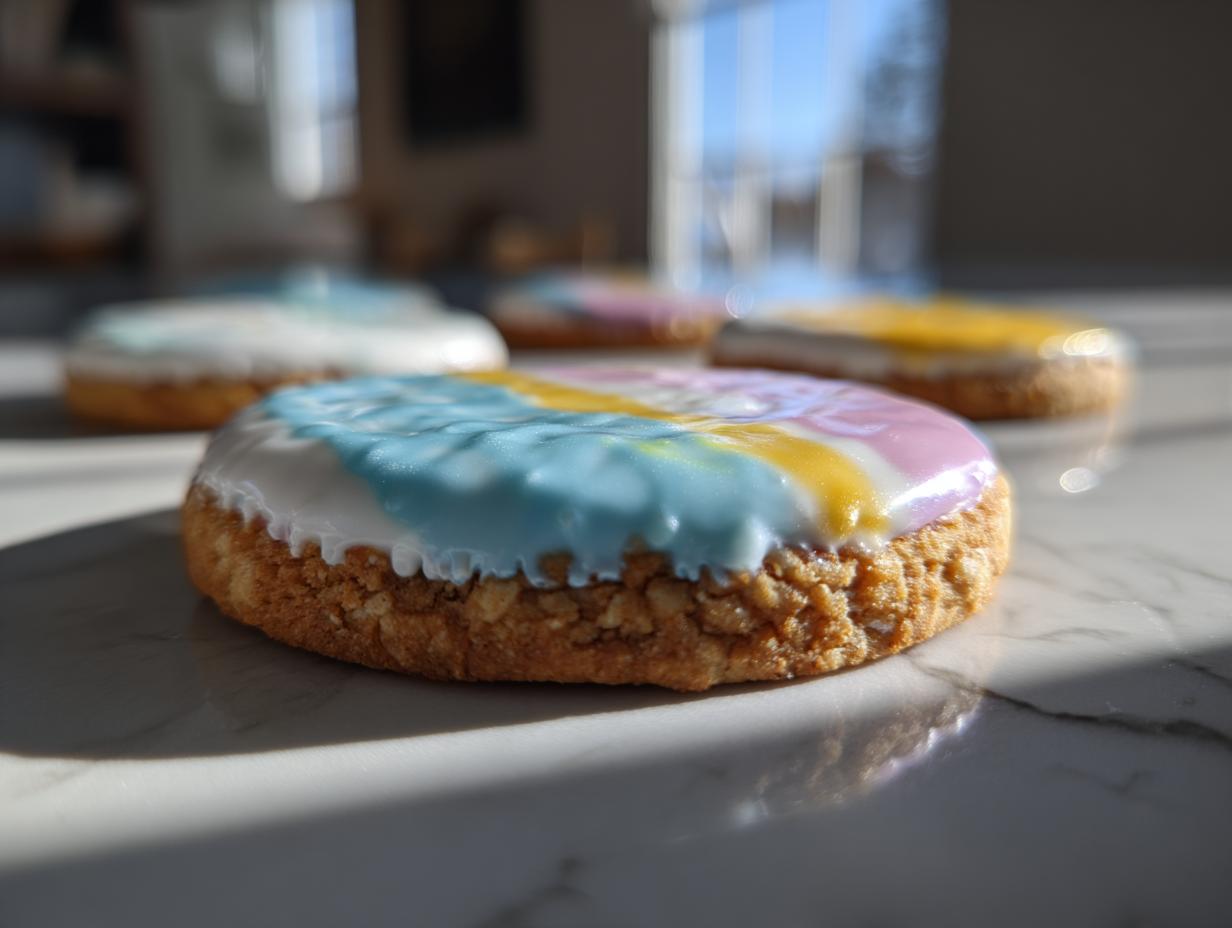
Okay, ditch those runny glazes—they’re beautiful for about thirty minutes, then they become a sticky disaster! What we need is a hardening cookie icing recipe that locks everything down. This Royal Icing recipe is my go-to because it’s engineered for durability. The combination of meringue powder and that tiny bit of corn syrup guarantees a smooth drying sugar cookie frosting that sets completely firm.
That means you get a truly glossy cookie glaze that sets dry, making the cookies absolutely perfect for stacking and gifting. It’s the best icing for decorating sugar cookies because it won’t smudge when you put them in a container. If you’ve been searching for that bakery style cookie icing that dries hard, this is it. It’s my secret weapon for stress-free holiday cookie tins!
I talk a lot about this method because it prevents cracking, too. For more decorating ideas before you start icing, take a peek at my sugar cookie truffles!
Ingredients for Hardening Cookie Icing Recipe
The magic ingredients here are not complicated at all, but their roles are very specific when you need that sturdy, crisp finish. You’ll start with two cups of powdered sugar, and I stress that you absolutely must sift it first! Nobody wants tiny little lumps in their beautiful, smooth frosting, right? Next, you need three tablespoons of meringue powder. This powder is what does the heavy lifting to make sure this is actually a sugar cookie icing that hardens instead of just staying tacky. We combine those dry elements with six tablespoons of warm water and one teaspoon of clear vanilla extract. The clear vanilla is crucial if you want a brilliant white base for bright colors.
And here’s the optional secret ingredient for that high-shine look: a quarter teaspoon of light corn syrup. Just a tiny bit makes the difference between a nice matte finish and that glossy, professional look we are aiming for! Don’t skip that step if you want a truly shiny sugar cookie topping.
Ingredient Notes and Substitutions for Smooth Drying Sugar Cookie Frosting
Let’s talk quick swaps because we always improvise in the home kitchen! If you don’t have meringue powder, you can sometimes get away with just one egg white, but honestly, the meringue powder gives you such a much more reliable, no-fail setup. That’s why I recommend sticking to it for this hard cookie icing recipe.
Also, about the vanilla: standard vanilla extract is brown, and trust me, it will slightly tint your white icing a lovely beige. But if you are going for deep reds or bright blues, you won’t notice. If you need pure, bright white icing for piping, always opt for the clear kind. Remember, the corn syrup is our secret weapon for that high gloss and helps keep the final product from cracking too much, making it the best recipe for hard cookie icing!
How to Make Sugar Cookie Icing That Hardens Completely
Now we get to the fun part: mixing! This might only take ten minutes, but that beating time is non-negotiable if you want that perfect, durable finish. First, in your bowl, combine that sifted powdered sugar with your meringue powder. Then, pour in the six tablespoons of warm water and the one teaspoon of clear vanilla extract. Start your mixer on low just to bring everything together—you don’t want a sugar cloud erupting in your kitchen! Scrape down the sides really well, because those dry pockets hold the secret to stickiness later.
Here is the key step: crank that mixer up to medium-high and let it run for five to seven full minutes. You have to whip the air into it! I learned this the hard way once when I cut it short at three minutes. My cookies looked amazing, but the next morning, they were still tacky! It was a disaster! This whipping action incorporates the air needed for this sugar cookie icing that hardens so beautifully. For inspiration on stabilizing frostings in general, you might want to check out my tips on making vanilla buttercream stable.
Once it’s thick and holds stiff peaks, you check the consistency. Remember, this base is for outlining, which needs to be quite firm. If you’re flooding the cookie—covering the whole surface—you need to thin it out using the 10-second rule. Keep adding water by the half teaspoon until the icing you drizzle off the whisk slowly disappears back into the bowl after you count to ten. That perfect flow is what gives you that smooth drying sugar cookie frosting.
Achieving the Right Consistency for Outlining and Flooding
Outlining just needs a very stiff mixture. If you squeeze it from the bag, it should hold its shape sharply and not sag at all. That’s a sign that this sugar cookie icing that hardens is ready to create sharp borders.
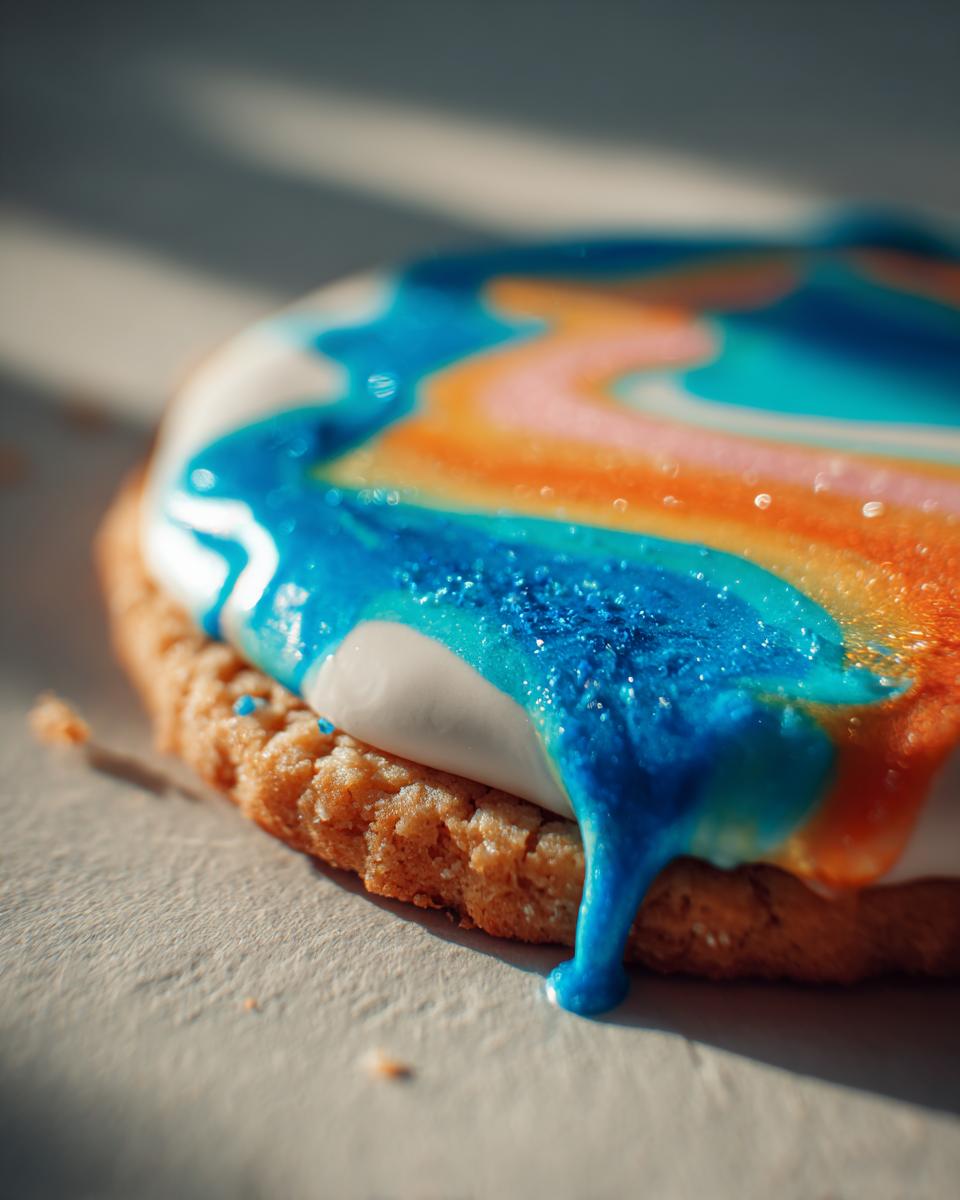
Flooding, however, needs that wonderful 10-second rule consistency I mentioned. It needs to be runny enough to spread across your cookie evenly, but stiff enough that the trail you make while mixing dissolves slowly. If the trail disappears instantly, it’s too thin, and you risk the color bleeding or the icing running right off the sides. If it takes longer than ten seconds to vanish, it’s too stiff for flooding; just add a couple more drops of water until you nail that sweet spot. If you overdo the water, don’t panic; just mix in a spoonful of your reserved sifted powdered sugar!
Tips for Success with Bakery Style Cookie Icing That Dries Hard
You’ve mixed it perfectly, so now we need to make sure the drying process cooperates! This is where a lot of people go wrong, ending up with icing that looks dry on top but feels gooey underneath. If you want a truly durable finish—the kind you can stack high for gifting—you have to manage the environment.
My number one rule for getting that firm finish is simple: Do NOT refrigerate your cookies while they dry. I know it feels counterintuitive, but the moisture in the fridge will make your beautiful, hardening cookie icing stay tacky forever! Keep the decorated cookies uncovered on the counter at room temperature. They need airflow! Depending on the humidity in your house, this can take anywhere from 8 hours to a full day, but air drying is the secret to that hard, almost enamel-like top layer.
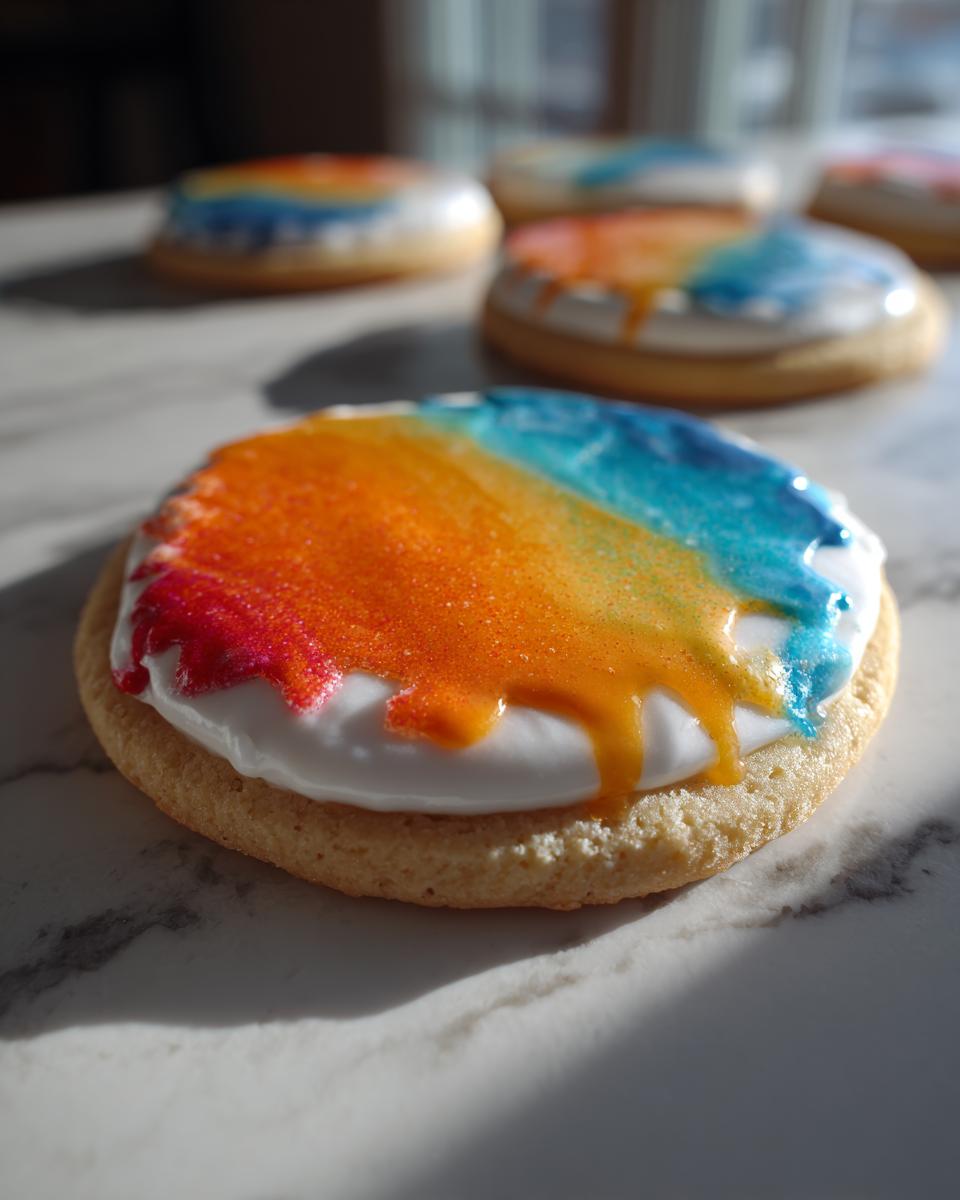
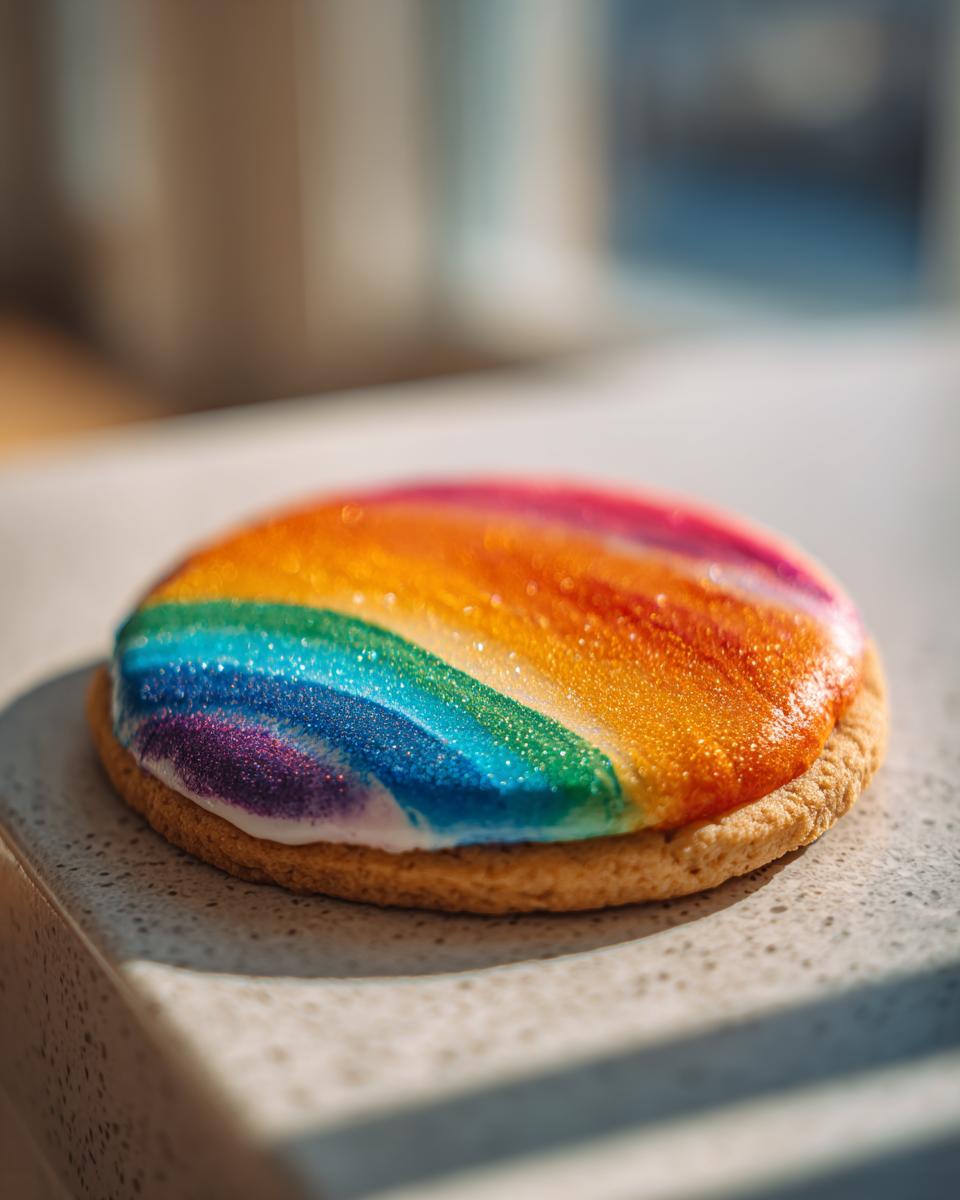
Next up, let’s talk color. If you are coloring your icing, you absolutely must use gel food coloring, not liquid drops. Liquid coloring adds too much extra water to the mixture, and guess what that does? It compromises your structure! Too much liquid means your sugar cookie icing that hardens might crack or never quite set dry. Gel colors are concentrated, so you only need a skewer tip’s worth to get vibrant hues. This is how you maintain that shiny cookie glaze that sets dry without diluting the meringue magic we worked so hard to whip in!
If you struggle with cracked icing even when you think you’re doing everything right, sometimes a drop or two of extra corn syrup added during the mixing phase helps prevent that from happening. It keeps the surface supple for just a moment longer while it dries, resulting in a much smoother, professional look on your finished cutouts. It’s details like these that make the difference between home baking and bakery style cookie icing that dries hard!
If you want to try a different texture next time that is naturally soft (no hardening required!), you absolutely must try my recipe for lemon crinkle cookies. But for sharp designs, stick to this royal icing!
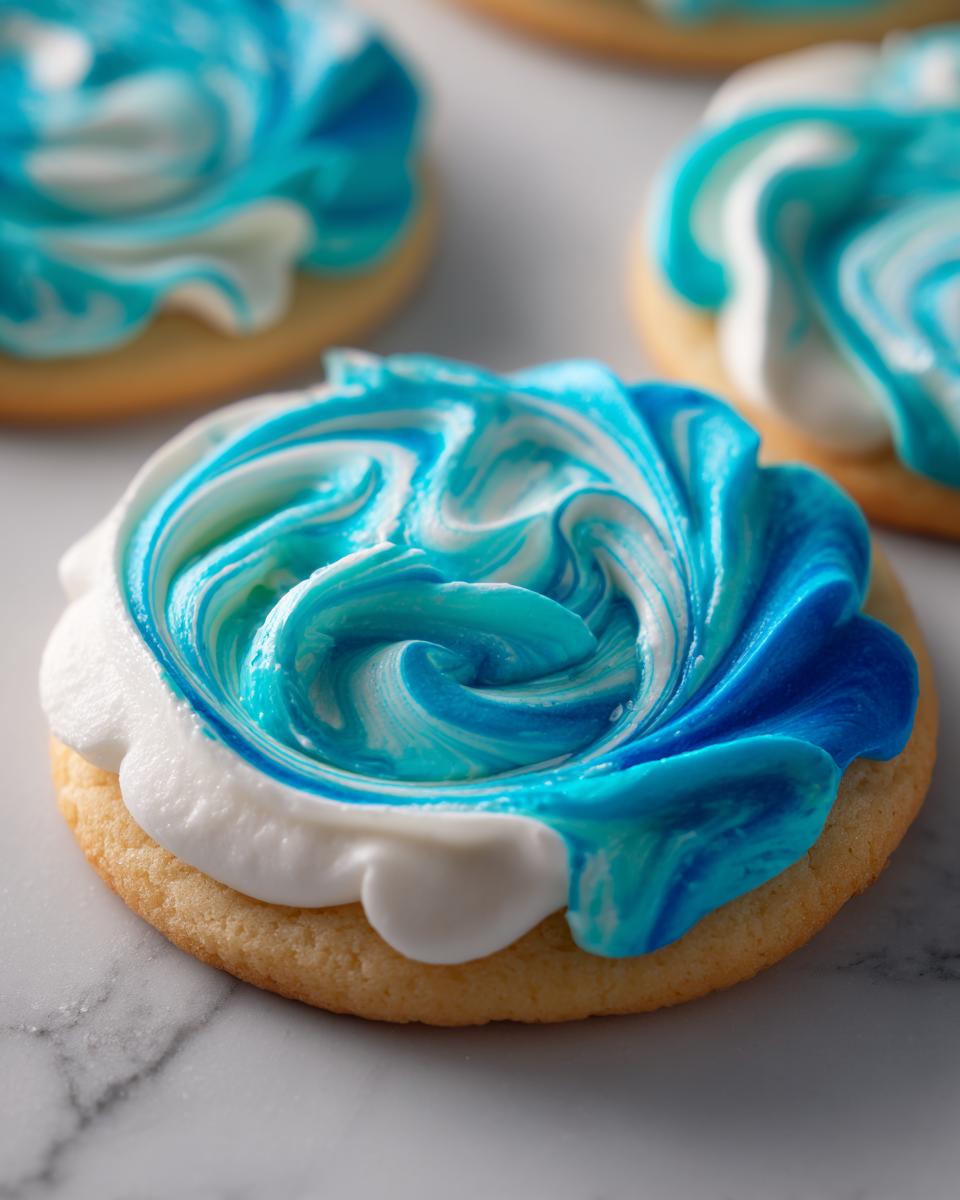
Coloring and Decorating with Your Stackable Cookie Icing
Once the icing is perfectly whipped, you have to move pretty quickly if you want to use it all! Remember all that air we spent those seven minutes beating into it? That aeration is vital for making sure this sugar cookie icing that hardens properly. If it sits out too long before you get it onto the cookie, it starts to deflate a little bit, and you might end up with a softer finish than you intended.
When coloring, stick to gel paste colors, like I mentioned before. Only use a toothpick dipped into the gel—a little bit goes such a long way! When you mix in the color, use a small spatula and fold it in gently until it’s just uniform. Don’t overmix it here! We’ve already done the hard work getting the air in; we don’t want to beat it out again while coloring. Fold until you *almost* don’t see streaks—that slight trace ensures you preserve that beautiful, stiff consistency you need for outlining borders.
If you’re using your icing for piping borders, make sure you get the outline done quickly and let it set up for about 15 to 30 minutes before you start flooding the inside area. This slight set time keeps your flooding color from creeping out past your lines—it’s a pro trick for making sure your design stays crisp! If you’re decorating for a big event, getting your base colors ready ahead of time is a lifesaver. You can make small batches of colors and keep them covered tightly with plastic wrap pressed right onto the surface of the icing in little bowls to keep them workable while you’re focusing on the final decorating push. For more inspiration on recipes that are great for making ahead, you might want to check out my cinnamon roll muffins!
Storage and Making Ahead for Cookie Icing for Gifting
If you’re anything like me, you probably want to make your beautiful sugar cookie icing that hardens a day or two before the actual decorating marathon. Planning ahead is essential, especially when you’re baking for holidays or large events! The great news is that this Royal Icing is incredibly stable.
For any leftover icing that you mix but don’t use right away—maybe you’re only making two colors today—you need to keep the air out. Pop that icing into a really airtight container. Then, take a small piece of plastic wrap and press it directly onto the surface of the icing itself. You want zero space between the air and the sugar mixture. This keeps it from forming that crusty skin that makes mixing again a headache. It stays perfectly good on the counter for a day or two. If it looks a little dry the next day, just stir in a couple of drops of water until it flows smoothly again.
When it comes to the finished cookies, this is where you’ll really appreciate that hard, durable shell. Once the icing is totally dry—and I mean rock hard, not just surface dry—these cookies stack like little jewels! You don’t need to worry about smearing them when you put them into tins or cellophane bags for cookie icing for gifting. They are protected! The hard icing acts like a natural barrier. I’ve found that these decorated cookies stay absolutely perfect for up to two weeks when stored in an airtight container at room temperature.
But here’s a pro tip for packing! Never stack them until you are 100% certain they are dry. I give mine a full 24 hours, even if it feels like they are done sooner. If you’re packing them up to travel, place a square of parchment paper between each layer. This prevents any slight friction from dulling that beautiful shine you worked so hard to achieve. For other make-ahead treats that are just as fun, check out my recipe for graham cracker toffee!
If you are looking for other reliable icing methods, my friend over at Cincy Shopper has a great basic guide to cookie icing that hardens to see how different recipes compare!
Troubleshooting Common Issues with Sugar Cookie Icing That Hardens
Even with my precise formula for this sugar cookie icing that hardens, sometimes things look a little off once you start decorating or the next day. Don’t stress! Almost every issue comes down to either water content or the whipping time we discussed earlier. When you know what went wrong, fixing it is super easy, and that’s what using a recipe developed with food science background helps with!
Let’s tackle the three big frustration points I hear about the most. First, if your icing is cracking heavily once it dries, that’s your big clue that you added too much liquid—usually water, or maybe you got a little too enthusiastic with the gel color. When cracking happens, it means the sugar structure is too tight and strained after drying. The fix is simply to remix that batch, or start a new one, and be much more restrained with adding water when achieving that 10-second flooding consistency.
The absolute worst is when your gorgeous cookie dries tacky! If you wake up and your beautifully decorated cookie is sticking to the plastic wrap or your fingers, it usually means one thing: you didn’t whip it long enough. Those 5 to 7 minutes of high-speed mixing are what create tiny air pockets that allow the structure to fully set firm. If it’s still sticky after 24 hours, it needs more time, OR you added too much moisture. If it’s only slightly tacky, try leaving the cookies out in a very dry, low-humidity area for a few more hours.
Finally, sometimes the icing feels grainy, even if you sifted the sugar perfectly. This usually happens if the icing sits for a very long time before use, or if you get condensation back into the bowl, causing the sugar crystals to reform slightly. If it feels gritty, don’t throw it out! You can save it by whipping it again on high speed for another two minutes or slowly mixing in just one more teaspoon of meringue powder. That extra whipping should break down any re-formed crystals.
For general kitchen troubleshooting—like when my sauce splits or I need a quick fix for mayo—I always turn to my guide on making homemade tartar sauce for quick tips on emulsions. The same principles of balance apply to this icing!
Frequently Asked Questions About Hardening Cookie Icing Recipe
I know you might still have a couple of lingering questions about getting that perfect, durable finish. That’s totally normal when you’re trying out a new recipe, especially one that needs to set rock-solid! I’ve gathered the most common things I hear about this sugar cookie icing that hardens so you can move forward with confidence.
Can I use milk instead of water in this recipe?
This is such a common question! You absolutely *can* use milk instead of water if you want a slightly richer flavor, but I highly recommend sticking to the warm water for the initial mix. Why? Milk has fat and protein, which can sometimes interfere with that super hard, non-sticky set we are aiming for in this hardening cookie icing recipe. The water keeps the structure super clean so the meringue powder can do its job perfectly. If you *must* use milk, use the absolute lowest amount possible, and know that your dry time might be a little longer.
How long does this sugar cookie icing that hardens take to dry fully?
This is the million-dollar question, isn’t it? If you want that beautiful, professional finish that lets you stack cookies without any smears, you need patience! Generally, under normal indoor humidity, you should allow 8 to 12 hours for the icing to be firm enough to touch gently. However, for them to be certified stackable, giftable, or safe for little hands to handle, I always recommend waiting a full 24 hours. They need to be completely dry all the way through for that truly hard finish. Remember, the goal here is a glossy cookie glaze that sets dry, not just a slightly stiff surface!
Is this icing okay if I make it the day before decorating?
Yes, absolutely! As I mentioned in the storage section, this Royal Icing is wonderful for making ahead. You mix it up, cover it tightly with plastic wrap pressed directly onto the surface to keep the air out, and leave it on the counter for up to 24 hours. When you are ready to decorate your cookies, just give it a quick stir. If it seems a tiny bit stiff, add a drop or two of water until it reaches that perfect consistency again. This preparation is key for stress-free holiday baking when you need that smooth drying sugar cookie frosting ready to go!
What if my icing ends up too thin for outlining?
If you accidentally added too much water, don’t panic and definitely don’t throw it out! This is where having extra sifted powdered sugar on hand pays off. Just add one tablespoon of sifted powdered sugar to the batch at a time, mixing gently with a spatula until it tightens back up. If you over-whipped it and it’s too stiff, a few drops of water will loosen it right up. It’s all about small, careful adjustments to get that perfect flow! When you get it right, you’ll have that amazing, durable cutout cookie glaze for decorating.
To see my favorite recipes for cookies that pair perfectly with this resilient icing, check out my poached pears recipe—it might seem different, but the attention to balance is the same!
Nutritional Estimates for This Icing
Because this is an icing recipe, the numbers can look a little high in terms of sugar—that’s just the nature of the beast when you want something that sets rock hard and looks beautiful! Please remember, these are just rounded estimates based on the ingredients provided, and they assume you are serving one-quarter of the total icing batch as one serving size.
- Serving Size: 1/4 cup icing
- Calories: 180
- Sugar: 45g
- Sodium: 15mg
- Fat: 0g
- Saturated Fat: 0g
- Trans Fat: 0g
- Carbohydrates: 45g
- Fiber: 0g
- Protein: 1g
- Cholesterol: 0mg
If you need a savory inspiration after all that sugar, you absolutely have to check out my recipe for easy tamale pie. Sometimes you just need something hearty after a day of cookie decorating!
PrintGlossy Royal Icing That Hardens Firmly for Sugar Cookies

Make bakery-style sugar cookie icing that hardens completely for durable, stackable decorations. This easy royal icing recipe dries smooth and glossy, perfect for gifting and holiday treats.
- Prep Time: 10 min
- Cook Time: 0 min
- Total Time: 10 min
- Yield: Coats approximately 2 dozen medium cookies 1x
- Category: Baking
- Method: Mixing
- Cuisine: American
- Diet: Vegetarian
Ingredients
- 2 cups powdered sugar, sifted
- 3 tablespoons meringue powder
- 6 tablespoons warm water
- 1 teaspoon clear vanilla extract
- 1/4 teaspoon light corn syrup (optional, for extra shine)
Instructions
- In a medium bowl, combine the sifted powdered sugar and meringue powder.
- Add the warm water and clear vanilla extract to the dry ingredients.
- Beat with an electric mixer on low speed until the ingredients are just combined. Scrape down the sides of the bowl.
- Increase the mixer speed to medium-high and beat for 5 to 7 minutes until the icing is very thick, smooth, and holds stiff peaks. This whipping action incorporates air, which helps it dry hard.
- Check the consistency. For outlining, the icing should be very stiff. For flooding (covering the cookie surface), add water, 1/2 teaspoon at a time, until the icing flows slowly off the whisk in a thick ribbon that disappears back into the bowl after counting to ten (this is the 10-second rule consistency).
- Color the icing using gel food coloring, mixing thoroughly.
- Use the icing immediately to outline and flood your cut-out sugar cookies.
- Allow the cookies to dry uncovered at room temperature for 8 to 24 hours until the icing is completely hard to the touch. Do not refrigerate while drying.
Notes
- For a bright white icing, use clear vanilla extract instead of standard brown vanilla extract.
- If your icing is too thin for flooding, add more sifted powdered sugar, one tablespoon at a time.
- If the icing becomes too thick while decorating, thin it with a few drops of water.
- This icing sets hard enough for stacking and gifting once fully dry.
Nutrition
- Serving Size: 1/4 cup icing
- Calories: 180
- Sugar: 45g
- Sodium: 15mg
- Fat: 0g
- Saturated Fat: 0g
- Unsaturated Fat: 0g
- Trans Fat: 0g
- Carbohydrates: 45g
- Fiber: 0g
- Protein: 1g
- Cholesterol: 0mg