
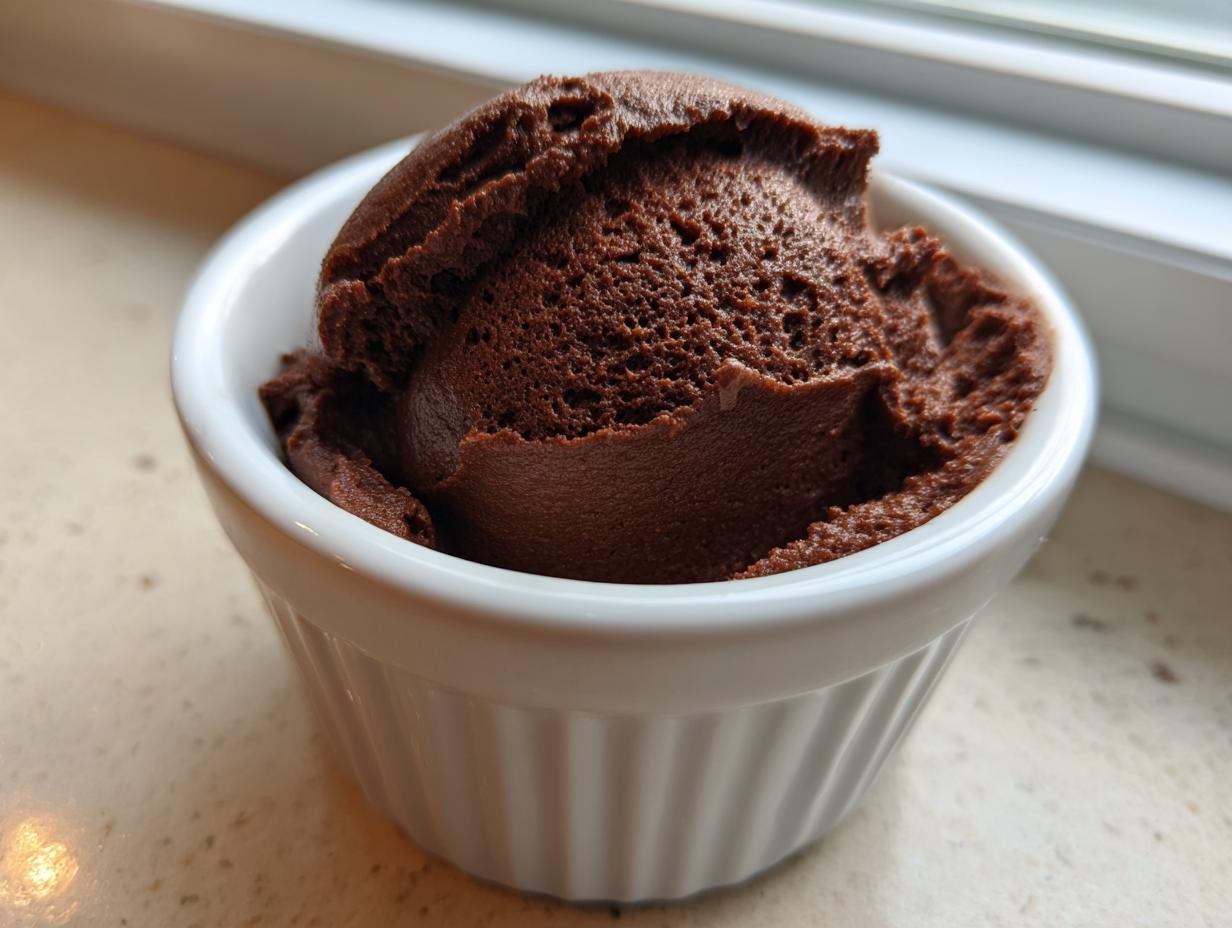
If you’ve ever tried to make mousse only to end up with something grainy or dense, I totally get it. It feels like you need a chef’s degree just to get that cloud-like texture right! But I promise you, achieving that perfect dessert texture isn’t some secret reserved for pastry chefs. I’m Mia Rodriguez, and my goal at Cooking by Mia is to take those seemingly complicated dishes and make them totally doable for you at home. This easy, no-bake **chocolate mousse** is my go-to solution. It’s rich, deeply flavored, and delivers that melt-in-your-mouth, **Silky Smooth Chocolate Mousse Recipe** finish every single time. After years developing recipes in professional kitchens and learning genuine home cooking from my family, I know exactly the balancing act needed to make this dessert foolproof. You can find more of my favorite simple yet show-stopping dessert recipes right here.
- Why This Easy Homemade Mousse is Your New Favorite Chocolate Mousse
- Ingredients for Your Decadent Chocolate Mousse
- How to Make Chocolate Mousse: Step-by-Step Instructions
- Tips for Success Making Your Chocolate Mousse
- Serving Suggestions for This Elegant Chocolate Dessert
- Storage and Reheating Instructions for Chocolate Mousse
- Frequently Asked Questions About Chocolate Mousse
- Nutritional Estimates for This Chocolate Mousse Recipe
- Share Your Silky Chocolate Mousse Creations
Why This Easy Homemade Mousse is Your New Favorite Chocolate Mousse
Forget dirtying three bowls and worrying about tempering eggs! This particular beauty is a true winner because it nails the three things home cooks always ask for: speed, simplicity, and that unbelievable texture. It’s a fantastic **no bake chocolate dessert**, meaning you can pull it together fast, and honestly, the flavor is just so much richer than anything store-bought.
- Totally no-bake—hands down the fastest way to an elegant chocolate dessert.
- Unbelievably creamy; it tastes like you spent hours on it.
- Perfect for a crowd or just for sneaking spoonfuls while the dishwasher runs.
If you need something quick on a busy Tuesday but still want that wow factor, check out how good this is for weeknight dinners!
Achieving the Perfect Fluffy Mousse Recipe Texture
The secret to making this happen without eggs is simply pure, beautiful heavy cream. We whip that cream up until it’s holding stiff peaks—that’s what traps the air and gives us that light and airy body. It makes this the absolute Best Chocolate Mousse for Beginners because if you can whip cream, you nail the structure! That fluffy texture is the foundation of a great fluffy mousse recipe.
Ingredients for Your Decadent Chocolate Mousse
Getting the ingredients right is half the battle, especially when you want that deep, decadent chocolate mousse flavor. Everything needs to be measured precisely, but don’t sweat it—this list is short and sweet! We are aiming for intensely rich flavor here, so quality matters.
- 6 ounces high-quality bittersweet chocolate, finely chopped
- 1/4 cup strong brewed coffee, cooled completely
- 1/4 cup granulated sugar
- 1 teaspoon vanilla extract
- 1 1/2 cups heavy whipping cream, nice and cold
- A tiny pinch of salt
Ingredient Notes and Substitutions for Chocolate Mousse
Listen, you’re making a creamy mousse recipe where the chocolate is the star, so don’t cheat on quality! I always recommend using bittersweet chocolate that’s 70% cocoa or higher. That higher percentage gives you a deeper, less-sweet profile that’s just gorgeous. Since this is a wonderful mousse without eggs recipe, the quality of the chocolate and the structure from the whipped cream are everything. If your cream isn’t cold enough, it just won’t whip up right, so keep it chilled!
How to Make Chocolate Mousse: Step-by-Step Instructions
Okay, get ready because this is where the magic happens! Making this chocolate mousse is truly just a few simple transfers and mixes, but timing is everything. Don’t rush the cooling process, and you’ll get that beautiful, decadent end product. I wrote this out like I’m standing right next to you in the kitchen!
Melting the Chocolate Base for Rich Dark Chocolate Mousse
First thing’s first, get your lovely chopped chocolate into a medium heatproof bowl. Now, heat up that strong brewed coffee—you want it just simmering, not boiling aggressively. Pour the hot coffee right over the chocolate. Seriously, just let it sit there for two full minutes without touching it. This lets the heat do its job! Then, grab a whisk and mix gently but firmly until that chocolate and coffee turn into a completely smooth, glossy pool. Whisk in your sugar and vanilla right after that. Set this mixture aside completely until it’s cooled down to room temperature. Trust me, if it’s hot when you fold in the cream, you’ll deflate all your hard work!
Creating the Light and Airy Mousse Structure
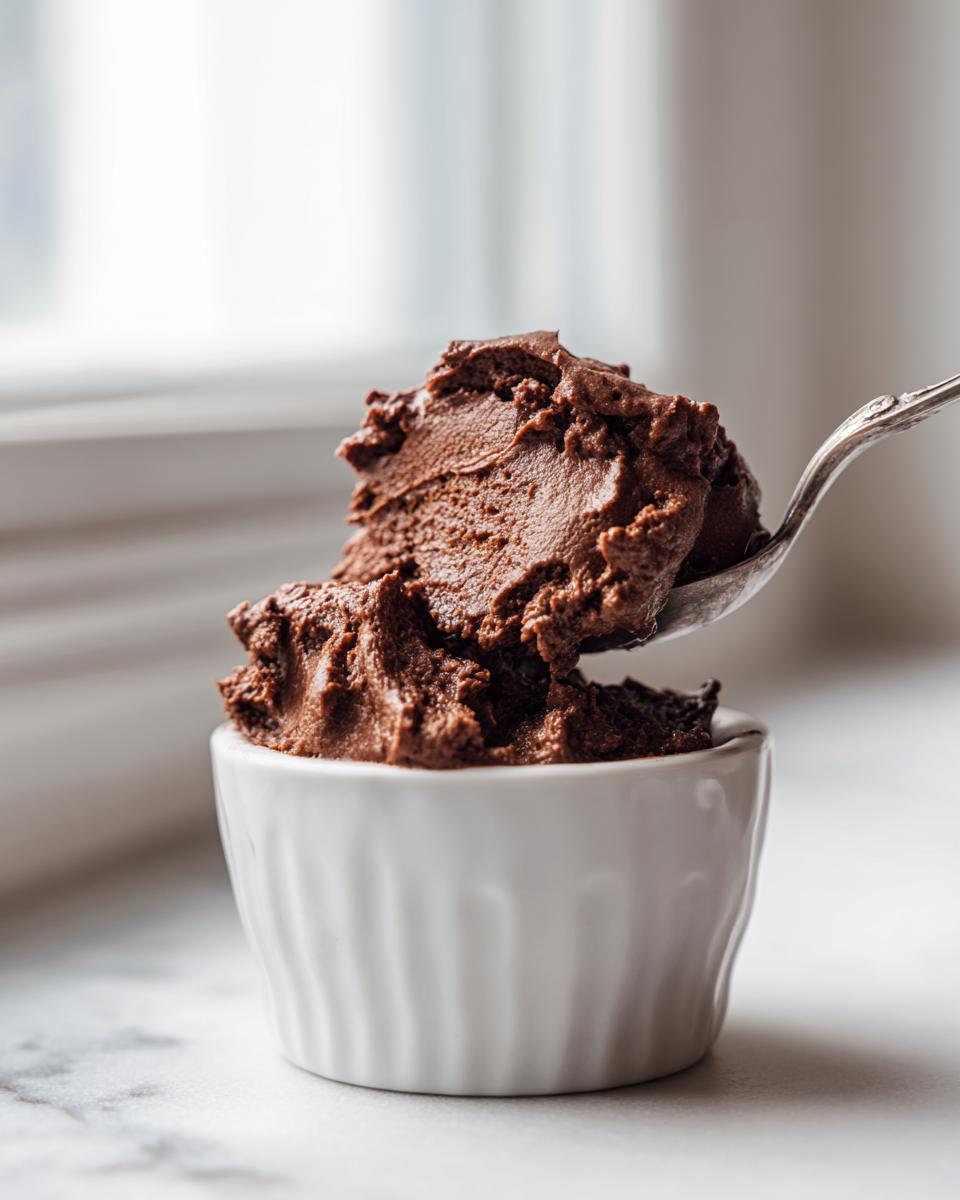
While that chocolate base is chilling out, use your electric mixer on a separate, cold bowl to tackle the heavy cream and that pinch of salt. Beat it until you have stiff peaks—when you lift the beater, the cream stands straight up! Now, we lighten things up. Take about a third of that whipped cream and fold it gently into your cooled chocolate mixture. This is called “sacrificing” the first bit; it loosens up the chocolate so it can accept the rest of the air. Once that’s mixed, slowly fold in the remaining cream in two batches. The key here is light hands so you maintain that creamy mousse recipe texture. Stop mixing the second you see no more white streaks. Spoon it into your glasses and remember: at least 4 hours in the fridge! I know, waiting is the hardest part.
You can check out my one-bowl chocolate bread if you need another quick chocolate fix while you wait for this to set up!
Tips for Success Making Your Chocolate Mousse
Okay, we’ve mixed it, we’ve folded it, and now we chill it, but I have a few non-negotiable rules I stick to when turning this into a truly gourmet chocolate treat. Following these tips has meant the difference between a good mousse and an absolutely stunning one for my dinner parties!
First, that bowl of chocolate? It absolutely must be room temperature before you even think about introducing the whipped cream. If it’s too warm, it melts the air right out of your cream, and poof—no more fluffy mousse. If it gets firm while waiting, give it a very gentle whisk to smooth it out before adding the cream, but never warm it over heat again. You want it pliable, not runny.
Second tip, and this is crucial for that silky chocolate mousse recipe feel: make sure your bowl and whisk attachments are sparkling clean and totally grease-free when you whip your heavy cream. Even a tiny bit of fat residue can keep the cream from reaching those stiff peaks we need. Pop the bowl and whisk into the freezer for about 15 minutes before you start whipping the cream; that super cold start helps everything come together faster and stronger.
Finally, when you fold, use a spatula, not a whisk or a wooden spoon. Cut straight down the middle of the bowl, scrape along the bottom, and bring the batter up and over the top. Turn the bowl a quarter turn and repeat. This gentle turning motion keeps everything integrated without crushing those beautiful air bubbles we worked so hard to create. It’s a slower process, but it’s worth it for that perfect payoff!
For more ways to get rich chocolate flavor without much fuss, you have to try my moist and fudgy chocolate banana bread recipe next time!
Serving Suggestions for This Elegant Chocolate Dessert
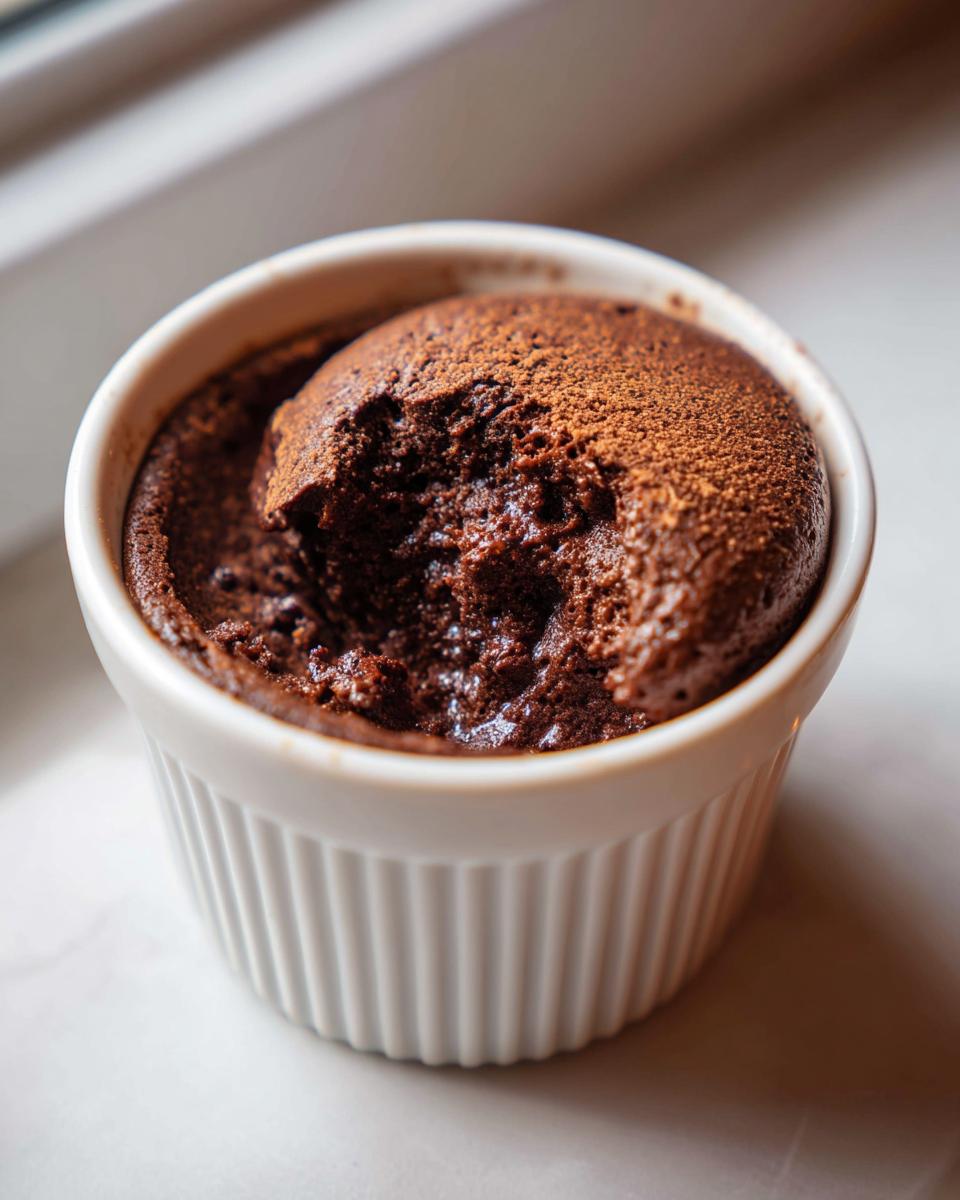
Okay, now your gorgeous chocolate mousse is chilled and waiting, and we need to make the presentation worthy of the flavor! This dessert belongs on the table when you want something truly elegant. For **dinner party desserts**, presentation counts, right?
I love keeping it simple but luxurious. Dust the top of each serving lightly with high-quality cocoa powder or some fine chocolate shavings—the darker the better! If you want a burst of color, nestle one or two fresh raspberries or slivers of orange zest on top. It contrasts beautifully with the dark color. If you’re feeling extra fancy, a small dollop of homemade unsweetened whipped cream sets it off perfectly. If you want to pair it with something warm, try serving it alongside my easy poached pears. That warm spiced fruit with the cold, rich mousse? Heaven!
Storage and Reheating Instructions for Chocolate Mousse
This creamy mousse recipe is absolutely made for making ahead, which sounds like music to my ears, right? Because this is a no-bake dessert that relies completely on that beautifully whipped cream for structure, you should never even think about reheating it! Warming it up will just melt all that lovely air right out, leaving you with a chocolate puddle.
The best way to store your decadent chocolate mousse is in individual serving dishes—like little ramekins or pretty glasses—covered tightly. Use plastic wrap pressed right down onto the surface of the mousse itself, and then cover the whole dish. This prevents any weird fridge smells from getting absorbed and keeps the surface from drying out or forming a skin.
How long does it last? Honestly, it tastes best within the first 24 hours, but it holds up beautifully in the refrigerator for up to three days. Remember that chilling time? If you decide to make it the day before your dinner party, that’s actually perfect! The mousse firms up just a touch more overnight, and it gives the flavors time to really meld together. Any longer than three days, and the texture starts getting a tiny bit tired, so try to keep it fresh!
Frequently Asked Questions About Chocolate Mousse
I get so many questions about making sure this chocolate mousse turns out perfectly smooth, especially since it’s so simple. Don’t worry if you’re nervous about getting that airy texture; I’ve got you covered with the common hurdles that pop up!
Can I make this chocolate mousse ahead of time?
Oh, please do! This is one of the best parts about this **creamy mousse recipe**. Since it needs at least four hours to set up beautifully, making it the day before your big dinner is actually ideal for the best texture. Just make sure you cover those individual serving dishes tightly—like I mentioned, press plastic wrap right onto the surface—so it stays fresh and doesn’t absorb any fridge smells. It’s perfect for making your party prep way easier!
What is the best way to make a quick chocolate dessert?
If you need something speedy, this recipe is your answer! It’s the ultimate **quick chocolate dessert** because there is zero oven time involved. Once you melt the chocolate base, the active work is just whipping the cream and folding. You can have it assembled in about 20 minutes, and then just let the fridge handle the rest! It’s much faster than baking anything, guaranteed. If you love no-bake sweets, you should definitely see what other appetizers and snacks I have that might fit into your busy schedule!
Nutritional Estimates for This Chocolate Mousse Recipe
Now, I know some of you count every bite, and some of you just dive right in (you’re my kind of people!). But because I spent time studying food science, I always like to give a general idea of what’s in what we make. Remember, this is just an estimate based on calculations for the ingredients listed, especially the dark chocolate ratio. Things change based on the exact brand of cream or chocolate you use, of course!
This rich chocolate mousse is definitely an indulgent sweet treat, not a diet food, but a little decadence goes a long way, right? Here’s the breakdown per serving (assuming this recipe yields 4 lovely portions):
- Serving Size: 1 serving
- Calories: Around 410
- Total Fat: About 34g (with 20g being saturated fat—that’s your good, rich cocoa butter!)
- Carbohydrates: 28g
- Sugar: 25g
- Protein: 5g
- Cholesterol: 110mg
It clocks in with a good amount of fat, as expected from heavy cream and quality chocolate, but that contributes directly to that dreamy mouthfeel we’re chasing in a decadent chocolate mousse. Try to enjoy it slowly!
Share Your Silky Chocolate Mousse Creations
Gosh, I really, really hope that when you make this light and airy mousse, you adore it as much as I do! Once you’ve tucked it away in the fridge for those required four hours and finally taken that first taste, I would absolutely love to hear what you think. Did it come out as smooth as silk? Was the coffee addition just the right pop for your palate?
Please do me a huge favor: come back here and leave a star rating! Five stars are always appreciated, but even if you had a snag or a question, drop a comment below. That feedback helps me enormously and lets other people know exactly what to expect when they try this **chocolate mousse** recipe.
And if you snapped a picture—and I know you did, because this stuff is gorgeous—please tag me on social media! I love seeing your triumphs in the kitchen. It makes all the testing and tweaking worth it when I see your beautiful results. You can reach out to me directly if you have any special cooking questions using my contact page, too. Happy baking—or, well, happy chilling!
PrintEasy, Silky Smooth Chocolate Mousse Recipe

Make a rich, creamy, and light chocolate mousse at home. This no-bake dessert is simple enough for beginners but elegant enough for dinner parties.
- Prep Time: 20 min
- Cook Time: 0 min
- Total Time: 4 hr 20 min
- Yield: 4 servings 1x
- Category: Dessert
- Method: No-Bake
- Cuisine: American
- Diet: Vegetarian
Ingredients
- 6 ounces high-quality bittersweet chocolate, chopped
- 1/4 cup strong brewed coffee, cooled
- 1/4 cup granulated sugar
- 1 teaspoon vanilla extract
- 1 1/2 cups heavy whipping cream, cold
- Pinch of salt
Instructions
- Place the chopped chocolate in a medium heatproof bowl.
- Heat the brewed coffee in a small saucepan until just simmering. Pour the hot coffee over the chocolate and let it sit for 2 minutes without stirring.
- Whisk the chocolate and coffee mixture until completely smooth. Whisk in the sugar and vanilla extract until combined. Set the bowl aside to cool to room temperature.
- In a separate large bowl, use an electric mixer to beat the cold heavy whipping cream and salt until stiff peaks form. This creates the light, airy texture.
- Gently fold about one-third of the whipped cream into the cooled chocolate mixture to lighten it.
- Carefully fold the remaining whipped cream into the chocolate mixture in two additions until just combined. Do not overmix; stop when no white streaks remain.
- Spoon or pipe the chocolate mousse into individual serving dishes or small glasses.
- Chill the mousse in the refrigerator for at least 4 hours, or until firm.
Notes
- For a deeper flavor, use dark chocolate with 70% cocoa content or higher.
- If you prefer a mousse without eggs, this recipe relies on whipped cream for structure.
- Serve this decadent chocolate mousse topped with fresh raspberries or chocolate shavings.
Nutrition
- Serving Size: 1 serving
- Calories: 410
- Sugar: 25g
- Sodium: 45mg
- Fat: 34g
- Saturated Fat: 20g
- Unsaturated Fat: 14g
- Trans Fat: 0.5g
- Carbohydrates: 28g
- Fiber: 3g
- Protein: 5g
- Cholesterol: 110mg