
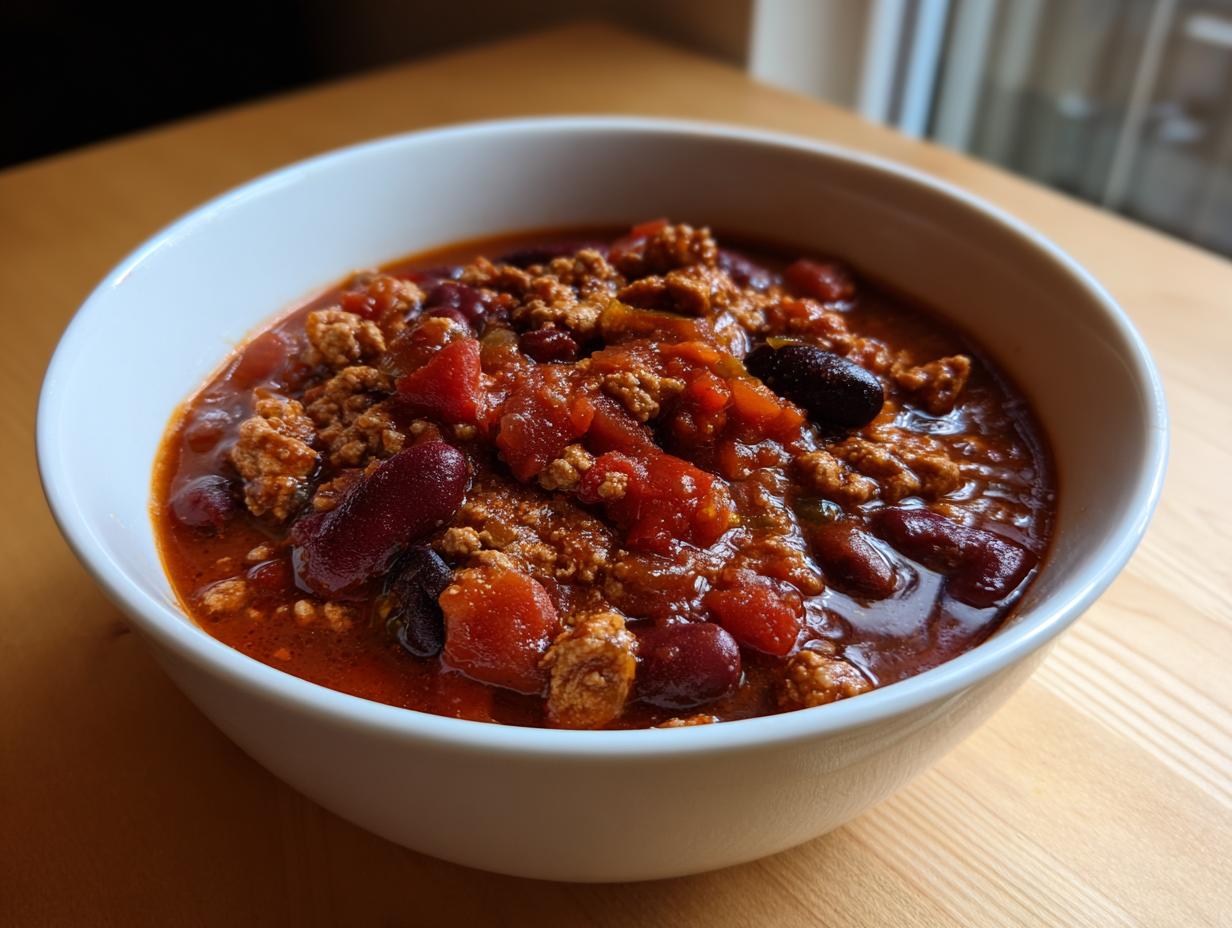
If you’re anything like me, you crave food that really *sticks* to your ribs, especially on a chilly evening. We need meals that feel like a warm hug but don’t derail our health goals. That’s why I’m so thrilled to share what I genuinely believe is the ultimate high protein chili. Having worked professionally testing recipes and armed with my degree in Nutrition, I’ve tweaked this one until it’s perfect: deeply flavorful, incredibly hearty, and clocking in with amazing protein for keeping you full for hours. Forget bland health food; this is comfort food that works hard for you. If you’re looking for that reliable recipe for your `weeknight dinners`, you’ve found it!
- Why This High Protein Chili Recipe Stands Out
- Ingredients for Your Ultimate High Protein Chili
- How to Prepare This Stovetop Chili Recipe
- Cooking Variations for Your High Protein Chili
- Ingredient Notes and Substitutions for Lean Ground Beef Chili
- Tips for the Perfect Healthy Chili Dinner
- Serving Suggestions and Chili Toppings Ideas
- Storage and Reheating for Meal Prep Chili
- Frequently Asked Questions About This Protein Packed Meals Recipe
Why This High Protein Chili Recipe Stands Out
I know you probably have a million chili recipes saved, so why add mine to the mix? Well, this isn’t just any pot of beans and meat. Because I’ve tested and tuned this recipe professionally, I can promise you serious results. Trust me, this one delivers on flavor *and* fuel.
- It packs over 30 grams of protein per hearty serving to keep you energized.
- It’s surprisingly fast! We get deep flavor in under an hour on the stovetop.
- The seasoning blend is bold—we go big on the spices, never shy!
It’s perfect for your meal prep rotation or just a satisfying `easy lunch` tomorrow.
Ingredients for Your Ultimate High Protein Chili
Gathering your components is straightforward, which is key when I’m whipping up a batch of this high protein chili for dinner. I love using lean ground turkey because it keeps the fat down while keeping that protein sky-high, but if you prefer, lean ground beef works just beautifully too. Remember, rinsing those beans is essential—it washes away that excess starch and sodium, giving you a cleaner, better flavor profile in the final simmer.
Here’s what you’ll need waiting by the stove:
- 1 tablespoon olive oil
- 1.5 pounds lean ground turkey (the 93% lean or higher kind works best!)
- 1 large yellow onion, chopped
- 1 green bell pepper, chopped
- 3 cloves garlic, minced
- 1 (15 ounce) can black beans, rinsed and drained
- 1 (15 ounce) can kidney beans, rinsed and drained
- 1 (28 ounce) can crushed tomatoes, undrained
- 1 (15 ounce) can tomato sauce
- 1 cup low-sodium chicken broth
- 2 tablespoons chili powder
- 1 tablespoon ground cumin
- 1 teaspoon dried oregano
- 1/2 teaspoon smoked paprika
- 1/4 teaspoon cayenne pepper (only if you like a little kick!)
- 1 teaspoon salt
- 1/2 teaspoon black pepper
How to Prepare This Stovetop Chili Recipe
When I make this, I always use my favorite big Dutch oven. It holds the heat so well, which is crucial for developing that rich flavor profile we want in a great high protein chili. It comes together fast on the stovetop, but stick around for the simmering part—that’s where the real magic happens! If you have extra time, let it go longer; flavor is always worth the wait.
Browning the Meat and Sautéing Aromatics
First things first, we need to get some color on that turkey. Heat up your olive oil in that big pot over medium-high heat. Toss in the ground turkey and use your spoon to break it up into crumbles. Cook it away until it’s totally browned through—this usually takes about 6 to 8 minutes. The most important part here? You absolutely must drain off any extra grease you see pooling. We want lean protein, not a greasy pot!
Once it’s drained, throw in your chopped onion and bell pepper right there with the turkey. Let those veggies soften up a bit; about 5 minutes should do the trick.
Building Flavor with Spices and Liquids
Okay, here is one of my little secrets from the test kitchen: now is the time to wake up those spices! Add your minced garlic, chili powder, cumin, oregano, paprika, and cayenne (if you’re feeling brave). Stir everything together and cook it for just 1 minute. I call this *blooming* the spices. You’ll know it’s working because your whole kitchen will smell incredible! That quick heat unlocks so much more depth than just tossing them in with the liquid.
Next, pour in everything else: the crushed tomatoes (don’t drain them!), tomato sauce, broth, and both cans of rinsed beans. Stir it all up, bring it to a nice, gentle simmer, and then cover the pot just a bit. We need this to hang out on low heat for a minimum of 30 minutes. But honestly? If you can let it simmer for a full hour, the flavors marry so much better. Taste it at the end and adjust that salt and pepper before serving.
If you’re more of a set-it-and-forget-it cook, check out my tips for making this a super easy `slow cooker chili` right in the notes!
Cooking Variations for Your High Protein Chili
I know not every night allows for watching a pot simmer, right? That’s why I love that this **high protein chili recipe** is so versatile. Whether you prefer dumping ingredients in the slow cooker before work or using the speed of the Instant Pot, this recipe adapts beautifully. It’s about making sure you get that **protein-packed meal** whenever you need it, with minimal fuss!
Here are the two easy ways I convert this stovetop favorite:
Slow Cooker Chili
For the slow cooker method, you still need to brown that turkey and sauté your onions, pepper, and garlic first—don’t skip that flavor step! Once everything is fragrant, transfer all the contents of your pot straight into the slow cooker. Make sure you add that broth and all the tomatoes. Cover it up and cook on Low for about 6 to 8 hours, or if you’re rushing, High for 3 to 4 hours. It’s the perfect `slow cooker chili` for a weekend where you are busy running errands!
Instant Pot Chili
If you’re using an electric pressure cooker, stick to the Sauté function to brown the meat and bloom those spices just like we did on the stovetop. Then, pour everything else in—liquid, beans, tomatoes, the works. Secure that lid tight. Cook on High Pressure for about 10 minutes. You must let it do a Natural Pressure Release for 10 minutes after it finishes cooking before you manually try to vent the rest. That controlled release really helps the flavors meld, even when you’re moving fast!
Ingredient Notes and Substitutions for Lean Ground Beef Chili
One of the best parts about this recipe is how flexible it is! Since this is a very popular **high protein chili**, people often ask me about swapping the protein. If you prefer the classic deep flavor of beef, absolutely swap the turkey for 1.5 pounds of 90% lean or leaner ground beef. You’ll still get that fantastic protein count, though you might need to drain just a tiny bit more fat.
Remember I stressed rinsing the beans? That’s non-negotiable for me! It really cleans up the texture. Also, if you only have diced tomatoes on hand instead of crushed, go ahead and use those—it just results in a chunkier chili texture, which I think is fun for a hearty bowl. Don’t worry about using fire-roasted tomatoes either; they’ll just add an extra smoky layer to your **healthy chili dinner**!
Tips for the Perfect Healthy Chili Dinner
Making a truly fantastic, healthy chili involves more than just opening cans and stirring. Because I’ve spent so much time as a recipe developer, I can share a few little tricks that take this already great high protein chili and make it absolutely restaurant-quality every single time.
Here are my essential insider tips:
- Don’t Skip the Low-Sodium Broth: This might seem minor, but I use low-sodium chicken broth over regular every time. Canned tomatoes and beans already bring a decent amount of salt to the party. By starting with low-sodium broth, I have total control over the final seasoning. If you use regular broth, you risk ending up with chili that tastes aggressively salty once it reduces during simmering.
- Thicken It Naturally: If your chili looks a little too soupy after the minimum simmer time, resist the urge to dump in cornstarch! Instead, try this: take about a half cup of the chili solids (meat, beans, tomatoes) and mash them really well with your spoon right against the side of the pot. Or, better yet, scoop them out, mash them in a separate bowl, and stir that thick paste back in. That starch from the beans and vegetables acts as a natural, flavor-boosting thickener.
- Adjusting Heat Like a Pro: Cayenne pepper is great, but if you want to deepen the heat *and* the flavor, don’t panic and just add more cayenne at the end. My trick is to mix a tiny pinch of extra cayenne with maybe a quarter teaspoon of the existing cumin and chili powder, warm that mix in a teaspoon of oil for 15 seconds, and then stir that little spice bomb into the pot. It integrates the heat better, making it less sharp.
These small steps make a huge difference between a decent chili and the best you’ll ever make! Serve it up hot with some crunchy sides, perhaps even some crunchy `garlic breadsticks` for dipping!
Serving Suggestions and Chili Toppings Ideas
Okay, we’ve got our big, bold, high protein chili simmering perfectly, but the fun isn’t over! Chili is really the perfect base for a customizable, hearty protein bowl, so always set out a fun topping bar. It lets everyone personalize their bowl exactly how they like it, making it feel extra special.
My professional recommendation leans toward toppings that add crunch, freshness, or an extra protein boost. You absolutely must try swapping out standard sour cream for plain Greek yogurt; it gives you that creamy tang with far more protein and less fat. Fresh cilantro and diced avocado are non-negotiables for brightness, in my book!

For something really flavorful, you could even whip up a little side of my creamy `street corn salad` flavors to put right on top. A sprinkle of crushed tortilla chips adds the perfect texture contrast to that rich, thick chili base.
Storage and Reheating for Meal Prep Chili
This is where my nutrition background really shines, because a great **high protein chili** like this is absolutely perfect for meal prepping. If you aren’t eating it all in one go—and honestly, six servings disappear fast—you need to know how to store it properly to keep that flavor locked in.
For the fridge, make sure the chili cools down mostly to room temperature before you seal it tight. You don’t want condensation building up inside the container, which can sometimes speed up spoilage. Once sealed, it keeps wonderfully for 4 full days. I often portion mine out into single-serving, microwave-safe containers as soon as it cools a bit, ready to grab and go throughout the week!
Freezing Your Chili for Later
Chili freezes like a dream, seriously. This recipe is so sturdy that even after thawing, the texture remains almost exactly the same. When using freezer bags, lay them flat on a baking sheet while they freeze—this makes them stackable later, saving precious freezer space! You can freeze this for up to three months without any real drop in quality. Just remember to leave a little headspace if you are using a rigid container, because liquids expand when they freeze!
The Best Way to Reheat
Reheating is simple, but timing is everything. For the microwave, zap it on 50% power for a couple of minutes, stir it thoroughly, and then finish it on high until piping hot. Stirring halfway through prevents those annoying hot spots in the middle. If you’re reheating a big batch on the stovetop, use medium-low heat and keep it covered, stirring frequently. Don’t try to rush it over high heat; you don’t want the beans sticking to the bottom. Low and slow reheating preserves that rich, long-simmered flavor we worked so hard to build!
Frequently Asked Questions About This Protein Packed Meals Recipe
Can I make this a Low Carb Chili Options?
That is a fantastic question, especially if you are watching your carbohydrate intake! The main sources of carbs here are the black beans and kidney beans, and of course, the tomatoes. To make this a true **low carb chili** option, you would need to skip both cans of beans entirely. You’ll use the same amount of ground turkey, veggies, and spices. If you still want that thick texture, you can substitute the beans with extra mushrooms (like diced cremini) and maybe sautéed shredded zucchini near the end. You’ll lose some fiber and a bit of the overall protein count, but the flavor base is still super rich!
Is this a Gluten Free Chili?
Yes, absolutely! I am so happy to confirm this recipe is naturally gluten free chili! We aren’t adding any flour thickeners, pasta, or non-certified ingredients. All your seasonings, tomatoes, broth, and meat are naturally gluten-free, so you can serve this confidently to anyone avoiding gluten. It’s a huge win when you need **protein packed meals** that are also safe for sensitive diets!
How long does it take if I use ground beef instead of turkey?
If you decide to switch from turkey to ground beef, the cooking time for the meat step will be almost identical. You’ll still brown about 1.5 pounds of meat, which takes 6 to 8 minutes. The key difference, as I mentioned earlier, is that you might have slightly more grease to drain off if you don’t opt for 93% lean beef. The rest of the simmering and flavor-building process stays exactly the same, so you still get a stellar dinner in under an hour. For those tracking numbers, using leaner beef might put you closer to that 35-40g protein range, versus the 30g mark we hit with the turkey!
Is this recipe freezer-friendly, setting it up for later meal prep chili?
It is one of the best recipes for batch cooking, seriously! This **meal prep chili** freezes beautifully. Once cooled down, transfer it into heavy-duty freezer bags or freezer-safe containers. It will last about three months in the freezer. When you’re ready to eat, just thaw it overnight in the fridge and reheat gently on the stovetop. It really tastes just as good as the first day!
For more great ideas and tips on fueling your active life, make sure you check out my favorite recipes for `healthy breakfast` too!
PrintUltimate High Protein Turkey and Bean Chili

This hearty, high protein chili uses lean ground turkey and two types of beans to create a filling, flavorful meal perfect for weeknight dinners or meal prep. It delivers robust taste and satisfying texture.
- Prep Time: 15 min
- Cook Time: 45 min
- Total Time: 60 min
- Yield: 6 servings 1x
- Category: Dinner
- Method: Stovetop
- Cuisine: American
- Diet: Low Fat
Ingredients
- 1 tablespoon olive oil
- 1.5 pounds lean ground turkey (93% lean or higher)
- 1 large yellow onion, chopped
- 1 green bell pepper, chopped
- 3 cloves garlic, minced
- 1 (15 ounce) can black beans, rinsed and drained
- 1 (15 ounce) can kidney beans, rinsed and drained
- 1 (28 ounce) can crushed tomatoes, undrained
- 1 (15 ounce) can tomato sauce
- 1 cup low-sodium chicken broth
- 2 tablespoons chili powder
- 1 tablespoon ground cumin
- 1 teaspoon dried oregano
- 1/2 teaspoon smoked paprika
- 1/4 teaspoon cayenne pepper (optional, for heat)
- 1 teaspoon salt
- 1/2 teaspoon black pepper
Instructions
- Heat the olive oil in a large Dutch oven or heavy-bottomed pot over medium-high heat.
- Add the ground turkey to the pot. Break it up with a spoon and cook until browned completely, about 6 to 8 minutes. Drain off any excess grease.
- Add the chopped onion and bell pepper to the pot with the turkey. Cook until the vegetables soften, about 5 minutes.
- Stir in the minced garlic, chili powder, cumin, oregano, smoked paprika, cayenne pepper (if using), salt, and black pepper. Cook for 1 minute until the spices are fragrant.
- Pour in the crushed tomatoes, tomato sauce, chicken broth, rinsed black beans, and rinsed kidney beans. Stir everything together well.
- Bring the chili mixture to a simmer. Once simmering, reduce the heat to low, cover the pot partially, and let it cook for at least 30 minutes, stirring occasionally. For deeper flavor, simmer for 1 hour.
- Taste the chili and adjust salt and pepper as needed before serving.
Notes
- For slow cooker preparation: After browning the turkey and sautéing the vegetables on the stovetop, transfer all ingredients to a slow cooker. Cook on low for 6 to 8 hours or on high for 3 to 4 hours.
- For Instant Pot preparation: Sauté the turkey and vegetables using the Sauté function. Add all remaining ingredients, secure the lid, and cook on High Pressure for 10 minutes. Allow for a Natural Pressure Release for 10 minutes before venting the remaining pressure.
- This recipe yields approximately 30 grams of protein per serving.
- Serve with toppings like shredded cheese, Greek yogurt, avocado, or fresh cilantro.
Nutrition
- Serving Size: 1.5 cups
- Calories: 380
- Sugar: 10
- Sodium: 550
- Fat: 12
- Saturated Fat: 4
- Unsaturated Fat: 8
- Trans Fat: 0
- Carbohydrates: 35
- Fiber: 12
- Protein: 30
- Cholesterol: 85