
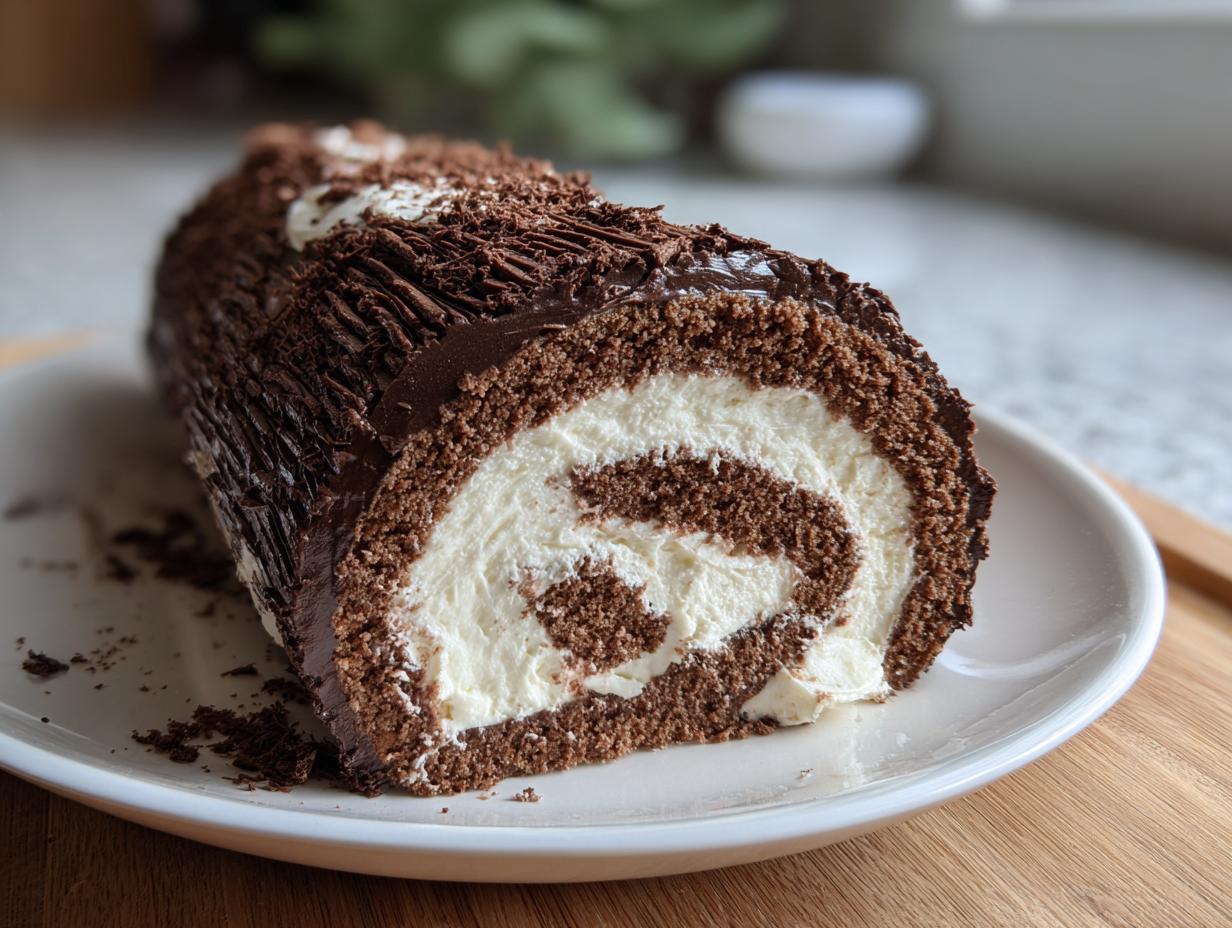
The holidays are truly magical, aren’t they? Every year, I look forward to the sounds, the smells, and especially the baking traditions that bring everyone together around the table. Now, I know some desserts look incredibly complicated—like that beautiful, rustic yule log cake—but I promise you, they don’t have to be! After years developing recipes in professional kitchens and seeing where home cooks often get stuck, I’ve perfected this Chocolate Yule Log Cake (Bûche de Noël) recipe to be surprisingly simple for beginners. We focus on the classic, rich chocolate flavor and make sure the tricky rolling part goes smoothly. Trust me, this is one showstopper you can absolutely nail this Christmas, thanks to a technique that prioritizes reliability over fussiness. If you want to see more about how I build reliability into my recipes, check out my About page!
- Why This Easy Chocolate Yule Log Cake is Your New Holiday Tradition
- Essential Ingredients for Your Yule Log Cake (Bûche de Noël)
- Step-by-Step Instructions for the Classic Yule Log Technique
- Tips for Success When Making a Yule Log Cake
- Decoration Ideas for Buche de Noel to Impress Guests Holiday Dessert
- Make Ahead Holiday Cakes: Storing Your Yule Log Cake
- Serving Suggestions for This Festive Holiday Baking Treat
- Frequently Asked Questions About the Yule Log Cake
- Estimated Nutritional Data for This Yule Log Cake
- Share Your Festive Holiday Baking Creations
Why This Easy Chocolate Yule Log Cake is Your New Holiday Tradition
I wanted to develop a recipe that takes all the mystery out of that fabulous French dessert. When you see a Bûche de Noël, you think it requires a pastry chef’s degree, but that’s simply not true! This version is designed so you can create a gorgeous presentation without the holiday headache. We focus on fantastic flavor and easy assembly, meaning less stress for you.
Key Benefits of Our Yule Log Cake Recipe
- This truly is a rolled chocolate cake tutorial made simple; I walk you through the exact steps needed to roll the sponge without tearing it, even if it’s your first time.
- It’s surprisingly fast! You’re looking at a quick bake time, making it a great choice if you need easy holiday desserts that don’t take up your whole afternoon.
- The final product is an undeniable showstopper Christmas cake—that beautiful ganache bark guarantees compliments!
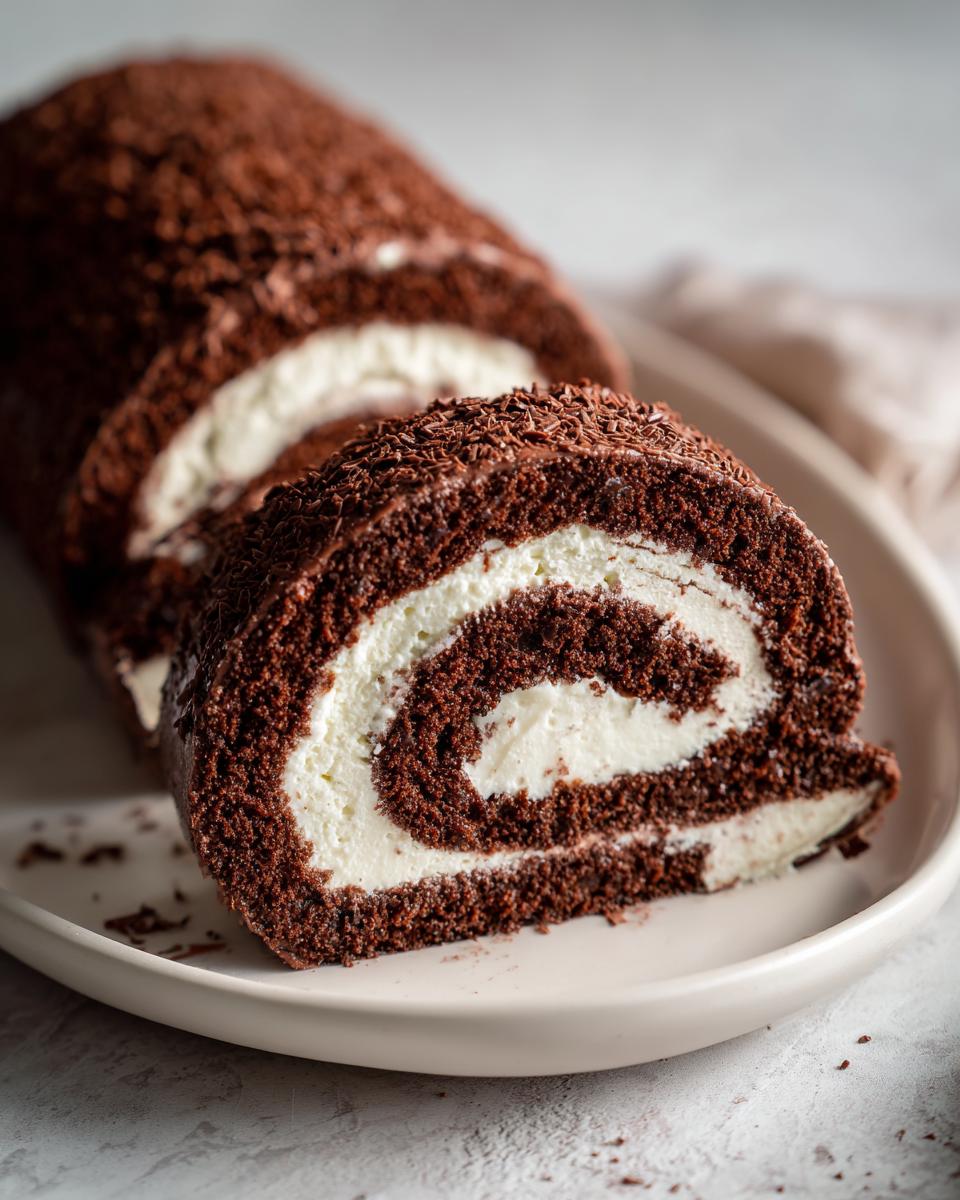
- We stick to the deep, comforting chocolate flavor that makes this a delicious winter dessert recipe everyone loves.
- It’s fantastic for making ahead, so you can assemble the final look the day before your big gathering.
Essential Ingredients for Your Yule Log Cake (Bûche de Noël)
Alright, let’s talk about what goes into this magic. Because this cake relies on a sponge that needs to roll perfectly, ingredient precision matters more than usual. We aren’t using any fancy stabilizers here; we’re relying on good technique and quality goods! For the cake itself, make sure those 4 large eggs are truly separated into yolks and whites—that’s the secret to lift in a sponge that’s going to be rolled hot. We use standard flour and sugar, but please, don’t skimp on the cocoa powder. If you want that deep, intensely chocolatey flavor that defines a fantastic yule log cake, spring for a high-quality, unsweetened variety.
For the fillings and frosting, the heavy cream needs to be very cold for that gorgeous whipped cream filling. And for the ganache topping, I always recommend using semi-sweet chocolate, around 60% cacao, finely chopped. Melting it down with the butter and cream yields that perfect, spreadable texture we need to create the realistic wood grain effect.
Ingredient Notes and Substitutions for the Rolled Chocolate Cake Tutorial
The way you handle the eggs here is make-or-break. When you beat those egg whites, you absolutely must reach stiff, glossy peaks—meaning when you lift the whisk, the peak stands straight up without slumping. This trapped air is what keeps the cake light, so when you fold it into the dark chocolate batter, you have to be gentle! Think folding like you’re tucking in a baby, not stirring soup. Don’t try to substitute the whole eggs with milk or liquid substitutes here; for this classic Buche de Noel recipe, the structure depends on those proteins.
Also, for the ganache, while you *could* technically use heavy cream and butter alone, adding that single tablespoon of butter at the end makes the ganache shinier and smoother, which is critical if you want your bark texture to look polished and glossy. Don’t skip it!
Step-by-Step Instructions for the Classic Yule Log Technique
Okay, this is where the magic happens, and honestly, where most people get nervous! But stick with me, because once you see how simple the rolling process is, you’ll be ready to tackle any Buche de Noel recipe. Remember, we are going for elegance without the stress. The whole process, from preheating to having the cake cooling rolled up, is quite fast. You’ll preheat your oven to 375°F (190°C) and get that 15×10 jelly roll pan lined perfectly with parchment paper, making sure the paper sticks up over the edges a little—that’s your handle later on!
Creating the Light Sponge for Your Christmas Log Cake
We start with the yolks. Beat those first with the half-cup of sugar until they are pale yellow and look thick, almost ribbon-like. Stir in your vanilla. Now, switch bowls—we need a totally clean one for the whites!
Whip those egg whites with a pinch of salt until they start forming soft peaks. Slowly stream in that remaining 2 tablespoons of sugar while continuing to beat until you have those beautiful, stiff, glossy peaks. This air is your primary leavening agent, so treat it kindly! Next, sift your flour and cocoa powder together. Fold the dry ingredients into the yolk mixture bit by bit. Once that’s mostly combined, you need to introduce the whites. Take one-third of the whites and stir them in—don’t worry about deflating them; you’re just loosening the base batter. Then, gently, gently fold in the remaining whites until you see no white streaks left. If you overmix here, your airy sponge turns into a dense flapjack, and we can’t roll that!
The Crucial Rolling and Cooling Process for the Yule Log Cake
When the cake comes out of the oven (after only 10 to 12 minutes—watch it closely!), here is the absolute non-negotiable step: Immediately invert the hot cake onto a clean kitchen towel that you have generously dusted with powdered sugar. Peel off that parchment paper right away. This is vital! If you wait, the cake sticks, and when you try to roll it, it rips into sad little pieces.
Starting from one of the short ends, you roll the cake and the towel up together TIGHTLY. Think of it like rolling a sleeping bag. Place that log seam-side down on a wire rack and let it cool completely in that position. Why roll it hot? Because you are training the cake to hold that curve! If you let it cool flat, it will snap when you try to shape it later. I sometimes even dampen the towel slightly before dusting to give the cake even more surrender power! This ensures your final yule log cake maintains that wonderful, classic rolled shape.
Assembling and Frosting Your Showstopper Christmas Cake
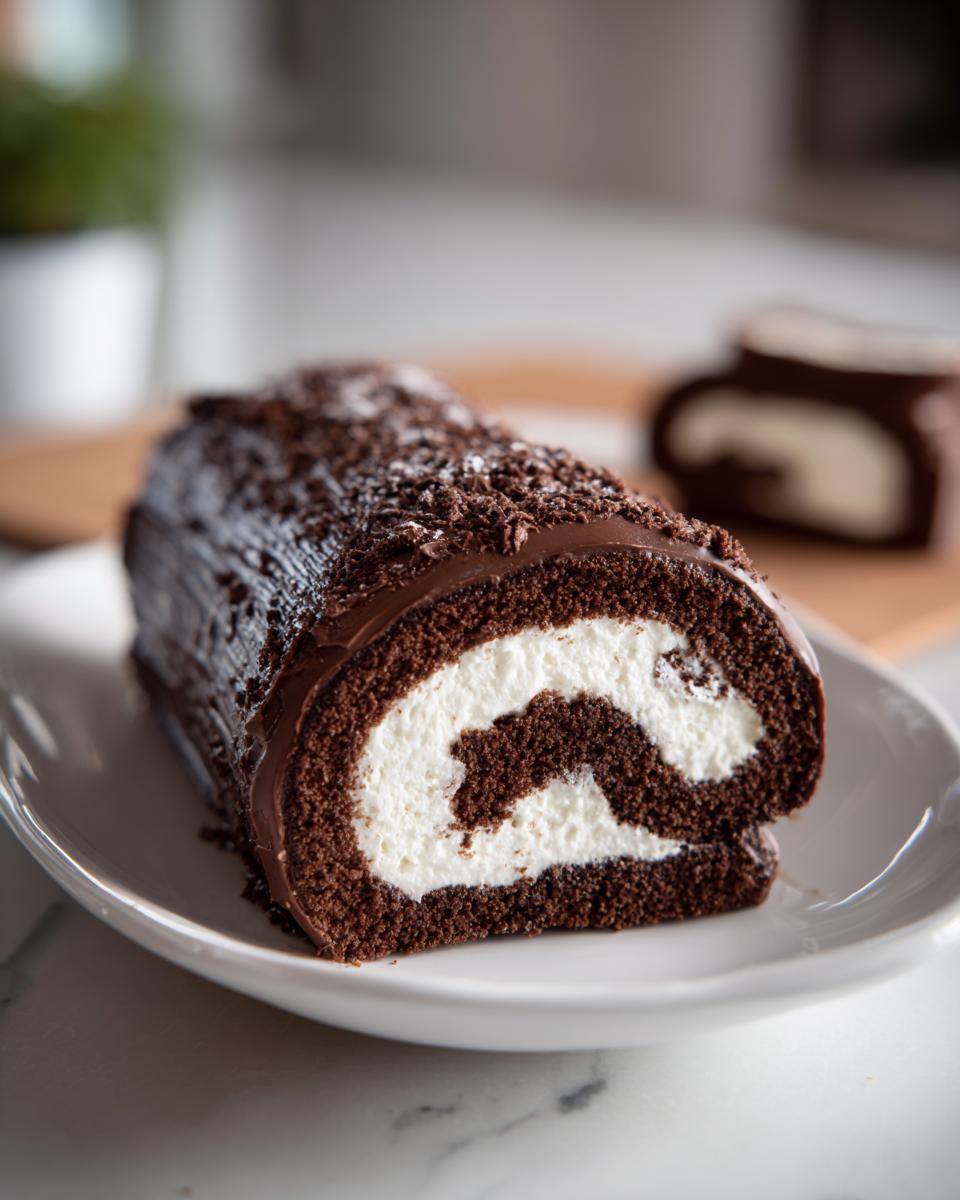
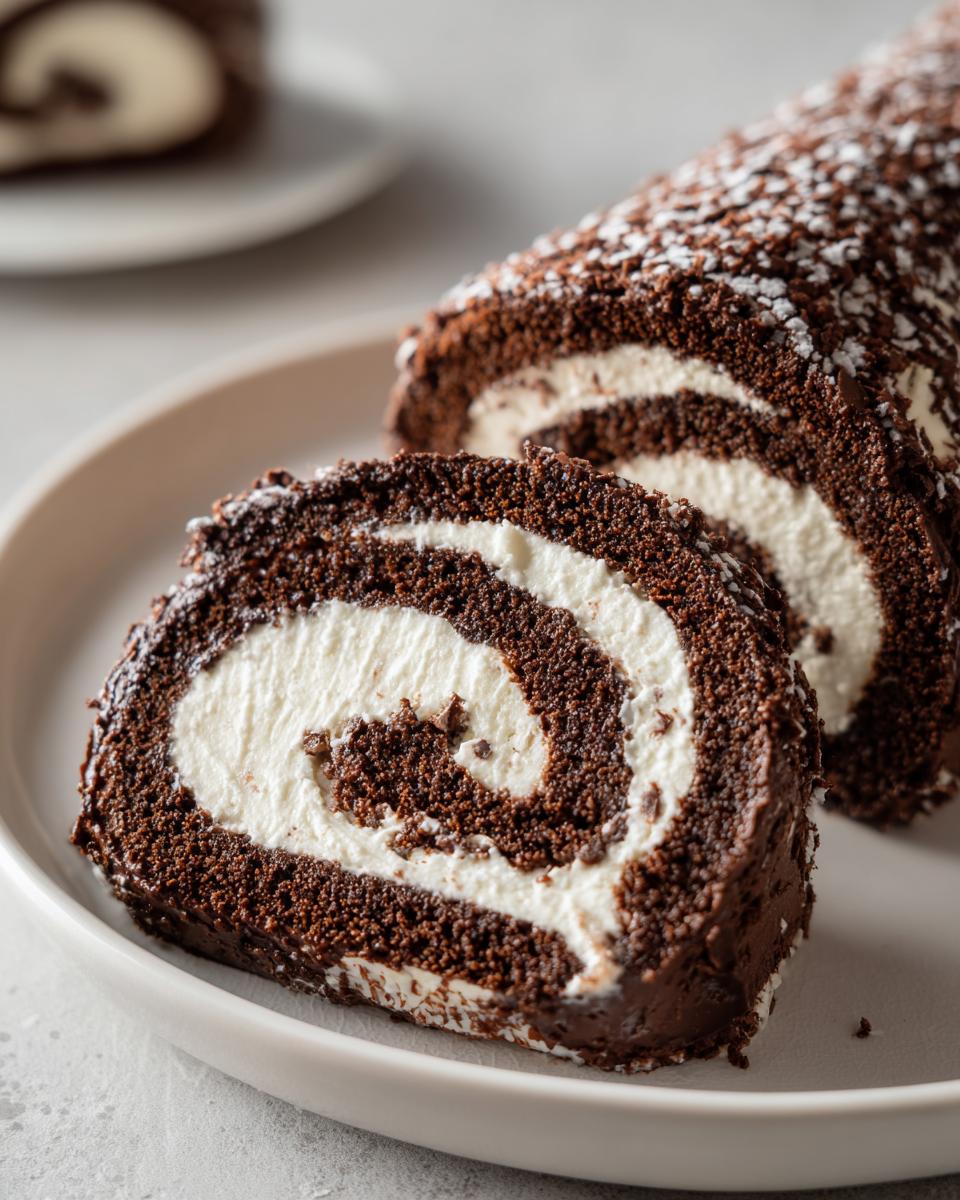
Once cool, you gently unroll the cake. Now, whip your cold heavy cream with the powdered sugar until it’s perfectly stiff. Spread that filling evenly across the surface, leaving about an inch bare on the far edge. Reroll the cake, this time without the towel, making sure it’s snug and place it on your serving platter with the seam underneath. Now for the visual appeal, which is what makes this a true showstopper Christmas cake!
Melt your chocolate, add the cream and butter for the ganache, and let that cool just until it’s thick enough to spread but still soft. Frost the entire outside of the rolled cake. To get that famous log look, take a fork and gently drag the tines across the frosting in long, parallel lines. This mimics the texture of bark—it’s so easy, but it looks professional! Chill it before serving so the ganache sets up nicely.
Tips for Success When Making a Yule Log Cake
Making the yule log cake sponge is the most technically sensitive part, but honestly, it’s all about temperature control and timing. My professional experience has taught me that a few degrees too hot or a minute too long in the oven spells disaster for a sponge that needs to be rolled. These small details are my secret sauce for success, ensuring you turn out a perfect Bûche de Noël without any rips or breaks.
Achieving Perfect Sponge Texture for Your Yule Log Cake
You absolutely must trust your oven thermometer, not just what the dial says. If you overbake this sponge by even two minutes, the cake dries out just enough to snap when you try to bend it around the filling. Keep that oven door closed tightly until that 10-minute mark hits. Also, remember that the cake needs to be inverted onto that sugared towel while it’s still piping hot. This sounds counterintuitive—we usually let things cool!—but that heat transfer is what convinces the structure to bend gracefully around the towel as it cools. If you let it cool flat, you’re going to end up with a very pretty, flat sheet cake, not a log!
If you do end up with a small crack, don’t panic! That’s where extra whipped cream or extra ganache comes in handy. Think of it like patching drywall—a little extra filling can hide any minor mistakes before you apply that outer layer of frosting. For more inspiration on handling your chocolate sponge, check out these tips from Emma’s Cake Studio.
Decoration Ideas for Buche de Noel to Impress Guests Holiday Dessert
Now that you’ve mastered the roll and the ganache, it’s time to play artist! This is what transforms your beautiful cake into that breathtaking Holiday centerpiece dessert we all dream about making. Since we went for that rustic bark texture with the fork, we want natural, forest-inspired decorations. I think the easiest way to make this look expensive is by using simple, edible elements.
You absolutely must try making little meringue mushrooms; they look so charming resting right against the chocolate log! You can find recipes all over for them, and they bake up while your cake is chilling. Another super simple trick is scattering a few fresh cranberries and some small sprigs of fresh rosemary around the base and across the top. It instantly gives that festive red and green color pop. It looks like the log was just brought in from a snowy forest, and honestly, it’s so much easier than piping intricate buttercream flowers. For presentation ideas that really wow, check out some creative looks over here. Once you’ve got your decorations down, don’t forget to explore my method for making a stunning King Cake for your next celebration!

Make Ahead Holiday Cakes: Storing Your Yule Log Cake
I know that during the holidays, timing is everything, and you can’t have your gorgeous yule log cake taking up precious oven space the day before Christmas! That’s why learning how to handle this as a make ahead holiday cake is a major win. You have a little bit of flexibility here depending on which stage of the process you stop at. If you bake and roll the sponge cake the day before you plan to frost it—which I highly recommend—it needs zero special treatment.
Just let it cool completely in that rolled position, then carefully unroll it the next day, spread your filling, and re-roll. Wrap the assembled log tightly in plastic wrap when you are done frosting it. This keeps the filling nice and cold and the sponge moist. I often find that this cake actually tastes *better* the next day. The whipped cream filling firms up perfectly, and the chocolate ganache develops a richer flavor profile.
You can safely store the fully frosted Yule Log Cake in the refrigerator for up to three days. If you need to store it longer, it’s safer to freeze it, but I really, really don’t recommend freezing a cake with whipped cream filling if you can avoid it! If you must freeze, wrap it extra tightly in plastic wrap and then foil. When you plan to serve, thaw it overnight in the fridge. Just know that when it thaws, you might need to add a fresh dusting of powdered sugar right before serving to freshen up that snowy look.
Serving Suggestions for This Festive Holiday Baking Treat
Once your beautiful yule log cake has chilled for at least an hour—or even better, overnight—it’s time to think about presentation and what goes alongside it. This rich chocolate cake is so satisfying on its own, but pairing it correctly just elevates the whole experience, turning it into a true festive holiday baking moment!
Because the cake is so deeply chocolaty with a slightly sweet whipped cream filling, it pairs beautifully with things that have a bit of tang or spice to cut through that richness. For drinks, you cannot go wrong with a strong, freshly brewed coffee or perhaps a robust espresso. Those slightly bitter notes balance the sweetness of the ganache perfectly. If you’re looking for something truly seasonal, I absolutely adore serving a slice of this alongside a small glass of homemade eggnog—you can find my recipe for creamy homemade eggnog here; it’s wonderfully warm and creamy!
When it comes to serving temperature, remember that we chilled it to let the ganache set. If you serve it straight from the coldest part of the fridge, the cake itself can feel dense, and the chocolate might be too firm on the palate. I always recommend pulling the finished Christmas log cake out onto the counter about 20 to 30 minutes before you plan to slice and serve. This little rest time allows the sponge to soften up just enough and lets those lovely chocolate flavors bloom. It’s the perfect moment—a brief pause before digging into your stunning centerpiece!
Frequently Asked Questions About the Yule Log Cake
I get so many questions after the holidays about the Bûche de Noël, especially since rolling a cake seems like such a challenge! Don’t worry if you have lingering doubts after trying this Buche de Noel recipe—that’s totally normal when tackling a classic. Here are the few things I hear most often from other home bakers looking to master this perfect winter dessert recipe.
Can I use a 9×13 sheet cake instead of a jelly roll pan for my Yule Log Cake?
You absolutely can, and many people do when they are planning for bigger crowds! The goal for the classic log shape is usually a 10-inch diameter, which the standard jelly roll pan gives you perfectly. If you use a 9×13 inch pan, you’ll end up with a shorter, fatter log because the area is wider. When you roll it, your log will be less of a tight spiral and more of a gentle curve. You’ll still use the same amount of filling, but you might have a little extra filling peeking out, which you can just smear artistically back over the top later. Just know that the baking time might vary slightly since the pan shape changes the thickness of the batter, so definitely start checking it around the 10-minute mark!
What is the difference between a Yule Log Cake and a Chocolate Swiss Roll for Christmas?
Honestly, in terms of technique, there’s almost no difference at all! A Chocolate Swiss Roll is just the general term for any jelly roll—a thin sponge cake baked in a jelly roll pan, filled with jam, cream, or frosting, and rolled up. The Yule Log Cake, or Bûche de Noël, is simply the French holiday incarnation of the Swiss Roll. The “difference” all comes down to decoration! Your Bûche de Noël *must* look like a log, complete with bark texture from the ganache and maybe some festive accents like mushrooms or holly. A standard Swiss Roll might just be dusted with sugar or topped with a simple glaze. So, mastering the Swiss Roll technique is exactly how you master the Christmas log cake!
My cake cracked when I rolled it. How do I fix this for my Buche de Noel recipe?
Oh, I am so sorry that happened! I know that feeling of panic when you see the first fissure. But here’s the great secret: cracks are totally fixable, especially since we’re covering this masterpiece in thick chocolate ganache! First, if it’s a small crack, just use the extra whipped cream filling that you planned to spread on the cake to patch the inside of the crack before you re-roll it. Second, and this is my favorite trick, let the crack happen! If you’re covering the outside with dark ganache bark, you can use a knife or fork to intentionally emphasize the crack, turning it into a knot in the wood or a bit of torn bark texture. Don’t fight it; decorate over it! It immediately becomes part of the rustic charm. No one will ever know you had a little mishap!
Estimated Nutritional Data for This Yule Log Cake
Now, before we dive into wrapping up, I always like to give folks a heads-up on what they’re serving up. As a home baker who also happens to have a background in Food Science, I believe in transparency! Keep in mind that this data is an estimate based on standard ingredient calculations for one hearty slice of this decadent yule log cake. If you swap out the semi-sweet chocolate for dark or use different amounts of heavy cream in your ganache, those numbers—especially the fat and sugar content—will shift slightly. This recipe is definitely a holiday indulgence, so enjoy it responsibly!
To review, here is the approximate nutritional breakdown for one serving of our festive French favorite:
- Calories: 450
- Fat: 28g (with 17g saturated fat)
- Carbohydrates: 45g
- Protein: 6g
This information is just a guideline, of course. If you want to see the full policies on how I handle data and content here on the site, you can always check out my privacy policy! But truly, the best part of this cake isn’t the macros; it’s the look on your family’s faces when you bring out that beautiful, rich, chocolatey log!
Share Your Festive Holiday Baking Creations
Honestly, seeing your finished cakes is the absolute best part of sharing these recipes! You spend all that time perfecting the sponge and mastering the ganache bark, and then you add your own special touch to make it yours. That’s what cooking is all about—taking a classic structure and making it your own masterpiece.
Once you’ve made this stunning yule log cake, I would be so thrilled if you let me know how it went! Please take a moment down below to drop a star rating and leave a little review. Were you brave and tried the meringue mushrooms? Did you use traditional holly, or did you try a twist, maybe with toasted nuts?
If you snap a picture of your incredible showstopper Christmas cake, tag me on social media! Seeing all your gorgeous presentations makes my day and inspires me for next year’s baking adventures. If you ever have any questions about the recipe or need to reach out directly about substitutions or techniques, you can always find my contact information here at Cooking by Mia. Happy holidays and happy baking!
PrintEasy Chocolate Yule Log Cake (Bûche de Noël) for Beginners

Make your holiday baking stress-free with this easy Chocolate Yule Log recipe. This step-by-step guide helps you create a beautiful and delicious log cake, perfect for festive occasions and gatherings.
- Prep Time: 30 min
- Cook Time: 12 min
- Total Time: 42 min
- Yield: 8 servings 1x
- Category: Dessert
- Method: Baking and Rolling
- Cuisine: French
- Diet: Vegetarian
Ingredients
- 4 large eggs, separated
- 1/2 cup granulated sugar, plus 2 tablespoons for egg whites
- 1/4 cup all-purpose flour
- 1/4 cup unsweetened cocoa powder
- 1 teaspoon vanilla extract
- 1/4 teaspoon salt
- 1 cup heavy cream, cold
- 1/2 cup powdered sugar
- 8 ounces semi-sweet chocolate, chopped
- 1/2 cup heavy cream (for ganache)
- 1 tablespoon unsalted butter
Instructions
- Preheat your oven to 375°F (190°C). Line a 15×10 inch jelly roll pan with parchment paper, letting the paper overhang slightly on the long sides. Lightly grease the parchment paper.
- In a large bowl, beat the egg yolks with 1/2 cup granulated sugar until the mixture is pale yellow and thick. Stir in the vanilla extract.
- In a separate clean bowl, beat the egg whites with the salt until soft peaks form. Gradually add the remaining 2 tablespoons of sugar and beat until stiff, glossy peaks form.
- Sift the flour and cocoa powder together. Gently fold the dry ingredients into the yolk mixture in three additions.
- Carefully fold one-third of the beaten egg whites into the chocolate batter to lighten it. Then, gently fold in the remaining egg whites until just combined, being careful not to deflate the batter.
- Spread the batter evenly into the prepared pan. Bake for 10 to 12 minutes, or until the cake springs back lightly when touched. Do not overbake.
- While the cake bakes, lay a clean kitchen towel on your counter and dust it generously with powdered sugar.
- Immediately invert the hot cake onto the sugared towel. Peel off the parchment paper. Starting from a short end, carefully roll the cake and towel together tightly. Let the cake cool completely in this rolled position on a wire rack.
- To make the filling, beat the cold heavy cream and powdered sugar until stiff peaks form.
- Once the cake is cool, gently unroll it. Spread the whipped cream filling evenly over the cake, leaving a 1-inch border on the edges.
- Reroll the cake snugly, without the towel, and place it seam-side down on a serving platter.
- To make the ganache, place the chopped chocolate in a heatproof bowl. Heat the 1/2 cup of heavy cream in a small saucepan until it just simmers. Pour the hot cream over the chocolate and let it sit for 5 minutes. Stir until smooth. Stir in the butter until fully incorporated.
- Let the ganache cool slightly until it is spreadable but still glossy. Spread the ganache over the entire surface of the rolled cake, using a fork or knife to create bark-like lines for a rustic log appearance.
- Chill the Yule Log Cake for at least 1 hour before slicing and serving. Dust with powdered sugar for a snowy effect.
Notes
- For a traditional look, use the tines of a fork to drag lines across the chocolate frosting to mimic tree bark texture.
- If you want to make this a make ahead holiday cake, you can bake and roll the sponge cake one day ahead, storing it wrapped tightly at room temperature. Frost the cake the day you plan to serve it.
- For a festive finish, decorate with small meringue mushrooms or fresh cranberries and rosemary sprigs to look like holly.
Nutrition
- Serving Size: 1 slice
- Calories: 450
- Sugar: 35g
- Sodium: 150mg
- Fat: 28g
- Saturated Fat: 17g
- Unsaturated Fat: 11g
- Trans Fat: 0.5g
- Carbohydrates: 45g
- Fiber: 2g
- Protein: 6g
- Cholesterol: 120mg