
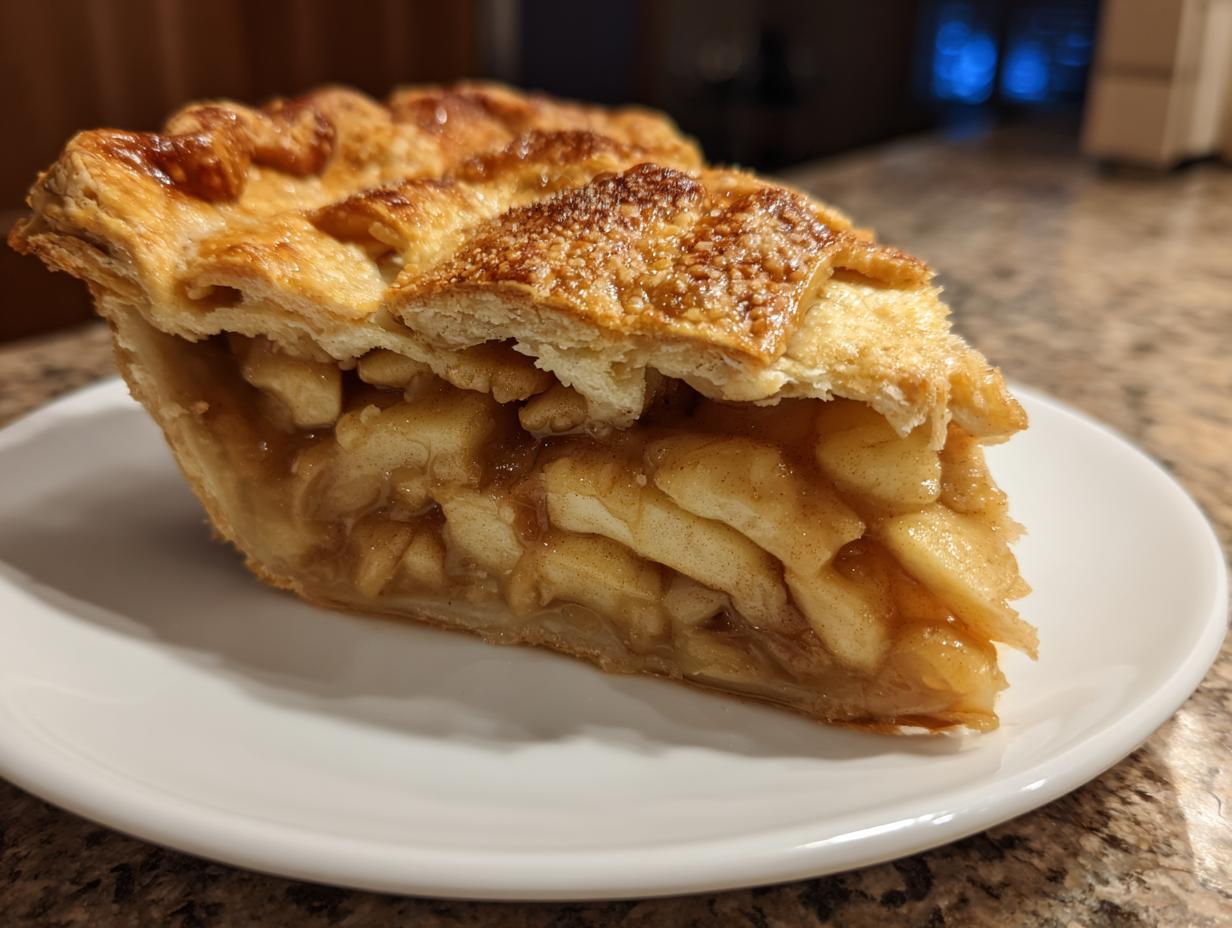
There’s nothing quite like the scent of cinnamon and baked apples filling your kitchen—it just screams comfort, holidays, and everything good about being home. If you’re ready to stop searching and finally nail that perfect slice, you’ve found your forever recipe. This isn’t just another recipe; this is my ultimate, tried-and-true guide for the perfect homemade apple pie, complete with the flakiest, most buttery double crust you’ll ever manage. Here at Cooking by Mia, my background in professional recipe development means I’ve tested every angle to ensure tradition meets reliability. Trust me, this classic flavor profile is what family memories are made of.
- Why This Is the Best Homemade Apple Pie Recipe You Will Make
- Ingredients for Your Classic Apple Pie From Scratch
- How To Make Homemade Apple Pie: Step-by-Step Instructions
- Buttery Pie Crust Secrets and Ingredient Notes
- Serving Suggestions for Your Homemade Apple Pie
- Storage and Reheating Instructions for This Traditional Pie Recipe
- Frequently Asked Questions About Making Pie From Scratch
- Estimated Nutritional Data for a Slice
- Share Your Cozy Autumn Treat Experience
Why This Is the Best Homemade Apple Pie Recipe You Will Make
I know, I know, everyone claims theirs is the Best Apple Pie Recipe, but I stand by this one because it marries my grandmother’s old-fashioned love with the science I learned in professional kitchens. This is true comfort food baking done right. It guarantees that classic, irresistible slice every single time, which is why it’s the cornerstone of our holiday table. You will absolutely nail this!
Achieving the Perfect Flaky Pie Crust Tutorial
The crust is everything, right? Too many recipes give you a tough, sad shell. We use an all-butter method, and the trick is keeping everything freezing cold—I mean, *freezing*. This technique forces the butter to stay in distinct little pockets. When it hits the oven, those pockets steam open, resulting in that unbelievable, shimmering flaky texture that defines a top-tier Flaky Pie Crust Tutorial. It’s worth the initial chill time!
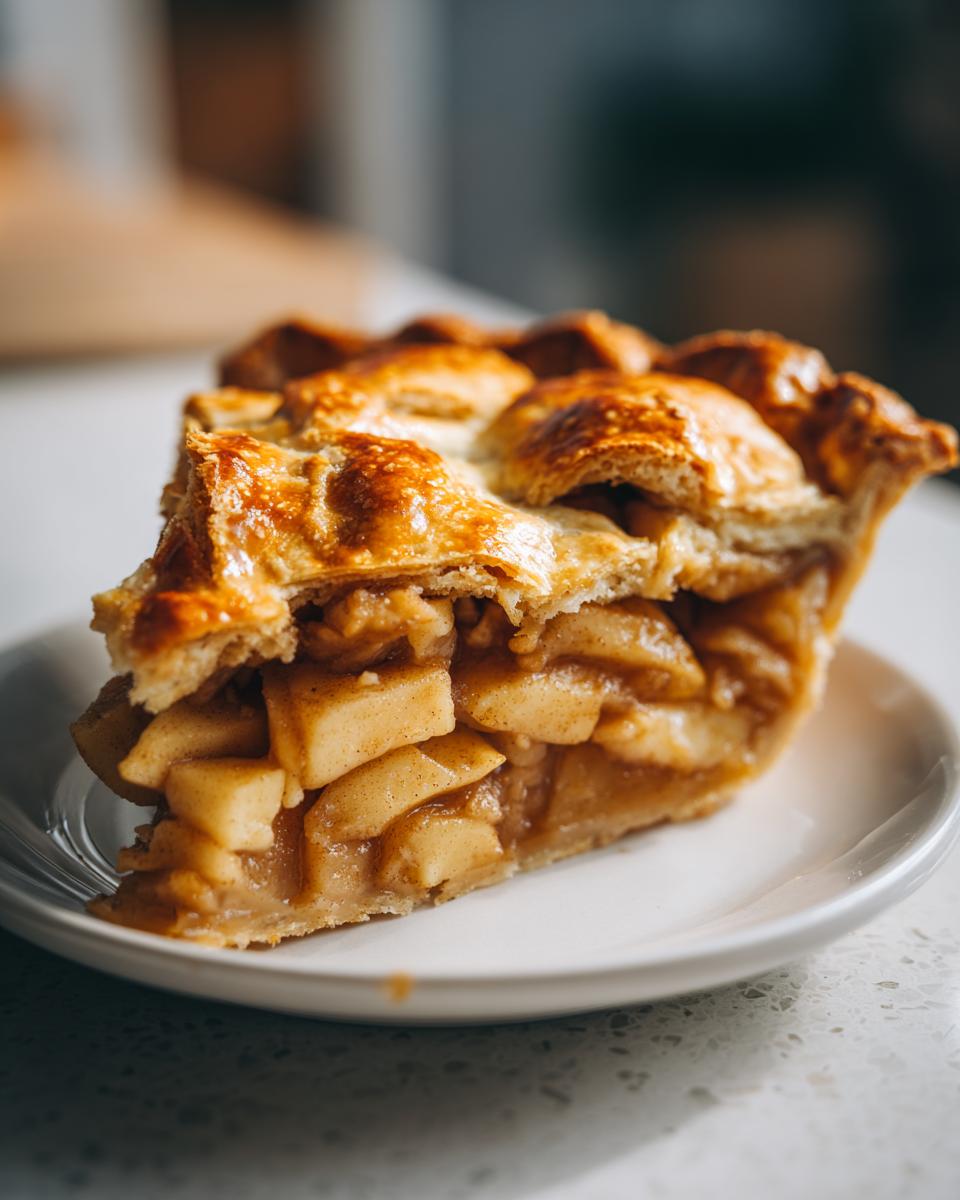
The Secret to Cinnamon Spiced Apple Filling
I never stick to just one apple here, because balancing tartness and sweetness is key! We use Granny Smith for that required structural integrity and tart bite, but blend it with sweet Honeycrisp for complexity. The spices are simple—cinnamon, nutmeg, and just a hint of allspice—creating that familiar, warm Cinnamon Spiced Apple Filling that instantly transports you back to cozy fall days. If you want to browse more of my simple dessert ideas, check out my dessert recipe collection!
Ingredients for Your Classic Apple Pie From Scratch
Okay, let’s talk ingredients! When you’re going for that perfect, sturdy, yet tender crust, using quality ingredients and, most importantly, keeping them *cold*, is non-negotiable. I’ve broken this down into the three parts of your pie so you can shop and prep like a pro. Remember, precision here is what turns a good pie into a showstopper. Trust me, the difference between room-temperature butter and ice-cold butter is the difference between tears and triumph!
For the All-Butter Double Crust
This is where the magic starts, so don’t skimp! We need that structural integrity that only real butter provides. Everything in this section absolutely has to be very cold—seriously, think freezer-cold butter and ice water.
- 2 1/2 cups all-purpose flour
- 1 teaspoon salt
- 1 cup (2 sticks) unsalted butter, very cold and cubed
- 1/2 cup ice water, plus more if needed
For the Cinnamon Spiced Apple Filling
This mix gives you that sweet-tart flavor that keeps people coming back for a second slice. I use two types of apples because Granny Smith needs to hold up in the heat, while Honeycrisp carries that beautiful sweetness. See? My food science brain coming in handy!
- 6 large Granny Smith apples, peeled, cored, and sliced 1/4-inch thick
- 3 large Honeycrisp apples, peeled, cored, and sliced 1/4-inch thick
- 3/4 cup granulated sugar
- 1/4 cup packed light brown sugar
- 1 teaspoon ground cinnamon
- 1/4 teaspoon ground nutmeg
- 1/8 teaspoon ground allspice
- 1 tablespoon lemon juice
- 2 tablespoons all-purpose flour (this is our thickener!)
Oh, and don’t forget the finishing touches for that golden top, which are listed separately below since they aren’t mixed in until assembly!
- 1 tablespoon unsalted butter, cut into small pieces (for dotting the top of the apples)
- 1 large egg, beaten with 1 teaspoon water (for the egg wash)
- Coarse sugar, for sprinkling
How To Make Homemade Apple Pie: Step-by-Step Instructions
Alright, this is the main event! Making a marvelous homemade apple pie from scratch isn’t difficult, but it requires paying attention to a few key steps, especially the temperatures. We need to keep things cold for the crust and manage our heat while baking. Follow these steps exactly, and you’ll have a dessert worthy of any gathering. Head over to my easy baking projects page for more reliable recipes like this!
Making the Flaky Pie Crust Tutorial Dough
First things first: the dough. In a big bowl, whisk your flour and salt. Now, take that super cold, cubed butter and use a pastry blender—or just your fingertips, which I prefer—to cut it in. You’re looking for coarse crumbs with visible chunks of butter still there, maybe the size of a small pea. These are crucial! Next, drizzle in that ice water, just a tablespoon at a time, mixing until the dough *just* hugs together. Do NOT squish it into a smooth ball! Divide it, wrap both halves tight, and shove them into the fridge for at least two hours. That rest period is essential for that flaky texture we promised!
Assembling the Cinnamon Spiced Apple Filling
While your dough is chilling out, you can tackle the filling. Get all your beautifully sliced apples into a large bowl. Sprinkle over both sugars, all the lovely spices, the lemon juice, and that two tablespoons of flour. The flour is important; it absorbs the apple juices so you don’t end up with soup at the bottom of your pie! Toss everything *gently* with a big spatula. You want every slice coated in spice, but you definitely don’t want to mash those perfect 1/4-inch slices.
Assembling and Baking Your Double Crust Apple Pie
Time to put this beauty together! Roll out one chilled dough disk into a 12-inch circle and carefully lay it in your 9-inch pie dish. Pile that spiced apple mixture high in the bottom crust. Take the remaining tablespoon of butter and dot the top of the apples—it adds richness. Then, roll out the second disk, place it on top, trim the overhang to about an inch, and crimp the edges together tightly. This seal guarantees we keep all those amazing juices locked in during the bake! Brush the top with egg wash and sprinkle with coarse sugar. Now, we bake! Start hot at 425 degrees F for 15 minutes to set that amazing Double Crust Apple Pie structure. After that initial blast, drop the oven way down to 375 degrees F and bake for another 45 to 55 minutes until you see thick bubbles coming through the vents. If the edges look like they are getting too dark, just wrap a little foil around them!
Buttery Pie Crust Secrets and Ingredient Notes
I want you to feel super confident walking into this recipe, especially when it comes to the crust. People get intimidated by making a double crust from scratch, but honestly, once you trust the cold butter, the physical work is easy. These little clarifications on ingredients are the things I learned writing recipes professionally—they turn guesswork into guaranteed perfection. Getting this right is the secret to true Buttery Pie Crust Secrets!
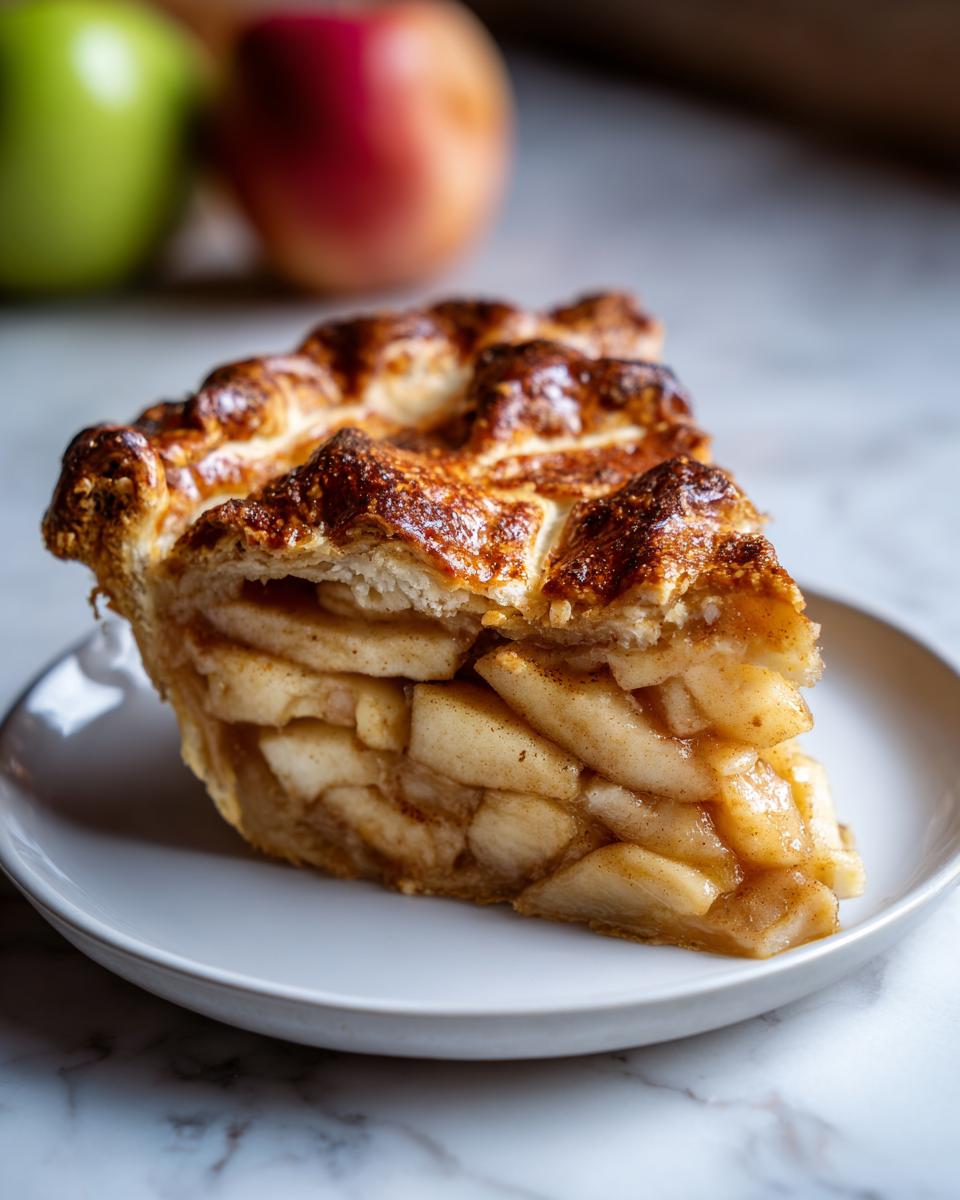
Best Apples for Pie Selection
If you only use one kind of apple, you’ll end up with a runny, mushy mess, or maybe a pie that’s too hard to chew. My secret is blending! You need that firm, tart Granny Smith to hold up against the long bake time without dissolving. That’s the backbone! But Granny Smith alone is just too sour for my taste. That’s why I pair it with the Honeycrisp. Honeycrisp is sweeter and breaks down just a little bit more, making the most amazing, buttery sauce around the firmer slices. It’s an unbeatable team for an old fashioned dessert like this.
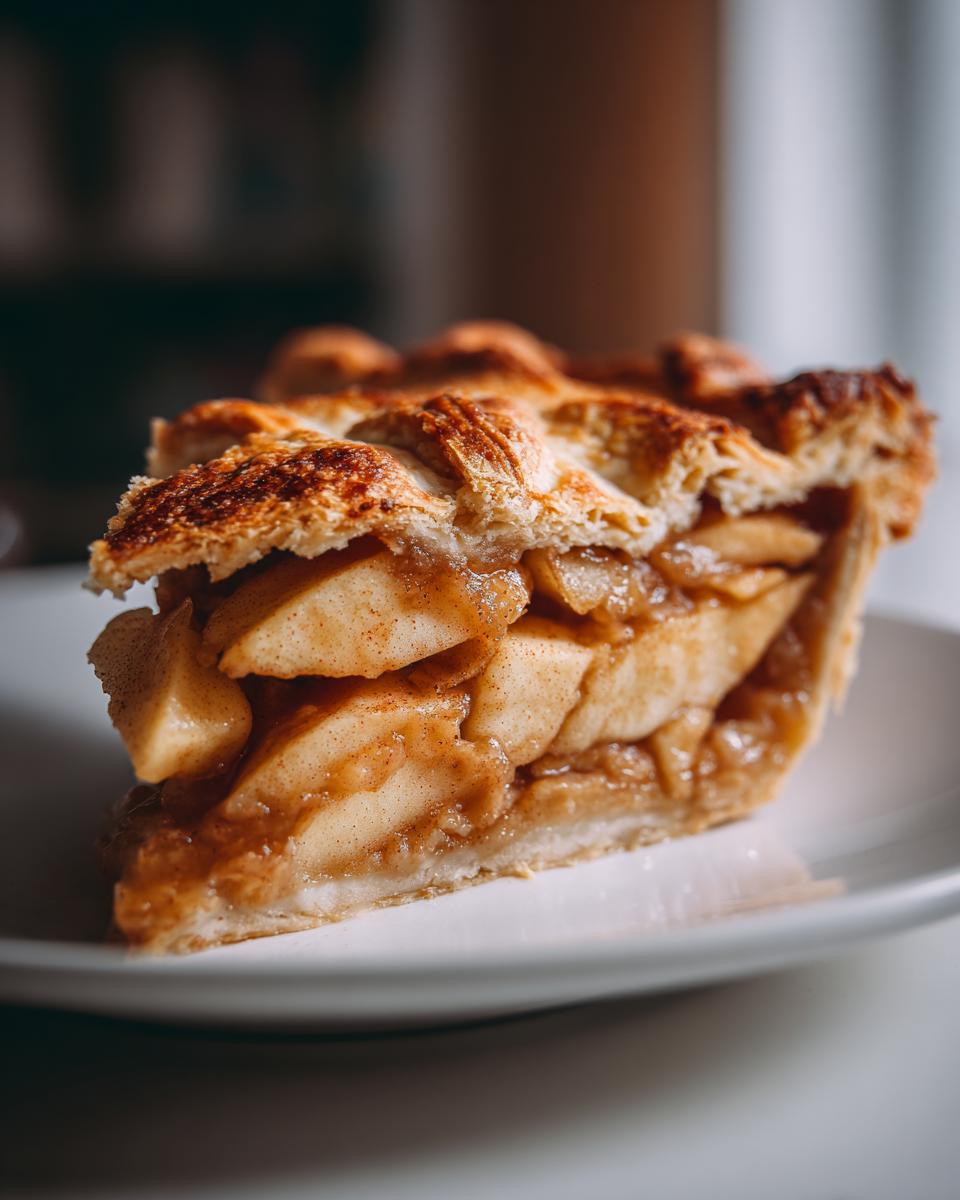
Tips for Perfect Apple Slices
Uniformity is everything in pie fillings, folks! If you have large chunks next to thin slivers, the thin ones turn to sauce while the thick ones are still crunchy when you cut the pie. I strictly tell you to slice everything exactly 1/4-inch thick. You can buy a mandolin slicer if your knife skills aren’t up to par, but aim for consistency! Also, don’t skip that tablespoon of lemon juice during the toss. Apples oxidize—they turn brown—the second they hit the air. The acid keeps them looking bright yellow and fresh right up until they go into the oven. For more tips on ingredient handling, you should check out my guide on making bakery-style bread; the prep rules are similar!
Serving Suggestions for Your Homemade Apple Pie
The grand finale! You’ve spent the time making the best apple pie recipe from scratch, and now you deserve the perfect pairing. We’re keeping this simple because this classic pie truly stands on its own. We are going for that wonderful, cozy, old fashioned dessert vibe, so forget the fancy sauces.
First up, the absolute, mandatory classic: a scoop of really good vanilla bean ice cream. The contrast between the warm, spiced apple filling and that cold, melting cream is just heavenly. It’s the ultimate temperature and texture play, and honestly, I don’t think an apple pie is truly served until the ice cream starts dripping down the side.
But here’s a little secret I picked up that feels very Southern and deeply comforting: sharp cheddar cheese. Yes, seriously! Grab a thin slice of sharp cheddar—the kind that crumbles a little—and lay it right on top of your hot slice of pie before you dig in. The savory, salty cheese cuts right through the sweetness of the filling. It sounds strange if you haven’t tried it, but trust me, it elevates this dessert to a whole new level of comfort! Learn more about other family favorites like my homemade eggnog recipe for future holidays.
For a simpler, less dramatic serving, a light dusting of powdered sugar across the perfectly golden top is enough. It looks beautiful and shows off that hard work you did on the crust braiding or crimping!
Storage and Reheating Instructions for This Traditional Pie Recipe
Okay, you’ve done it! You’ve baked the majestic homemade apple pie, and now you have to resist eating the whole thing in one sitting. We need a plan for leftovers, because properly storing and reheating pie is almost as important as baking it!
The absolute first rule after it comes out of the oven is patience. I cannot stress this enough! You need to let your pie cool completely, and I mean fully cooled to room temperature, before you even consider putting it in the fridge. That means letting it sit on a wire rack for at least three to four hours uncovered. If you cover it while it’s still warm, that steam gets trapped, and guess what happens? Your beautiful, flaky top turns instantly soggy. We want that crisp shell for our next slice!
Once it’s totally cool, you can wrap the whole pie tightly in plastic wrap or place it in an airtight container. It keeps beautifully on the counter for about one day if your kitchen isn’t too hot. After that, pop it into the refrigerator for up to four days. If you’re worried about the crust getting a little soft after refrigeration, here’s my trick for reviving that flaky texture.
To reheat, skip the microwave entirely—microwaves kill pie crusts! Instead, take your slice (or the whole pie) and place it on a sheet pan. Heat it in a 350 degree oven (175 degrees C) for about 10 to 15 minutes. This gentle heat crisps up the buttery bottom and warms the filling perfectly. It tastes almost as good as fresh out of the oven! Make sure you check out my terms of use page to see how I handle all my recipe testing standards.
Frequently Asked Questions About Making Pie From Scratch
I always get so many questions after I share this recipe because people want to make sure they get that perfect, cozy result! Baking a pie from scratch involves a few tricky spots, so I pulled together the most common things folks ask. Don’t hesitate to reach out via my contact page if you have any other concerns!
Can I use store-bought pie crust instead of making it from scratch?
Look, I totally get it. Sometimes you just want an Easy Homemade Dessert without the two-hour chilling time for the dough! You certainly *can* use store-bought crust if you’re short on time. However, I have to be honest: the star of this recipe is that unbelievably flaky, buttery crust we spent all that time perfecting. The texture you get from the all-butter, hand-cut method simply can’t be matched by the pre-made stuff, which often uses stabilizers and shortening. It will still taste good, but it won’t have that signature shatter we’re aiming for!
How long does the filling need to cool before slicing?
This is a big one, and it’s where most people rush and end up with a soupy mess on their plate! You absolutely must let the pie cool for a minimum of three to four hours after it comes out of the oven. Why so long? Because as the pie cools, all that glorious, bubbling filling thickens up. If you cut into it hot, the flour and starch won’t have set properly, and the filling will just run out onto your cutting board. Don’t give in to temptation—wait for that perfect, thick slice!
Can this pie be frozen?
Both yes and no, depending on your timing! If you freeze the pie *unbaked* (after you’ve assembled the whole thing but before the egg wash), it freezes wonderfully. Just wrap it tightly in a couple of layers of plastic wrap and foil, and freeze for up to three months. When you’re ready to bake, let it thaw slightly on the counter (maybe 30 minutes), remove the outer plastic, and bake as directed, probably adding about 10-15 extra minutes to the lower temperature bake time since it will go into the oven colder.
If you freeze it *after* baking, it’s trickier. The crust texture tends to suffer a bit once re-frozen after being baked—it can get a little soft. If you must freeze the baked pie, make sure it’s cooled completely, wrap it tightly, and try to bake it within a month. Reheat slices gently in the oven just like I mentioned before to try and revive that flaky texture!
Estimated Nutritional Data for a Slice
I always get asked about the nutritional breakdown for this homemade apple pie, especially since we are using so much real butter for that amazing crust! Remember, because this is made completely from scratch—we are using actual chunks of butter, brown sugar, and multiple types of fruit—these numbers are just an estimate. If you use a lighter hand with the sugar or swap out butter for a substitute (which I don’t recommend for flavor, but hey!), your totals will change. These figures are based on 8 generous slices from the whole pie.
- Serving Size: 1 slice
- Calories: 450
- Sugar: 35g
- Sodium: 250mg
- Fat: 24g
- Saturated Fat: 15g
- Unsaturated Fat: 9g
- Trans Fat: 0g
- Carbohydrates: 60g
- Fiber: 4g
- Protein: 5g
- Cholesterol: 60mg
So, yes, it’s a treat! But when you make something this delicious and traditional pie recipe-worthy, a little indulgence is absolutely fine. Everything tastes better when you know you made it yourself with love!
Share Your Cozy Autumn Treat Experience
Now that you have the blueprint for the best homemade apple pie—with that incredible flaky crust and perfectly spiced filling—it’s time for you to make some memories! Baking is always better when it’s shared, and I absolutely cherish seeing your beautiful creations pop up online. I put my heart into developing this reliable recipe, and knowing it made it onto your table for a family gathering or as a perfect Cozy Autumn Treat just makes my day.
When you pull that golden-brown beauty out of the oven, please snap a picture and tag me! I’d love to see your crimping skills and how golden your crust turned out. If you found this recipe as straightforward as I designed it to be, please leave a rating right here on the page. Four or five stars tells other bakers that this is the one they can trust when they need an easy homemade dessert that tastes like tradition.
We love talking shop, so leave a comment below and tell me: What is your favorite holiday pie tradition? Are you team ice cream or team sharp cheddar cheese? If you’re still looking for inspiration for other desserts, you can always head back to my About Page to see more about my culinary journey!
And hey, if you found some new tips here from my professional experience, maybe give this one a look too—it’s a slice of Americana that other bakers are loving right now: Discover the Secret to Apple Pie Perfection. Happy baking, folks!
PrintUltimate Classic Homemade Apple Pie with Flaky All-Butter Double Crust

Bake the ultimate comfort dessert: a classic homemade apple pie from scratch featuring a tender, flaky all-butter double crust and a sweet, cinnamon-spiced apple filling. This reliable recipe delivers perfect results for your next holiday or family gathering.
- Prep Time: 45 min
- Cook Time: 70 min
- Total Time: 135 min
- Yield: 8 servings 1x
- Category: Dessert
- Method: Baking
- Cuisine: American
- Diet: Vegetarian
Ingredients
- 2 1/2 cups all-purpose flour
- 1 teaspoon salt
- 1 cup (2 sticks) unsalted butter, very cold and cubed
- 1/2 cup ice water, plus more if needed
- 6 large Granny Smith apples, peeled, cored, and sliced 1/4-inch thick
- 3 large Honeycrisp apples, peeled, cored, and sliced 1/4-inch thick
- 3/4 cup granulated sugar
- 1/4 cup packed light brown sugar
- 1 teaspoon ground cinnamon
- 1/4 teaspoon ground nutmeg
- 1/8 teaspoon ground allspice
- 1 tablespoon lemon juice
- 2 tablespoons all-purpose flour
- 1 tablespoon unsalted butter, cut into small pieces (for dotting)
- 1 large egg, beaten with 1 teaspoon water (for egg wash)
- Coarse sugar, for sprinkling
Instructions
- Prepare the Pie Dough: In a large bowl, whisk together the 2 1/2 cups flour and 1 teaspoon salt. Cut in the cold butter using a pastry blender or your fingers until the mixture resembles coarse crumbs with some pea-sized pieces of butter remaining.
- Gradually add the ice water, one tablespoon at a time, mixing until the dough just comes together. Do not overmix. Divide the dough in half, flatten each half into a disk, wrap in plastic wrap, and chill for at least 2 hours.
- Prepare the Apple Filling: In a large bowl, combine the sliced apples, granulated sugar, brown sugar, cinnamon, nutmeg, allspice, lemon juice, and 2 tablespoons of flour. Toss gently to coat the apples evenly.
- Assemble the Bottom Crust: On a lightly floured surface, roll out one disk of dough into a 12-inch circle. Carefully transfer the dough to a 9-inch pie plate. Trim the edges, leaving a 1-inch overhang. Place the pie plate in the refrigerator while you prepare the top crust.
- Assemble the Top Crust: Roll out the second disk of dough into an 11-inch circle. Cut vents or use cookie cutters to create a design.
- Fill the Pie: Pour the apple mixture into the chilled bottom crust. Dot the top of the apples with the 1 tablespoon of cut butter pieces.
- Top and Seal: Place the top crust over the filling. Trim the edges, leaving a 1-inch overhang. Crimp the top and bottom edges together to seal. Brush the top crust lightly with the egg wash and sprinkle generously with coarse sugar.
- Bake the Pie: Preheat your oven to 425 degrees F (220 degrees C). Place the pie on a baking sheet to catch drips. Bake for 15 minutes at 425 degrees F. Then, reduce the oven temperature to 375 degrees F (190 degrees C) and continue baking for 45 to 55 minutes, or until the crust is golden brown and the filling is bubbling thickly. If the edges brown too quickly, cover them loosely with foil.
- Cool: Let the homemade apple pie cool on a wire rack for at least 3 to 4 hours before slicing. This allows the filling to set properly.
Notes
- For the flakiest crust, keep all butter and water extremely cold.
- Use a mix of apples, like Granny Smith for tartness and Honeycrisp for sweetness, to achieve the best flavor balance.
- If you prefer a lattice top, cut the top dough into even strips and weave them over the filling.
Nutrition
- Serving Size: 1 slice
- Calories: 450
- Sugar: 35g
- Sodium: 250mg
- Fat: 24g
- Saturated Fat: 15g
- Unsaturated Fat: 9g
- Trans Fat: 0g
- Carbohydrates: 60g
- Fiber: 4g
- Protein: 5g
- Cholesterol: 60mg