
If you’ve ever spent hours carefully crafting a dessert only to watch it erupt in a massive crack right out of the oven, I feel your pain! Cheesecake baking can feel like high-stakes drama, but trust me, we’re changing that narrative right now. I’m Mia Rodriguez, and between my grandmother’s kitchen wisdom and my background in Food Science, I’ve cracked the code for you. This is The Ultimate Creamy White Chocolate Cheesecake recipe, and the best part? We’re achieving that restaurant-quality, silky texture without ever needing a fussy water bath. Say goodbye to steam and hello to simple success!
- Why This Baked White Chocolate Cheesecake is Your New Favorite Showstopper Dessert Recipe
- Ingredients for the Ultimate Creamy White Chocolate Cheesecake
- How to Prepare Your Baked Cheesecake Secrets: Step-by-Step Instructions
- Tips for Success with this Creamy Cheesecake Recipe
- Variations: White Chocolate Raspberry Cheesecake and More
- Storage & Reheating Instructions for Your Decadent Dessert Recipe
- Frequently Asked Questions About White Chocolate Cheesecake
- Estimated Nutritional Data for This Indulgent Sweet Treat
- Share Your Ultimate White Chocolate Dessert Experience
Why This Baked White Chocolate Cheesecake is Your New Favorite Showstopper Dessert Recipe
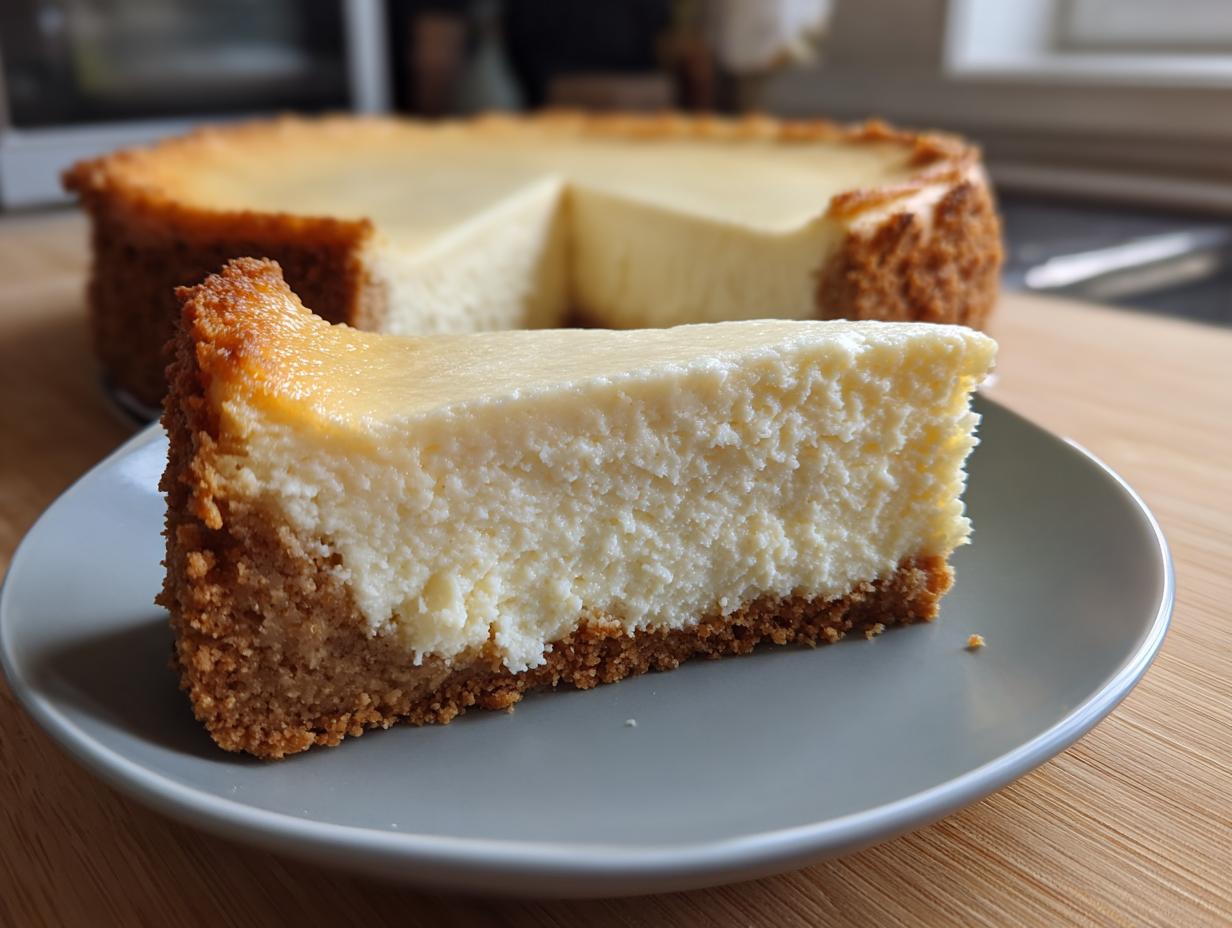
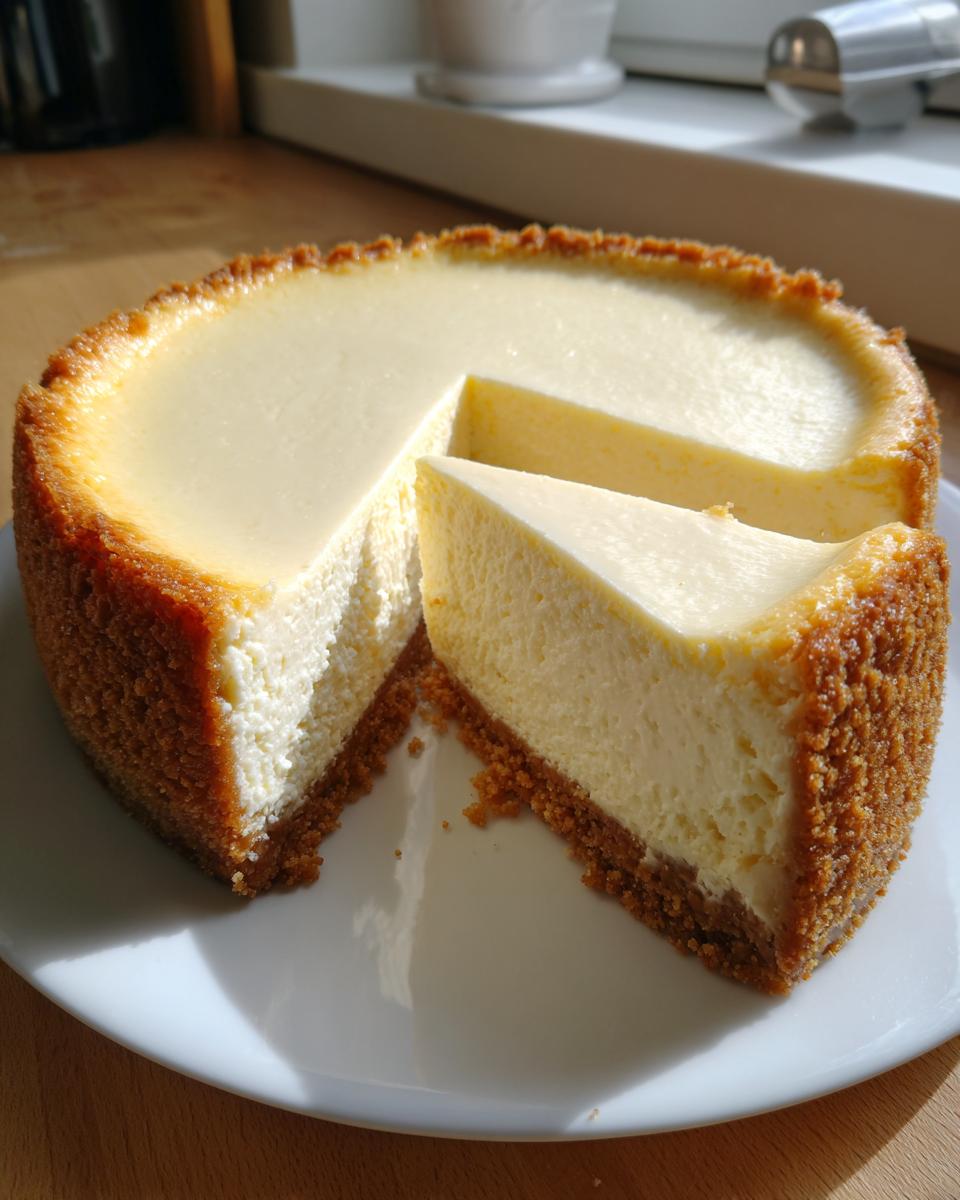
Look, I know what you want: a truly rich and smooth cheesecake that tastes like it came from a five-star bakery. It needs to be decadent, velvety, and absolutely perfect for being the star of your holiday table—a real showstopper dessert recipe. I remember one disastrous birthday party where I tried to bake a giant cheesecake, and the top looked like a topographical map. Since then, I swore I’d master the no-water-bath method using temperature control alone. This recipe finally delivers that incredible texture we all crave without the fear of leaks!
Achieving Silky Cheesecake Filling Without a Water Bath
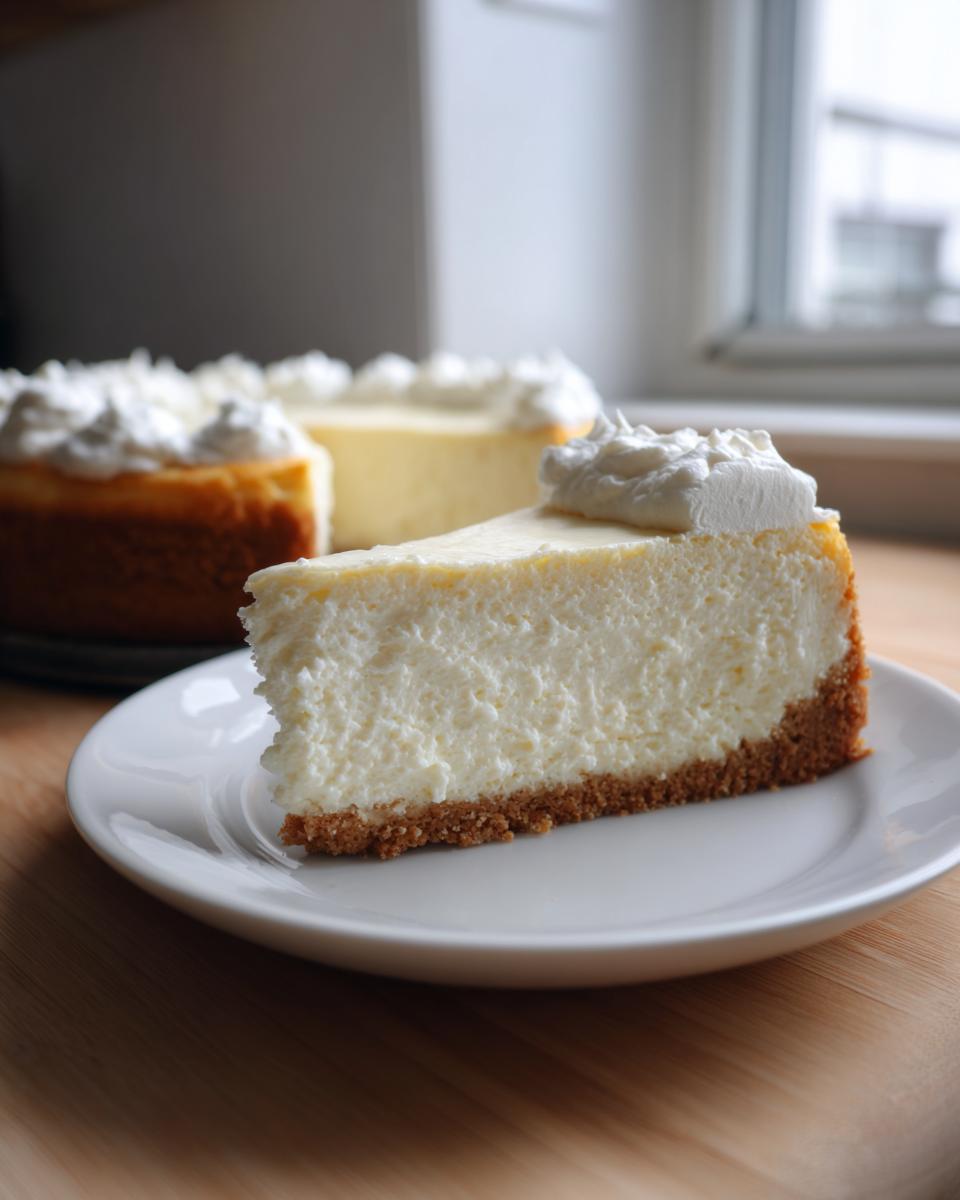
The secret to that luxurious mouthfeel and avoiding unsightly cracks lies entirely in temperature management, not water! Because we use full-fat ingredients and melt the white chocolate slightly before incorporating it, we get structure. Then, we bake low and slow at 300°F. The most important part for that silky cheesecake filling is the slow cool: turning the oven off and letting it coast for a full hour. This gradual descent prevents the rapid temperature drop that causes shrinkage and cracking. Trust me on the slow cool—it’s non-negotiable!
Ingredients for the Ultimate Creamy White Chocolate Cheesecake
Okay, let’s talk about what actually goes into making this white chocolate cheesecake so incredibly rich. My Food Science background pops up here because the quality of your chocolate absolutely matters. Don’t go grabbing the cheap stuff; you want something that tastes wonderful on its own, because that flavor is the star of the show. Also, pay attention to whether I say ‘room temperature’—it’s not just a suggestion, it’s the law for lump-free baking!
Crust Ingredients for Your White Chocolate Cheesecake
We start with a strong foundation. For the crust, you’ll need:
- 1 1/2 cups graham cracker crumbs
- 1/4 cup granulated sugar (trust me, this little bit helps it hold together!)
- 6 tablespoons unsalted butter, melted
When you mix this up, really press it down firmly into the bottom of that springform pan. You can use the bottom of a measuring cup to get it super compact. We want this crust to stand sturdy against that filling!
Filling Ingredients for a Rich and Smooth Cheesecake
This is where the magic happens. Remember, the cream cheese, eggs, sour cream, and heavy cream all need to be at room temperature. If they are cold, you’ll end up with little lumps that just won’t blend away, and that ruins the whole rich and smooth cheesecake vibe we are going for.
For the filling, grab these:
- 3 (8 ounce) packages full-fat cream cheese, softened
- 1 1/2 cups granulated sugar
- 1 teaspoon vanilla extract
- 1/4 teaspoon salt
- 4 large eggs, room temperature
- 12 ounces high-quality white chocolate, melted and cooled slightly
- 1/2 cup sour cream, room temperature
- 1/4 cup heavy cream, room temperature
Make sure that white chocolate is slightly cooled down before it hits the batter, otherwise it can curdle things up. We want smooth sailing all the way!
How to Prepare Your Baked Cheesecake Secrets: Step-by-Step Instructions
This is where we put those baked cheesecake secrets into action! Remember, baking a gorgeous white chocolate cheesecake without any hassle is all about respecting the temperature—both of the oven and the ingredients themselves. I’ve broken this down into three phases, and sticking to the temperature changes is how we stop those cracks before they start.
Preparing the Crust and Initial Bake
First things first: wrap that springform pan like it’s heading into the ocean! Even though we skip the water bath, wrapping the bottom and sides completely with heavy-duty foil is my insurance policy against any tiny leaks. Mix your graham crumbs, sugar, and melted butter, press it in tight, and pop that crust into a 325°F oven for just 10 minutes. That brief pre-bake sets it nicely so it doesn’t get soggy later.
Mixing the Silky Cheesecake Filling
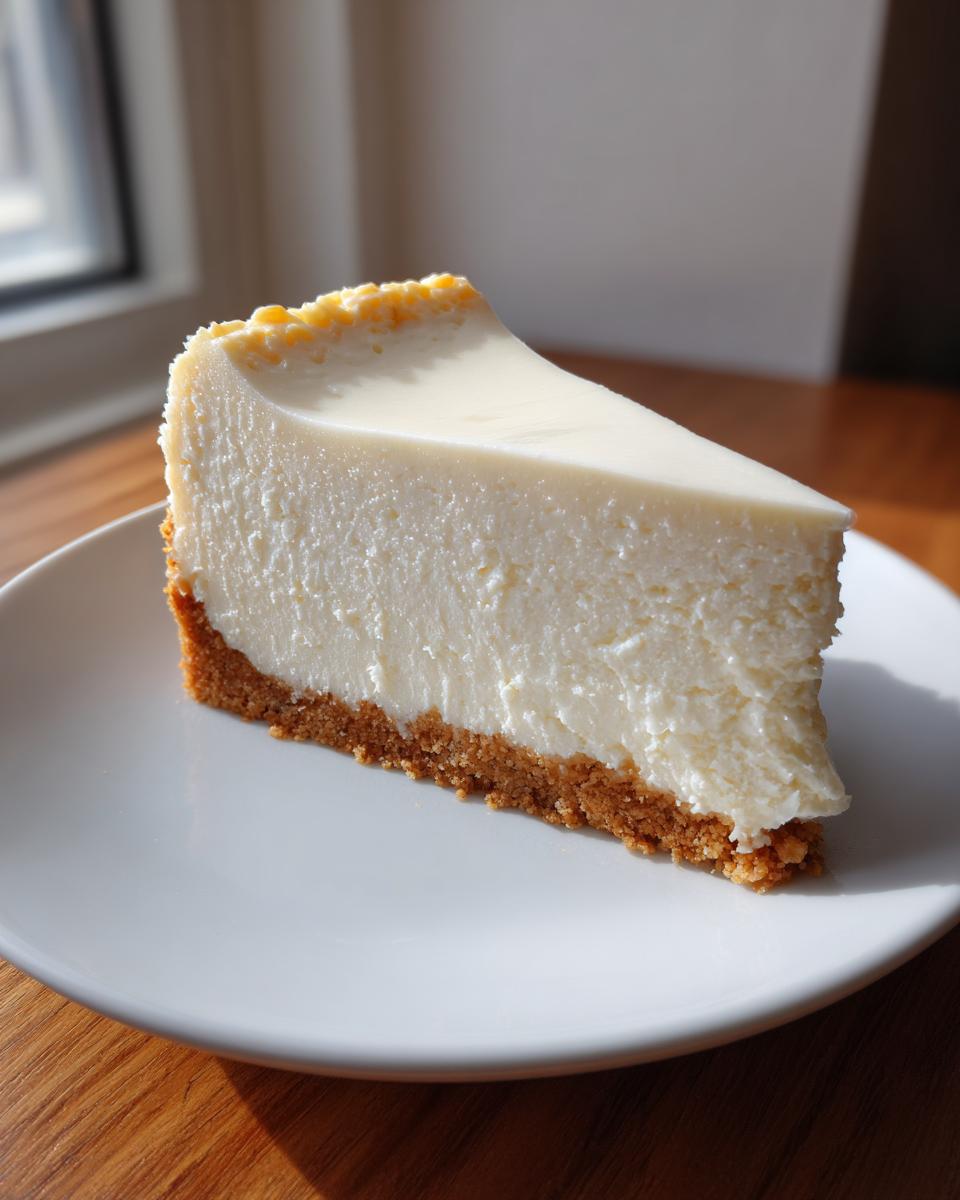
Once the crust cools a bit, we mix. Start your electric mixer on medium and beat that softened cream cheese until it’s absolutely spotless—no lumps allowed. Seriously, scrape down that bowl! Then, slowly beat in your sugar, vanilla, and salt. Add the eggs one at a time, mixing on *low* speed until they *just* disappear. When you add the slightly cooled melted white chocolate, the sour cream, and the heavy cream, switch to folding gently. If you overmix now, you incorporate too much air, and that’s a fast track to cracks later. We are aiming for that perfect silky cheesecake filling here!
Baking and The Crucial Cooling Method for Your White Chocolate Cheesecake
Pour that creamy batter into the prepared crust and gently tap the pan on the counter a couple of times to pop any big bubbles. Now, drop your oven temperature way down to 300°F. Bake it for about 60 to 75 minutes. You’ll know it’s ready when the edges look set, but the center still has a little magical wobble—that slight jiggle is key! This is where the anti-crack magic truly happens: Turn the oven OFF, prop the door open just a crack using a wooden spoon, and let it just sit in there to cool down slowly for a full hour. That slow descent is the best defense against how to prevent cheesecake cracks.
Tips for Success with this Creamy Cheesecake Recipe
Baking a truly spectacular white chocolate cheesecake comes down to just a few non-negotiable rules. My biggest piece of advice for getting that fantastic creamy cheesecake texture is patience with your ingredients. You simply cannot rush the softening of the cream cheese or warming your eggs, sour cream, and heavy cream.
If those elements are cold, you are going to end up fighting lumps the entire time, and we already established that air bubbles and lumps are the enemy of smooth perfection! Also, please treat your white chocolate well; use a high-quality bar or chips you actually enjoy eating straight from the bag. If you’re using top-tier chocolate, you don’t have to work half as hard to get a flavorful result.
Variations: White Chocolate Raspberry Cheesecake and More
Now that you’ve mastered the ultimate baked base—that wonderfully rich and smooth cheesecake foundation—it’s time to have a little fun! While I truly believe this white chocolate cheesecake stands perfectly on its own, sometimes you want a little pop of color or tang, right? Especially around the holidays, people always ask me about adding fruit!
If you’re dreaming of a dazzling white chocolate raspberry cheesecake, the key is timing. You want to prepare a quick raspberry sauce—just simmer fresh or frozen raspberries with a little sugar until thick. Then, once you pour your creamy filling into the crust (before you go into that slow-baking phase), you dollop tablespoons of that sauce over the top. Use a knife or skewer to swirl it gently through the top layer. Don’t swirl too deeply, or you mess up that gorgeous structure we worked so hard for!
For something perfect for Thanksgiving or Christmas, try my cranberry white chocolate dessert idea! Instead of raspberry, stir in about a half cup of fresh or lightly sugared cranberries right into the batter with the white chocolate. They offer a tart counterpoint that cuts through the richness beautifully. Either way, start with this base recipe; it’s sturdy enough to handle whatever flavor explosion you dream up next!
Storage & Reheating Instructions for Your Decadent Dessert Recipe
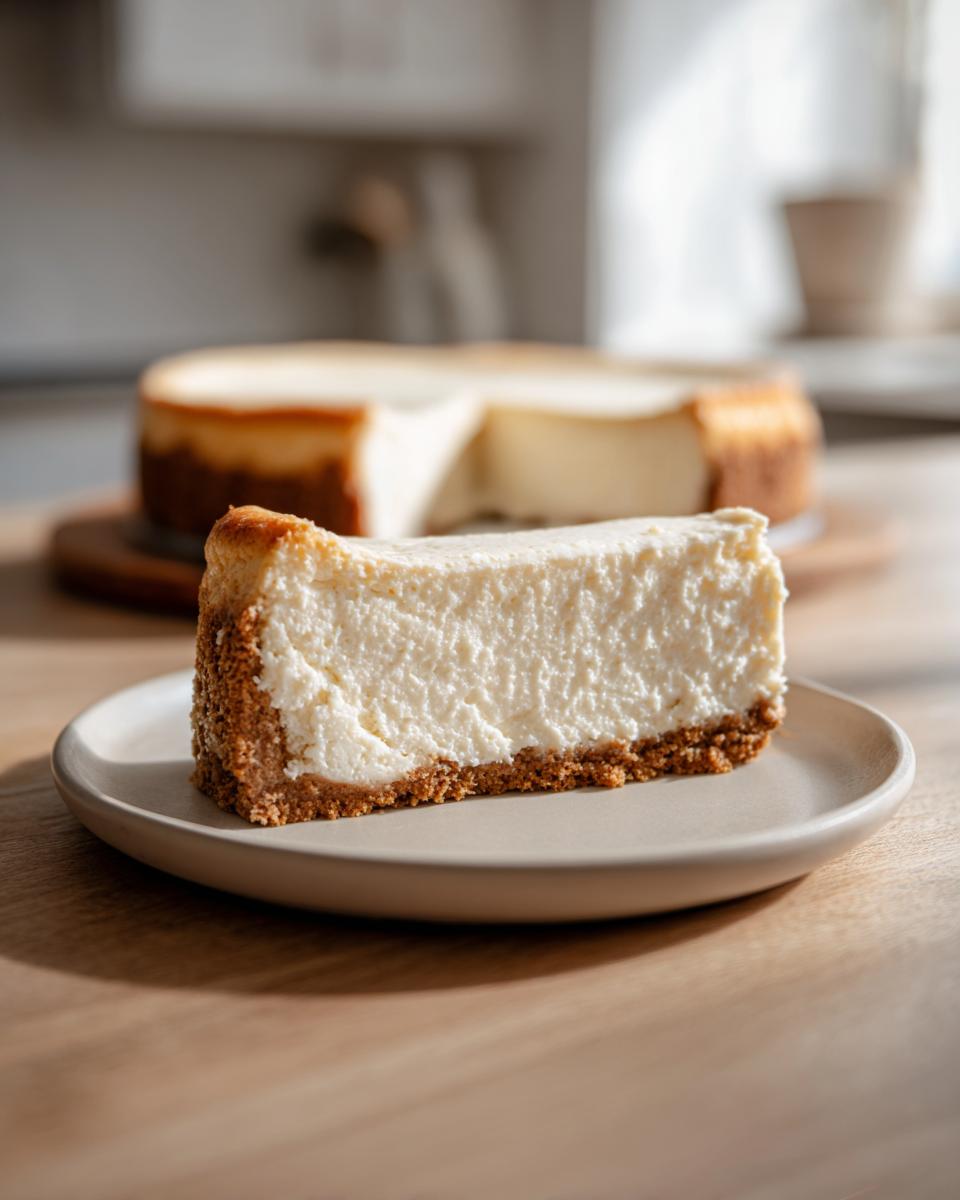
Okay, the hard part is over! You’ve nurtured this beautiful white chocolate cheesecake through the oven, and now you want to make sure it stays perfect. The chilling time is non-negotiable, friends. I know you want to slice into it right away when it’s still warm, but you absolutely must resist! Chilling isn’t just about making it firm; it’s about letting those fats settle and the flavors truly meld together. You need at least six hours, but honestly, overnight is where this really shines.
Once it’s fully chilled and you’ve carefully removed that springform ring, cover it loosely with plastic wrap or foil. Keep it stored in the coldest part of your refrigerator. When properly stored, this decadent dessert recipe will stay beautiful for four or five days. That’s great news because it means you can make it the day before a big party!
Now, about reheating—don’t even think about it! This is a baked, dairy-heavy dessert, and microwaving it or trying to warm it up is just going to melt it into a soupy mess. The best way to enjoy this is either straight from the fridge when it’s cold and firm, or let it sit on the counter for about 20 minutes before serving. That little bit of warming softens the texture just enough so you get that buttery melt-in-your-mouth sensation without losing the structure. Perfection!
Frequently Asked Questions About White Chocolate Cheesecake
I know you might have a few lingering questions when dealing with a delicate dessert like this amazing white chocolate cheesecake. I always get questions after testing recipes professionally, so here are the things I hear most often. Having the right answers means you get that perfect results every single time!
Can I make this a No Bake White Chocolate Cheesecake instead?
That’s a fun idea! While this specific recipe is painstakingly developed for the baked, rich and smooth cheesecake texture we talked about—especially relying on the slow cool to avoid cracks—it’s not designed to set up correctly without the oven. The structure relies on those eggs. If you are really set on a no bake white chocolate cheesecake, you’ll need a dedicated recipe that uses gelatin or stabilizers to set up cold. This recipe is all about that deeply satisfying baked texture!
What is the best way to melt white chocolate for the filling?
White chocolate is temperamental, okay? It burns faster than regular chocolate because of the milk solids. I rely on two methods depending on how much patience I have! The safest way is always the double boiler—a bowl set over simmering (not boiling!) water. If I’m in a hurry, I microwave it in 20-second bursts, stirring well after every single burst. The most important thing, and this comes from my Food Science training, is ensuring it cools down until it’s just barely warm—not hot—before you gently fold it into the cream cheese mixture. Hot chocolate will actually cook your eggs slightly and ruin the silky cheesecake filling.
My cheesecake still cracked slightly. What went wrong?
Ugh, the dreaded crack! Don’t panic; it’s still delicious, but let’s prevent it next time. Ninety-nine percent of the time, cracks are caused by one of two things: over-beating the batter (which incorporates too much air that expands and then collapses) or a sudden temperature change. Double-check that you added your eggs one by one on low speed and stopped mixing as soon as the chocolate was folded in. Then, make absolutely certain you followed the cooling down step: turn off the oven, prop the door open, and let it hang out in that residual heat for an entire hour. That controlled cooldown is the absolute key to preventing surface stress on your creamy cheesecake.
Estimated Nutritional Data for This Indulgent Sweet Treat
When you’re making an indulgent sweet treat like this white chocolate cheesecake, I think it’s helpful to have a rough idea of what you’re digging into. Remember, this is an estimate based on the full list of ingredients provided, and because we are using full-fat cream cheese and real butter, it’s definitely decadent! The actual numbers can shift depending on exactly which brand of white chocolate or sour cream you end up using, so take these figures as a guideline for planning your indulgence.
Here is the breakdown per slice (based on 12 servings):
- Serving Size: 1 slice
- Calories: 450
- Fat: 30g (You need that fat for the ultimate creamy texture!)
- Saturated Fat: 18g
- Trans Fat: 0.5g
- Cholesterol: 110mg
- Total Carbohydrates: 40g
- Sugar: 35g
- Protein: 8g
- Sodium: 250mg
- Fiber: 1g
See? It’s rich! But that’s why it’s saved for special occasions, right? Knowing these numbers helps me plan the rest of the menu when I’m making this decadent dessert recipe for friends.
Share Your Ultimate White Chocolate Dessert Experience
Phew! We did it. You have officially conquered the most intimidating dessert on the block—the baked cheesecake—and done it without the mess of a water bath! That ultimate white chocolate dessert is yours now, and I hope you saved room for a huge slice. I truly believe this recipe belongs in your ‘must-make’ rotation, especially since you proved you can bake a crack-free cheesecake!
Now that you’ve made this showstopper, I desperately want to see it! Snap a picture of your finished cheesecake—whether you kept it plain or dressed it up with those gorgeous raspberry swirls we talked about—and tag me on social media. Using the hashtag for Cooking by Mia means I get to see your successes popping up on my feed, and that truly makes my day.
When you have a moment, please come back here and leave a rating, too! Five stars if you loved that unbelievably creamy cheesecake texture, or drop a comment below telling me what you thought. If you have any troubleshooting questions or brilliant variations I haven’t thought of yet, please reach out through my contact page. Happy baking, and thank you so much for trusting me with your sweet treats!
PrintThe Ultimate Creamy Baked White Chocolate Cheesecake (No Cracks, No Water Bath Technique)
Bake a restaurant-quality, rich, and smooth white chocolate cheesecake without needing a water bath. This recipe focuses on achieving a silky texture and preventing cracks for a showstopper dessert.
- Prep Time: 30 min
- Cook Time: 75 min
- Total Time: 8 hours 45 min
- Yield: 12 servings 1x
- Category: Dessert
- Method: Baking
- Cuisine: American
- Diet: Vegetarian
Ingredients
- 1 1/2 cups graham cracker crumbs
- 1/4 cup granulated sugar (for crust)
- 6 tablespoons unsalted butter, melted
- 3 (8 ounce) packages full-fat cream cheese, softened
- 1 1/2 cups granulated sugar (for filling)
- 1 teaspoon vanilla extract
- 1/4 teaspoon salt
- 4 large eggs, room temperature
- 12 ounces high-quality white chocolate, melted and cooled slightly
- 1/2 cup sour cream, room temperature
- 1/4 cup heavy cream, room temperature
Instructions
- Preheat your oven to 325°F (160°C). Wrap the outside bottom of a 9-inch springform pan tightly with heavy-duty aluminum foil, covering the bottom and sides completely to prevent water seepage (even though you will not use a water bath, this protects the crust).
- Prepare the crust: Combine graham cracker crumbs, 1/4 cup sugar, and melted butter. Press the mixture firmly into the bottom of the prepared springform pan. Bake the crust for 10 minutes. Remove and let it cool while you prepare the filling.
- Reduce the oven temperature to 300°F (150°C).
- Prepare the white chocolate: Melt the white chocolate using a double boiler or in short intervals in the microwave. Set aside to cool slightly; ensure it is not hot when added to the batter.
- Make the filling: In a large bowl, beat the softened cream cheese with an electric mixer on medium speed until completely smooth, scraping down the sides often. This step is key for a creamy cheesecake.
- Gradually add 1 1/2 cups sugar, vanilla extract, and salt. Beat until just combined. Do not overmix.
- Add the eggs one at a time, mixing on low speed only until each egg is incorporated. Stop mixing as soon as the last egg is blended in.
- Gently fold in the slightly cooled melted white chocolate, sour cream, and heavy cream until the batter is uniform.
- Pour the filling over the cooled crust. Tap the pan gently on the counter a few times to release any large air bubbles.
- Bake at 300°F (150°C) for 60 to 75 minutes. The edges should look set, but the center 2 inches should still have a slight jiggle when gently nudged.
- Turn off the oven, crack the oven door open slightly (use a wooden spoon to prop it open), and let the cheesecake cool inside the oven for 1 hour. This slow cooling prevents cracking.
- Remove the cheesecake from the oven and let it cool completely on a wire rack. Once cool, run a thin knife around the edge before removing the springform ring.
- Chill the cheesecake in the refrigerator for at least 6 hours, or preferably overnight, before serving for the best rich and smooth texture.
Notes
- Use room temperature ingredients for the cream cheese, eggs, sour cream, and heavy cream; this prevents lumps and ensures a silky cheesecake filling.
- Do not use low-fat cream cheese; full-fat is necessary for the ultimate creamy texture.
- If you choose to add a topping, such as a raspberry purée, apply it only after the cheesecake is fully chilled.
Nutrition
- Serving Size: 1 slice
- Calories: 450
- Sugar: 35g
- Sodium: 250mg
- Fat: 30g
- Saturated Fat: 18g
- Unsaturated Fat: 12g
- Trans Fat: 0.5g
- Carbohydrates: 40g
- Fiber: 1g
- Protein: 8g
- Cholesterol: 110mg