

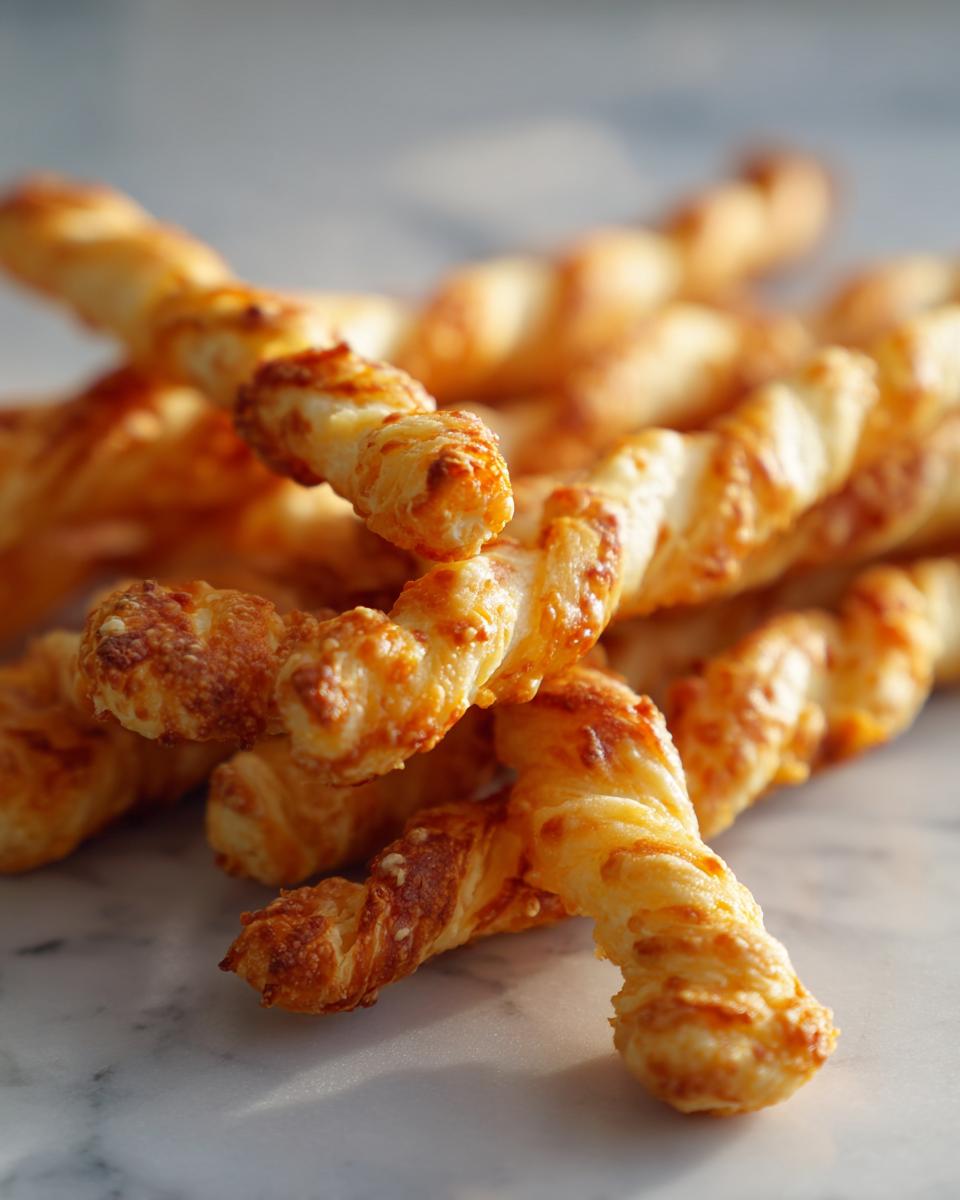
There are savory snacks you eat, and then there are savory snacks that disappear the second you set them out. These are the ones! Forget those sad, soft crackers you find sitting around after a party. When I bring out my Classic Crispy Southern Cheese Straws, I know I’m in for a show, because they vanish instantly. This isn’t just any cheesy biscuit recipe; this is *the* recipe emphasizing buttery texture and maximum shatteringly crisp edges. Growing up in a home where Southern entertaining was an art form, I’ve perfected these over years of testing. Trust me when I say these addictive cheese straws, made with real, sharp cheddar, are mandatory for game day or any gathering you want to impress at.
- Why This is the Best Cheese Straws Recipe You Will Ever Make
- Ingredients for Classic Crispy Southern Cheese Straws
- Step-by-Step Instructions for Homemade Cheese Straws
- Tips for Perfect Party Savory Snacks: Mastering Cheese Straws
- Ingredient Notes and Substitutions for Your Cheese Straw Recipe
- Serving Suggestions for These Cheddar Cheese Appetizers
- Storage and Reheating Instructions for Homemade Cheese Straws
- Frequently Asked Questions About Cheese Straws
- Share Your Best Cheese Straw Recipe Experience
Why This is the Best Cheese Straws Recipe You Will Ever Make
I’ve spent years understanding food science, especially when it comes to texture. These aren’t just baked cheese; they are structural marvels designed for that perfect snap! My goal was always to elevate the classic Southern staple into something truly addictive, and honestly, I think I cracked the code. That’s why these rise above the rest. If you peek at what experts say, they’re always looking for that authentic texture, like folks over at Serious Eats often highlight when discussing Southern cheese straws.
- We achieve that amazing shatter because we insist on using plenty of sharp cheddar snacks.
- The final result is guaranteed Crispy Cheese Straws—they won’t be limp or oily after cooling.
- They are quick enough to make last minute, but taste like they took all day!
If you follow my method, you’re guaranteed a superior savory cracker experience every single time. We get that delightful flakiness that keeps people reaching for more.
Secrets to Achieving Truly Crispy Cheese Straws
The magic behind the crispiness involves physics, my friends! It all comes down to temperature management. We need those distinct layers of butter separated by flour so they create steam pockets and lift as they bake, resulting in that fantastic crisp finish.
First, your butter needs to be rock solid cold, cut into tiny cubes. Second, you absolutely must chill the dough for at least 30 minutes—seriously, don’t skip this! This lets the fat firm up again. Finally, the rolling needs to be precise. I insist on rolling the dough out to just about 1/8-inch thick. Any thicker and you’re wandering into soft biscuit territory instead of perfect cheese straws territory!
Ingredients for Classic Crispy Southern Cheese Straws
Okay, when it comes to ingredients for these amazing snacks, the quality really shows. We are keeping things simple here because we want that amazing sharp cheddar flavor to shine through! Remember, this isn’t complicated baking; it’s about respecting what you put in. Below is what you need, but listen closely: you MUST use freshly grated sharp cheddar cheese. Pre-shredded just won’t cut it for the best savory texture. That block cheese is the secret weapon for incredible Sharp Cheddar Snacks!
- 2 cups all-purpose flour
- 1 teaspoon salt
- 1/2 teaspoon cayenne pepper (this is optional, but I always throw it in for a little warmth!)
- 1 cup (that’s two full sticks!) unsalted butter, cut into small cubes and kept super cold.
- 1 1/2 cups freshly grated sharp cheddar cheese—don’t cheat on this part!
- 1/4 cup ice water—this is crucial for bringing the dough together without making it tough.
Step-by-Step Instructions for Homemade Cheese Straws
Alright, let’s get this dough mixed! This is where the magic happens, and keeping things cold is your highest priority. I want you to have the absolute crispiest snacks possible, so please treat your butter like ice! We’re aiming for those flaky layers, not a tough cracker.
First up, grab a big bowl. Whisk your flour, salt, and that little bit of cayenne together lightly. Next, you need to tackle the butter. Remember, it needs to be cubes from the fridge! You’ve got to ‘cut’ that cold butter into the flour mixture. I use a pastry blender—it works fast—but your fingertips are fine if you move quickly. Stop blending when it looks like coarse crumbs, and you can still see some pea-sized chunks of butter. That’s important!
Once the butter is worked in, stir in all that glorious, freshly grated sharp cheddar. Now for the water. Add the ice water just a tablespoon at a time. Mix it until the dough starts thinking about sticking together. Don’t knead it like bread! As soon as it forms a shaggy ball, stop right there. Don’t forget to check out Melissa’s site for more inspiration on cheese straws recipes!
Mixing the Dough for Buttery Cheese Bites
I cannot stress this enough: overmixing is the enemy of flaky, delicate Buttery Cheese Bites! When you mix flour and water too much, gluten wakes up, and gluten equals chewy. Chewy cheese straws are just sad crackers. You are just trying to incorporate the flour and water enough so the dough holds its shape when you press it. If you see a streak of dry flour on the side of the bowl, that’s totally okay. Pull it together gently with your hands.
Chilling and Shaping Your Cheese Straws
Once I have the dough patched together into a flat disk, I wrap it tight and send it straight to the fridge for at least 30 minutes. This chilling time lets the fat in the butter freeze back up. If the butter melts quickly in the oven, the strands spread into flat pancakes. If it’s cold, it pushes up and creates those amazing layers, giving you that *snap*. When you roll them out—and I mean *roll*—aim for about 1/8-inch thin. Then, cut them into strips, maybe give them a little twist if you’re feeling fancy, pop them on parchment paper, and bake them at 400°F. They only need about 10 to 14 minutes.
Tips for Perfect Party Savory Snacks: Mastering Cheese Straws
Now that you know the basics, let’s talk about trouble-shooting, because nobody wants a batch of flat, greasy disappointment when they’re aiming for superior Southern Cheese Straws. The biggest issue I hear about is sticky dough. If your dough is too sticky even after the initial chill, don’t panic! Just sprinkle a *tiny* bit of extra flour on your surface and gently work it in until it feels manageable. But go easy—too much flour and you lose the buttery flavor.
Another critical aspect of crafting delicious Game Day Appetizers is baking evenly. Since these bake fast, the edges can brown before the middle is totally crisp. That’s why rotating your pans halfway through baking is a non-negotiable rule for perfect Party Savory Snacks. If you notice browning happening way too fast, pull the pan forward and decrease the oven temperature by about 15 degrees for the last 5 minutes. Cooling them completely on a wire rack is the final, most important step for achieving that satisfying crunch in every single bite of your cheese straws!
Ingredient Notes and Substitutions for Your Cheese Straw Recipe
Let’s talk specifics because the ingredients are truly what separate a good snack from the *best* crackers you’ve ever made. As I mentioned earlier, if you take away only one thing from this post, let it be this rule: Use freshly grated sharp cheddar cheese. Pre-shredded stuff is convenient, I get it! But those bags are coated in things like potato starch or cellulose to keep them from clumping up in the bag. Those anti-caking agents mess with the way the cheese melts and can actually inhibit that beautiful, crispy structure we are chasing in these cheese straws.
When the cheese is fresh, it melts cleanly and blends right into the flour and butter, giving you that silky, uniform texture throughout the dough. That’s the difference between a cheesy puff and a perfectly crisp straw!
Now, if you want to mix things up a little, especially if you’re looking for a slightly more complex flavor profile, you can definitely play with the cheese blend. A fantastic substitution idea is to swap out about a quarter cup of that cheddar for grated Parmesan cheese. Parmesan brings a lovely salty, nutty depth that pairs unbelievably well with the spice. You can even look into herb varieties, like the rosemary Parmesan ones I’ve seen others try, such as those featured over at A Better Recipe. It adds a gorgeous, aromatic note to the classic flavor without changing the core technique at all!
Serving Suggestions for These Cheddar Cheese Appetizers
Now that you have a big platter of perfectly golden, incredibly crisp cheese straws, what do you serve them with? These aren’t just meant to sit lonely on a plate, honey! These amazing Cheddar Cheese Appetizers are designed to be the star of your spread.
For a classic Southern spread, you can never go wrong serving them alongside a creamy pimento cheese dip. It’s cheesy-on-cheesy goodness, and honestly, it’s decadent in the best way possible. They are also fantastic just piled high next to a bowl of mixed olives and cocktail onions for a slightly elevated happy hour snack mix. If you’re serving them during cooler months or as an appetizer before dinner, try setting out a small bowl of spicy mustard for dipping—the sharp tang cuts through the richness of the butter and cheddar perfectly.
But my absolute favorite way to serve these buttery bites? Alongside a big, warm bowl of soup. Particularly when I make my Penicillin Soup recipe, these savory straws are fantastic for dipping and crunching. They turn a cozy lunch into a real occasion! Seriously, put these out at your next party, and don’t bother making too many backups—they won’t last long!
Storage and Reheating Instructions for Homemade Cheese Straws
Part of the magic of a great batch of cheese straws is that they are the ultimate make-ahead appetizer, but you have to store them right! If you treat them like regular cookies, they’ll absorb moisture from the air, and we simply cannot let that happen to our perfectly crisp snacks. The key to keeping these buttery bites flaky for days is airtight containment.
Once your straws are completely, totally cool—and I mean room temperature, maybe even still slightly warm from the cooling rack—transfer them immediately into an airtight container. Glass containers with tight-fitting lids are my favorite because I can see how many I have left! You can layer them with a piece of parchment paper between the layers, but honestly, if they are rolled thin enough, they stack just fine without tearing.
These homemade savory crackers will stay perfectly crisp for up to a week when stored correctly on the counter. Do not put them in the refrigerator, though! The humidity inside the fridge is what makes things go soft, and we want to avoid sogginess at all costs.
Now, let’s say it’s Game Day, and you made them three days ago. No worries! You can absolutely bring that crispness right back. Just before serving, spread your straws out on a baking sheet, single layer if you can manage it, and pop them into a 300°F oven for maybe 5 to 7 minutes. Keep an eye on them! That little bit of warm, dry heat sucks out any lingering moisture they might have picked up and refreshes that beautiful, shattering crunch. They come out tasting practically fresh-baked. If you ever need to reach out with questions about storage or anything else, you know you can always drop me a line on my contact page!
Frequently Asked Questions About Cheese Straws
Can I really use pre-shredded cheese? I’m short on time!
Oh, I know the temptation when you’re whipping up a batch of quick Easy Cheese Straws! But honestly, if you want that perfect melt and maximum flavor for your homemade savory crackers, please stick to grating your own sharp cheddar. The anti-caking agents in the bagged stuff interfere with the dough structure, and you just won’t get that beautiful, savory melt that defines a great cheese straw. It’s worth an extra three minutes with the box grater, I promise!
How do I make these spicy cheese straws without ruining the texture?
It’s really easy to add heat! Since we are using a small amount of cayenne in the base recipe, you can simply increase that amount slightly. If you want something deeper, try substituting half of the cheddar with Pepper Jack cheese, which I know Trisha Yearwood loves to do, or add a pinch of smoked paprika and a dash of dry mustard powder to the flour mixture. These additions add flavor complexity and heat without adding extra moisture that could soften the dough.
Can I make the dough ahead of time and freeze it?
Yes, you absolutely can! This is one of my favorite tricks for effortless entertaining. After you mix and form the disk, wrap it tightly in plastic wrap. You can freeze this dough for up to two months. When you’re ready to bake, let it thaw in the refrigerator overnight—don’t try to hurry it! Then, roll it out as directed. You might need to chill it for an extra 15 minutes on the floured surface just to firm it up again before cutting, but the results are totally worth the planning ahead!
Why are my cheese straws spreading out instead of staying thin?
That tells me one of two things is happening! Either your butter wasn’t cold enough when you cut it into the flour, or you didn’t chill the dough long enough before rolling. Butter that enters the oven warm or room temperature melts instantly and runs right out, flattening your straw. That mandatory 30-minute chill time ensures the butter stays in distinct, cold pockets within the dough. If you want those flaky, crisp results, that chill time is as important as the cheese itself! If you want to learn more about my overall approach to cooking, please check out the About Page.
Share Your Best Cheese Straw Recipe Experience
Now you have all my secrets! You have the sharp cheddar, the ice-cold butter, and the precise technique to make the most shatteringly crisp cheese straws anyone has ever tasted. But truly, I want to know how they turned out for you! Did your family devour the entire batch before the game even started? Did you manage to save a few for yourself?
The best part of sharing these recipes, especially cherished family staples like these homemade cheese crackers, is hearing about your successes in your own kitchens. So please, don’t be shy! Come back here and let me know how they performed at your next gathering. Were they the hit of the party, perhaps alongside your other Holiday Cheese Appetizers?
I’d be so grateful if you could take a moment to leave a star rating right below this post. It helps me keep testing and refining recipes like these fantastic cheddar cheese appetizers for future cooks. And if you have a killer flavor addition—maybe you added rosemary or a different smoked pepper—tell us about it in the comments section below! I’m always looking for fun ways to tinker with a perfect recipe. Happy baking, and thank you so much for trying out my favorite savory snack!
PrintClassic Crispy Southern Cheese Straws

Make the best homemade cheese straws using sharp cheddar cheese and cold butter for a shatteringly crispy, savory snack perfect for parties or game day.
- Prep Time: 20 min
- Cook Time: 14 min
- Total Time: 44 min
- Yield: About 4 dozen 1x
- Category: Appetizer
- Method: Baking
- Cuisine: American
- Diet: Vegetarian
Ingredients
- 2 cups all-purpose flour
- 1 teaspoon salt
- 1/2 teaspoon cayenne pepper (optional, for a slight kick)
- 1 cup (2 sticks) cold unsalted butter, cut into small cubes
- 1 1/2 cups freshly grated sharp cheddar cheese
- 1/4 cup ice water
Instructions
- In a large bowl, whisk together the flour, salt, and cayenne pepper if you are using it.
- Cut the cold butter into the flour mixture using a pastry blender or your fingertips until the mixture resembles coarse crumbs with some pea-sized pieces of butter remaining.
- Stir in the freshly grated sharp cheddar cheese until evenly distributed.
- Gradually add the ice water, one tablespoon at a time, mixing until the dough just comes together. Do not overmix.
- Gather the dough, form it into a flat disk, wrap it in plastic wrap, and chill in the refrigerator for at least 30 minutes. This step helps achieve maximum crispiness.
- Preheat your oven to 400 degrees Fahrenheit (200 degrees Celsius). Line two baking sheets with parchment paper.
- On a lightly floured surface, roll the chilled dough out to about 1/8-inch thickness.
- Cut the dough into strips about 1/2-inch wide and 4 to 5 inches long. You can twist the strips slightly for a classic look.
- Place the cheese straws on the prepared baking sheets, leaving a small space between them.
- Bake for 10 to 14 minutes, rotating the sheets halfway through, until the straws are golden brown and crisp. Baking time depends on thickness.
- Transfer the hot cheese straws to a wire rack to cool completely. They will crisp up further as they cool.
Notes
- Use freshly grated sharp cheddar cheese; pre-shredded cheese contains anti-caking agents that prevent the best melt and texture.
- Keep the butter as cold as possible throughout the mixing process to ensure a flaky, crispy final product.
- For a variation, substitute 1/4 cup of the cheddar with grated Parmesan cheese.
Nutrition
- Serving Size: 4 straws
- Calories: 85
- Sugar: 0.1
- Sodium: 150
- Fat: 6.5
- Saturated Fat: 4.0
- Unsaturated Fat: 2.5
- Trans Fat: 0.1
- Carbohydrates: 4.5
- Fiber: 0.2
- Protein: 3.0
- Cholesterol: 18