
Oh, let’s talk about those desserts that instantly pull you back to childhood birthday parties and summer picnics! There’s just something undeniable about the warm, buttery scent of a retro cake that makes everything feel right. For me, the ultimate showstopper in that category is the magnificent pineapple upside down cake. It’s pure sunshine on a plate, isn’t it?
While tons of recipes exist, I spent years—drawing on my background in professional recipe development and my roots in classic American cooking—perfecting the balance here. The insights I gained while working in professional kitchens and developing my own culinary voice are all baked into this method. You can read more about my journey in baking and nutrition over on my About Page. Trust me when I say this from-scratch version beats anything quickly mixed together. We’re aiming for deep caramel flavor and a truly moist crumb, every single time.
If you’ve landed here looking for the Best Pineapple Upside Down Cake Recipe, you’ve found your new favorite! We’re going to make a gorgeous, juicy dessert together.
- Why This Classic Pineapple Upside Down Cake Recipe Stands Out
- Ingredients for the Best Pineapple Upside Down Cake Recipe
- How to Make Pineapple Upside Down Cake From Scratch: Step-by-Step
- Tips for Success with Your Nostalgic Cake Recipes
- Serving Suggestions for Your Tropical Dessert Recipes
- Storage and Reheating Instructions for Pineapple Upside Down Cake
- Frequently Asked Questions About Pineapple Upside Down Cake
- Estimated Nutritional Data for This Homemade Pineapple Cake
- Share Your Masterpiece
Why This Classic Pineapple Upside Down Cake Recipe Stands Out
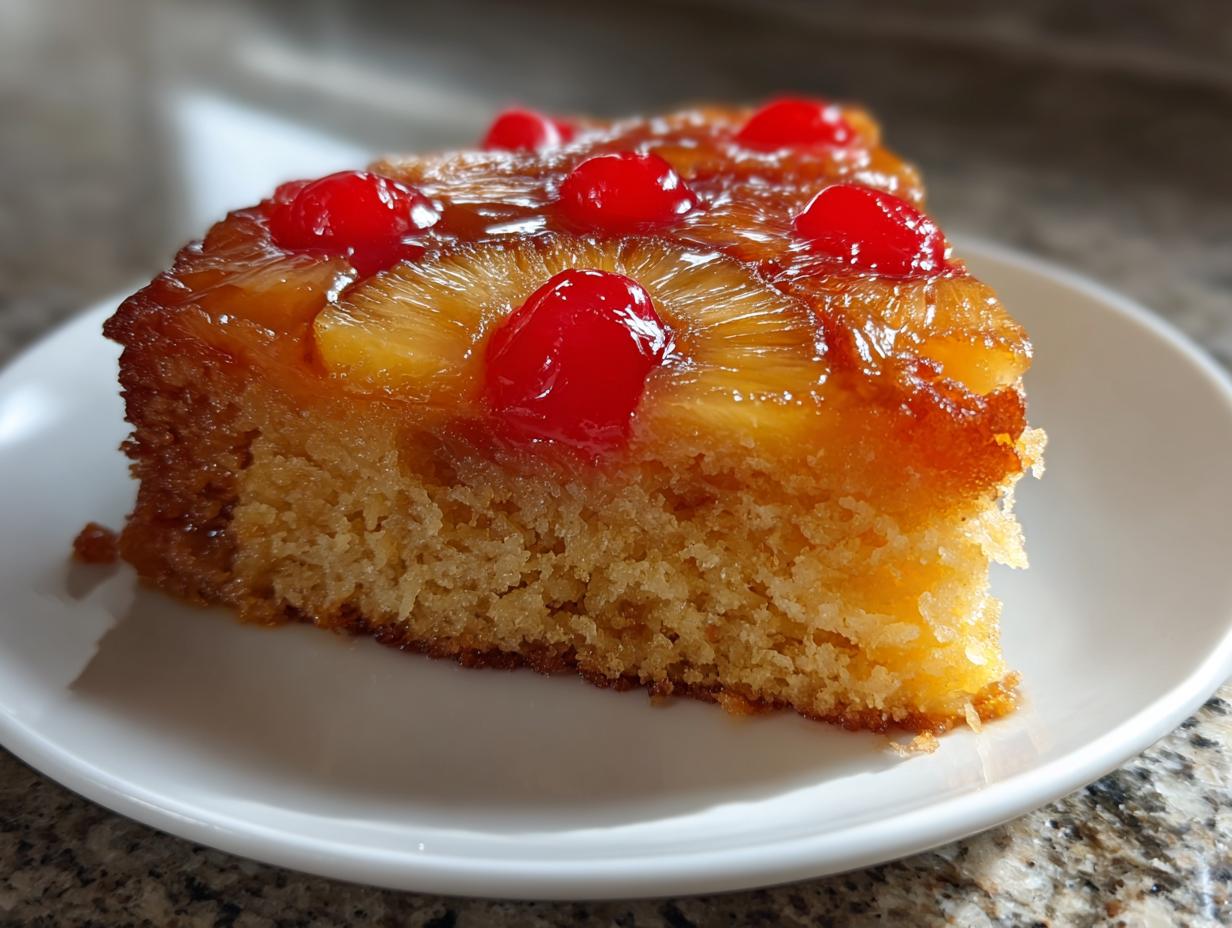
When you’re making a Classic Pineapple Upside Down Cake, you aren’t just making a cake; you’re making a centerpiece. This isn’t some dry, sad fruit cake that sticks to the pan! What sets this recipe apart is the marriage of flavor and texture.
- It delivers a genuinely Moist Pineapple Dessert texture thanks to the pineapple juice in the batter.
- The topping caramelizes beautifully without tasting burnt or overly sweet.
- And most importantly? It releases perfectly clean onto the plate.
Achieving the Perfect Caramelized Fruit Topping Cake
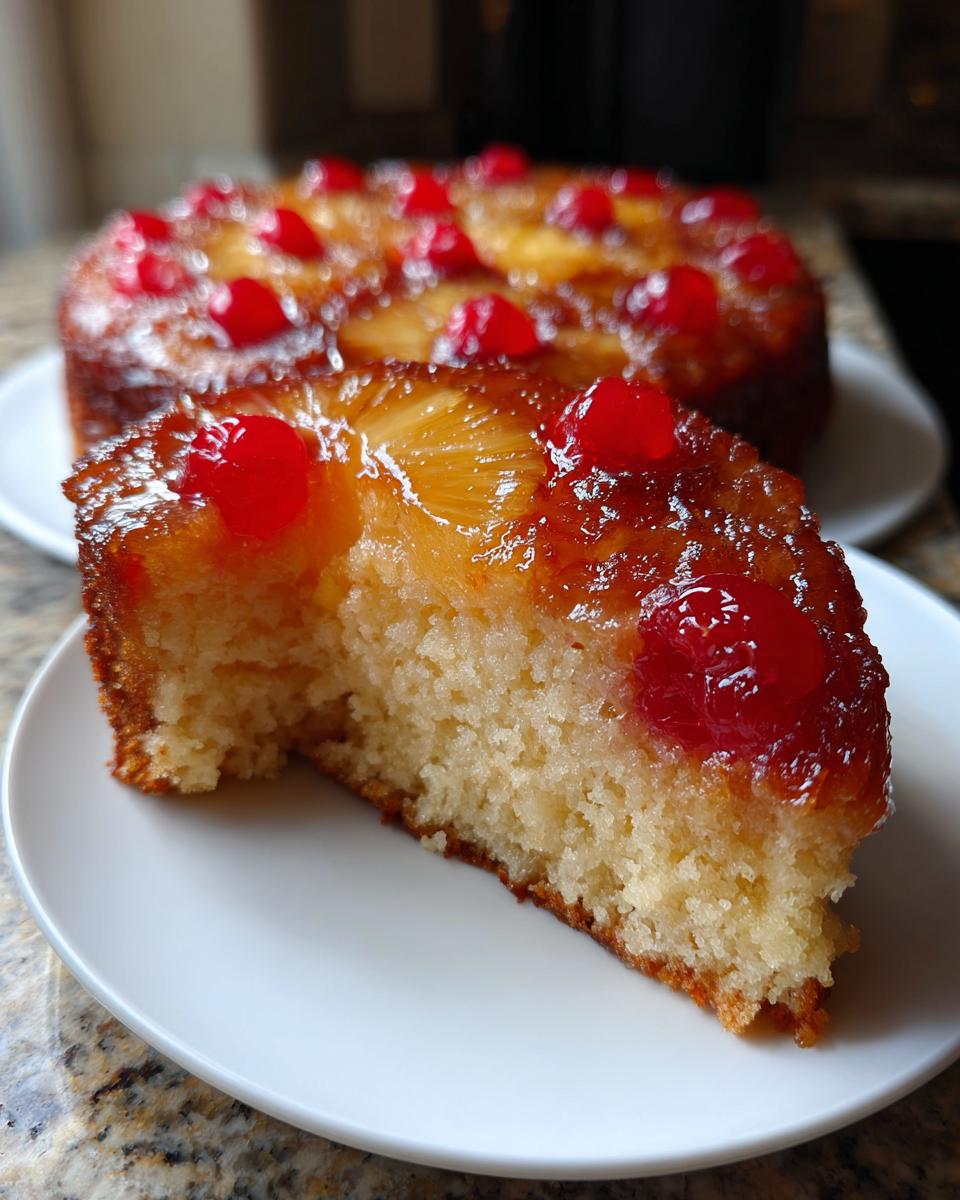
That dark, gooey layer—that’s everything! We achieve that perfect richness by starting the entire assembly with melted butter poured right into the pan, followed immediately by packed brown sugar sprinkled evenly over it. This creates a luxurious, bubbling caramel layer before the batter even hits the pan. It’s the secret to that deep, gorgeous color in your final Caramelized Fruit Topping Cake.
Tips for a Perfectly Released Upside Down Cake Every Time
Look, the biggest stressor for any upside-down cake baker is that moment of truth when you flip it. You have to trust the process! The most crucial step is time: you let the cake cool in the pan for exactly ten minutes after it comes out of the oven. Seriously, set a timer! This allows the caramel to set up just enough so it’s not running everywhere but is still soft enough to cling to the cake when you flip it. That brief window guarantees you pull off a Perfectly Released Upside Down Cake.
Ingredients for the Best Pineapple Upside Down Cake Recipe
Okay, now that we’ve talked about the magic, let’s look at what you actually need to buy! Because this is a From Scratch Pineapple Cake, we need good quality basics. When I develop a recipe, especially one this beloved, I swear by precision in the measurements. That’s how we guarantee you get that incredibly tender, moist crumb every time.
Don’t worry; it uses standard pantry items and canned fruit, which makes prep surprisingly quick for such a showstopper! You can pop over to my Dessert Recipes collection for other delicious options once you master this one, but for now, gather these!
Here is what you need for the topping and the batter:
- 1/2 cup unsalted butter (for the topping)
- 1 cup packed light brown sugar
- 1 (20 ounce) can pineapple slices in juice, drained (and reserve that juice!)
- 10 maraschino cherries, drained
- 1 1/2 cups all-purpose flour
- 1 1/2 teaspoons baking powder
- 1/2 teaspoon salt
- 1/2 cup unsalted butter, softened (for the batter)
- 3/4 cup granulated sugar
- 2 large eggs
- 1 teaspoon vanilla extract
- 1/2 cup milk
- 1/4 cup reserved pineapple juice
Ingredient Notes and Substitutions for Your Pineapple Upside Down Cake
A few quick notes from my test kitchen because ingredient choice truly matters here. First, that pineapple juice you reserve? It’s gold! It adds acid and flavor right into the cake batter, making it a superior Moist Pineapple Dessert compared to just using milk. Make sure you measure out 1/4 cup and set it aside before you start melting the topping butter.
Second, about the cherries: The classic recipe uses those bright red maraschino beauties, and I stick with them for that nostalgic punch. But if you’re feeling adventurous, you can absolutely substitute fresh raspberries or even small slices of fresh peach in their place. If you do that, skip draining them, but remember they might release more water, so your baking time could be slightly longer. Also, remember the butter for the topping needs to be fully melted, but the batter butter must be softened—that temperature difference is key to how the caramel forms!
How to Make Pineapple Upside Down Cake From Scratch: Step-by-Step
Now that we have our beautiful ingredients ready, let’s get down to the fun part—the assembly! Making this pineapple upside down cake from scratch is totally worth the small investment of time because that structure and flavor simply can’t be beaten. I always tell folks that this process isn’t hard; it just requires you to follow the order precisely, especially when we’re building that glorious topping layer.
We are using a standard 9-inch round pan, and trust me, resisting the urge to grease it beforehand is step one in achieving that perfect non-stick caramel finish. I put together this guide below to walk you through every single stage, from melting the butter to the big reveal. If you’re looking for simple yet impressive results for your Weeknight Dessert Ideas, this is it!
Preparing the Caramelized Fruit Layer
This layer is applied cold and baked hot, which is why the order matters so much! First, take that half cup of butter and melt it completely, then just pour it right into your ungreased cake pan. Spread it around gently to coat the bottom. Next, sprinkle that cup of packed brown sugar evenly over the melted butter—don’t glob it up anywhere!
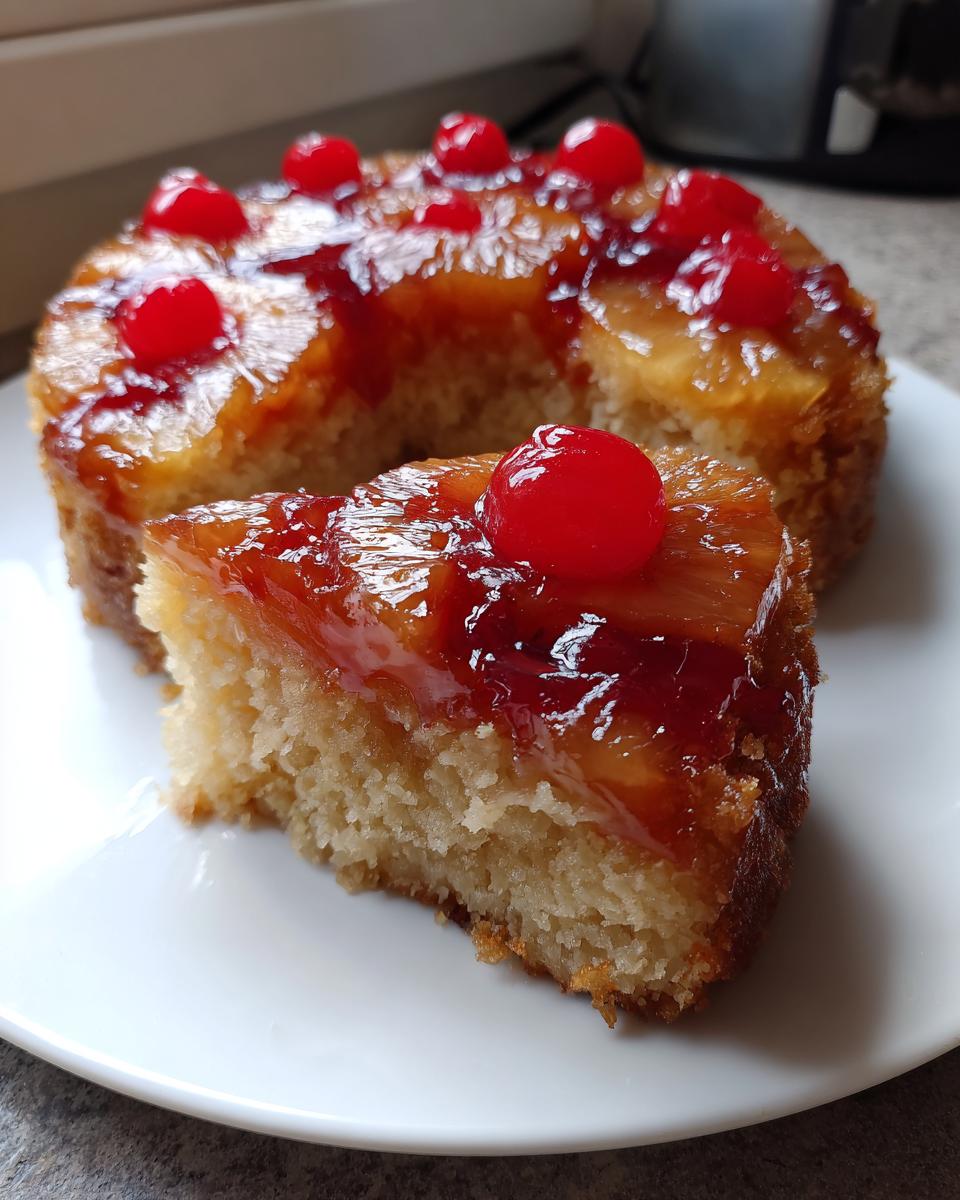
Now for the fun visual part: arranging the fruit. Take your drained pineapple slices and lay them neatly over the sugar. This is where you make your beautiful Pineapple Ring Dessert layout! Place one bright red maraschino cherry right in the middle hole of each pineapple ring. Scatter the remaining cherries wherever you have gaps around the edges. That’s it for the topping—it’s ready to hold the batter!
Mixing the Homemade Pineapple Cake Batter
We need to create an airy cake so it soaks up all that pineapple moisture later. Start by whisking your dry ingredients—flour, baking powder, and salt—in a medium bowl and set them aside. In your large mixing bowl, you must cream that softened butter and the granulated sugar together until it’s genuinely light and fluffy. Patience here pays off! Then, beat in those eggs one by one until they are fully incorporated.
Next, mix your milk with that precious reserved pineapple juice. Now you’ll add the dry mix and the milk mixture alternately to the creamed ingredients. Remember my rule: start and end with the dry stuff! **Do not overmix!** Seriously, mix only until you see no more white streaks. Overmixing develops gluten, and we want tender, not tough, when making your Homemade Pineapple Cake.
Baking and Inverting the Pineapple Upside Down Cake
Gently pour that prepared batter right over your beautifully arranged fruit. Spread it softly—don’t stir or scrape the brown sugar layer underneath! Bake at 350°F (175°C) until a wooden pick inserted in the center comes out clean. It should take about 35 to 40 minutes.
The inversion moment is critical for achieving that Perfectly Released Upside Down Cake. Once it’s out of the oven, you must let it rest, but only for ten minutes! Set that timer! Then, grab a serving plate that’s larger than your pan, place it upside down over the cake pan, and wearing sturdy oven mitts, flip the whole thing quickly and securely. Let the pan sit on the plate for a full minute before lifting it carefully. If any little piece of pineapple or cherry looks stuck, just use a tiny offset spatula to gently nudge it back into place. Voila! Tropical perfection!
Tips for Success with Your Nostalgic Cake Recipes
Making a cake this old-school brings so much joy, but when you’re dealing with hot sugar caramel, you need a few tricks up your sleeve besides just the written steps. These tips have been hard-won over many batches of this pineapple upside down cake. Don’t let my occasional kitchen chaos discourage you—practice makes for these wonderful Appetizers & Snacks!
I remember one time, I was rushing a batch for a neighborhood brunch. I thought, “Ten minutes? Pfft, I’ll give it five minutes to cool.” Big mistake! When I flipped it, the caramel was too runny, and half the topping slid right off onto the counter. It still tasted amazing (I salvaged what I could and served it in a bowl), but the presentation was a disaster. Lesson learned: always respect the ten-minute resting period!
Here are a few things you absolutely must remember:
- Don’t Use A Springform Pan: Seriously, don’t even attempt it. The juices and the caramel will leak out the bottom seam the minute that sugar melts. Stick to a sturdy 9-inch metal cake pan or a cast iron skillet for the best results.
- Use Room Temperature Eggs: I mention this in the batter section, but it bears repeating. When your butter and sugar are perfectly creamed, adding cold eggs will instantly deflate all those gorgeous air bubbles you just worked so hard to create! Let your eggs sit out for about 30 minutes first.
- The Cherry Hole Trick: If you struggle to get the cherries to stay put in the center of the rings, try this: Before you even start baking, take a clean toothpick or a small wooden skewer and gently poke it down through the center of the pineapple ring and into the brown sugar layer. This little anchor helps hold the cherry in place when the batter surrounds it.
If you want to see how another great baker handles their classic version, check out the tips over at Maryane’s site; we both agree on the richness of the brown sugar layer!
Serving Suggestions for Your Tropical Dessert Recipes
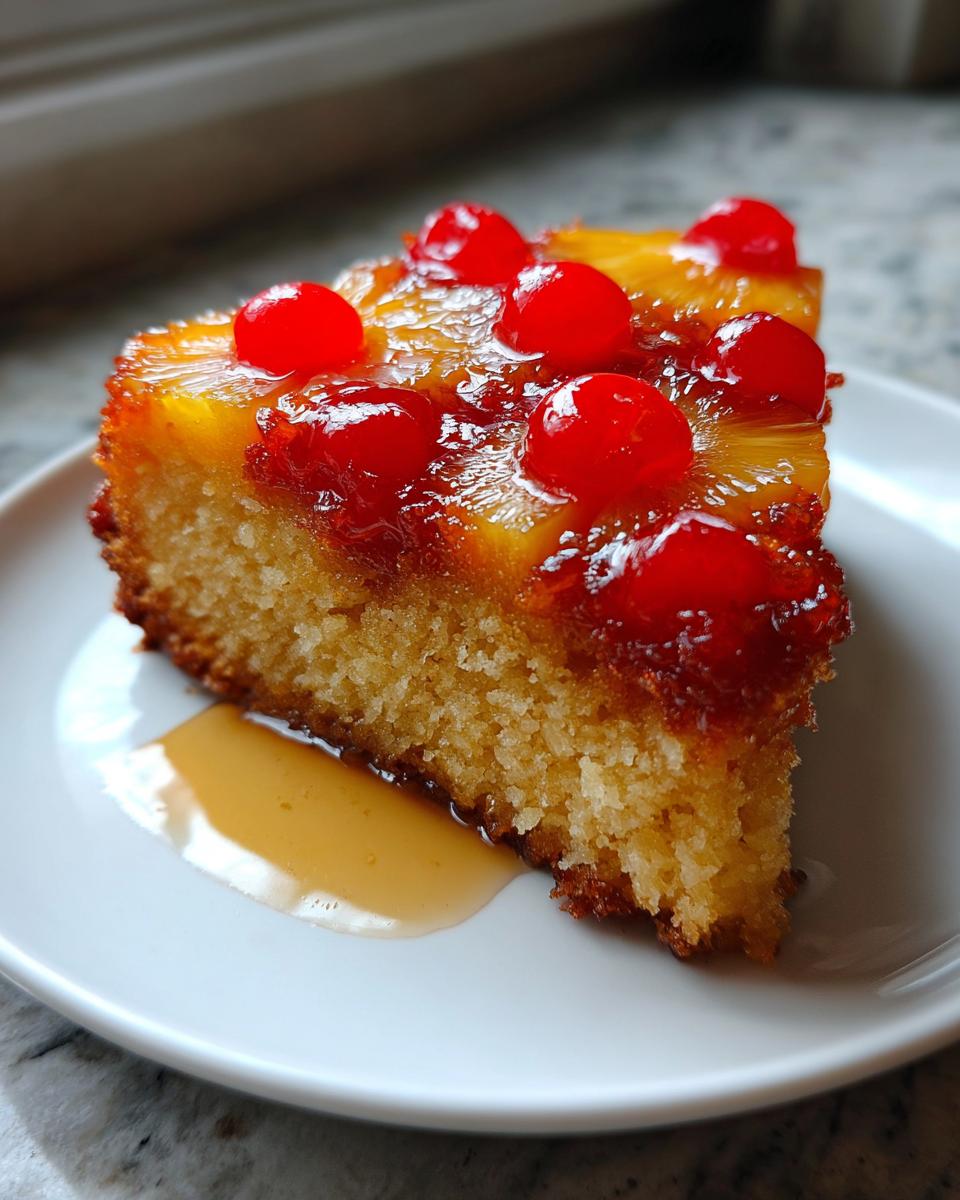
Once you flip that gorgeous pineapple upside down cake and smell that warm, buttery caramel, you’re going to want something creamy to cut through the richness! This cake is fantastic all on its own, of course. It’s already a true Potluck Showstopper Cake!
But if you’re serving it slightly warm—and you absolutely should be—a scoop of high-quality vanilla bean ice cream melts perfectly into the warm fruit topping. Honestly, that cold-and-warm contrast makes it utterly irresistible. If you prefer something lighter, a dollop of lightly sweetened fresh whipped cream works just as well. And hey, if you’re looking for another amazing warm, tropical dessert, you have to check out my recipe for Easy Bananas Foster if you want another hit of caramelized goodness!
Storage and Reheating Instructions for Pineapple Upside Down Cake
Even though this pineapple upside down cake is so good I rarely have leftovers, you might find yourself needing to store some for later—or maybe you just want to save the best slice for yourself tomorrow! Because we used real butter and fruit juice in this moist pineapple dessert, how you store it really matters to keep that tender crumb intact.
The good news is that this cake is pretty resilient! You can absolutely keep it stored loosely covered at room temperature for up to two days. Make sure it’s sitting somewhere cool, though, especially if your kitchen runs warm. The sugar in the caramel topping helps preserve it a bit, but honestly, I wouldn’t push past 48 hours on the counter if you want that fresh-baked texture.
If you know you have leftovers past that two-day mark, or if your kitchen is notoriously warm, it’s safer to cover it tightly with plastic wrap and pop it into the fridge. It will last well for about five days in the refrigerator. Yes, it will firm up a bit when it gets cold, but don’t panic about that!
How to Reheat for That Fresh-From-the-Oven Taste
Reheating is the secret handshake to taking a slightly chilled slice and making it taste like you just flipped it out of the oven. If it’s coming out of the fridge, let it sit on the counter for maybe 30 minutes first to take the deep chill off.
For the best results, I always recommend the microwave, but briefly! Place a slice on a microwave-safe plate and heat it for about 10 to 15 seconds on medium power. That little blast of heat will re-liquefy the butter and sugar in the topping and soften the cake right back up. You won’t even believe it was chilled!
If you want to warm up the whole remaining cake, wrap it tightly in foil and warm it at a low temperature—around 300°F—for about 10 minutes. Just be sure the foil is tight so the moisture doesn’t escape! Enjoy your leftovers!
Frequently Asked Questions About Pineapple Upside Down Cake
I get so many questions after people try this recipe for the first time, which totally makes sense! This is a classic, and sometimes the old ways have a few quirks. Don’t you worry, though! Whether you’re wondering about different pans or how to customize the fruit, I’ve got you covered. It’s all about making your **pineapple upside down cake** perfectly yours. If you ever have a question I haven’t covered, feel free to reach out through my Contact Page!
Can I use a cast iron skillet for this pineapple upside down cake?
Oh, yes, you absolutely can, and honestly, I love it when people make a true Skillet Pineapple Cake! Cast iron is fantastic because it holds heat so evenly, which can sometimes give you an even deeper, richer caramel than a regular metal pan once you flip it. The only caveat is that cast iron retains heat longer than aluminum or steel. That means you need to watch that 10-minute cooling time very closely—maybe even drop it to 8 minutes—or your caramel might get a little too hard. But if you nail that timing, you get the most beautiful, rustic-looking dessert!
What is the best way to make this a ‘Cherry and Pineapple Cake’?
If you prefer a heavier fruit presence or just really love those bright cherries, it’s easy to punch up the fruit ratio! To shift this to a more dedicated Cherry and Pineapple Cake, I recommend increasing your pineapple slices to about 12 or 13—just enough to almost completely cover the base without overlapping too much. For the cherries, instead of 10, try using 14 or 15. Make sure you drain them separately, though!
Here’s my pro move for color: If you use those deeply dark, alcohol-soaked Luxardo cherries instead of the bright red maraschinos, you won’t get that shocking pink color, but you’ll get this incredible, rich, almost black cherry flavor that marries beautifully with the brown sugar. It makes it feel much more sophisticated, though possibly a little less “retro.” When you increase the fruit, you might notice the cake batter seems a little thin on top, but don’t mess with the batter; trust the science! Just check for doneness a minute or two early. If you’re looking for more general tips on baking, check out this great recipe resource from Everyday Kitchen Lab!
Do I have to use brown sugar, or can I use all white sugar?
Please, if you take one piece of advice from my kitchen about this specific recipe, it’s to stick mainly with brown sugar for the topping! White sugar will melt and caramelize, sure, but brown sugar contains molasses. That molasses is what gives you that deep, chewy, complex toffee flavor that defines the best pineapple desserts. You can use granulated sugar in the cake batter part, but the topping absolutely needs that brown sugar to achieve that perfect caramelized look.
How do I know if my cake is done baking?
The wooden pick test is helpful, but for a Moist Pineapple Dessert like this, we need to look for more than just a clean pick! When the cake is done, the edges should look glossy and they will start to pull away ever so slightly from the sides of the pan—that little gap is your first sign. Also, gently tap the center. If it springs back lightly, it’s often ready. If it sinks, give it five more minutes. A slightly moist crumb means you’ve hit perfection!
Estimated Nutritional Data for This Homemade Pineapple Cake
I know some of you are thinking about nutrition while you’re planning your next potluck, and I totally get it! Developing recipes with both amazing flavor and thoughtful balancing is why I went to school for Food Science. While this pineapple upside down cake is definitely a rich, comforting treat—we are using butter and brown sugar, after all!—I wanted to give you a general idea of what you are looking at per slice.
Since this is a homemade recipe, and everyone’s ingredients vary slightly (and honestly, who measures the exact amount of caramel that drips onto their plate?), please take these numbers as a helpful guideline rather than a strict medical measurement. These estimates are based on eight standard slices from the recipe provided.
Here’s the nutritional snapshot for one slice of this delicious Tropical Dessert Recipe:
- Serving Size: 1 slice
- Calories: 380
- Fat: 19g
- Saturated Fat: 11g
- Carbohydrates: 50g
- Sugar: 35g
- Protein: 5g
- Cholesterol: 95mg
See that sugar content? That comes mostly from that beautiful, thick, caramelized topping we worked so hard to perfect! It’s a small price to pay for such a memorable, Retro Dessert Idea, if you ask me. Enjoy every bite!
Share Your Masterpiece
Whew! We did it! You’ve successfully created a stunning, showstopping, and perfectly released pineapple upside down cake! Now, the best part for me is seeing your creations. Cooking is a shared experience here at Cooking by Mia, and hearing how this recipe worked out in your kitchen is what keeps me going!
Please, after you’ve polished off that first slice warm with vanilla ice cream, take a moment to drop me a line below. I genuinely want to know: Did the caramel bubble perfectly? How did your family react to this amazing Classic Pineapple Upside Down Cake?
Your feedback—especially those star ratings—helps signal to others that this is a tested, reliable recipe worth making. If you are sharing photos on social media (and you totally should, because those caramelized rings are gorgeous!), please tag me! Let’s spread the love for these incredible Nostalgic Cake Recipes.
If you ever want to review our commitment to your privacy while you’re sharing, you can always check out the Privacy Policy linked below. Happy baking, friends!
PrintClassic Pineapple Upside Down Cake From Scratch

Make this classic pineapple upside down cake from scratch for a moist, tender dessert with a perfect caramelized fruit topping. This recipe ensures the cake releases cleanly from the pan.
- Prep Time: 20 min
- Cook Time: 40 min
- Total Time: 60 min
- Yield: 8 servings 1x
- Category: Dessert
- Method: Baking
- Cuisine: American
- Diet: Vegetarian
Ingredients
- 1/2 cup unsalted butter
- 1 cup packed light brown sugar
- 1 (20 ounce) can pineapple slices in juice, drained (reserve juice)
- 10 maraschino cherries, drained
- 1 1/2 cups all-purpose flour
- 1 1/2 teaspoons baking powder
- 1/2 teaspoon salt
- 1/2 cup unsalted butter, softened
- 3/4 cup granulated sugar
- 2 large eggs
- 1 teaspoon vanilla extract
- 1/2 cup milk
- 1/4 cup reserved pineapple juice
Instructions
- Preheat your oven to 350°F (175°C). Do not grease your 9-inch round cake pan.
- In a small saucepan over medium heat, melt the 1/2 cup of butter. Pour the melted butter into the bottom of the cake pan.
- Sprinkle the brown sugar evenly over the melted butter.
- Arrange the pineapple slices on top of the brown sugar mixture. Place one maraschino cherry in the center of each pineapple ring, and scatter the remaining cherries around the edges.
- In a medium bowl, whisk together the flour, baking powder, and salt. Set this aside.
- In a separate large bowl, cream together the 1/2 cup softened butter and the granulated sugar until light and fluffy.
- Beat in the eggs one at a time, mixing well after each addition. Stir in the vanilla extract.
- In a small bowl, whisk together the milk and the reserved pineapple juice.
- Gradually add the dry ingredients to the wet ingredients, alternating with the milk mixture, beginning and ending with the dry ingredients. Mix until just combined; do not overmix.
- Carefully pour the cake batter over the pineapple and cherry layer in the pan. Spread the batter evenly.
- Bake for 35 to 40 minutes, or until a wooden pick inserted into the center comes out clean.
- Remove the cake from the oven and let it cool in the pan on a wire rack for exactly 10 minutes.
- Place a serving plate upside down over the cake pan. Wearing oven mitts, carefully invert the pan and plate together. Let the pan sit for a minute, then gently lift the pan off the cake. If any fruit sticks, place it back onto the cake.
- Serve warm.
Notes
- For best results and to prevent sticking, do not grease the pan before adding the butter and sugar topping. The butter and sugar create a natural non-stick caramel layer.
- If you want a richer caramel flavor, you can use dark brown sugar instead of light brown sugar.
- This moist pineapple dessert is excellent served with a scoop of vanilla ice cream or whipped cream.
Nutrition
- Serving Size: 1 slice
- Calories: 380
- Sugar: 35g
- Sodium: 250mg
- Fat: 19g
- Saturated Fat: 11g
- Unsaturated Fat: 8g
- Trans Fat: 0.5g
- Carbohydrates: 50g
- Fiber: 1g
- Protein: 5g
- Cholesterol: 95mg