

Listen, when it comes to hosting, especially when the big game is on, the last thing you need is a complicated mess of pots and pans. You need food that’s going to vanish the second you put it out, and frankly, you need it *fast*. That’s why I’m convinced this chili cheese dip is the absolute champion of party appetizers. As someone who’s spent years developing reliable recipes for family gatherings, I can tell you this: it’s the ultimate, ridiculously easy 3-ingredient recipe that screams Game Day victory. Seriously, if you can stir, you can make this dip perfectly smooth and cheesy in under 20 minutes. It’s pure crowd-pleasing magic, and because I love easy recipes so much—I even have a go-to for my < caramelized onion dip—you’ll want to keep this secret close!
- Why This Ultimate Chili Cheese Dip Is Your New Game Day Favorite
- Gathering Ingredients for Your Easy Chili Cheese Dip Recipe
- How to Prepare the Ultimate Chili Cheese Dip on the Stovetop
- Alternative Method: Making Chili Cheese Dip in the Slow Cooker
- Tips for Success with Your Simple Dip Recipes
- Serving Suggestions for Your Chili Cheese Dip
- Storage and Reheating Instructions for Leftover Chili Cheese Dip
- Frequently Asked Questions About This Chili Cheese Dip
- Nutritional Snapshot of This Comfort Food Dip
Why This Ultimate Chili Cheese Dip Is Your New Game Day Favorite
Forget dipping sauces that take forever! This recipe isn’t about technique; it’s about getting maximum gooey, cheesy flavor onto a chip with zero fuss. I developed this specific version so you could focus on the party, not the stove. Knowing you can whip up something truly fantastic this fast gives you such a boost of confidence!
Speed and Simplicity: The 3 Ingredient Dip Advantage
- Seriously, it’s done in about 20 minutes total. It’s a true < Quick Appetizer.
- You only need three core items! No fancy spice racks or secret prepping required here. It’s foolproof, trust me.
The Perfect Crowd Pleaser Dip for Any Gathering
If you’re looking for amazing < Super Bowl Snacks that disappear first, this is it. It’s the ultimate < Comfort Food Dip.
- It hits that warm, savory spot everyone craves at holiday appetizer spreads.
- It’s incredibly hard to mess up, which is the best part of any party food.
Gathering Ingredients for Your Easy Chili Cheese Dip Recipe
Okay, this is where the magic of the 3-ingredient setup really shines. Because we’re keeping things so simple, the quality of what you put in truly matters. When I was perfecting this recipe, I found that using a few key elements gives you that perfect, smooth texture without needing any fussy thickeners. If you’re wondering about the chili—I strongly suggest going for one without beans. Beans tend to mess with the creamy melt of the cheese, and we want pure, velvety goodness here!
Essential Components for the Creamy Chili Dip
You won’t need a long shopping list, that’s for sure. Just grab these three stars:
- One 8-ounce package of cream cheese—make sure it’s nice and softened first!
- One 15-ounce can of chili (remember, no beans is my secret weapon here!).
- One cup of good, sharp cheddar cheese, already shredded is fine.
Ingredient Notes and Substitutions for Your Chili Cheese Dip
When I talk about chili, many people default to a specific brand, like Hormel, and it works perfectly fine in a pinch for this Quick Appetizer. However, if you have time to simmer your own, go for it—just make sure it’s thick! On the cheese front, sharp cheddar gives you the best punch of flavor to cut through the richness, but don’t be afraid to try other cheeses if you want to change things up.
For a little kick—especially if you’re setting this out for a big game—try swapping half the cheddar for Pepper Jack. That little bit of heat really wakes up the flavor in this < Comfort Food Dip, and honestly, it tastes amazing!
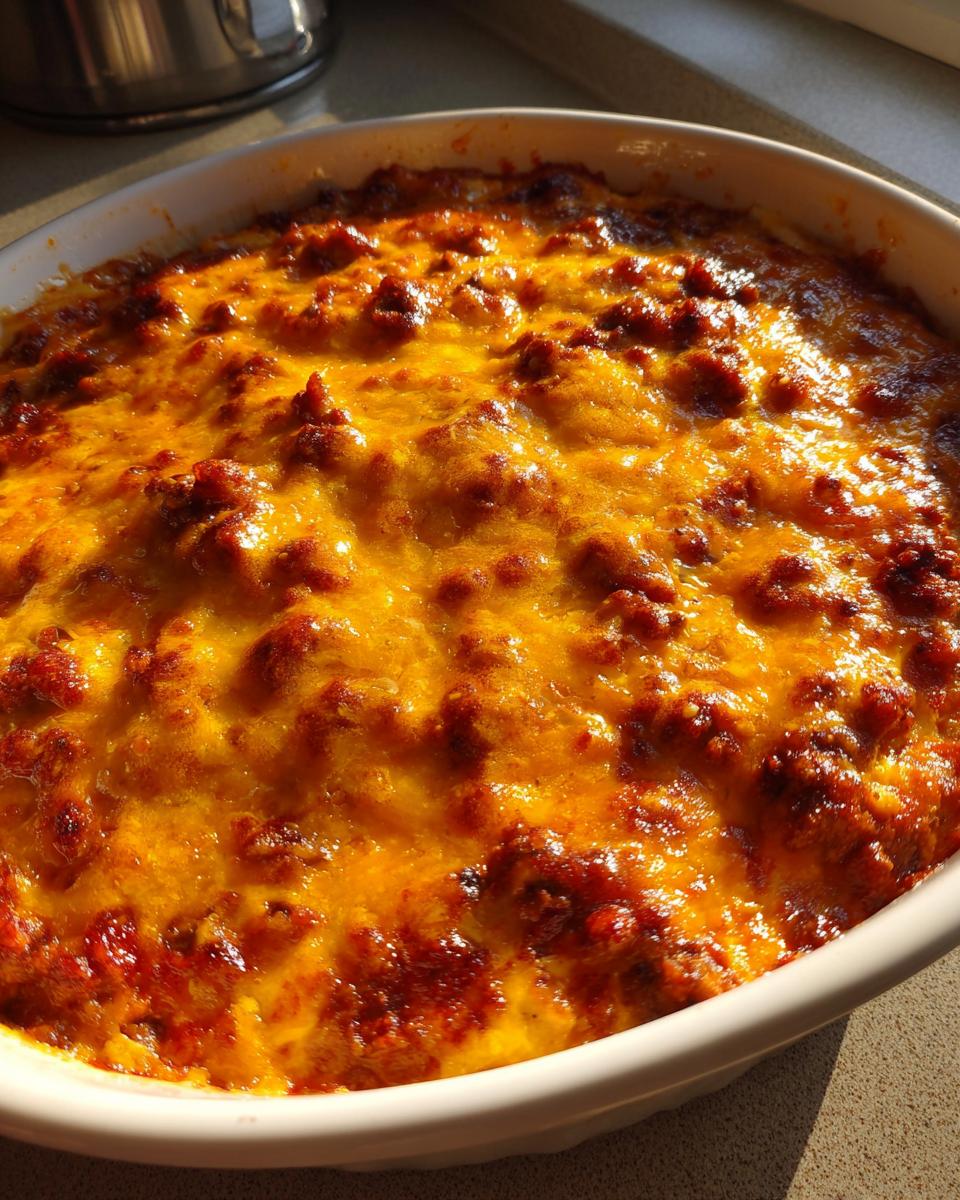
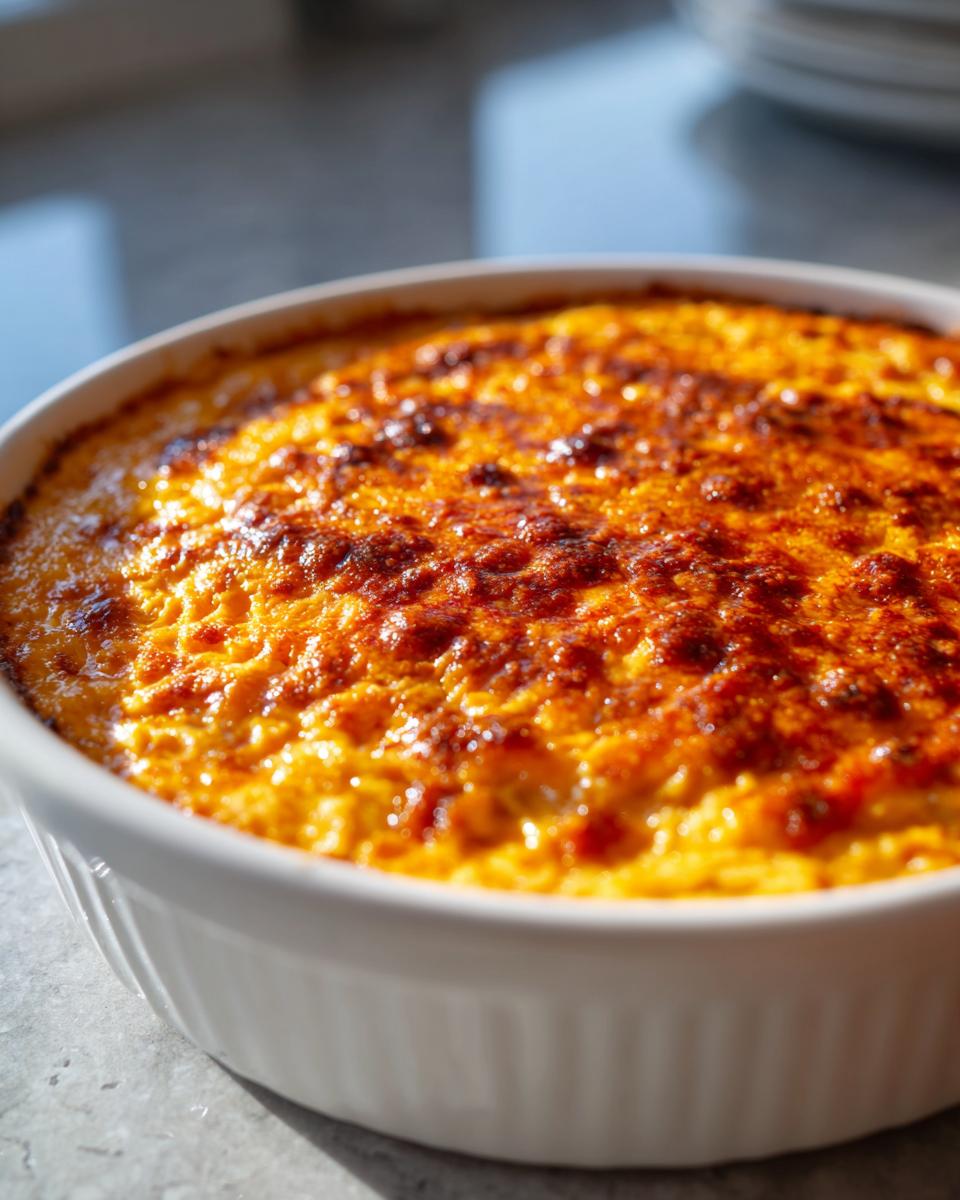
How to Prepare the Ultimate Chili Cheese Dip on the Stovetop
Okay, time to actually make this happen! Since we are aiming for that super smooth texture, we have to treat this stovetop method with a little respect—it’s not a “dump and go” situation, but I promise it’s still super fast. The key to avoiding any dreaded clumps in your < homemade alfredo sauce recipe or in this dip is temperature control. We want it warm and loving, not scorching hot and broken! You’re going to need a medium saucepan for this process, and just a bit of patience while that cheese starts to do its thing.
Step 1: Melting the Base for the Hot Cheese Dip
First things first: make sure that eight-ounce block of cream cheese has been sitting out long enough to truly soften. If it’s cold, it won’t melt evenly! Pop your softened cream cheese right into the saucepan along with that can of chili—no beans, remember? Set your stovetop heat to medium-low. You *must* stir this constantly. It might look a little weird at first, but just keep stirring until the cream cheese disappears into the chili and you have a completely uniform, smooth base. This usually takes about five minutes.
Step 2: Incorporating Cheese for the Best Cheese Dip
Once that base is smooth as silk, it’s time for the cheddar! Sprinkle in your cup of shredded sharp cheddar cheese gradually. Keep stirring constantly over that low heat. You are waiting for the cheese to melt completely into the mixture until it’s hot, bubbly, and luscious. When it’s glossy, pull it right off the heat immediately! This is your cue to grab those < because this Hot Cheese Dip won’t wait for anyone. Serve it up right away.
Alternative Method: Making Chili Cheese Dip in the Slow Cooker
I know, I know. Sometimes you’re prepping for a big tailgate or a party that lasts all afternoon, and you just can’t stand over the stove stirring for 15 minutes. That’s where the trusty slow cooker—or Crockpot, as my mom calls it—comes into play! This method is fantastic for making sure your **chili cheese dip** stays velvety smooth and perfectly hot for hours. It’s the ultimate low-effort setup for any < crockpot chili recipe situation, honestly.
If you want to go the < Slow Cooker Dip route, the process is even simpler than the stovetop version. Get out a small slow cooker—you don’t need the giant one unless you’re feeding a stadium!
First, follow my usual rule: make sure that cream cheese is truly soft. If you forgot to take it out, you can microwave it for about 15 seconds just to loosen it up. Toss the softened cream cheese, the chili (again, no beans if you can help it!), and the shredded cheddar right into the insert.
Set that beauty on LOW. You’re looking at about one to two hours. The reason we use LOW is simple: slow and steady prevents scorching on the bottom, which is the #1 way to ruin a beautiful layered dip like this! Stir it gently every 30 minutes or so, just to help things combine and melt uniformly. By the time the first guest arrives, you’ll have a perfectly melted, glorious bowl of goodness ready to go. It’s my favorite way to handle bigger crowds!
Tips for Success with Your Simple Dip Recipes
Even though this is one of my most straightforward < Simple Dip Recipes, I always have a few tricks up my sleeve to ensure it comes out exactly how I want it—that glossy, perfect restaurant texture that screams premium flavor, even though it’s made from canned goods!
Number one, and I can’t stress this enough, is that temperature control we talked about with the stovetop method. If your heat creeps up to medium or worse, medium-high, that cream cheese will seize up faster than you can say “touchdown!” Keep it low. If it starts bubbling too vigorously, just pull the pan off the burner for 30 seconds while you stir furiously, then put it back on. It’s a little dance, but it keeps the base creamy.
Now, let’s talk about making this a truly hearty, from-scratch experience. While the 3-ingredient version is my go-to for speed, sometimes you want a deeper flavor, especially if you’re making this as a main snack instead of just a side dip. My favorite upgrade is adding ground beef. I brown about a half-pound of good quality ground beef first, making sure I drain every last bit of fat off before I even think about adding it to the pan with the cream cheese and chili.
Why drain the fat? Because fat separates when it gets too hot, and excess grease floating on top of your dip looks messy and ruins that beautiful, thick melt we’re aiming for. Draining it completely ensures that the flavor of the beef blends right into the chili and cheese, making it an incredibly rich and savory experience. It turns a simple appetizer into something that feels much more substantial, which is fantastic for those long football Sundays!

One final note on cheese quality: always shred your own if you can manage it! Pre-shredded cheddar is coated in potato starch or cellulose so it doesn’t clump in the bag. That anti-clumping agent fights against the smooth melt when you’re making a **Creamy Chili Dip**. If you use block cheddar and shred it yourself, you avoid that starchy residue, and trust me, the melt is instantly silkier. It’s a small difference that shows you care about texture!
Serving Suggestions for Your Chili Cheese Dip
Okay, once your magnificent, bubbling bowl of chili cheese dip comes off the stove or out of the Crockpot, the final step is figuring out what vehicle you’re going to use to get that cheesy goodness into your mouth! This dip is so versatile and rich; it pairs perfectly with crispy, salty things, but I also love balancing that richness with something fresh. Seriously, don’t just grab the first bag of chips you see—put a little thought into your dippers!
Naturally, the first thing anyone reaches for are those sturdy tortilla chips. You’ll want the thicker, restaurant-style kind, or maybe even the scoops, because this stuff is heavy! If you’re throwing a big bash, make sure you put out a giant bowl of chips near the dip because they disappear faster than anything else. It’s just a universal rule of < party snacks, isn’t it?
But for those of us trying to balance out all that savory indulgence, I always set out a platter of fresh vegetables too. These aren’t just for looks, either. Crisp celery sticks and bell pepper strips—especially the red and yellow ones—offer a fantastic crunch and a cool, watery contrast to the warm, spicy dip. It stops things from feeling too heavy, too fast!
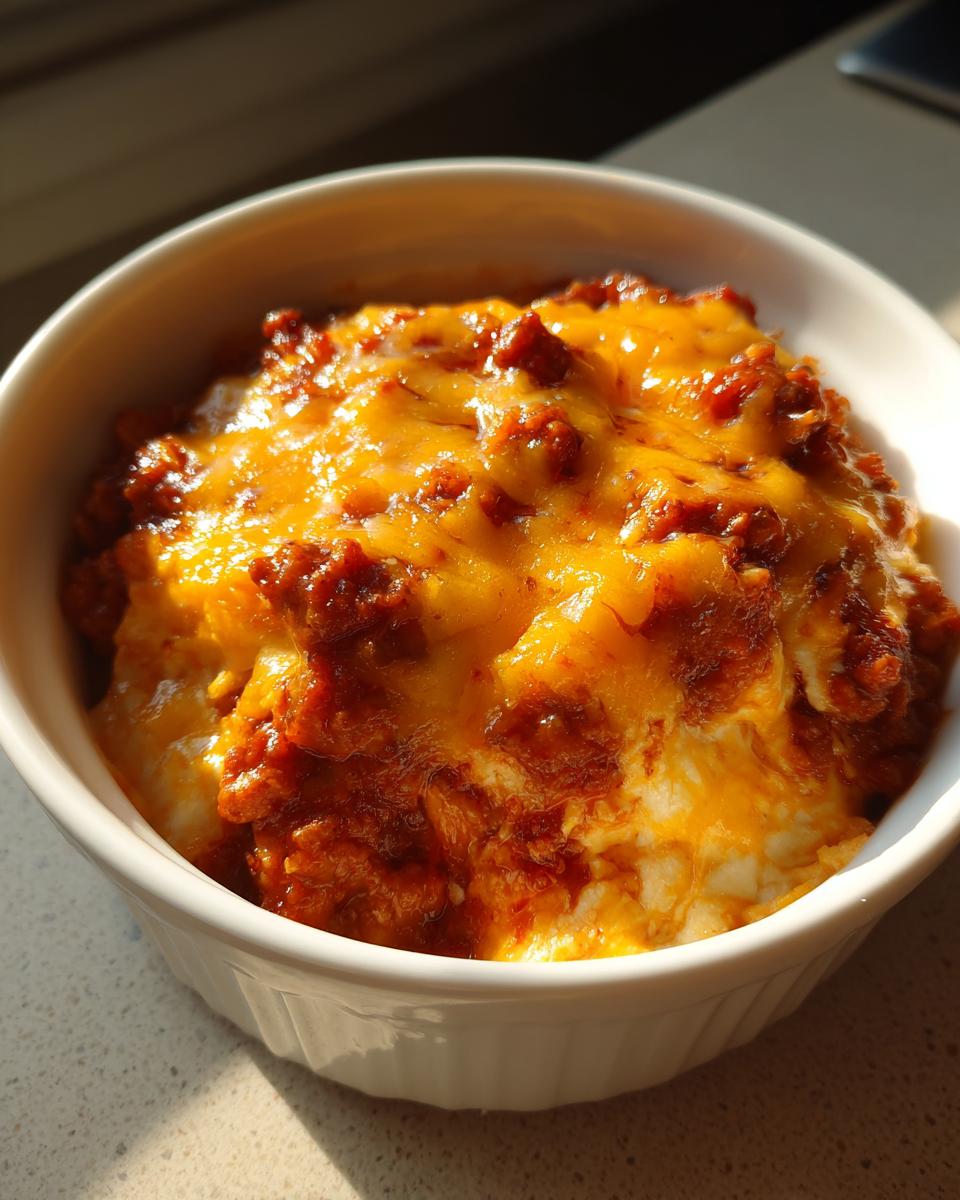
Don’t forget crackers! Simple water crackers or sturdy club crackers are wonderful because they don’t add too much flavor of their own. And, just between us, if you happen to have leftovers (which is rare because this is such a hit), I love warming up a scoop of this dip the next day and pouring it right over a baked potato. That turns leftovers into an amazing, quick lunch!
Storage and Reheating Instructions for Leftover Chili Cheese Dip
If you somehow manage to have any leftovers—which, honestly, requires superhuman willpower when this chili cheese dip is out—you definitely want to save it! It’s way too good to waste, even if the texture changes a tiny bit the next day. I always store my leftovers because they make an amazing topping for baked potatoes later in the week, just like I mentioned!
First things first: get it cooled down quickly. You shouldn’t leave this dip sitting out at room temperature for more than two hours, which as a party host, you already know! Once it’s cooled slightly, scoop any remaining dip into a clean, airtight container. Don’t just cover the bowl with foil; sealing it correctly keeps it fresher longer. Stored properly in the fridge, this dip should keep well for about three to four days. That’s plenty of time to enjoy it again!
Now, reheating is where you need to be a little gentle. The smooth texture we worked so hard to achieve on the stovetop can sometimes go a bit grainy when you blast it with high heat in the microwave. If you’re just reheating one small serving, feel free to use the microwave, but do it in short 30-second bursts, stirring well in between each cycle. Don’t rush it!
My absolute preferred method, though, is taking it back to the stove. Transfer the leftover dip back into a small saucepan. Again, medium-low heat is your friend. Add just a tiny splash—maybe a teaspoon—of milk or even a splash of water to help loosen things up as it heats. Stir constantly until it’s hot and bubbly again. It will often melt back into that beautiful consistency, ready for another round of dipping success!
Frequently Asked Questions About This Chili Cheese Dip
When you’re making delicious party food, you always end up with a few last-minute questions bubbling up. I get it! I have spent so much time tinkering with party snacks that I feel like I’ve answered every scenario in my head already. Here are some of the most common things folks ask me when they’re getting ready to serve up this fantastic, fast appetizer.
Can I make this a vegetarian Easy Chili Cheese Dip?
Oh, absolutely you can! Since this is such a foundational, simple dip, it totally adapts to a meatless lifestyle. The texture comes mostly from the cream cheese and dairy, so you don’t lose any structure at all. The trick is just swapping out the chili component. You can use any brand of vegetarian chili you like—just be sure it’s the hearty kind that has lots of texture, not just a thin sauce! This keeps it firmly in the realm of great < Easy Chili Cheese Dip territory.
What are the best Party Snacks to serve alongside this dip?
While tortilla chips are the traditional champion for any < Crowd Pleaser Dip, I always like to have options ready. For maximum dipping power, you need sturdy carriers! Think thick, sturdy tortilla chips—the scoops are fantastic. Beyond that, I always put out cold, crisp celery sticks and brightly colored bell pepper strips (red, yellow, or orange). The cool crunch of those veggies is a perfect foil to the warm, gooey cheese. Don’t forget some sturdy crackers too; they hold up really well against this thick dip!
How do I ensure my dip stays smooth and doesn’t separate?
This is the most important question for keeping this as the < Best Cheese Dip on the table! The entire process hinges on gentle heat. Remember how I stressed medium-low on the stovetop? That’s it. You need to allow the cream cheese to melt slowly into the chili base before you introduce the final cup of cheddar. If you crank that heat up, the fats start separating from the solids, and you’ll end up with a greasy, clumpy mess instead of a beautifully < Creamy Chili Dip. If it ever looks like it’s about to boil hard, immediately pull the pan completely off the heat and stir vigorously until it calms down, then put it back on low. That low, slow melt is the secret to success!
Nutritional Snapshot of This Comfort Food Dip
Now, I know when we’re making something totally decadent like this ultimate chili cheese dip, we aren’t usually counting calories—it’s a party, after all, and this is pure, rich < Comfort Food Dip! However, because I believe in providing complete information as of whole food knowledge, I’ve run the numbers based on the standard ingredients I used when testing this specific version.
Keep in mind that this is just an estimate, folks! Since we are using different brands of canned chili or maybe you decide to use Pepper Jack instead of cheddar, your final numbers are going to shift a little bit. This data is based on the three core ingredients and assumes about six servings.
- Serving Size: 1/6 of recipe
- Calories: Approximately 310
- Fat: Around 25g (with 15g Saturated)
- Carbohydrates: About 8g
- Protein: 14g
- Sodium: This is the one to watch—around 750mg, mostly from the canned chili and cheese!
If you’re adding ground beef as an upgrade, you’ll see those fat and protein numbers go up significantly. If you’re using celery sticks instead of chips to dip (smart move!), you’re offsetting a lot of those carbs! This snapshot confirms that while it’s a treat, it’s still a satisfying and robust snack for your next gathering.
PrintUltimate Easy 3-Ingredient Chili Cheese Dip Recipe (Game Day Ready)

Make this ultimate chili cheese dip using only three simple ingredients. This creamy, cheesy, and savory dip is ready in under 20 minutes, making it the perfect crowd pleaser for your next game day party or casual gathering.
- Prep Time: 5 min
- Cook Time: 15 min
- Total Time: 20 min
- Yield: 6 servings 1x
- Category: Appetizer
- Method: Stovetop
- Cuisine: American
- Diet: Vegetarian
Ingredients
- 1 (8 ounce) package cream cheese, softened
- 1 (15 ounce) can chili (no beans recommended for best texture)
- 1 cup shredded sharp cheddar cheese
Instructions
- Combine the softened cream cheese and canned chili in a medium saucepan.
- Heat the mixture over medium-low heat, stirring constantly until the cream cheese is fully melted and the mixture is smooth.
- Stir in the shredded cheddar cheese until it is completely melted and the dip is hot and bubbly.
- Transfer the dip to a serving bowl. Serve immediately with tortilla chips, crackers, or fresh vegetables.
Notes
- For a richer flavor, brown 1/2 pound of ground beef and drain the fat before adding it to the saucepan with the cream cheese and chili.
- If you prefer a slow cooker method, combine all ingredients in a small slow cooker. Cook on low for 1-2 hours, stirring occasionally until smooth and hot.
- Use a mix of cheeses, such as Monterey Jack or Pepper Jack, for a different flavor profile.
Nutrition
- Serving Size: 1/6 of recipe
- Calories: 310
- Sugar: 4
- Sodium: 750
- Fat: 25
- Saturated Fat: 15
- Unsaturated Fat: 10
- Trans Fat: 0.5
- Carbohydrates: 8
- Fiber: 1
- Protein: 14
- Cholesterol: 70