
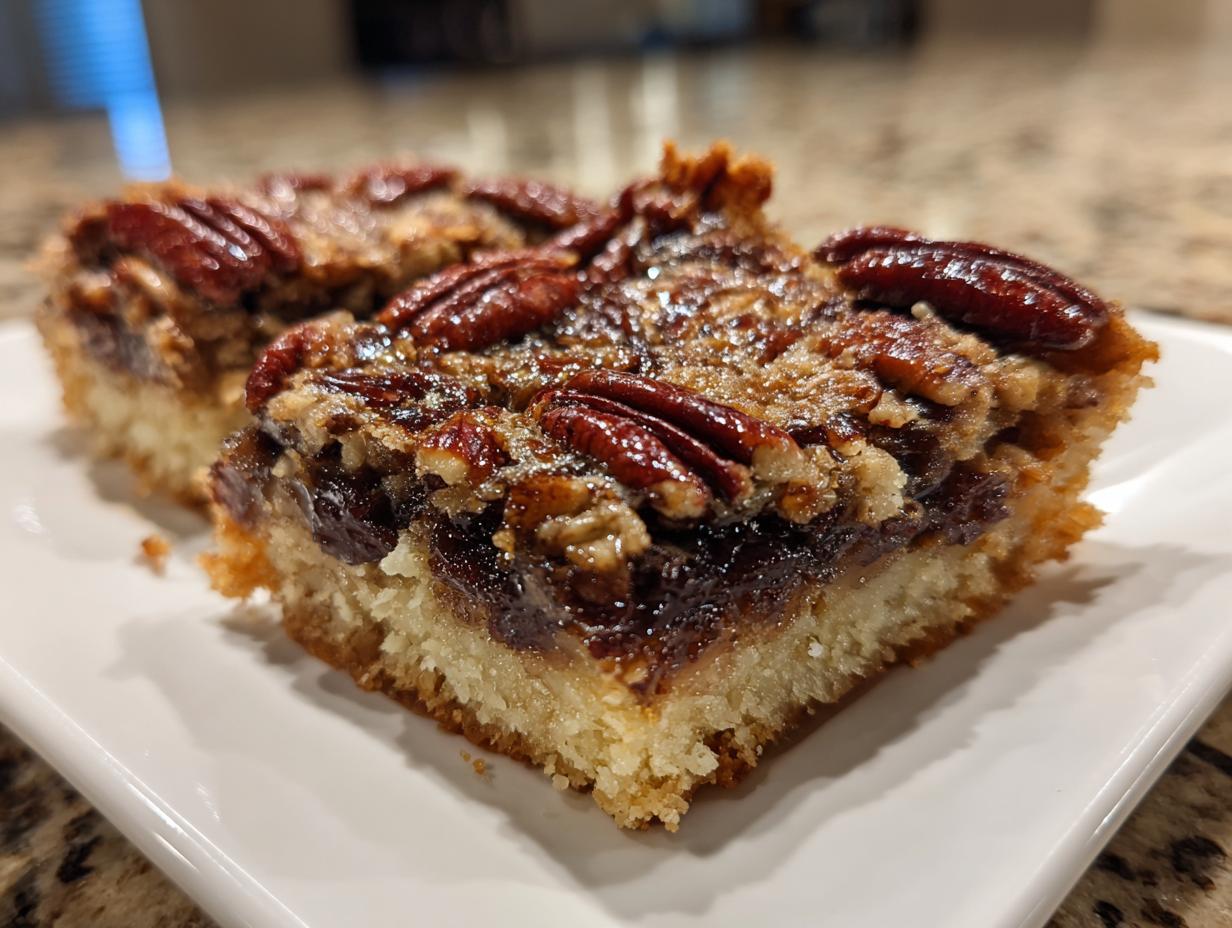
Listen, I love the drama of a full pie—I really do. But when it comes to holiday stress or just needing a quick, luxurious treat, nothing beats the convenience of a bar dessert, right? That’s why I landed on what I consider the absolute best thing you can bake: The Ultimate Easy Pecan Pie Bars with Buttery Shortbread Crust. After years developing recipes, I found the perfect blend that gives you that signature gooey texture and deep, caramelized flavor without any fuss.
Coming from a background balancing traditional Mexican flavors with my mom’s Southern comfort food, I know structure matters as much as taste. These pecan pie bars are solid, slice beautifully, and taste totally homemade. They’re proof that you don’t need hours to create something spectacular. If you’re looking for the best flavor with minimal cleanup, get ready to fall in love with this recipe. You can find more of my go-to treats right here at Cooking by Mia.
- Why You Will Love These Easy Pecan Pie Bars
- Essential Ingredients for Perfect Pecan Pie Bars
- Equipment Needed for Your Pecan Pie Bars Recipe
- Step-by-Step Instructions for Making Easy Pecan Bars
- Tips for Perfect Pecan Pie Bars Every Time
- Ingredient Notes and Substitutions for Pecan Pie Bars
- Storing and Reheating Your Homemade Pecan Treats
- Frequently Asked Questions About Pecan Pie Bars
- Serving Suggestions for Classic Pecan Squares
Why You Will Love These Easy Pecan Pie Bars
I get why people are obsessed with these little squares. Seriously, they hit every single sweet spot when it comes to easy baking, delivering all that rich flavor without the massive effort of a full pie. Here’s exactly why these pecan pie bars earned permanent residency in my baking rotation.
- Quick Prep Time is Real: We’re talking minutes to pull the crust together. You can have these beauties in the oven so fast, it’s almost scary!
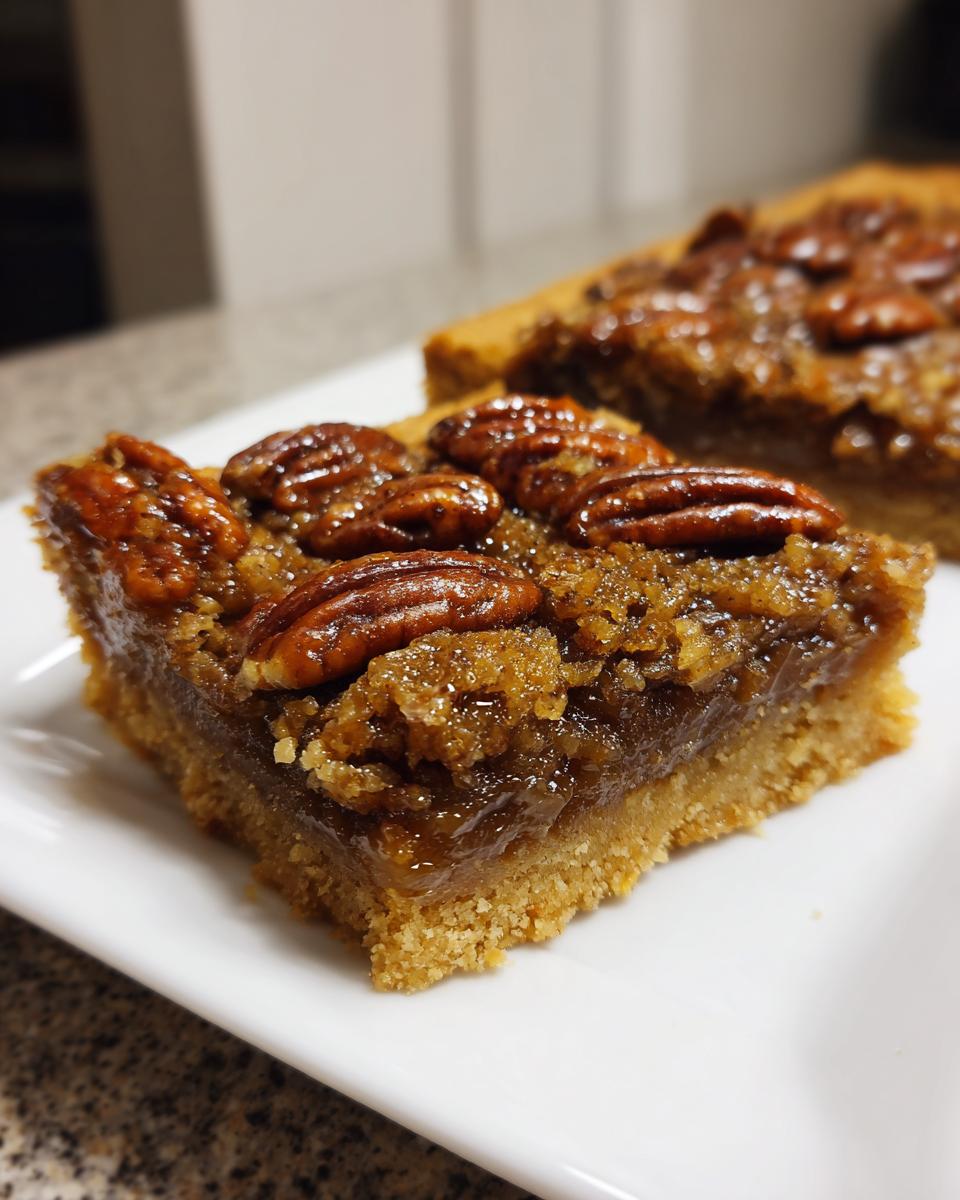
- That Flawless Buttery Crust: The shortbread base is non-negotiable for me. It bakes up crisp and tender, and it’s sturdy enough to make these gorgeous, sliceable bars.
- Gooey Filling, Guaranteed: That caramel-pecan topping has that perfect gooey texture. It sets up nicely, so you never have to worry about a runny mess.
- Party-Ready Portability: Because they are bars, they travel like a dream. Perfect for holiday parties when you need to hand off a dessert and head out the door!
Essential Ingredients for Perfect Pecan Pie Bars
When you’re making pecan pie bars, the ingredients truly speak for themselves. Since this is an easy recipe, we aren’t messing around with fancy stuff; we just need high-quality basics for that ultimate flavor. Make sure everything is measured correctly before you start whipping anything up!
- 1 cup unsalted butter, softened (This is crucial for that crust!)
- 1/2 cup granulated sugar for the base structure
- 1 cup all-purpose flour
- 1/4 teaspoon salt (for the crust)
- 1 cup packed light brown sugar (Use “packed”—it makes a difference in the gooeyness!)
- 1/2 cup light corn syrup (This is the secret sauce for the gooey texture!)
- 2 large eggs, lightly beaten
- 1 teaspoon vanilla extract
- 1/4 teaspoon salt (for the filling)
- 1 1/2 cups pecan halves
Equipment Needed for Your Pecan Pie Bars Recipe
You don’t need a million gadgets to make these pecan pie bars, which is part of why I love them so much for weeknight baking or when company shows up unexpectedly. I always have this basic list of tools ready to go!
Make sure you have these few key items handy before you even preheat the oven:
- A standard 9×13 inch baking pan. This size is perfect for getting those thick, sturdy bars!
- Parchment paper is your best friend here. Don’t skip it! We use it with an overhang so you can lift the entire slab out later like a cake.
- A medium mixing bowl for the crust mixture.
- A separate bowl, preferably a medium-sized one, for whisking up that delicious, gooey filling.
- A sturdy whisk. We need to get those eggs and syrups incorporated well, so a standard fork won’t quite cut it for the filling!
- A pastry blender or even just a fork if you don’t have one specialized for cutting butter into flour for the crust.
Step-by-Step Instructions for Making Easy Pecan Bars
Okay, buckle up, because this is where we turn simple ingredients into those incredible pecan pie bars that everyone fights over at the party! The process is super straightforward, which means less time fussing and more time tasting. We’re starting high and hot at 350°F (175°C) to get that crust just right. Remember to line your 9×13 pan with parchment paper, letting those sides hang over—that’s our built-in handle later on. If you’re looking for more stress-free recipes, check out some of my favorite easy holiday baking ideas!
Preparing the Buttery Shortbread Crust
First up is our powerhouse base. In your bowl, toss together the softened butter, granulated sugar, flour, and the first pinch of salt. Honestly, my favorite way to mix this is just using my hands or a pastry blender until it looks like coarse, happy crumbs. You really need to press this mixture firmly and evenly into the bottom of that prepared pan. Don’t be shy; pack it down! This layer goes into the oven for a quick 15 minutes to get lightly golden. That head start is what keeps this buttery shortbread crust from getting soggy later.
Creating the Gooey Pecan Filling and Assembly
While the base is doing its thing, whisk up your filling in that other bowl. You want the brown sugar, corn syrup, eggs, vanilla, and the final bit of salt completely combined—no lumps allowed! Pull that hot crust out when the timer dings. Now, quickly sprinkle your pecan halves evenly over that warm base. Immediately follow that up by slowly pouring the liquid filling mixture right over the nuts. Try to get it even so it bakes consistently. Pop it back in the oven for about 25 to 30 minutes. You are looking for edges that look set and slightly brown, but the very center should still jiggle just a tiny bit when you gently nudge the pan. That little softness means gooey goodness!

Cooling and Cutting Your Sliceable Pecan Squares
Here is the hardest part, and you must trust me on this step: DO NOT RUSH THE COOLING! If you try to cut these warm, they will smear everywhere and you’ll end up with pecan soup. Let these sliceable pecan squares cool completely—and I mean completely—on a wire rack. Several hours, or even overnight if you can manage it, is best. Once they are totally chilled and firm, grab those parchment overhangs; they act like handles, lifting the entire slab right out of the pan. Now you can use a big, sharp knife to slice them into perfect squares. Enjoy the clean cuts!
Tips for Perfect Pecan Pie Bars Every Time
Getting truly perfect pecan pie bars—the kind that slice cleanly and don’t end up a sticky mess—comes down to just a few tiny tricks that my years in the kitchen taught me. Honestly, you’ve got the right recipe, so now we just need to master the execution!
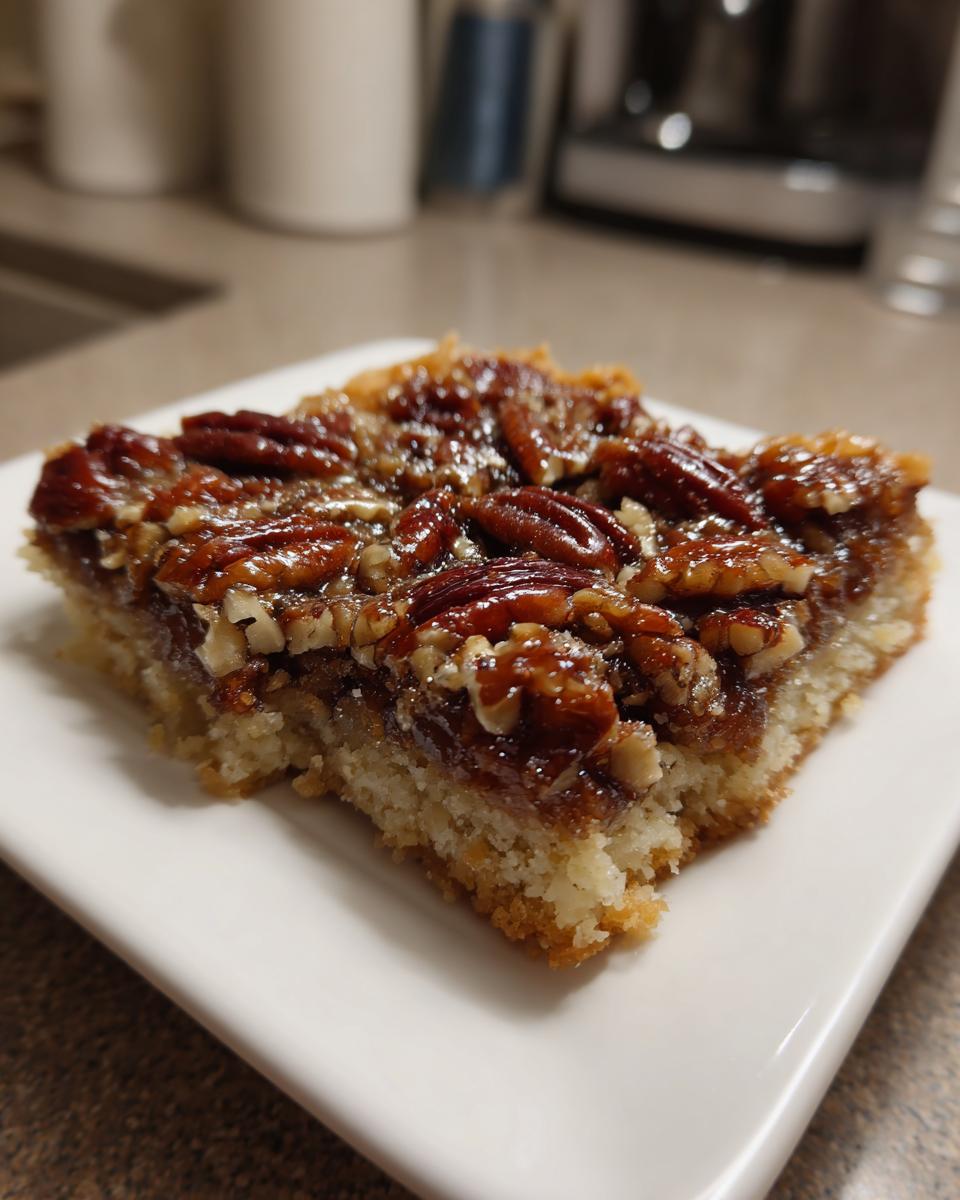
First, I highly, highly recommend toasting your pecans. You don’t have to go crazy, just 5 minutes in the oven while your crust bakes. It really wakes up their nutty flavor, making the whole bar taste richer. Plus, those toasted nuts hold up better in the gooey filling, keeping their crunch!
The second biggest success factor? Patience during cooling. You simply cannot slice them warm; you’ll just ruin the beautiful buttery shortbread crust base. Let them set up fully. If you want dependable results every time, I often follow some of my own tips found in my guide to simple baking recipes. A perfectly cooled bar is the secret to a beautiful slice, which is what everyone wants to see when you bring these delicious twist on a classic dessert out!
Ingredient Notes and Substitutions for Pecan Pie Bars
I always get questions about the filling, especially about corn syrup. Listen, I know some folks shy away from it because it sounds industrial, but for true, classic, gooey pecan pie bars, light corn syrup is the key player!
It doesn’t crystallize like plain sugar syrup does, and that’s what keeps the filling liquid and luscious instead of turning grainy and hard once it cools. It’s the magic that stops these bars from becoming rock-hard! If you absolutely, positively must avoid it, you can try substituting it with maple syrup or even golden syrup, but be warned—the texture might change slightly, maybe leaning a touch firmer, though it will still taste amazing. You need that specific chemical structure for the best caramelization, trust me.
Now, let’s talk nuts! While pecans are the star here, you can definitely mix things up if you need to. Walnuts are a fantastic swap, giving you a slightly earthier, more robust crunch. If you’re dealing with allergies or just want a totally different vibe, I’ve heard whispers of people making these with chocolate chips mixed into the filling instead of nuts entirely. That would turn them into an incredibly decadent square, possibly calling for a tweak to the bake time, but it’s certainly worth experimenting with if you want a fun twist on this delicious twist on a classic dessert.
Storing and Reheating Your Homemade Pecan Treats
I know you’re going to be tempted to eat all these pecan pie bars right out of the oven—I totally get it! But the beauty of a good bar recipe is that they are fantastic for making ahead. This is why I always preach about recipes that are perfect for your make-ahead dessert bars rotation!
The good news is that these slices hold up beautifully. Once they are completely cool—and remember, they *must* be cool—slide them into a truly airtight container. I usually layer them between sheets of wax paper just to make sure that gooey topping doesn’t stick to the next layer of nutty goodness. You can keep them right there on your counter at room temperature.
I’ve found that they honestly taste almost better the second day once the filling has fully settled its flavor. They keep really well this way for up to four days. Seriously, they never last that long in my house, but they are great for potlucks or just having a quick, sweet treat ready for when that 3 PM slump hits. Reheating isn’t really necessary; these homemade pecan treats are best served at room temperature, that’s when that buttery shortbread crust has the perfect contrast to the sticky filling!
Frequently Asked Questions About Pecan Pie Bars
I always get messages asking for clarification on the tricky bits, which is totally fair! Even the best pecan pie bars can have little hiccups if you rush a step. Here are the top questions I get about making these quick dessert bars perfectly every time.
Why are my pecan pie bars runny after baking?
This is almost always an issue of impatience! If your bars are runny, it usually means one of two things: either you didn’t bake them long enough, or you cut into them while they were still warm. That gooey filling needs time to set up, even after it comes out of the oven. I always wait until they are completely cool—like, refrigerated cool sometimes—before I even think about slicing. Remember, the center should still look a little soft when you pull them out, but they firm up as they cool down. Trust the process!
Can I substitute corn syrup in this recipe?
As I mentioned before, corn syrup is the magic behind that classic, non-grainy gooeyness, but I know some folks prefer not to use it. If you must substitute, try using pure maple syrup or golden syrup. However, these classic pecan squares might not set up quite as firmly, and the flavor profile will definitely shift to be more maple-forward. It won’t be bad, but it won’t be the exact old-fashioned flavor we are aiming for in this pecan pie bars recipe.
Can I freeze these easy pecan bars?
Yes, these freeze wonderfully! They hold up so well because of that shortbread crust. I usually bake them, let them cool totally, cut them into individual squares, and then wrap each one tightly in plastic wrap or foil. Then, I place the wrapped squares inside a heavy-duty freezer bag. They stay great for about three months! When you want one, just let it thaw on the counter for an hour or so. They are such a perfect make-ahead dessert for parties.
Do the pecans need to be toasted before baking?
Toasting them is highly recommended, but not strictly necessary if you are in a huge rush! If you toast them lightly first (maybe 5 minutes while the crust is baking), it really amps up the flavor of the nuts, adding a deeper, roasted note that complements the brown sugar filling perfectly. If you skip toasting, you’ll still have delicious homemade pecan treats, just slightly milder in nut flavor.
Serving Suggestions for Classic Pecan Squares
Once you’ve managed to cool these beauties and slice them into perfect little Classic Pecan Squares, the only question left is how to serve them! Because these bars are so rich—that buttery shortbread crust paired with that sweet, gooey filling—they pair wonderfully with something simple and cool to cut through the richness.
Here are my absolute favorite ways to set up a platter that will have people reaching for seconds:
- A Scoop of Vanilla: Seriously, you cannot beat the combination. A scoop of high-quality vanilla bean ice cream melting just slightly over a warm (after just sitting out for 15 minutes) bar is pure heaven. It’s a classic pairing for a reason!
- Fresh Whipped Cream: If you want something lighter than ice cream, whip up heavy cream with just a touch of powdered sugar and maybe half a teaspoon of vanilla. Spoon a dollop on top right before serving. It looks elegant and tastes incredible with the caramel notes.
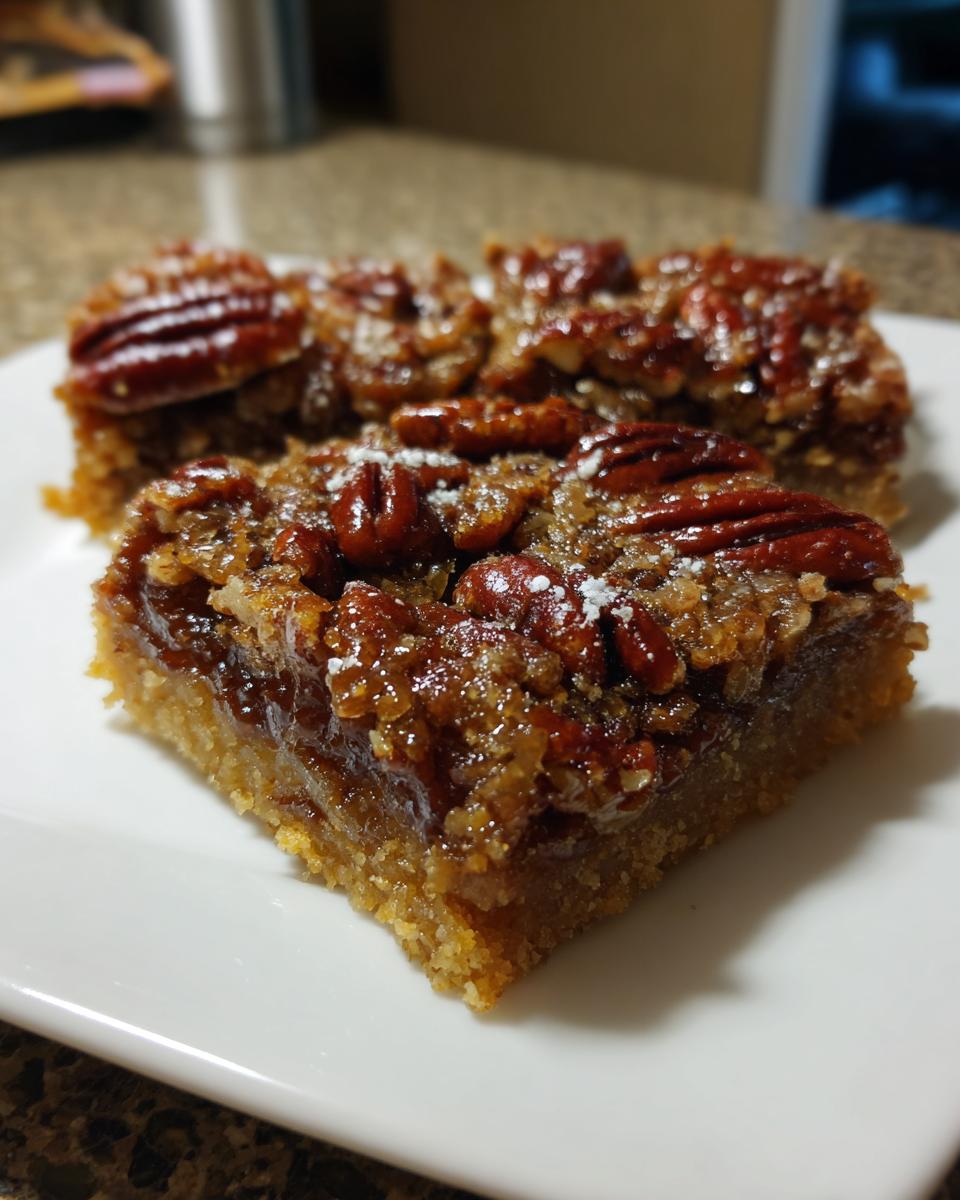
- A Dusting of Powdered Sugar: Sometimes simple is just *better*. After you cut your pecan pie bars, use a small fine-mesh sieve to dust the entire tray lightly with powdered sugar. It looks professional and adds a hint of visual contrast without adding more sweetness to the filling itself.
- Pair it with Coffee: If you’re serving these after dinner, make sure you have good, strong coffee ready. The bitterness and warmth of a fresh cup are the perfect foil for the intense sweetness we’ve got going on here in these rich bars.
These little bites are amazing on their own, of course, but having one of these simple accompaniments makes them feel like a spectacular, finished dessert spread for your next gathering. Check out more of my ideas for easy desserts that won’t stress you out when company is coming over at Cooking by Mia!
PrintThe Ultimate Easy Pecan Pie Bars with Buttery Shortbread Crust

Make these simple pecan pie bars for a portable, delicious dessert. They feature a rich, gooey pecan filling over a buttery shortbread crust, capturing the classic flavor of pecan pie in an easy, sliceable format perfect for holidays or potlucks.
- Prep Time: 15 min
- Cook Time: 45 min
- Total Time: 60 min
- Yield: 24 servings 1x
- Category: Dessert
- Method: Baking
- Cuisine: American
- Diet: Vegetarian
Ingredients
- 1 cup unsalted butter, softened
- 1/2 cup granulated sugar
- 1 cup all-purpose flour
- 1/4 teaspoon salt
- 1 cup packed light brown sugar
- 1/2 cup light corn syrup
- 2 large eggs, lightly beaten
- 1 teaspoon vanilla extract
- 1/4 teaspoon salt
- 1 1/2 cups pecan halves
Instructions
- Preheat your oven to 350°F (175°C). Line a 9×13 inch baking pan with parchment paper, leaving an overhang on the sides for easy removal.
- Prepare the shortbread crust: In a medium bowl, combine the softened butter, granulated sugar, flour, and 1/4 teaspoon salt. Mix with a fork or pastry blender until the mixture resembles coarse crumbs.
- Press the shortbread mixture evenly into the bottom of the prepared baking pan. Bake the crust for 15 minutes until lightly golden.
- While the crust bakes, prepare the filling: In a separate bowl, whisk together the brown sugar, corn syrup, eggs, vanilla extract, and the remaining 1/4 teaspoon salt until well combined.
- Remove the crust from the oven. Sprinkle the pecan halves evenly over the hot crust.
- Pour the liquid filling mixture slowly and evenly over the pecans.
- Return the pan to the oven and bake for 25 to 30 minutes, or until the filling is set and the edges are lightly browned. The center should still look slightly soft.
- Let the bars cool completely in the pan on a wire rack. This step is important for clean slicing.
- Once fully cooled, use the parchment paper overhang to lift the bars out of the pan. Cut into squares or sliceable pecan squares.
Notes
- For the best texture, allow the bars to cool completely, preferably for several hours or overnight, before cutting.
- If you prefer a richer flavor, you can toast the pecan halves lightly before adding them to the filling.
- These make-ahead dessert bars store well in an airtight container at room temperature for up to four days.
Nutrition
- Serving Size: 1 bar
- Calories: 240
- Sugar: 18g
- Sodium: 85mg
- Fat: 14g
- Saturated Fat: 6g
- Unsaturated Fat: 8g
- Trans Fat: 0g
- Carbohydrates: 28g
- Fiber: 1g
- Protein: 4g
- Cholesterol: 40mg