
The holidays just aren’t the holidays for me unless I’ve got a pitcher chilling in the fridge! I remember seeing all those cartons of eggnog at the store growing up, but honestly, nothing prepared by a machine can touch what you make right here at home. Forget those overly sweet, watered-down versions; this homemade eggnog recipe is the richest, creamiest, smoothest drink you’ll ever taste. It truly feels like a slice of tradition, and whenever I make it, I’m right back in the kitchen learning from my family. It’s my absolute favorite way to kick off the season!
- Why This is the Best Homemade Eggnog Recipe You Will Ever Make
- Gathering Ingredients for Your Classic Eggnog Recipe
- Step-by-Step Instructions for Perfect Stovetop Eggnog
- Making Bourbon Eggnog: Adding Holiday Cheer to Your Eggnog
- Easy Eggnog Recipe Without Alcohol (Amish Style)
- Dietary Variations: Dairy Free Eggnog and Sugar Free Eggnog Options
- Tips for Success When Making Your Eggnog
- Serving Suggestions for Your Festive Eggnog
- Storage and Reheating Instructions for Homemade Eggnog
- Frequently Asked Questions About Eggnog
- Estimated Nutritional Data for This Eggnog Recipe
- Share Your Experience Making This Eggnog
Why This is the Best Homemade Eggnog Recipe You Will Ever Make
Okay, I know everyone says *their* recipe for **classic eggnog** is the best, but trust me, this one stands up to the test. It’s completely different from anything you grab off the shelf. My formal training in Food Science really helped me figure out the *why* behind the best tastes, and combining that know-how with my family’s traditions just makes this incredible.
- It is unbelievably creamy eggnog—no comparison to thin, watery store versions.
- The flavor is perfectly complex; not just sweet, but warming and aromatic.
- It feels authentic, like an old fashioned eggnog that takes time and care.
- It comes together shockingly fast before the long chill time!
Achieving Perfect Creamy Eggnog Texture
The secret to that velvety mouthfeel? We only use the egg yolks here, not the whites! The yolks contain all the fat and lecithin needed to emulsify beautifully when we gently heat the mixture. This cooks the yolks safely, giving you that thick, custardy texture you associate with the best eggnog. It’s science, but it tastes like pure holiday magic!
Flavor Profile: Classic Spiced Eggnog Balance
We keep the spice level just right. It’s warm, nutty, and incredibly inviting. The real star here is the nutmeg—please, please use freshly grated nutmeg if you can! It releases oils that make the whole drink smell like Christmas morning. Everything balances out so nicely, especially when you give it that essential overnight rest in the fridge.
Gathering Ingredients for Your Classic Eggnog Recipe
Alright, let’s talk about what goes into this glorious batch of homemade eggnog recipe. Quality really matters here because the ingredients are so simple; there’s nowhere for anything mediocre to hide! You’ll need six yolks—yes, just the yolks—along with whole milk and heavy cream for that signature richness. Don’t even think about substituting those fats if you want the best texture!
Ingredient Notes and Substitutions for Homemade Eggnog
My biggest non-negotiable? Freshly grated nutmeg! You just can’t get that incredible sharp, warm fragrance from pre-ground stuff sitting in your spice cabinet. If you skip this, you miss half the experience. For now, just gather what you need for the base recipe. We’ll talk about swapping out dairy or sugar later on in the specialized sections, but for the *classic* version, we stick to the dairy and sugar listed.
Step-by-Step Instructions for Perfect Stovetop Eggnog
Okay, this is where we turn simple ingredients into holiday heaven! We are cooking this low and slow on the stovetop, which makes this recipe feel incredibly hands-on and rewarding. Remember, we aren’t aiming for scrambled eggs here, which is why we have to be careful when blending the hot milk with the yolks. Follow these steps exactly, and you’ll have the creamiest base possible for your spiced eggnog.
Tempering the Yolks: Essential for Smooth Eggnog
First, whisk those yolks and sugar until pale—that’s our starting point. Now comes the crucial part: tempering. Take about a cup of your warm milk mixture—it needs to be hot but not boiling—and start pouring it in a super slow, thin, steady stream into the yolk bowl. You absolutely have to whisk constantly while you pour! This gently raises the temperature of the eggs without shocking them. Once that cup is incorporated, pour that slightly warmed egg mixture back into the saucepan with the rest of the milk. See? No lumps!
Cooking and Thickening the Eggnog Base
Now put that saucepan back over low heat. This step tests your patience, but slow and low is the only way to go. Use a nice wooden spoon and just keep stirring, making sure you scrape the bottom so nothing sticks and burns. You’re looking for the moment where the mixture thickens enough to coat the back of your spoon evenly. The goal temperature is right around 170°F, but if you don’t have a thermometer, trust the spoon test. The second you see that coating, take it OFF the heat immediately. Never let it boil, or we’re back to scrambled eggs, and that ruins the whole base for our homemade eggnog recipe!
Making Bourbon Eggnog: Adding Holiday Cheer to Your Eggnog
Now we get to the fun part: turning this beautiful creamy base into a true holiday cocktail! If you’re looking to make a spirited batch of **bourbon eggnog**, the timing here is super important. You always wait until the mixture has been cooked, removed completely from the heat, and all the spices have been stirred in to add the liquor.
Why wait? If you add bourbon or spiced rum while the custard is cooking, the alcohol can actually interfere with the proteins setting properly, and we want that smooth texture! Once the alcohol is added, give it a good stir. Since spirits tend to dull sweetness, I sometimes add just a tiny bit more sugar if I’ve spiked a large batch, but taste it after it’s chilled first. This spiked version is absolutely essential for cozy nights by the tree—you can check out great ideas for classic spiced eggnog with a twist if you need more inspiration!
Easy Eggnog Recipe Without Alcohol (Amish Style)
Not everyone wants or needs liquor floating around their **holiday drinks**, especially if little ones—or friends who don’t drink—are around! I want to assure you right now: omitting the bourbon or rum does absolutely nothing to hurt this recipe. Seriously! When you leave out the spirits, what you are left with is the purest form of this classic beverage.
This creates what many people refer to as an **old fashioned eggnog**. It’s just that rich, perfectly cooked, vanilla-and-spice custard base. It’s deeply comforting, and by focusing purely on the creamy texture and the spices, it becomes fantastic for family gatherings or morning brunch. If you look up traditional recipes, you’ll often find that the Amish style relies purely on that cooked yolk base and amazing spices—no booze involved at all! You can even find authentic inspiration for that rich, non-alcoholic style here. It proves that sometimes, the simplest versions are truly the best!
Dietary Variations: Dairy Free Eggnog and Sugar Free Eggnog Options
I totally get it—the holidays are for everyone, and we should all be able to enjoy that cozy, rich flavor! Making adjustments to this **homemade eggnog recipe** to fit different needs is surprisingly simple. If you’re navigating dairy sensitivities, you can absolutely make a wonderful **dairy free eggnog**.
For the dairy swap, I suggest using a mixture of full-fat oat milk or cashew milk instead of the whole milk, and find a high-quality canned coconut cream or cashew cream for the heavy cream portion. You want that high-fat content to keep the custard rich! You generally don’t need to adjust the cooking method at all; just treat those milks like the originals.
If you’re keeping things low-carb or **sugar free eggnog** focused, you can swap the granulated sugar for a good quality, granular keto-friendly sweetener. Check the package conversion, but usually, you substitute cup-for-cup. That way, you keep the beautiful, velvety texture that comes from cooking the yolks properly! If you need inspiration for these swaps, you can find some great guidance on these modifications for dairy-free and for sugar-free options.
Tips for Success When Making Your Eggnog
You’ve cooked it perfectly, you’ve spiced it beautifully, and maybe you even added some Bourbon—now what? Don’t rush it! The biggest mistake people make with eggnog is trying to drink it warm or immediately after it comes off the stove. Trust me, that liquid sunshine needs time to settle down and get happy.
The chilling time is actually as important as the cooking time for getting that truly incredible, thick texture. You must refrigerate this for at least four hours, but truly, overnight is the magic number. When it chills, the flavors finally get to meld together—that cinnamon, nutmeg, and vanilla all integrate into the richness of the cream. If you skip the chill, the spices taste harsh and the texture feels thin.
Look, I know you want to taste it right away, but be disciplined! Pour it into a clean pitcher, cover it tight, and forget it’s in the fridge until tomorrow. Think of it like a slow-simmered sauce; it only gets better with patience.
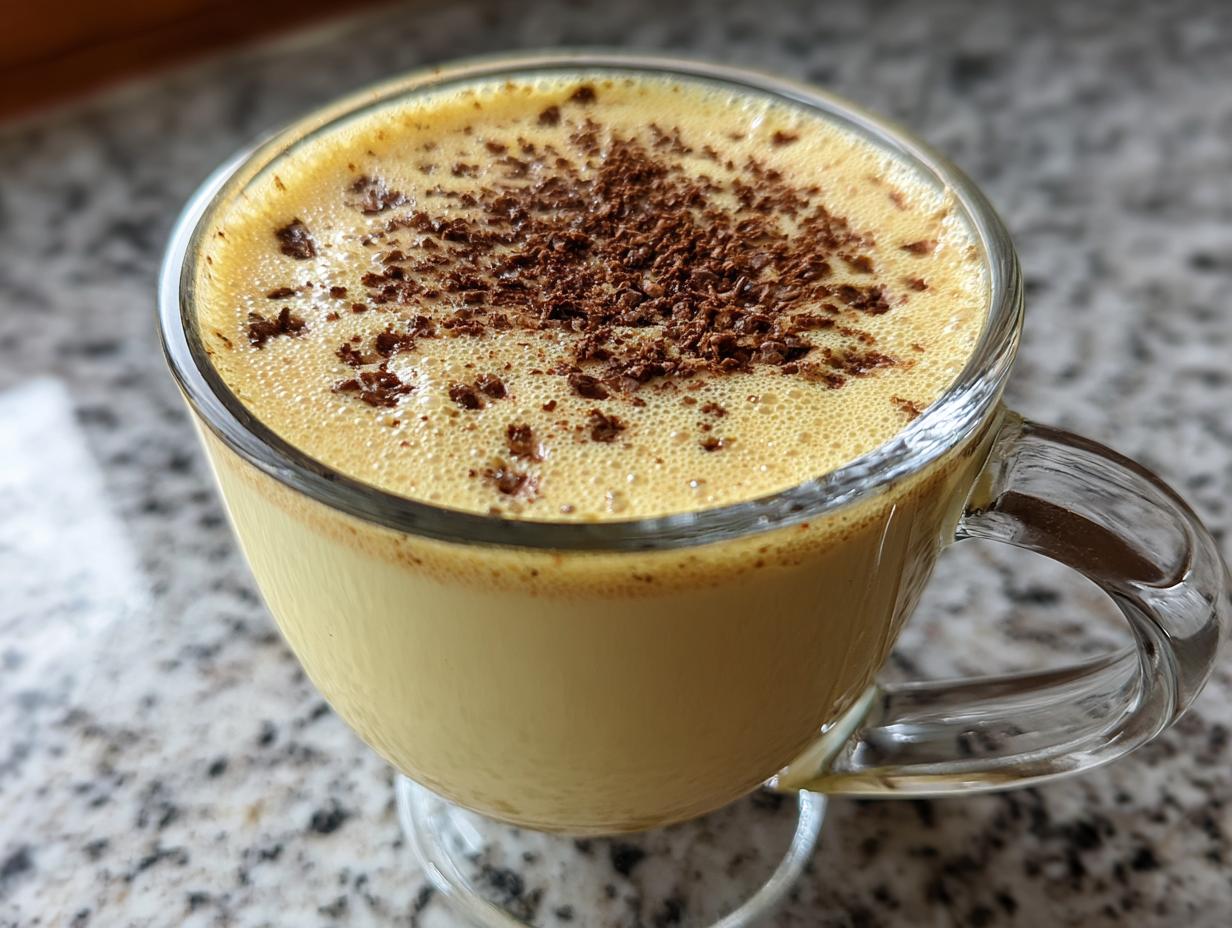
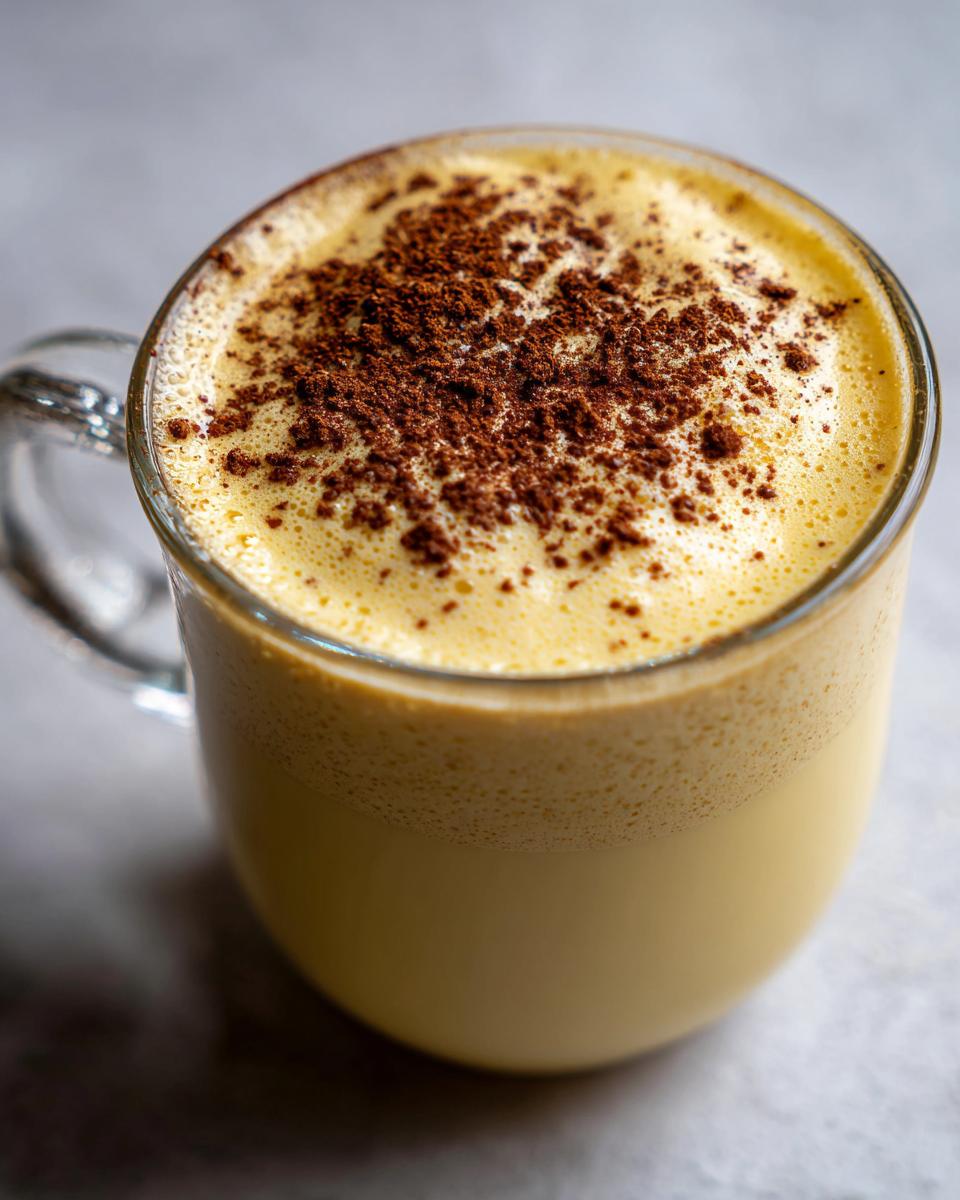
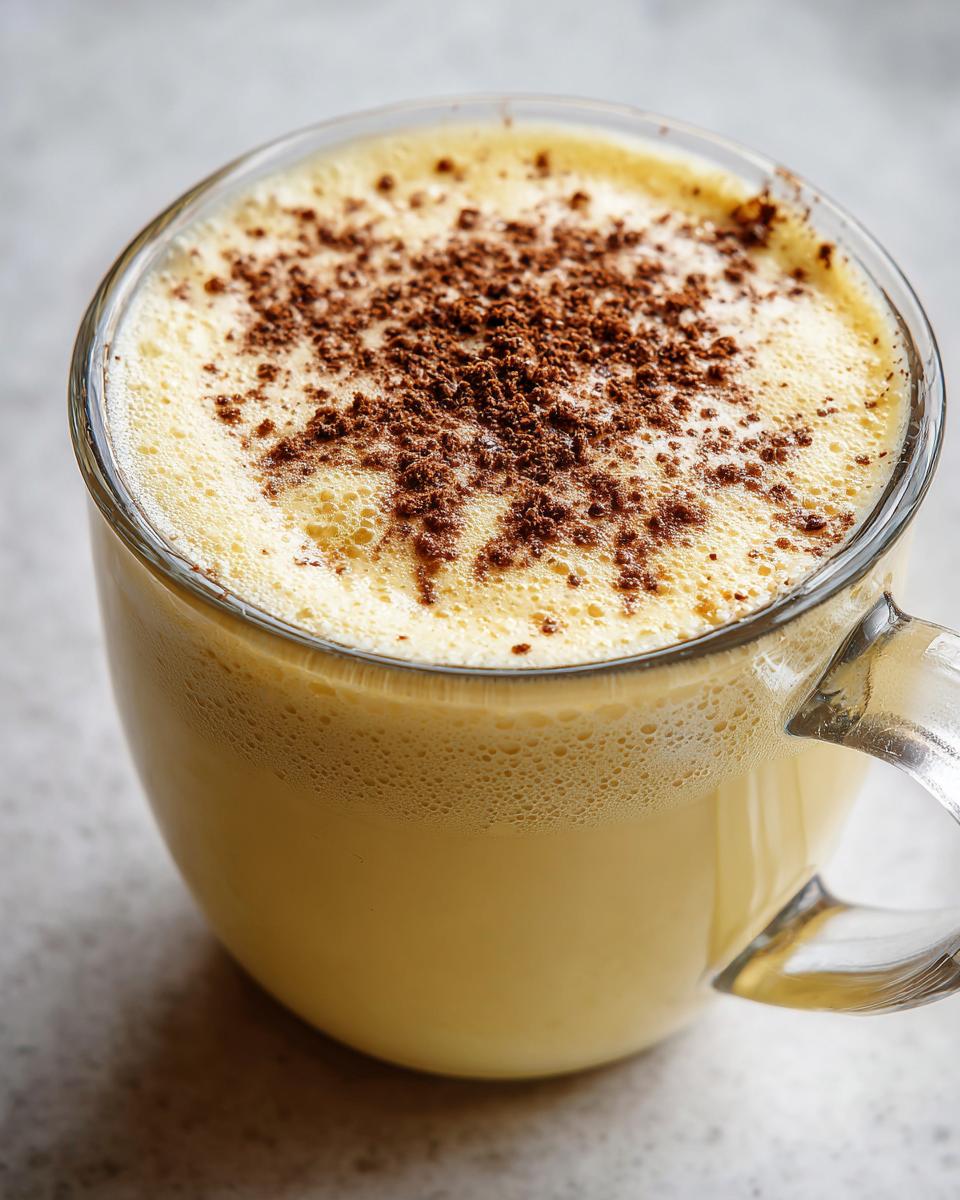
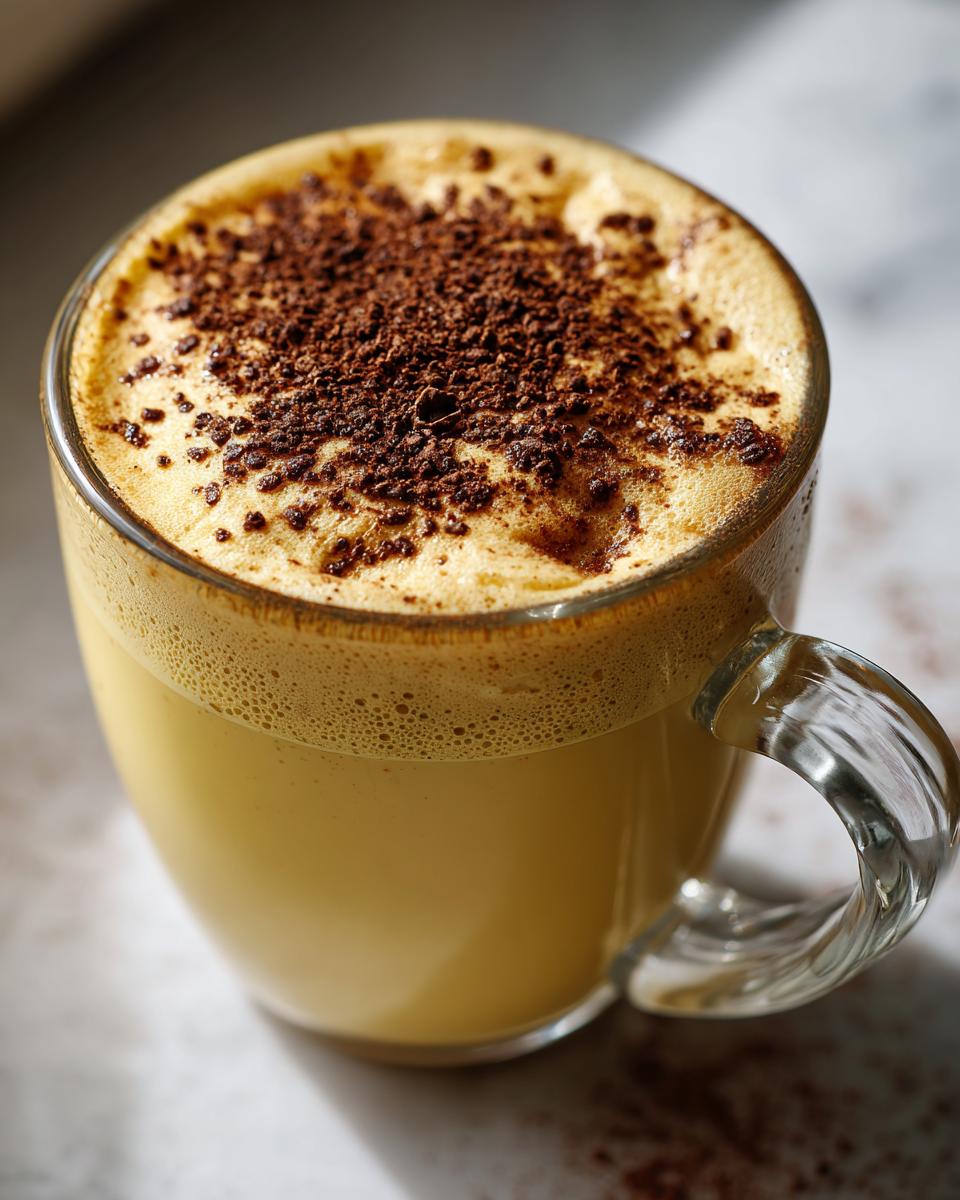
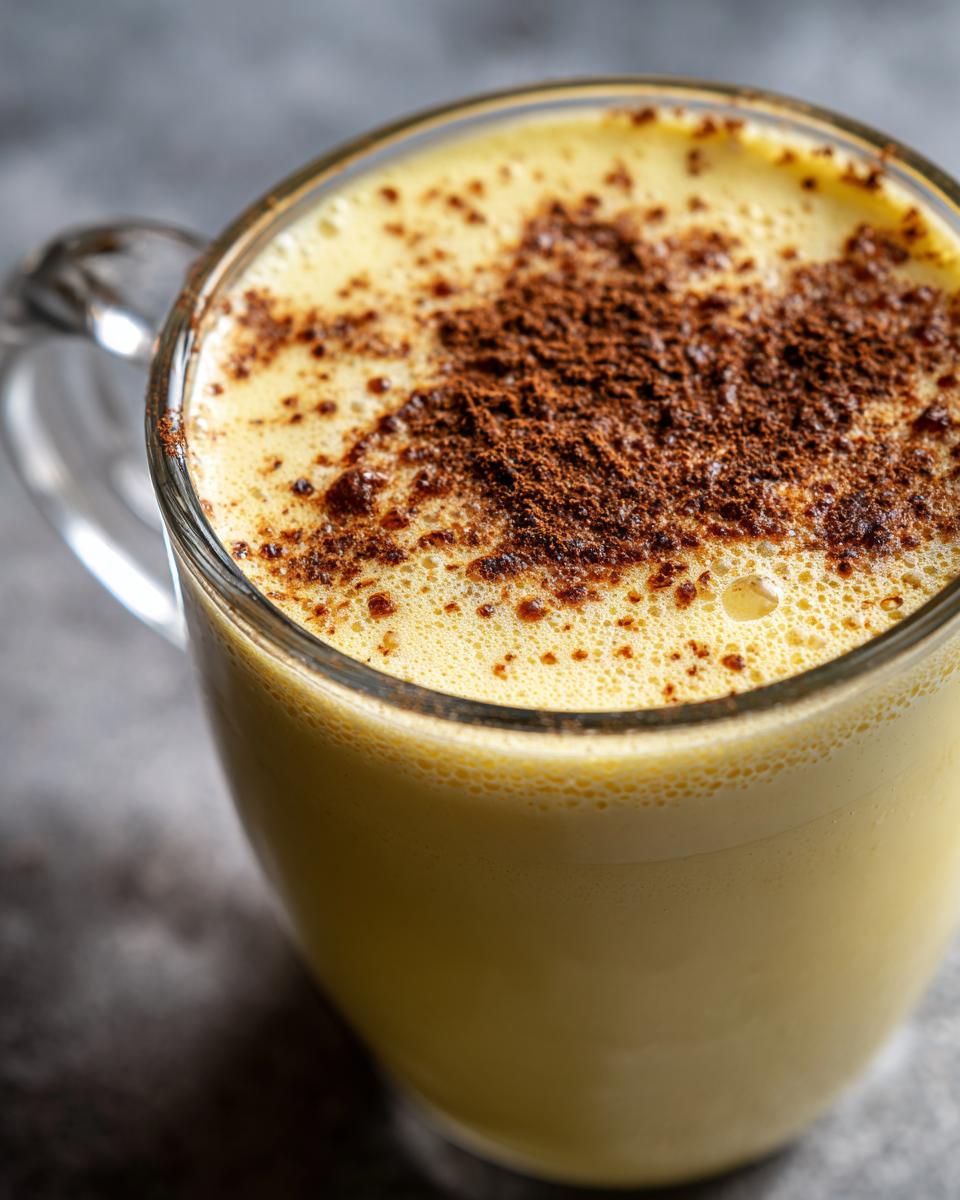
And one final, tiny but mighty tip for serving: Presentation counts! When you pull that pitcher out, don’t use dried spices for garnish. You absolutely need to grate fresh nutmeg right over the surface of the drink just before you serve it. The aroma hits you before the sip even touches your lips! It elevates the whole experience from a wonderful **creamy eggnog** to something truly spectacular.
Serving Suggestions for Your Festive Eggnog
Okay, you have the best **spiced eggnog** ever made, sitting perfectly chilled. While sipping it straight from a mug garnished with fresh nutmeg is the classic move—and totally encouraged—you can absolutely use this magnificent stuff for other things too! Don’t let these rich **holiday drinks** just sit in the fridge waiting for Christmas Eve.
Here’s a quick idea I love: Make a small batch of strong coffee, let it cool slightly, and mix it 50/50 with this eggnog base. Instant, incredibly decadent eggnog latte! It warms you right up. Also, don’t forget it makes a dynamite sauce. Drizzle a little over a warm slice of pound cake or even some gingerbread. The creamy richness of the eggnog just soaks right in. It’s really versatile!
Storage and Reheating Instructions for Homemade Eggnog
So you’ve made this glorious batch of homemade eggnog, and maybe you have some left over after the main party—which is great! Because we cooked the yolks, this lasts much longer than those store-bought cartons that always seem to go bad right away. You should definitely aim to keep it sealed tightly and refrigerated the whole time. I generally rely on my **creamy eggnog** lasting comfortably for about a week in the fridge.
Remember what I said about chilling overnight being essential for the flavor? Well, it’s true for storage too. The longer it sits cold, the more those spices deepen, and the better that texture becomes. If you can leave it for 3 or 4 days, you’ll notice it gets even silkier!
Now, when it comes to serving, it must be served cold. That’s the beauty of eggnog—it’s a refreshing winter drink. If someone *really* insists on warming it up, you can gently heat a single serving on the stovetop over very low heat, stirring constantly, just until it’s warm to the touch. But please, don’t boil it, and definitely don’t try to microwave a big pitcher. Trust me, heating it up risks messing with that beautiful emulsion we worked so hard to create. Stick to serving it chilled, straight from that cold pitcher!
Frequently Asked Questions About Eggnog
Can I use whole eggs instead of just yolks in this recipe?
Oh, you certainly *can*, but you’re going to change the texture completely! If you use whole eggs, the texture becomes much thinner, more like a drinkable custard than the thick, rich **creamy eggnog** we are aiming for here. This recipe relies on the yolks for that velvety, heavy mouthfeel. If you do use whole eggs, you might need to increase the chilling time even further to help it set up a bit more.
How long does homemade eggnog last in the refrigerator?
Because we are cooking this mixture properly on the stovetop, this **homemade eggnog recipe** lasts quite well! As long as you keep it sealed tightly and refrigerated, it should be perfectly good for about 5 to 7 days. That is why making it ahead of time is such a great idea for your **Christmas cocktails** planning!
Do I really have to chill the eggnog overnight?
You absolutely don’t *have* to, but I beg you to try! If you serve it right after mixing, the spices taste sharp, and the texture hasn’t totally settled. Giving it that overnight rest is the key to melding the nutmeg, cinnamon, and vanilla perfectly. It’s the difference between a good drink and the **best eggnog recipe** you’ve ever had. If you need to serve it sooner, aim for at least four hours chilled, but overnight is where the flavor magic happens.
Can this recipe be easily doubled for a big party?
Yes, you can absolutely scale this up for your **holiday drinks** party! When doubling, everything doubles—the yolks, the milk, the cream, all of it. The only thing you need to watch closely is the cooking time. Since you’ll have more volume, it might take a few extra minutes to reach that 170°F coating point on the spoon, so just stir patiently and keep checking! If you have any trouble at all scaling up, feel free to reach out to me through my contact page!
Estimated Nutritional Data for This Eggnog Recipe
Now, before we dive into the fun of serving and storing, I want to give you a quick heads-up on the numbers. Since this recipe instructs us to add the bourbon or spiced rum—because, let’s be honest, that’s pretty much mandatory for the authentic experience—the nutrition details reflect that alcoholic inclusion.
Keep in mind that since every drop of rum or bourbon counts, this is an estimate, and flavor preferences change how much you might use! But for a standard serving based on the recipe yielding six cups, here is what you’re looking at for one cup of this delicious, creamy treat:
- Calories: Approximately 450
- Fat: Around 28g (That’s where that luscious creaminess comes from!)
- Saturated Fat: Roughly 17g
- Carbohydrates: About 38g
- Sugar: We’re looking at about 35g of sugar here.
- Protein: About 10g
If you choose to make the **eggnog recipe no alcohol** version, your calorie and sugar counts will naturally decrease slightly because the spirits do contribute calories and residual sweetness. But honestly, I wouldn’t skip the bourbon; it just rounds out the flavor so perfectly, balancing the richness of the yolks and cream. Enjoy every sip, knowing you made the absolute best **homemade eggnog recipe** possible!
Share Your Experience Making This Eggnog
Now you have the whole secret to the *best* **eggnog** ever made! I’ve shared all my family’s tips for getting that perfect, **creamy eggnog** texture, from tempering those yolks just right to making sure you let it chill long enough to truly set.
I am absolutely dying to know how it turned out for you! Did you find that it really does taste better than anything you can buy? I need the details!
Please, take a moment right now and leave this recipe a rating down in the comments section. It truly helps other folks see that this **classic eggnog** is worth the effort. And here’s my big question for you: Did you go full festive and mix in some bourbon or spiced rum? Or did you stick to the pure, comforting flavor of the alcohol-free **old fashioned eggnog**? Let me know which version you loved most!
PrintCreamy Homemade Eggnog Recipe

Make this rich, creamy, and perfectly spiced homemade eggnog. This classic recipe is easy to prepare and tastes better than store-bought versions, perfect for holiday gatherings.
- Prep Time: 15 min
- Cook Time: 10 min
- Total Time: 4 hr 25 min
- Yield: 6 servings 1x
- Category: Dessert Drink
- Method: Stovetop Cooking
- Cuisine: American
- Diet: Vegetarian
Ingredients
- 6 large egg yolks
- 1 cup granulated sugar
- 1 quart whole milk
- 1 pint heavy cream
- 1 teaspoon vanilla extract
- 1/2 teaspoon ground nutmeg
- 1/4 teaspoon ground cinnamon
- Pinch of salt
- Optional: 1 cup bourbon or spiced rum
Instructions
- In a medium bowl, whisk the egg yolks and sugar together until the mixture is pale yellow and thick.
- In a saucepan, combine the whole milk and heavy cream. Heat over medium heat until small bubbles form around the edges, but do not boil.
- Slowly temper the egg mixture by pouring about one cup of the hot milk mixture into the yolks while whisking constantly.
- Pour the tempered egg mixture back into the saucepan with the remaining milk mixture.
- Cook over low heat, stirring constantly with a wooden spoon, until the mixture thickens enough to coat the back of the spoon (about 170°F). Do not let it boil.
- Remove the saucepan from the heat. Stir in the vanilla extract, nutmeg, cinnamon, and salt.
- If using alcohol, stir in the bourbon or rum now.
- Pour the eggnog into a pitcher or airtight container. Chill in the refrigerator for at least 4 hours, or preferably overnight, to allow the flavors to meld and the texture to set.
- Serve cold, garnished with freshly grated nutmeg.
Notes
- For a thicker, old-fashioned texture, use only egg yolks and cook the mixture gently.
- If you prefer an alcohol-free version, simply omit the bourbon or rum.
- Grate fresh nutmeg over the top just before serving for the best aroma and flavor.
- Chill time is essential for achieving a rich, creamy consistency.
Nutrition
- Serving Size: 1 cup
- Calories: 450
- Sugar: 35g
- Sodium: 80mg
- Fat: 28g
- Saturated Fat: 17g
- Unsaturated Fat: 11g
- Trans Fat: 1g
- Carbohydrates: 38g
- Fiber: 0g
- Protein: 10g
- Cholesterol: 250mg